Build a telescope case to suit your own personal telescope and you'll have something uniquely yours to transport your instrument to dark-sky sites and star parties.
Some travel telescopes come with hard cases, but often all you get is a soft case or the original bulky packaging, neither of which is ideal.
It is possible to buy flight cases and adapt the foam interiors, or you may be lucky – and wealthy – enough to be able to buy a custom-made version.
If you’ve ever been tempted to make your own hard case but have been put off by working out the construction, this article will show you how to build a sturdy, self-built wooden telescope case.
We’ve taken the hard graft out of working out the dimensions by creating an Excel spreadsheet to do the maths for you, which you can download from the the link below.
Download our telescope case spreadsheet (PDF)

Once you open this, you simply enter your telescope’s dimensions and the thickness of the wood and padding material you intend to use.
The spreadsheet then calculates the size for each piece of the case.
You can even print off a cutting list and take it to your timber merchant, who may be able to cut out the parts for you, saving time and reducing any worry about accuracy.
Designed to be compact and robust, our case is suitable for storing and transporting any telescope.
The design is very simple to build, requiring only modest tools and practical ability. It can be built from easy-to-obtain materials.
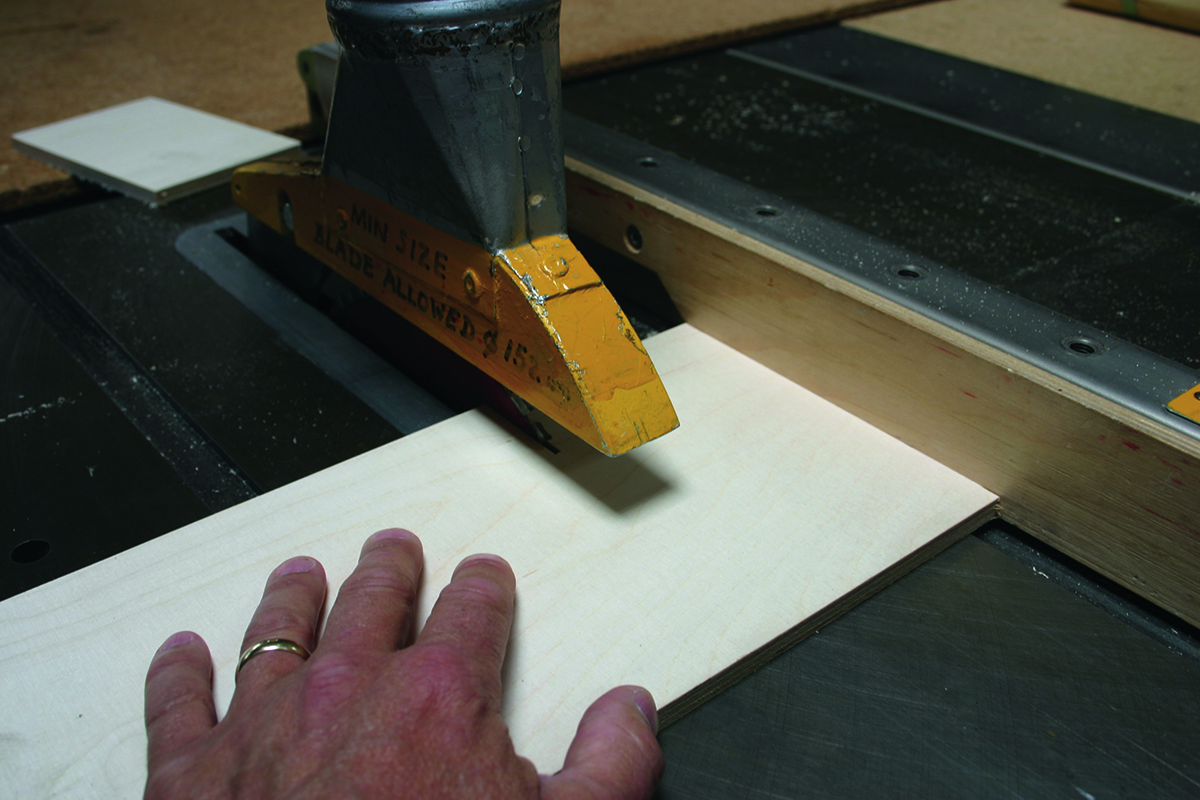
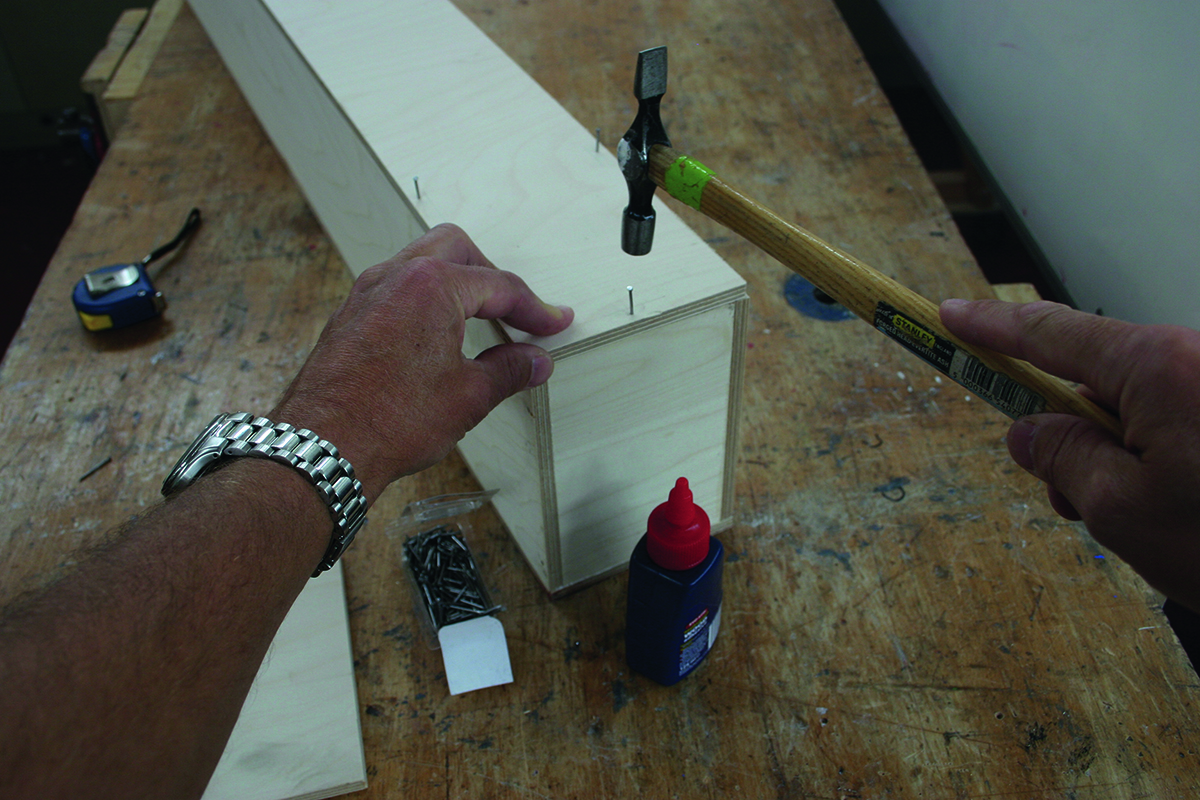
The telescope case is a plain, hinged box, constructed with simple butt joints (flat surfaces touching one another), which are glued together.
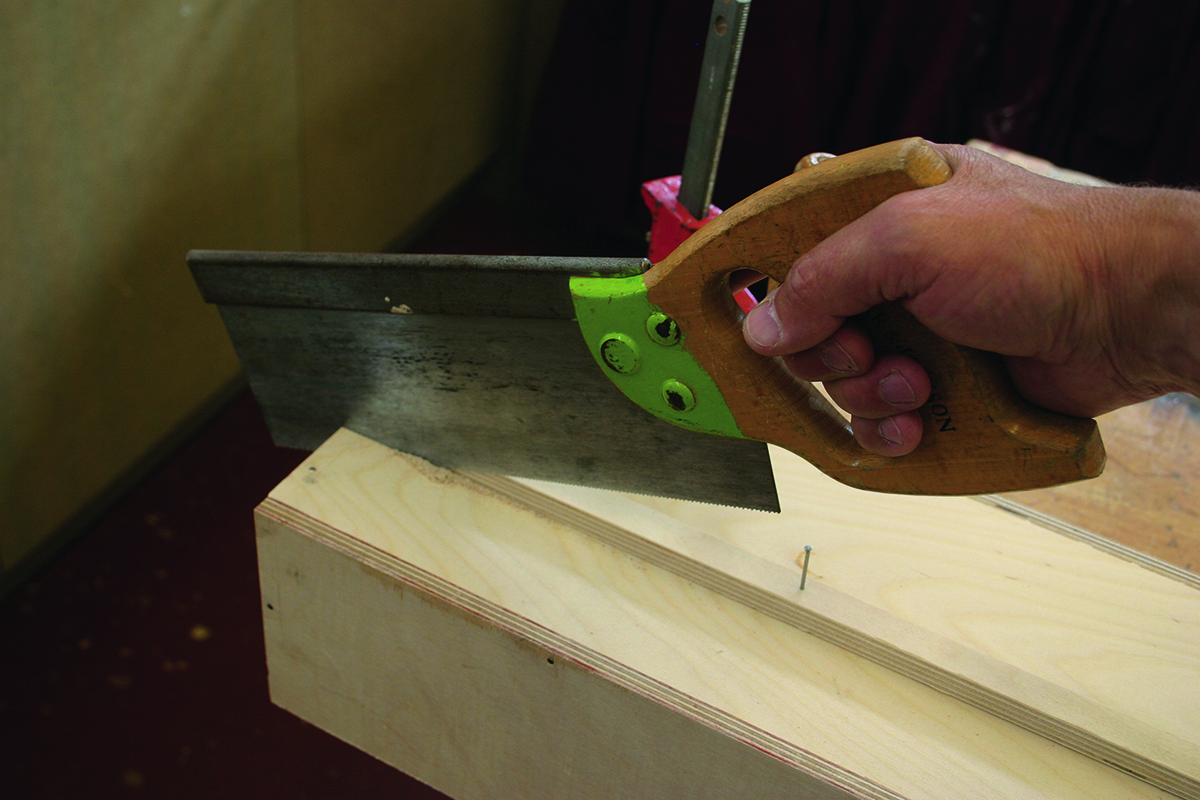
The case is made as one box and then sawn in two, creating the base and the lid.
Using this technique, even if your box is not perfectly straight, or you are not very neat at sawing, the bottom and lid will fit together perfectly.
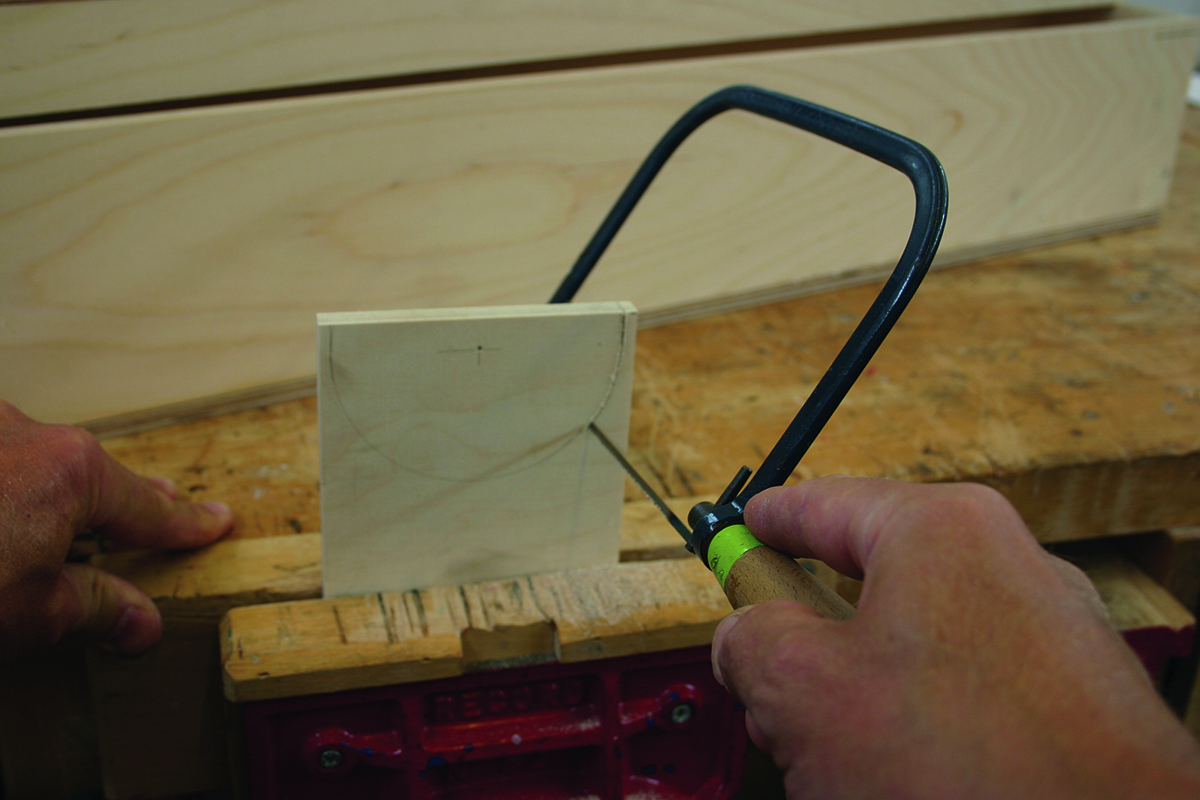
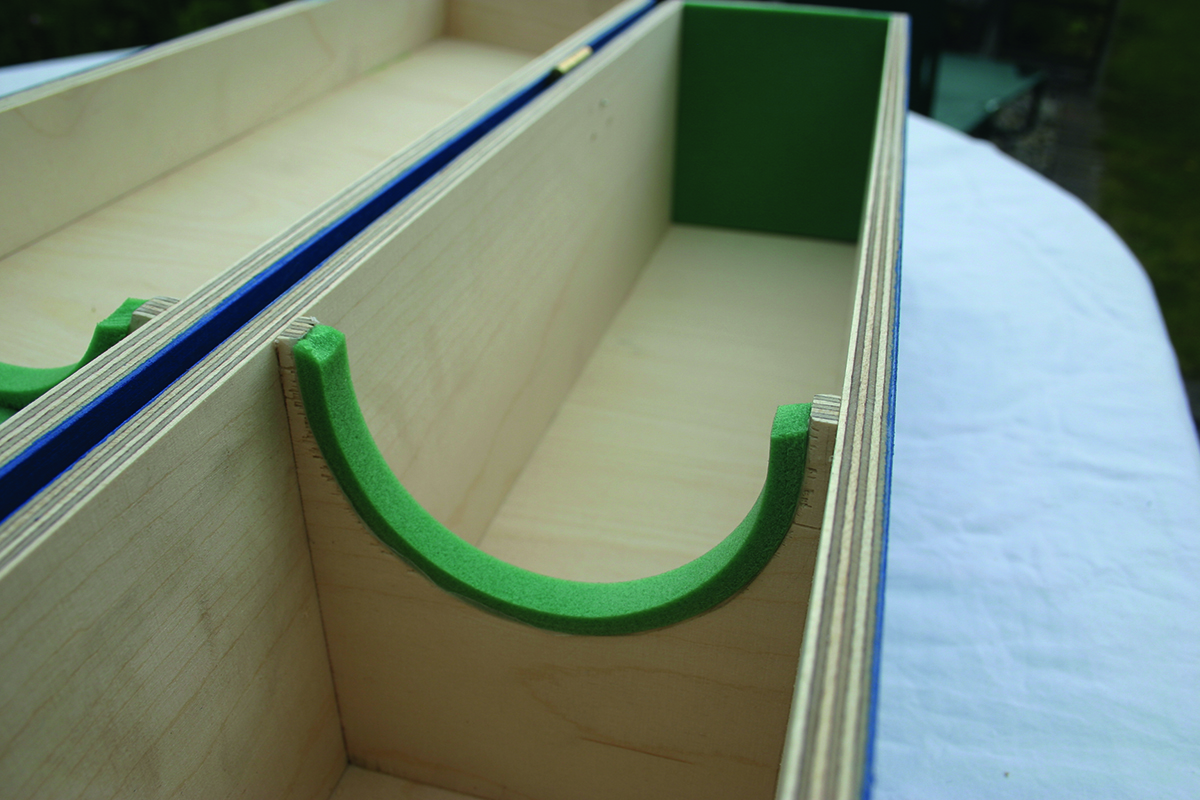
Externally mounted hinges and clasps eliminate the need to cut recesses and to reduce costs we made a simple rope handle. Inside the case, two dividers provide extra stiffening.
They have padded circular cut-outs that cradle the telescope tube and stop it from sliding around.
Cutting these isn’t too tricky, but if you do ‘wobble’ the soft padding material will cover a multitude of ‘sins’.
Before gluing them inside, check that they don’t foul on the finderscope or any other accessories
It is not necessary for the top and bottom parts of the dividers to line up exactly.
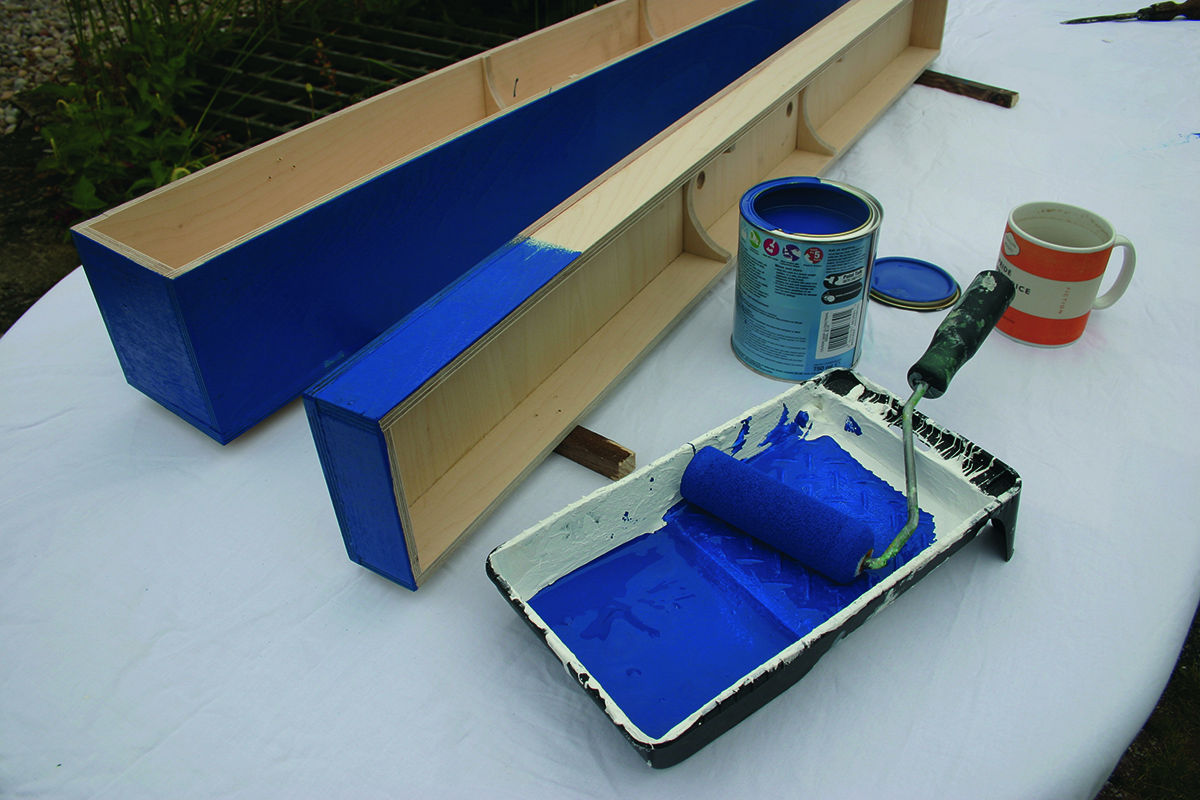
Painting and varnishing
Plywood or MDF needs a coat of gloss paint or varnish if you want it to last.
For natural timber, a preservative stain or varnish will give you a very classy look – especially if you invest in some nice brass fittings.
Paint the lid and base before you fit them together to avoid making a mess of the hinges and clasps.
You may want to add wheels or a padded seat to larger cases and you could add lockable clasps to keep sticky fingers out.
Once you have created cases for all your telescopes, you can adapt the design to hold mounts or eyepiece sets so that all your equipment is in matching boxes.
Building your own case is a satisfying project, and when you’ve made it yourself, you have the peace of mind of knowing your telescope is well looked after!
Tools and materials
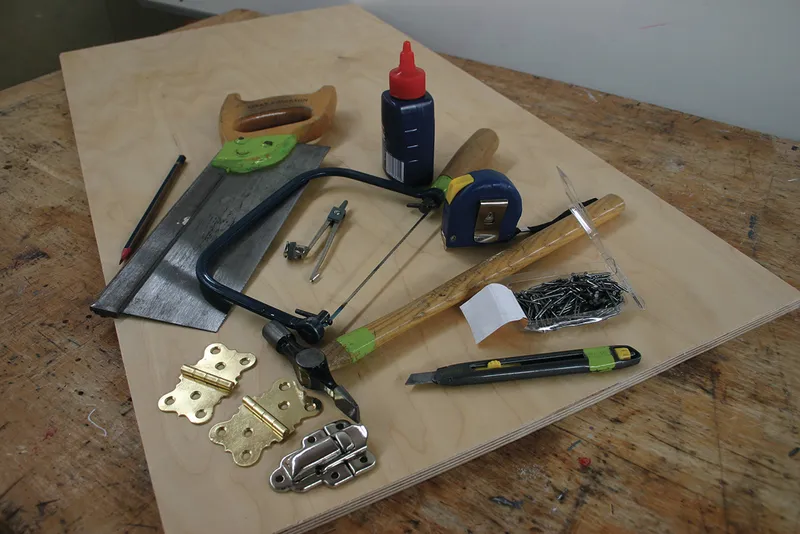
Tools
A hand saw, a coping saw, a small hammer, panel pins, glue and some paint.
Timber
9mm- or 12mm-thick plywood or MDF forthe case works best, but you can improvise with other materials if they are available.
Finishing touches
You need brushes or a small roller to paint the various parts. You’ll also need two external hinges, a clasp and a carrying handle, all with suitable fixing screws. Padding material can be craft foam, felt, carpet or the rubber from old computer mouse mats.
Choosing your materials
We chose 9mm plywood throughout for the case illustrated here because it is strong and stable.
It is possible to use 12mm-thick board for larger cases, or even 15mm, although the case can become rather heavy.
To reduce weight, substitute thinner material (we suggest 6mm) for the lid and base panels, but keep the side and end walls thicker.
For the padding material, any thin, soft material should work.
It needs a little give so it can absorb vibrations and a soft surface so it doesn’t cause any scratching.
Completed this build? Next, build your own astronomy accessories case to keep your bits and bobs in.