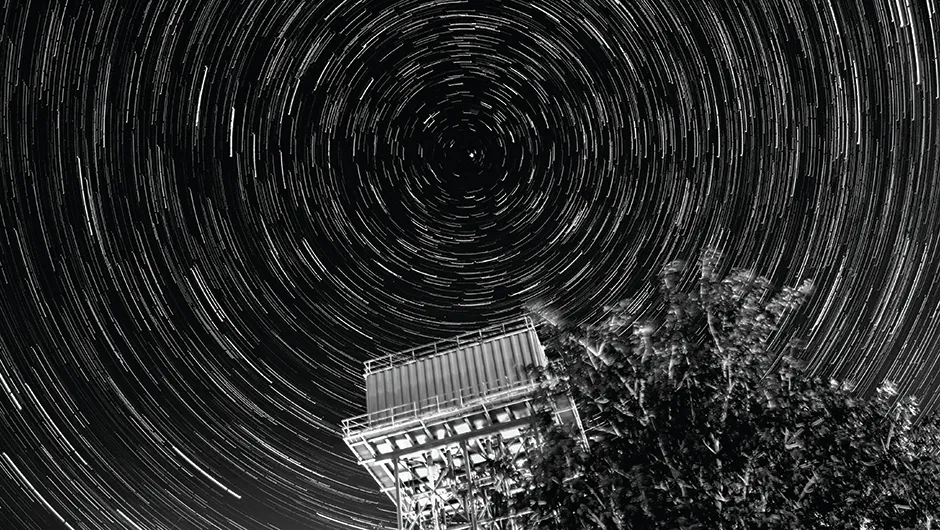
Image Credit: Mary McIntyre
One of the most beautiful and rewarding subjects in astrophotography is star trails.
You can create such an image by shooting a long-exposure photograph that captures the apparent movement of the stars.
But it’s not actually the stars that are moving – the appearance of movement is caused by the Earth spinning on its own axis, taking 23 hours 56 minutes and four seconds to complete one full rotation.
If you study the movement of the stars, you’ll notice that they rotate around the celestial poles.
In the northern hemisphere, stars appear to move anticlockwise around the north celestial pole, which is currently within 1° of Polaris.
The exact locations of the celestial poles are slowly but constantly changing due to precession – the ‘wobble’ caused by Earth’s rotational axis being tilted at 23.5°.
The celestial poles both follow a circular path that takes almost 26,000 years to complete, so those of us in the northern hemisphere are lucky to be here when Polaris is so near.
It’s important to know the location of the celestial pole when you’re deciding how to frame your images of star trails, especially if you want to include it in your photo.
If you look at a star-trail image, you’ll notice that the further away from the celestial pole a star lies, the greater the distance it appears to move within the shot.
This leads to the beautiful concentric circular patterns that are carved across the sky.
Where to look
Your latitude is what determines the exact position of Polaris in the sky and therefore the location of the celestial pole.
If you’re standing at the North Pole, Polaris would be directly above you.
If, however, you’re in London, which lies at a latitude of approximately 51°N, then Polaris would be 51° above the horizon.
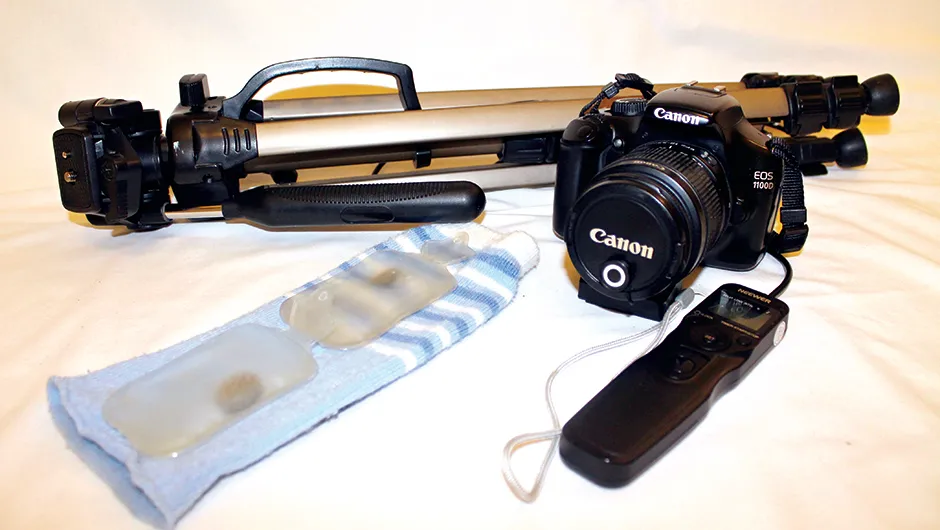
Producing star-trail images is relatively straightforward and you only need basic equipment to do it.
There are two methods: the first is to simply set your camera to take one long, continuous exposure.
The downside of this method is that unless you’re under incredibly dark skies, your final image will suffer from the effects of light pollution.
Also any fainter stars in your image will be completely washed out.
A better method is to stack lots of shorter-exposure photographs together using free software, such as StarStaX.
This sort of software is simple to use and gives brilliant results.
There are a few major advantages to using this method.
First of all, you can set the ISO much higher if you’re only shooting a 30-second exposure.
Doing so will reduce the effects of light pollution and enable your camera to pick up many more stars.
Then all you need to do is shoot multiple images for as long as you want your star trails to be – a total exposure time of longer than 15 minutes works well.
The second advantage is that if something ruins one of your photos, such as a low-flying aircraft or a security light, you can exclude the affected image from the stack and the software will fill in the gap for you.
Making movies
There’s one more advantage to using a stack of short-exposure images: you can save cumulative files, which allows you to create a timelapse video with the freeware program Windows Movie Maker.
Star-trail images are dramatic, but timelapse videos of them give even more breathtaking results.
However, keep in mind that as you’re using the cumulative images rather than a live video, any satellites or aircraft that pass through your shots (and there will be plenty of them) produce a white line across the star trails that will remain for the duration of the video.
There are many timelapse software programmes available to buy, but in this step-by-step we’ll show you how to do it with free software.
The biggest challenges you’ll face are finding a long enough period when the sky remains clear and preventing your lens from dewing up.