The Moon is gravitationally locked to Earth, rotating once on its axis in the same period of time that it takes to orbit our planet. For us on the ground, this means we see the same familiar face of the Moon all the time. There is, however, a small variation in the Moon’s appearance over time, due to an effect called ‘libration’.
Lunar libration describes the cumulative effects introduced by the elliptical nature of the Moon’s orbit and its tilt relative to the orbit of Earth.
If you're starting out in lunar astrophotography but what to give this challenge ago, read our guide on how to photograph the Moon.
The mechanics of the Moon's orbit
The Moon’s elliptical orbit means that its orbital speed around Earth varies over time. When it’s closest to our planet at perigee its speed is highest, and when it’s furthest from Earth at apogee its orbital speed is at its lowest.
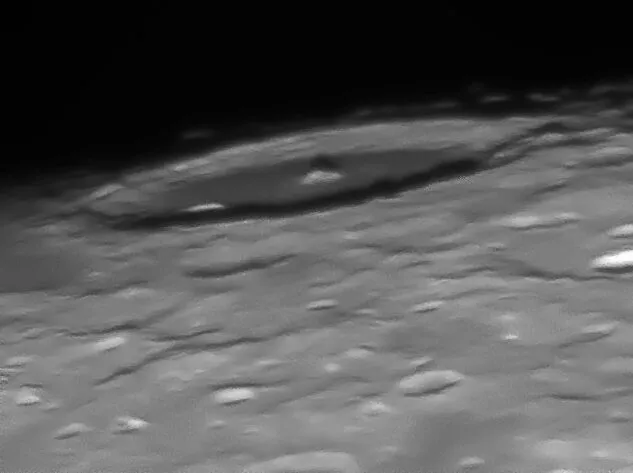
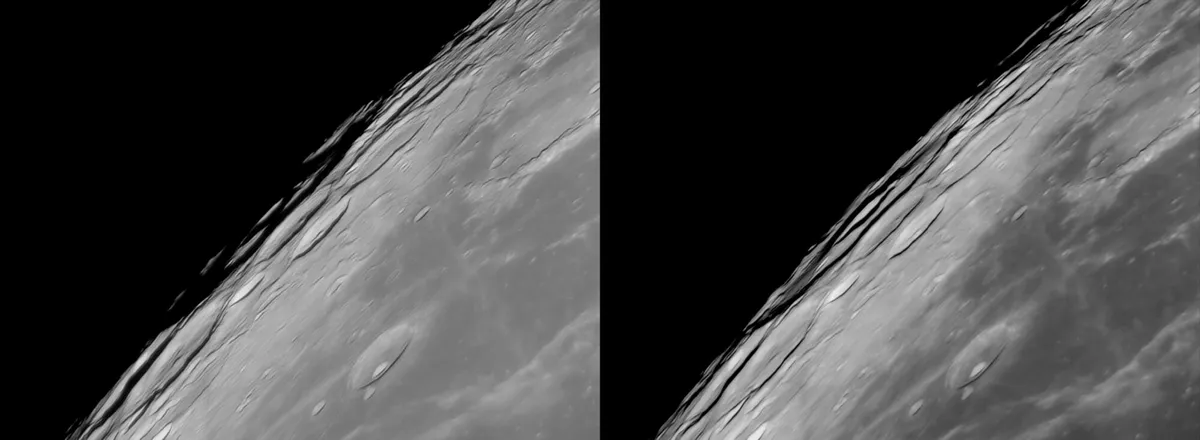
This variation allows us a peek around the eastern and western limbs of the Moon over time, and means that some features, like Neper Crater, are only visible during a favourable libration.
The image of Neper below was captured by Tom Howard in Sussex, in the UK. Tom says: "As the Moon rose, I realised that its libration was favouring the eastern limb, so I set myself the challenge of imaging Crater Neper in the libration zone.
I am delighted with the amount of detail recorded, especially considering the bad seeing that night."
The Moon’s orbit is tilted to that of Earth by about 5˚ too, causing the Moon to appear to move above and below the ecliptic.
As it does so, we effectively peek over the southern and northern edge of the Moon by a small amount. Together, these libration effects allow us to see 59% of the Moon’s surface, which is 9% more than if the Moon were rigidly locked to Earth.
One good way to see libration is to look for the elliptical sea known as Mare Crisium (one of many lunar maria), close to the Moon’s northeast limb.
At extreme librations, this can look close to the Moon’s limb or quite far away.
See crater Endymion during libration
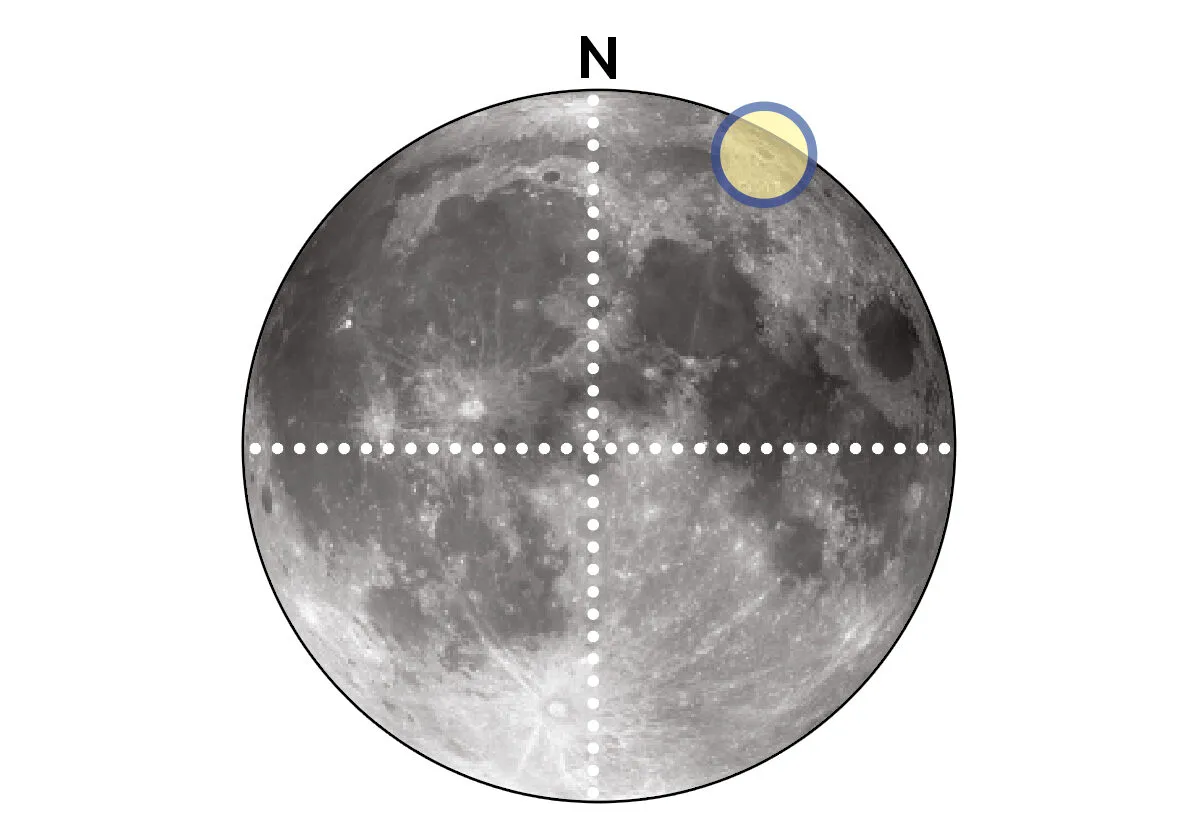
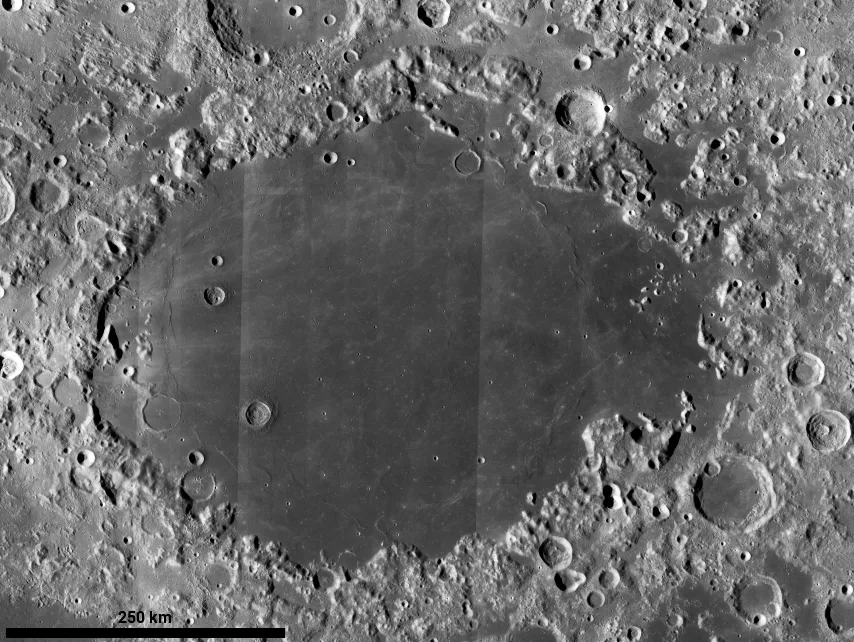
From Earth, 126km diameter Crater Endymion appears located close to the Moon’s northeast limb. A good challenge is to locate Mare Humboldtianum, a sea near to Endymion in the zone of libration, and watch it as libration rotates it out of view.
Features near to the Moon’s limb as seen from Earth appear to approach and distance themselves from their nearest limb over the course of a lunar month.
If sped up the motion would appear quite hypnotic, an oscillating action tantalisingly bringing features into good view before snatching them away once again.
Endymion does this. When closest to the limb it appears like a narrow ellipse, heavily foreshortened.
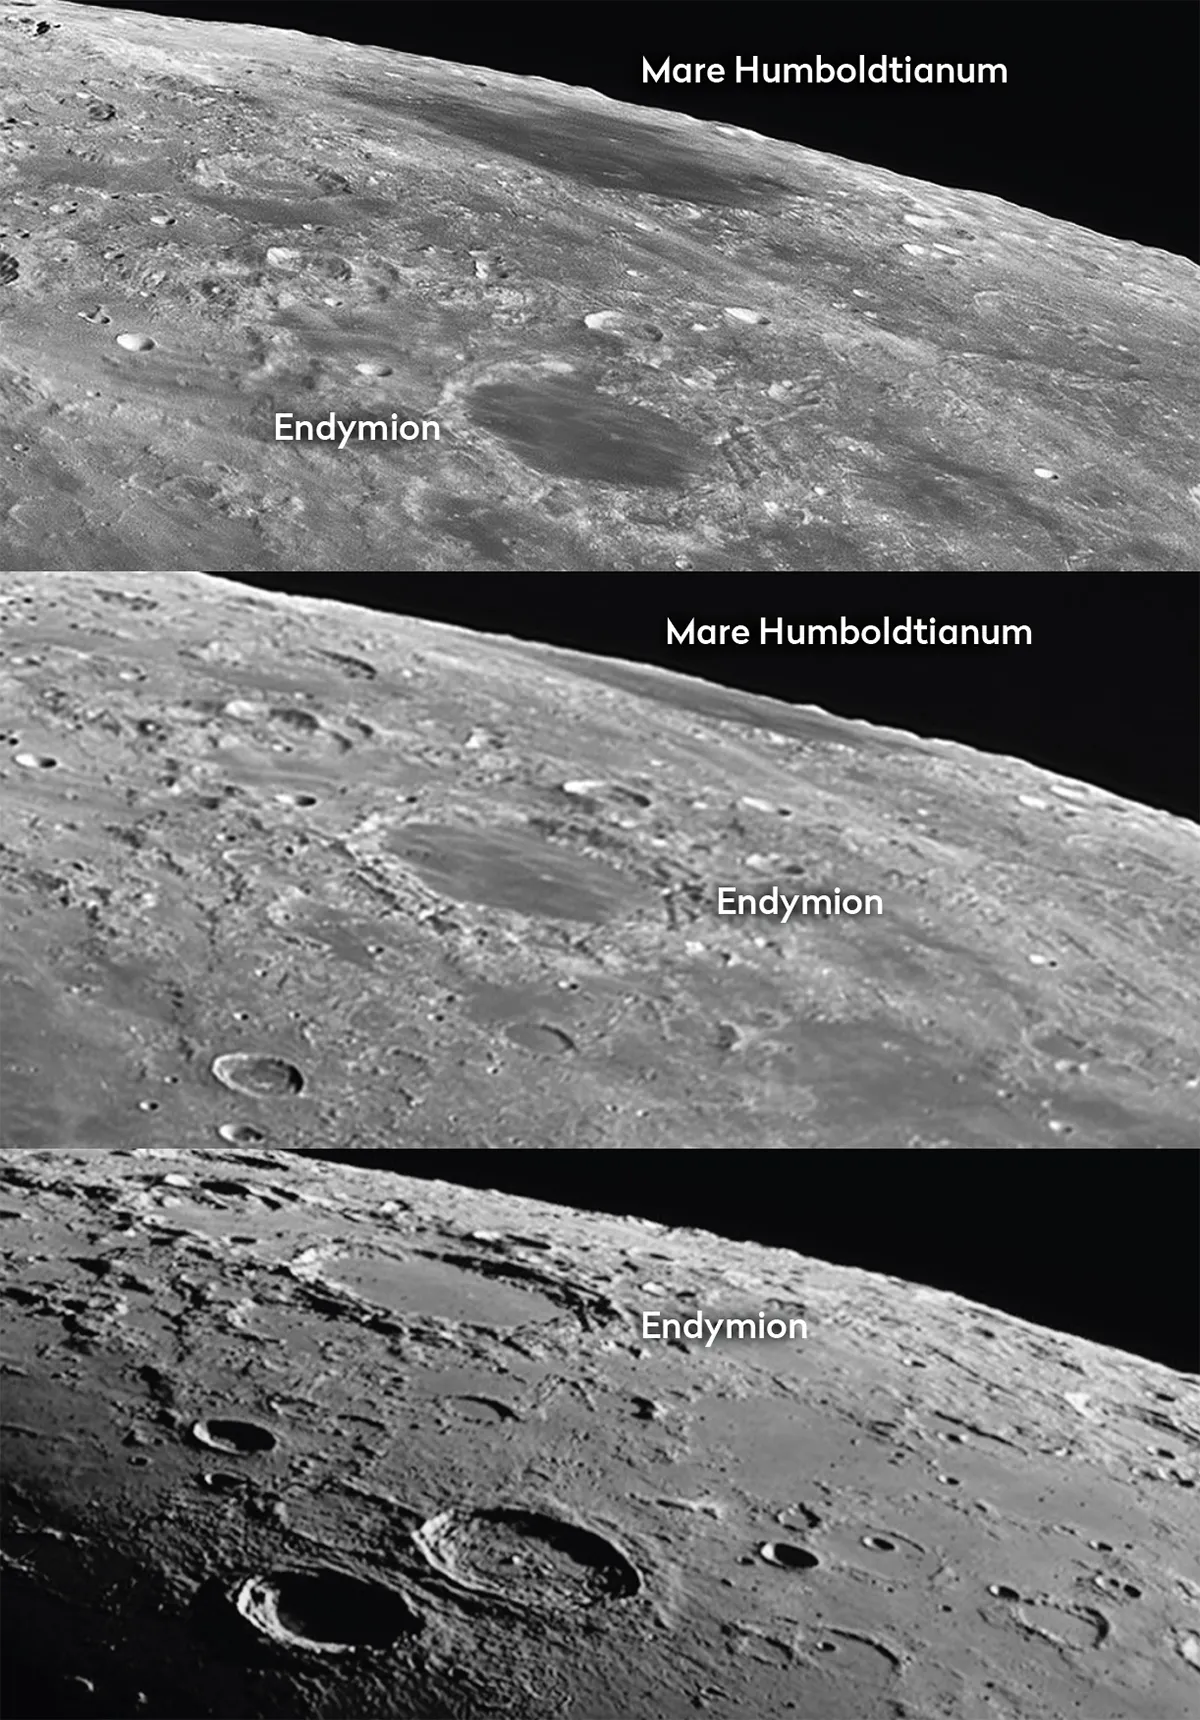
When farthest from the limb, it still appears foreshortened but the ellipse of its rim is wider, allowing you to better see internal detail.
However, despite its variable appearance, Endymion always remains visible from Earth, irrespective of the Moon’s overall libration state.
This is not the case for Mare Humboldtianum located northeast of Endymion. This 160km x 160km lava sea has the advantage of being visible when the Sun is high in its sky.
Consequently, it is possible to follow it for a decent amount of time whenever it’s lit by the Sun and libration keeps it in view.
How to photograph lunar libration
By capturing images of two different moons you can see the differences in the positions of features caused by libration.
Once you’ve grabbed images of both, you can overlay them so that the features almost line up – they won’t precisely because of libration.
The variation can be highlighted in a number of ways. For example, placing both images side by side, the minor differences in positions of features should be noticeable.
A more dramatic method is to create an animated image which flicks between both versions.
The visibility of libration on a large scale (eg, in a full disc image) depends on the variance between latitude and longitude libration values over the comparison period.
Another more ambitious project can be achieved by attempting to photograph every phase of the Moon over a month.
If you're imaging from the UK, probably the biggest hurdle to overcome is the British weather. You would have to be very lucky to be able to catch one phase every day over a month, but it may be possible to grab shorter sequences that still show the effects of libration.
Imaging lunar libration: step-by-step
Recommended equipment: 1,000mm focal length telescope, DSLR camera or equivalent
Step 1

Plan your shots; the best results will be achieved if you capture photographs under similar conditions. Select a time when the sky will be dark, as this will provide maximum contrast, but also removes any variation in appearance caused by blue or twilight-lit background skies.
Step 2
Select the right focal length for the task; an optimum setup is one that clearly shows lunar features beyond just the dark seas. A telescope with a 1,000mm focal length will work well with a DSLR or MILC-type camera (for more on DSLRs read our DSLR guide). Alternatively, a narrower field of view can be used to create a large-scale mosaic.
Step 3
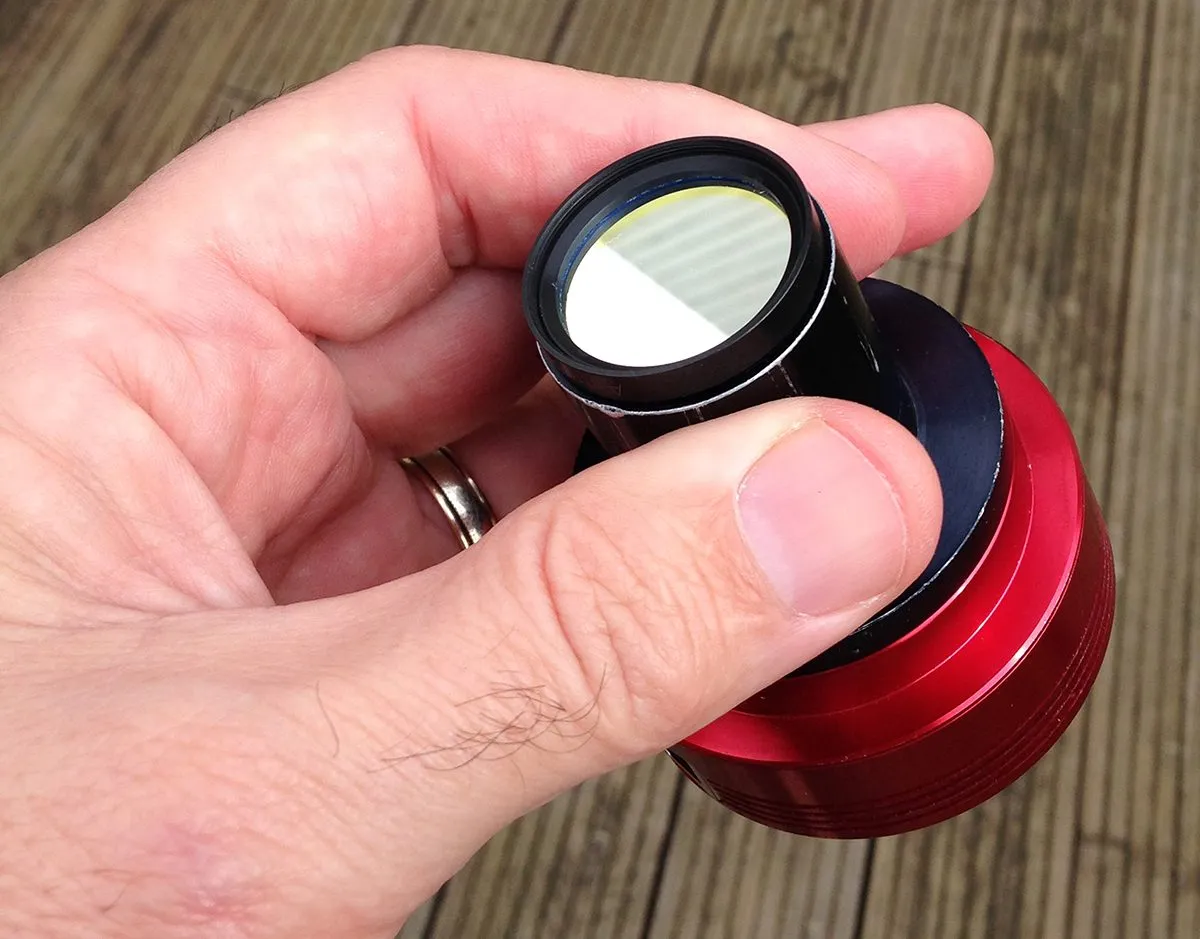
For mosaic shots, we’d recommend using a setup that includes a high frame rate camera. A mono camera paired with a red or infrared pass filter can also help keep features nice and sharp. Don’t be overly ambitious: limit the overlapping mosaic panels to a maximum of nine; even two or four should suffice.
Step 4
Process your images to the best of your ability and aim to produce natural-looking discs without over-exposed (white) or under-exposed (black) regions. Sharpen the disc to crispen up features, but take care not to overdo things; it helps to load both full Moon images at once and apply the same level of processing to each.
Step 5
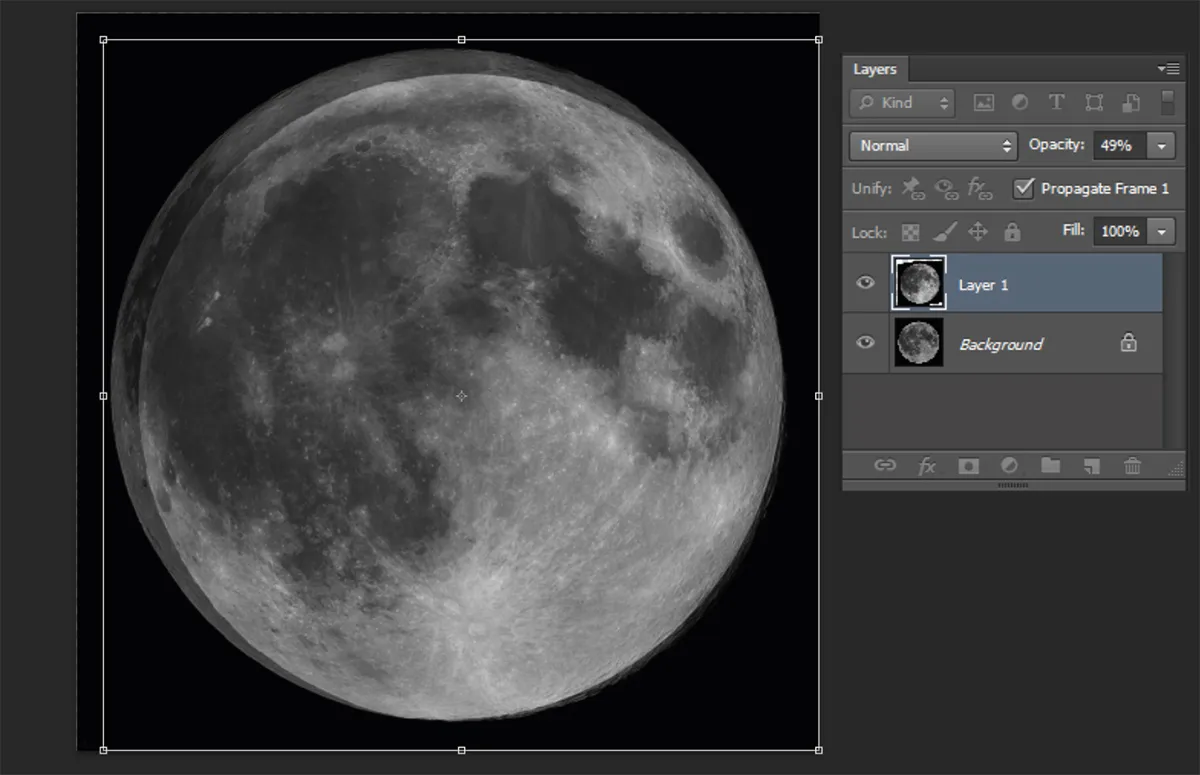
Load both images into a layer-based image editor as separate layers. Make the upper layer semi-transparent and adjust the sizes so the disc edges match. Don’t worry about feature orientation at this point; crop/adjust the canvas size so the image is square, with the centre of the Moon’s disc in the centre of frame.
Step 6
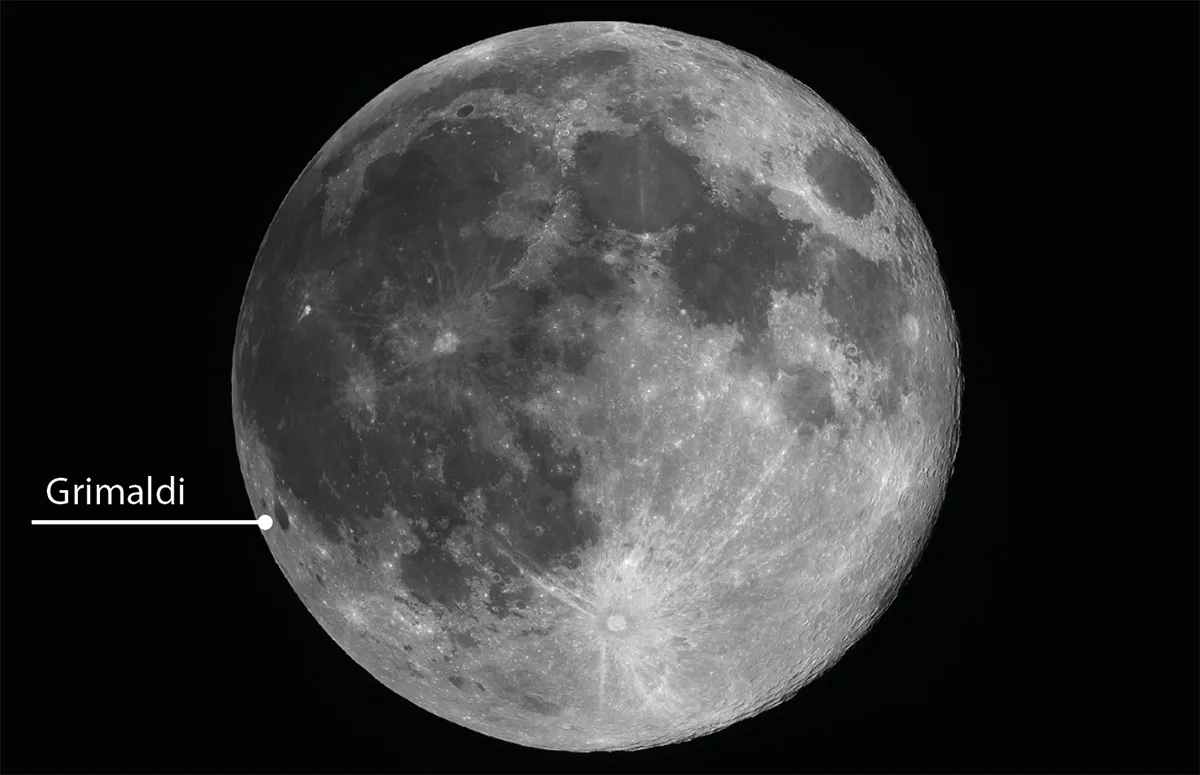
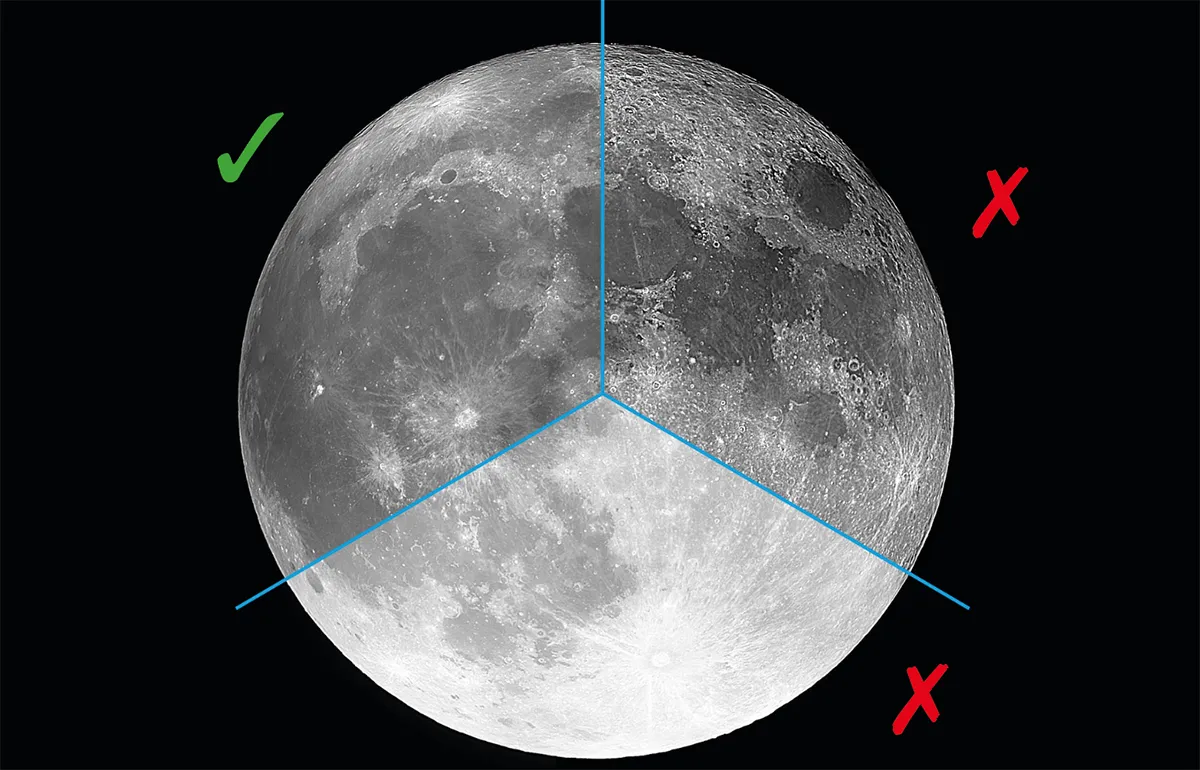
With the upper layer still transparent, rotate it so the dark crater Grimaldi appears close in both versions. Make the upper layer opaque and increase canvas width by 200%, placing both discs side by side. Alternatively, if your program allows it, create a 1-sec flick book-style animated GIF which switches between both versions.
Have you managed to observe or even photograph lunar libration? Let us know by emailing contactus@skyatnightmagazine.com, or get in touch via Facebook, Twitter or Instagram.
Pete Lawrence is an experienced lunar observer and astrophotographer. This guide originally appeared in the October 2020 issue of BBC Sky at Night Magazine.
