Astrophotography image processing is about more than just stretching data and reducing noise, those unwanted artefacts.
It is also important to create an even, realistic-looking background for your deep-sky objects.
A flat, dark background will enhance the appearance of the target, but depending on the conditions under which you are imaging, this can be challenging.
Generally in astrophotography you don’t want to focus on making the background sky completely black, as this can look artificial.
Thanks to light pollution and image-vignetting (where an image appears darker around the edges), captured images will often consist of uneven gradients – different patches of brightness or colour – that become more obvious as we stretch the data.
These gradients can be difficult to correct evenly, which is where a software plug-in to help with gradient control can be particularly useful.
In Adobe Photoshop, gradient control can be carried out via basic functions such as Curves, but a Photoshop plug-in that can swiftly flatten gradients and restore an even background colour saves a lot of time.
Here we'll show you how to use Russell Croman’s GradientXTerminator Photoshop plug-in to adjust the gradients in a wide-field image of the Jellyfish Nebula, IC443.
Once the plug-in is downloaded, you need to locate it – for Windows computers it is found in C:/drive > Downloads.
The file needs to be transferred to your Photoshop plug-ins directory, the location of which depends on the version of the software you are using.
For Photoshop 2022 on a Windows computer, click and drag the file to C:Program FilesCommon FilesAdobePlug-InsCC.
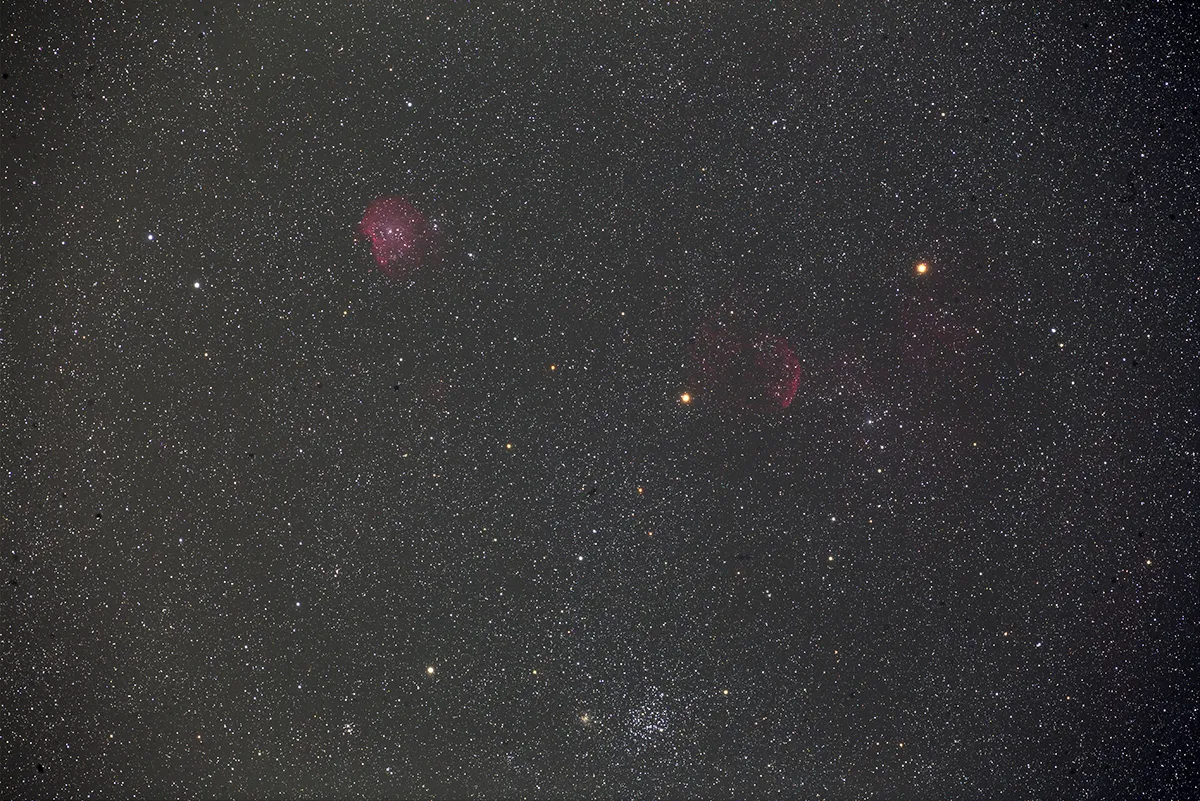
It’s best to apply GradientXTerminator after a stretch of the data using the Levels function (click Image > Levels), as we’ve done in our ‘before’ image (see above).
In the Levels window, drag the anchor points closer in towards the histogram, allowing it to widen and details to emerge.
Although this step was repeated several times to make the nebulae stand out in our 'before' image, there is still a vignette disrupting the image, so it's now time to remove these gradients.
Before you use the Gradient XTerminator plug-in, remember that you only want to apply it to the background, rather than the target.
If you allow the plug-in to change the target appearance too, it can remove some colour or nebulous detail.
To avoid this happening, use the Lasso tool in Photoshop: select the icon from the Toolbar on the left-hand side of the screen and then drag the Lasso tool around the objects.
Although this action automatically selects regions within the Lasso, you want to deselect these regions to ensure GradientXTerminator ignores them.
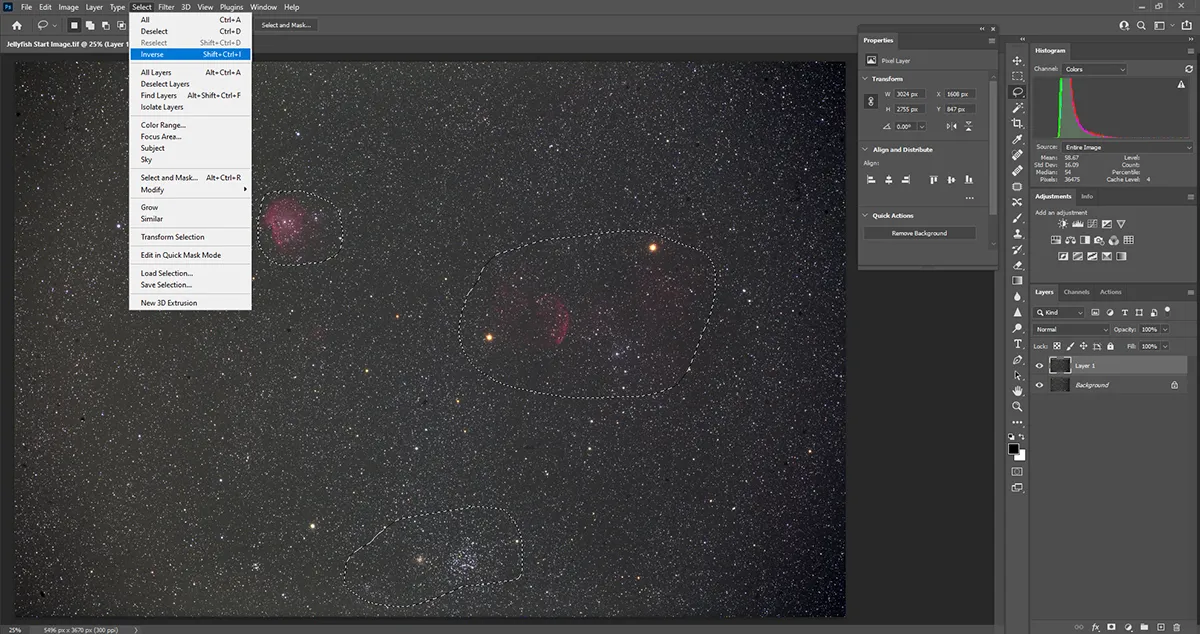
To do this click Select > Inverse to focus on the regions outside the Lasso (see image above).
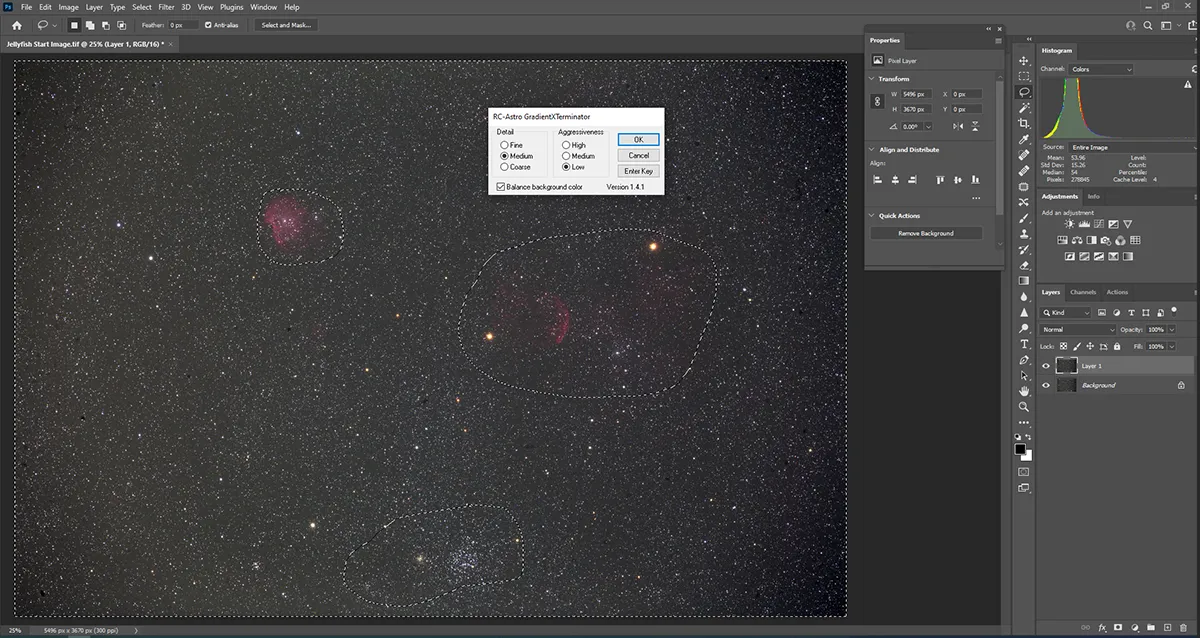
Now it’s time to apply the plug-in, which is accessed via the Filters menu by clicking Filters > RC Astro > GradientXTerminator.
For the first gradient adjustment, in the plug-in window, select Detail > Medium and Aggressiveness > Low (see image below).
Although this applies a broad correction to the background, some gradients are still present.
To make a finer adjustment to complete the gradient removal, without the risk of over-flattening our background, select the Magic Wand tool from Photoshop’s Toolbar.
A menu appears on the top of the screen, allowing you to set the strength.
Set the Tolerance to 7 on this occasion, but the best value will depend on the image. Generally, the best value will range between 5 and 10.
Now click on an area in the background, which depending on the Tolerance setting chosen should select most of, or all of the background (but not the object).
It is important to ensure the target is left untouched by GradientXTerminator, so this process takes a little trial and error.
Make sure you experiment with the Tolerance setting until you have most of the background selected minus the target(s) of your image.
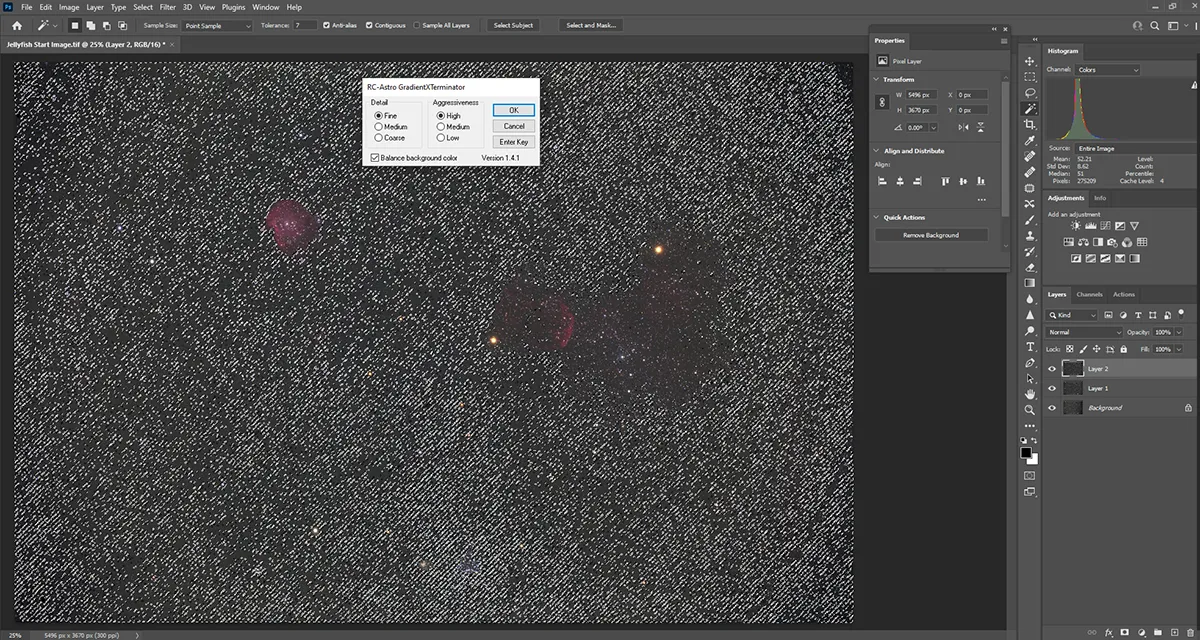
Then click on GradientXTerminator again, and this time set the Detail to Fine and the Aggressiveness to High (see image above).
This will ensure finer gradients are dealt with, giving a smoother result.
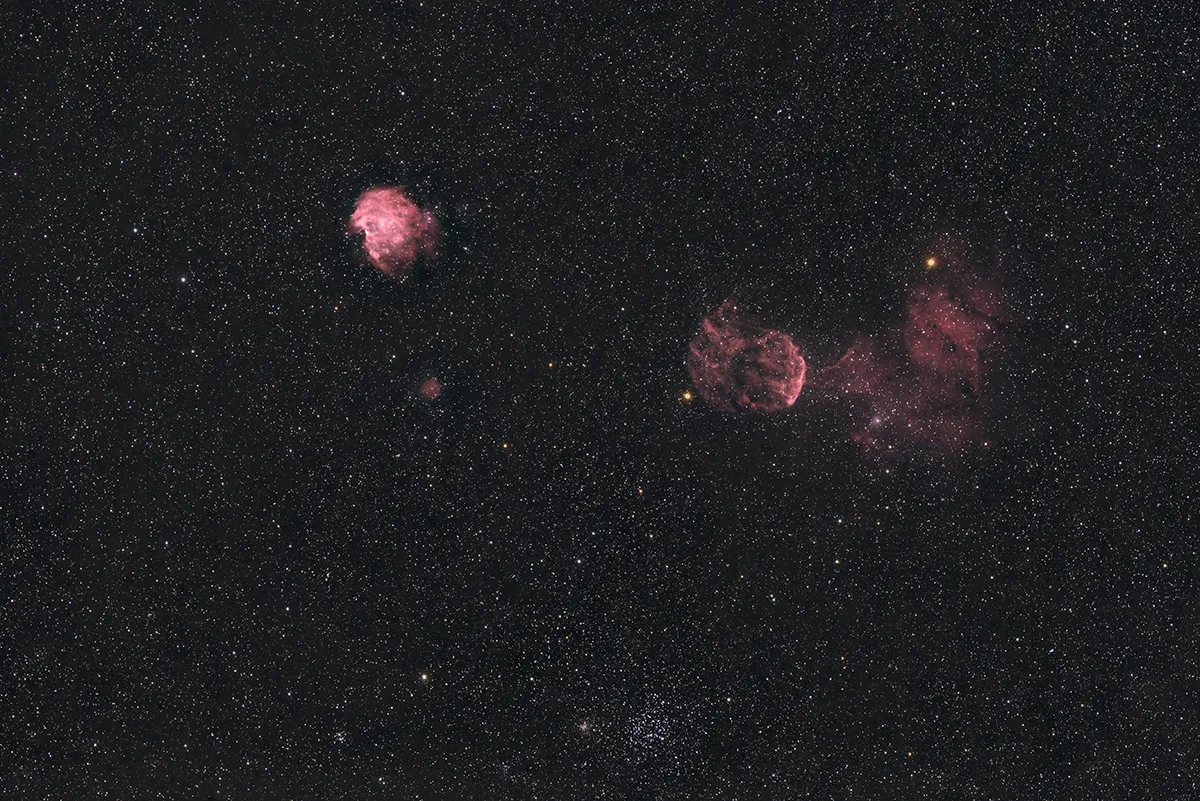
In the After image, the background now looks more even, with colour gradients and vignetting removed.
All that is left is to make some final Photoshop adjustments by using Selective Color and Brightness (click Image > Adjustments) and Dust and Scratches (Filters > Noise), before saving it.
3 tips for improving backgrounds in astrophotos
- The best ‘Tolerance’ settings depend on the deep-sky object – ensure dusty details are not highlighted.
- Apply GradientXTerminator in stages: use the ‘eye’ icon for that layer to view each change.
- For Magic Wand, the ‘Alt’ key allows you to add or subtract regions. A plus or minus will appear next to the icon.
This guide originally appeared in the May 2022 issue of BBC Sky at Night Magazine.