Venus is well-placed in the evening twilight in April, an intense blaze of light, difficult to miss in clear skies.
It’s an interesting object astronomically, showing subtle atmospheric markings through the eyepiece, as well as displaying striking changes in phase and apparent diameter.
Venus is interesting for another reason too. Being so intensely bright – the brightest of all the planets and often referred to as the morning or evening star – it’s essentially a point source at low magnification, and ideal for demonstrating experiments with light.
When placed in a dark sky, it’s possible to experience Venus's light casting a shadow – okay, it’s a dim shadow, but it’s one that can be photographed.
Being very close to a point light source, the shadow cast is really sharp and well-defined too.
You can also capture diffraction spikes when photographing Venus, and image the rainbow-like effect of dispersion.
Here are three ways of photographing Venus that you may not have tried before. Give at least one of them a go!
You'll need a DSLR camera with lens, a tripod or, preferably, a tracking mount
3 astrophotography experiments with Venus
Photograph a shadow cast by Venus
To record the elusive effect of a shadow cast by Venus's light, you’ll need to be somewhere where there are no other light sources. Even a bright sky can interfere.
A west or northwest-facing window is ideal, as long as you can turn all of the lights off.
If you can’t do this, use a large cardboard box with the opening pointed at Venus.
Either way, you’ll need a screen on which the shadow will be cast. This can be as simple as a light-coloured wall or several large white sheets of paper.
You’ll need a shadow-casting subject as well. This can be a shape cut from card pasted on a window or suspended in front of the box.
Then it’s simply a case of pointing a camera at the screen, focusing and taking your shot.
A high ISO is recommended to keep the exposure times short; take too long and the razor-sharp edge of the shadow will blur as Venus moves relative to the horizon.
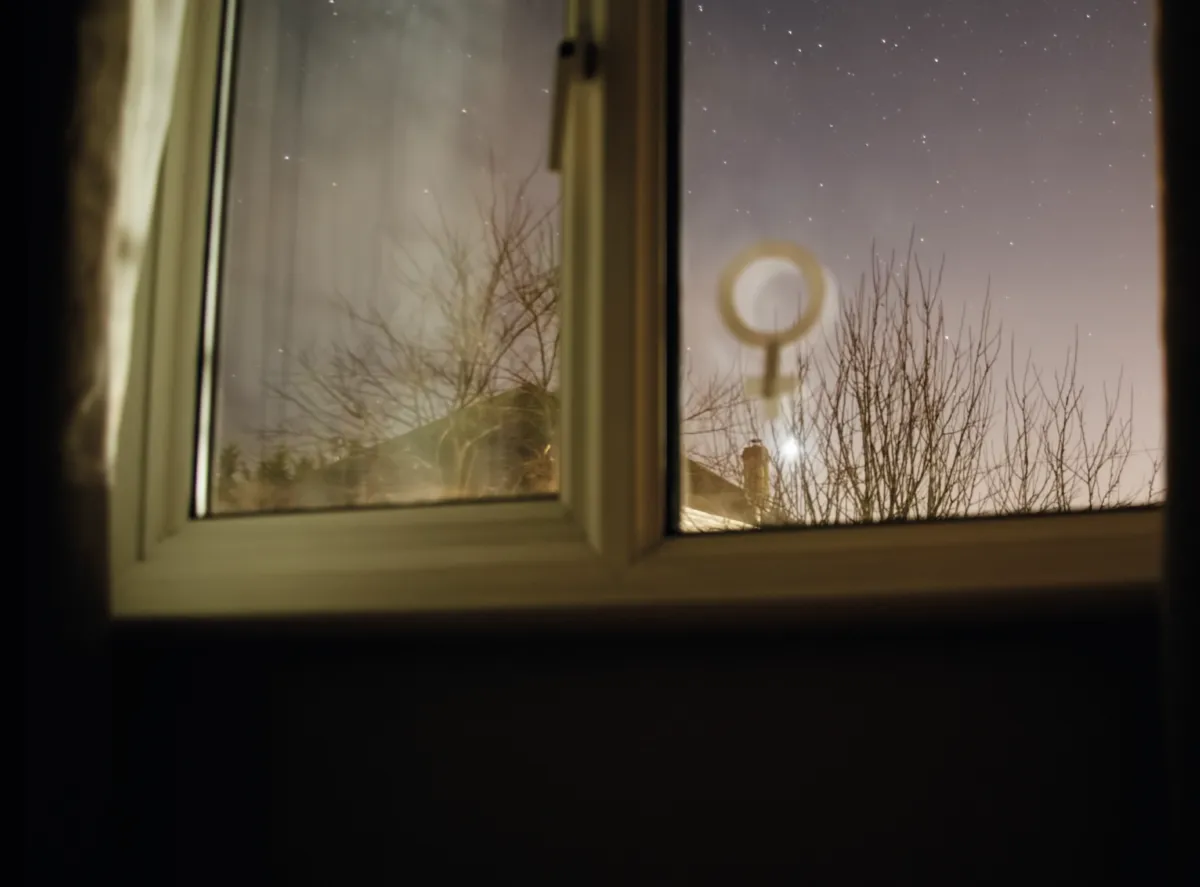
How to do it
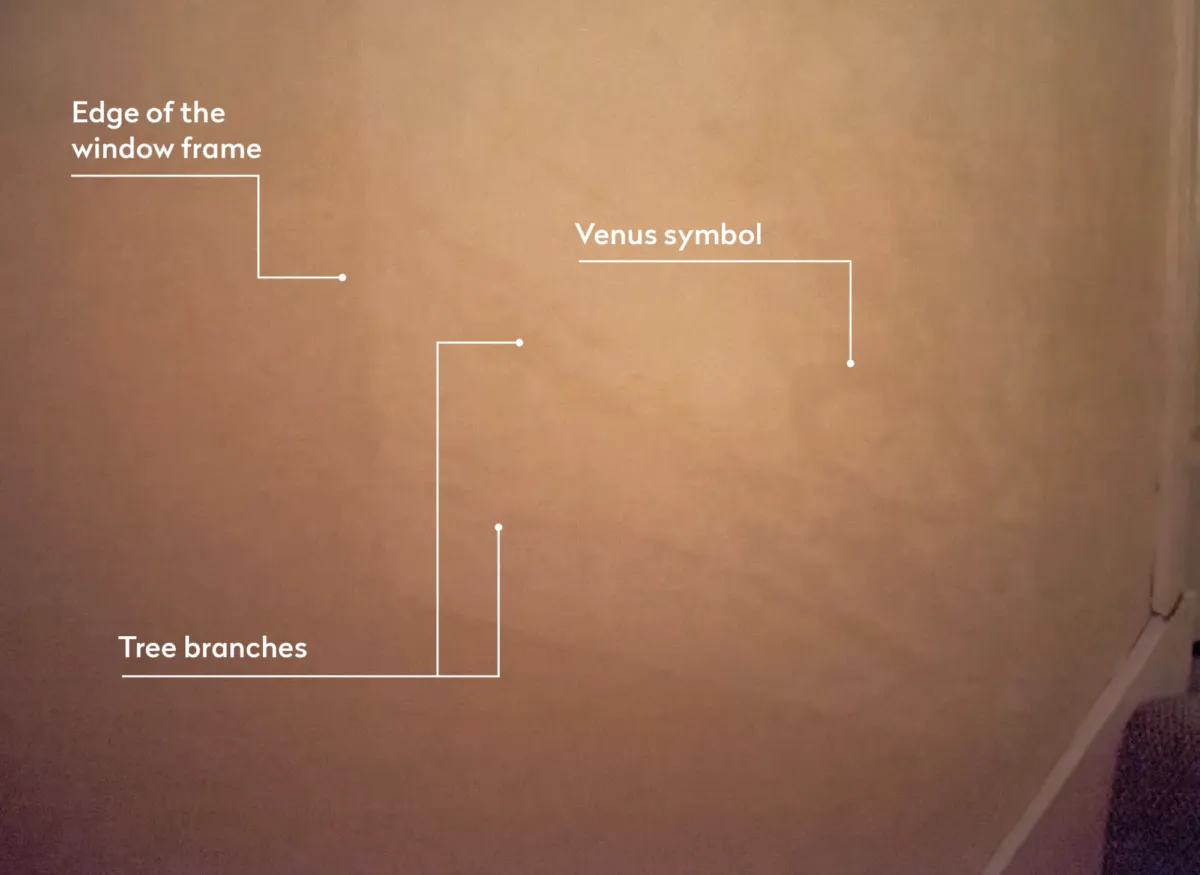
A west or northwest-facing window is ideal for capturing the shadow of Venus.
In a darkened room, attach a shape to a window pane to act as a shadow caster – in this case a cardboard cutout of the symbol of Venus.
The line from Venus through the target should ideally end up on a flat ‘screen’ wall.
Despite Venus being such a brilliant planet, its shadow is still dim and will require an extended exposure.
A mid to high ISO and low f/ number are essential. In our example above, there was a tree between Venus and our shadow target.
An exposure of 20 seconds was required. If exposures are too long, the shadow edges will blur.
Capture a Venus rainbow
Another interesting effect to see with Venus is something which is a nuisance for planetary imaging: atmospheric dispersion (hence the existence of atmospheric dispersion correctors)
This is caused by the light-dispersion quality of our atmosphere. Essentially, the atmosphere acts like a giant prism, refracting light that passes through it.
The thicker the atmospheric layer, the more bending that takes place. In other words, the bending is greater at lower altitude.
As white light passes through the atmosphere, different wavelengths of light get refracted by different amounts, resulting in an object’s light being spread into a small spectrum.
The effect is noticeable around the edge of the Moon, but the brilliance of Venus means it’s easier to stay with the effect at lower altitude.
Using a long-focal-length lens or telescope, it’s possible to see Venus completely smear into a small rainbow of colour.
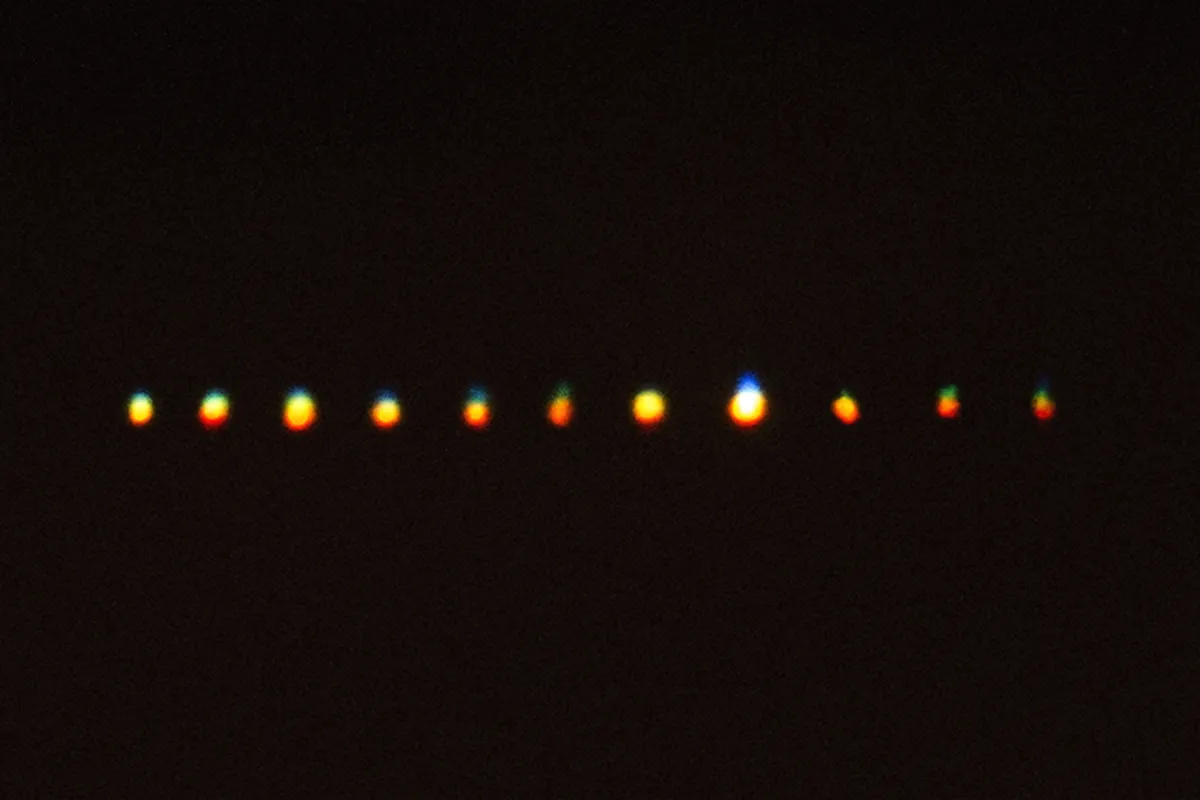
How to do it
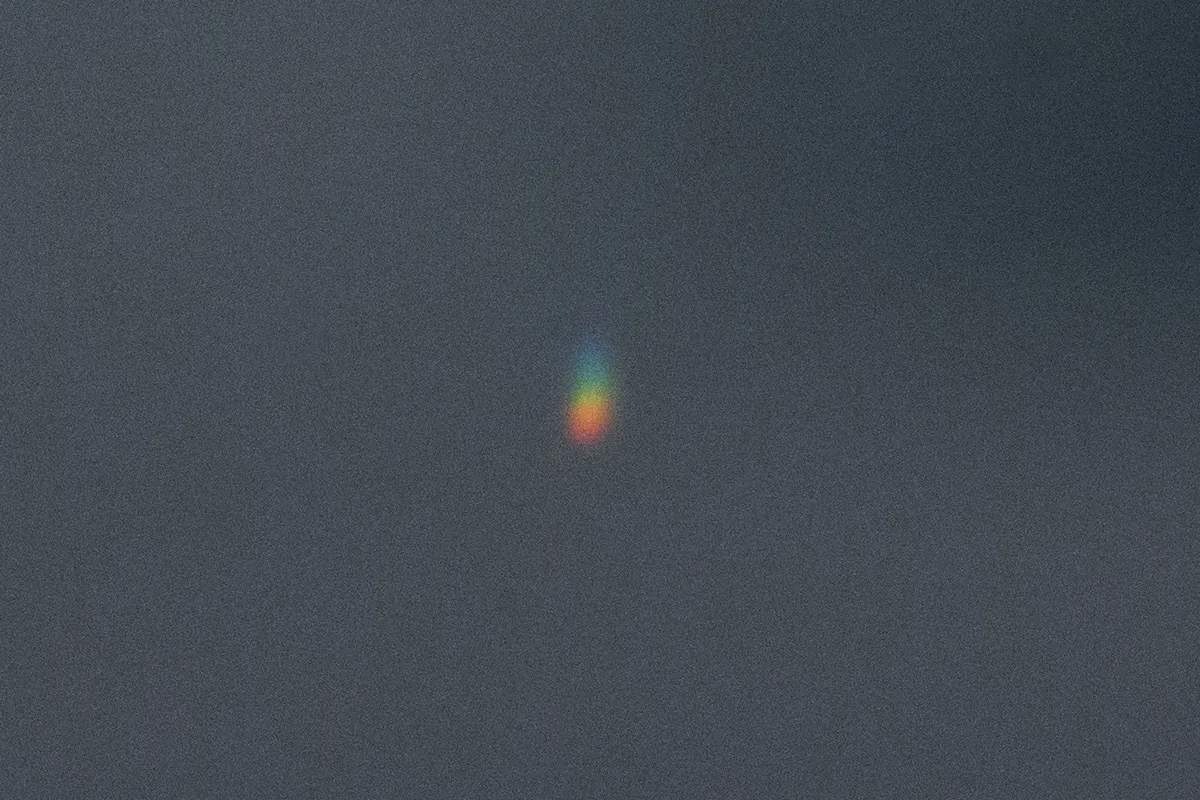
The sequence above, imaged through a low-power telescope as Venus was setting, shows the effects of atmospheric dispersion.
Venus’s light is spread into a spectrum, varying in intensity according to atmospheric stability (seeing).
Just before setting, the green edge of Venus detached, creating a Venusian ‘green flash’.
Although dispersion is easier to record with bright Venus, it’s not the only object to show it.
Mercury is another target that will show dispersion well. Its proximity to the Sun means you’ll typically need to record its colour spread against twilit skies, as shown here.
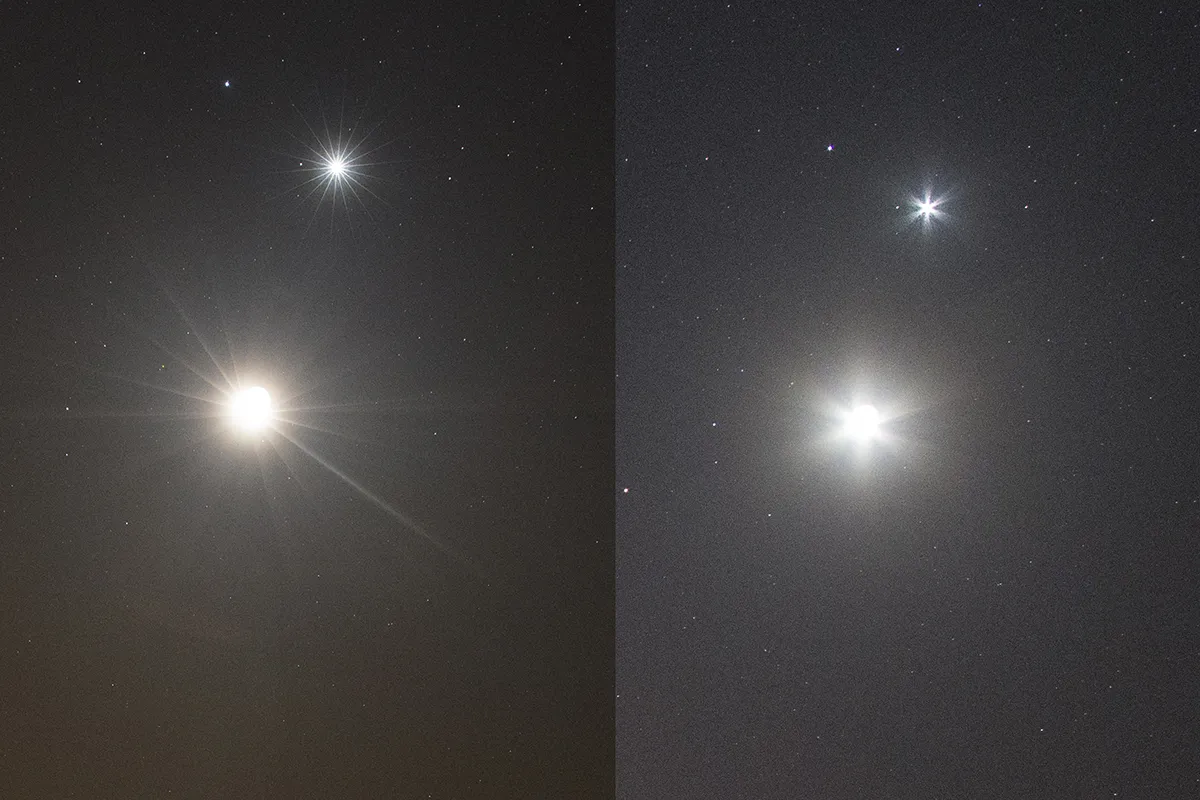
Capture Venus diffraction spikes
Finally, the planet’s brilliance and point-source nature make it ideal for experimenting with diffraction.
A low-power reflector will create diffraction spikes easily and some general photographic lenses can produce them when the lens aperture is stopped down.
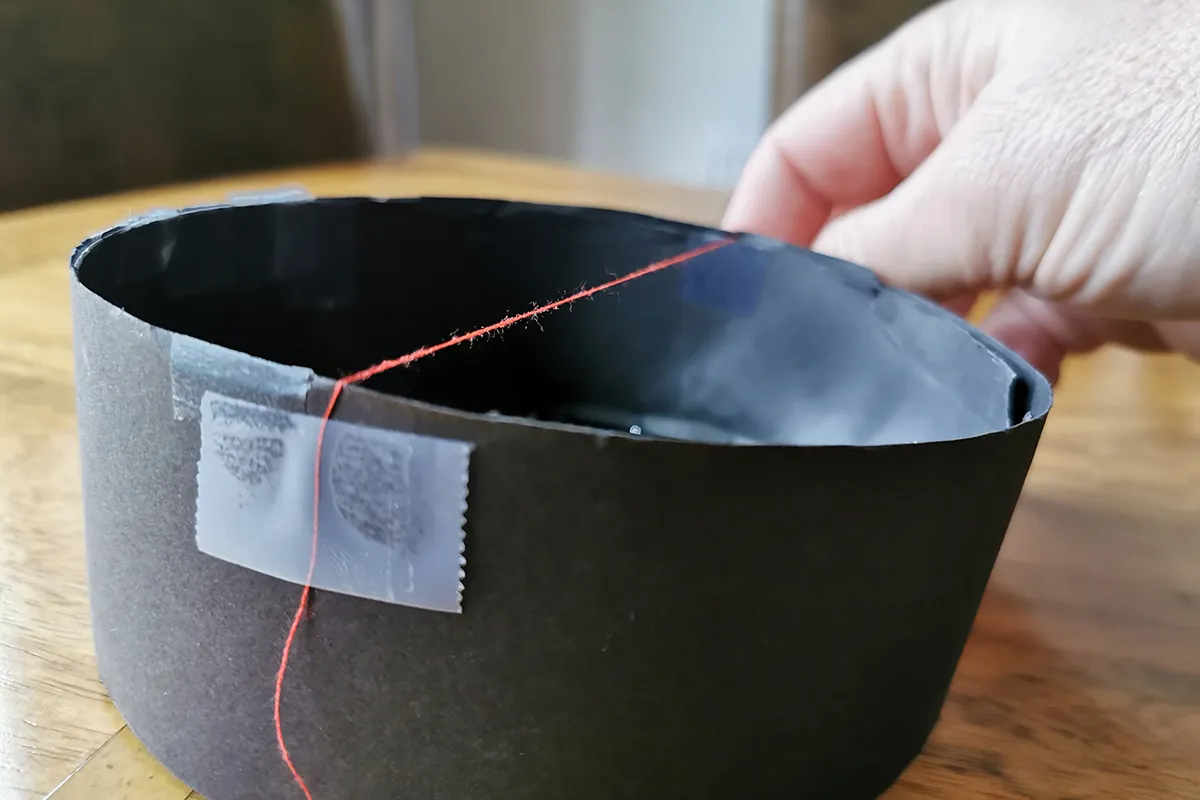
Alternatively, if using a refractor, cotton thread placed over the front aperture is a great way to show these physical effects with the Venusian light.
How to do it
A refractor can be made into a diffraction generator by creating a cardboard collar around the front of the scope and attaching cotton ‘vanes’ in various orientations.
Attach a camera to the scope and, using a mid-value ISO, focus (the spikes are useful for this) and take a shot of Venus, using an exposure of a few seconds.
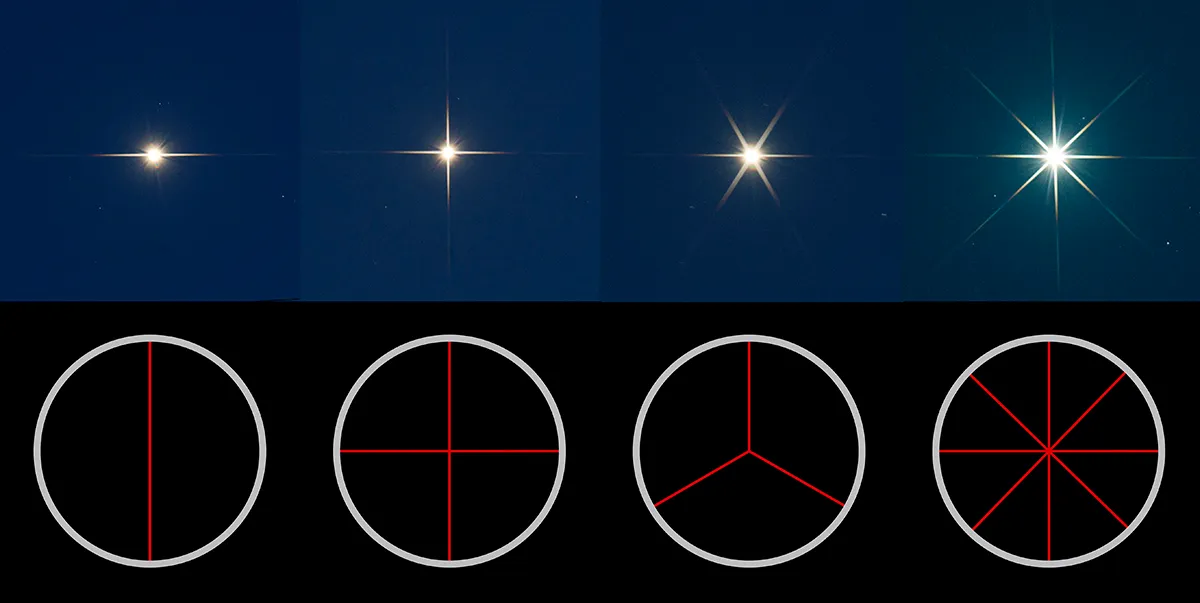
Start off with a simple cotton line across the telescope’s aperture diameter and go from there.
As you can see from the image above, four-vane pattern generates eight spikes, but half are coincident with the other half, so you only see four.
Three vanes arranged at 120° intervals don’t have this issue and here you’ll see six vanes with 60° between them.
Have you managed to complete any of our Venus photography experiments? Let us know by emailing contactus@skyatnightmagazine.com.
This guide originally appeared in the April 2023 issue of BBC Sky at Night Magazine.
