Makng a collimation tool for your reflecting telescope can be a cheaper alternative to some of the pricier collimators out there.
Many astronomers own reflecting telescopes, and the most common design is the Newtonian.
These mirror-based instruments provide much larger apertures for your money than refractors, which use lenses.
Because of this, reflectors can capture more faint starlight, giving you brighter views of astronomical objects.

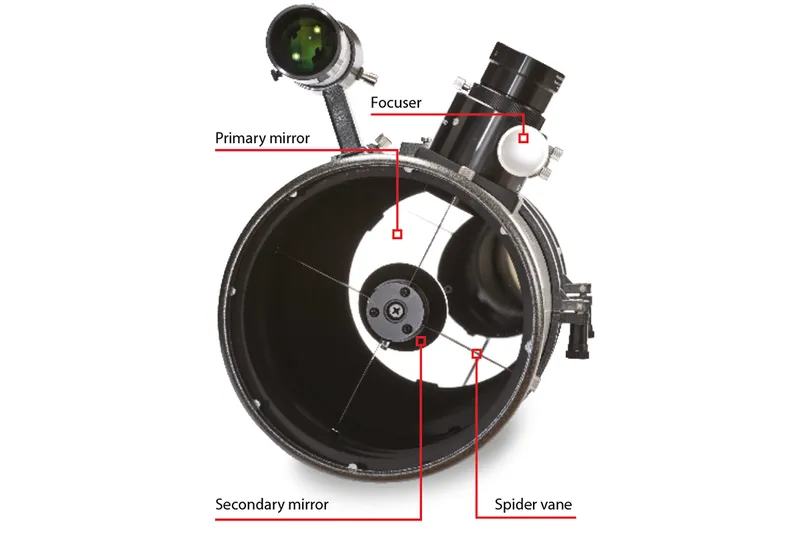
A Newtonian’s two mirrors need to be perfectly aligned to give well-focused, high-contrast views of the night sky.
Any rough handling or accidental impacts can knock the mirrors out of position, spoiling your view.
Thankfully, the Newtonian design allows for small adjustments to be made to correct this.
This is known as collimation.
To do this, you can use a laser collimator or follow our guide on how to collimate a Newtonian telescope.
In this project, we’re making a device to help you to perform these corrections accurately and get the best performance from your scope – a collimation tool.
Telescope collimators explained
Numerous commercial telescope collimation tools and aids are available.
Some are designed to help you visually align the secondary mirror with the focuser drawtube, others to help you align the primary mirror to reflect centrally along the main tube.
Some variants help you to align the reflection from the secondary mirror, and many provide a mixture of functions.
Our design is based on a combination tool called a Cheshire eyepiece, which helps tackle all three jobs.
What a telescope collimator is and how it works
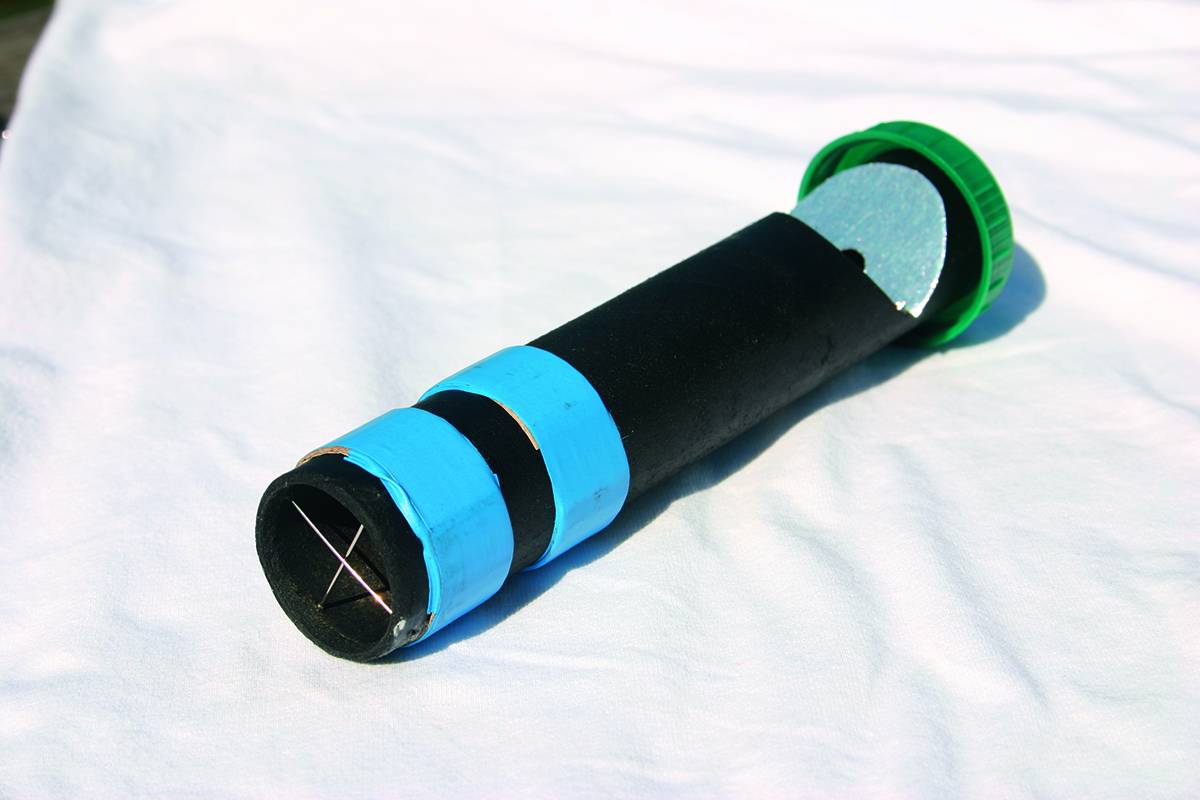
A telescope collimation tool is basically a hollow tube with a small eyehole at one end.
The length of the tube is calculated to suit the telescope, and you work it out by multiplying the internal diameter of the tube by the focal ratio of telescope.
So, for example, if you have a piece of tube with an internal diameter of 25mm and an f/5.6 scope, then the length you’ll need is 140mm (25 x 5.6).
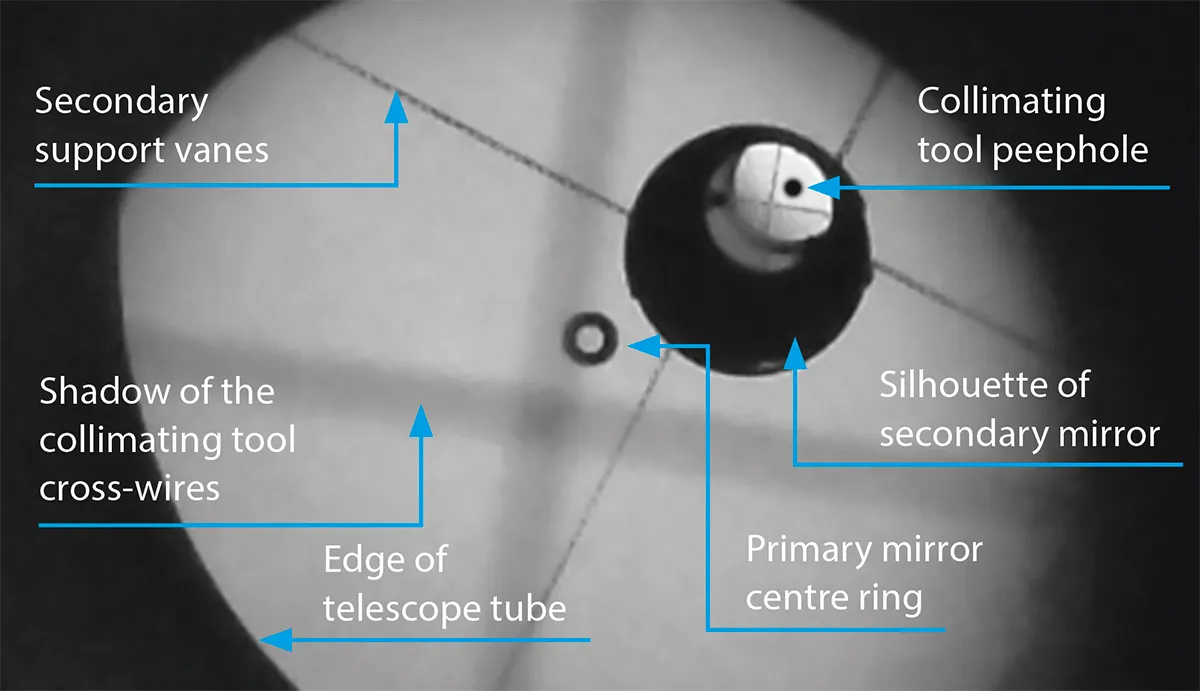
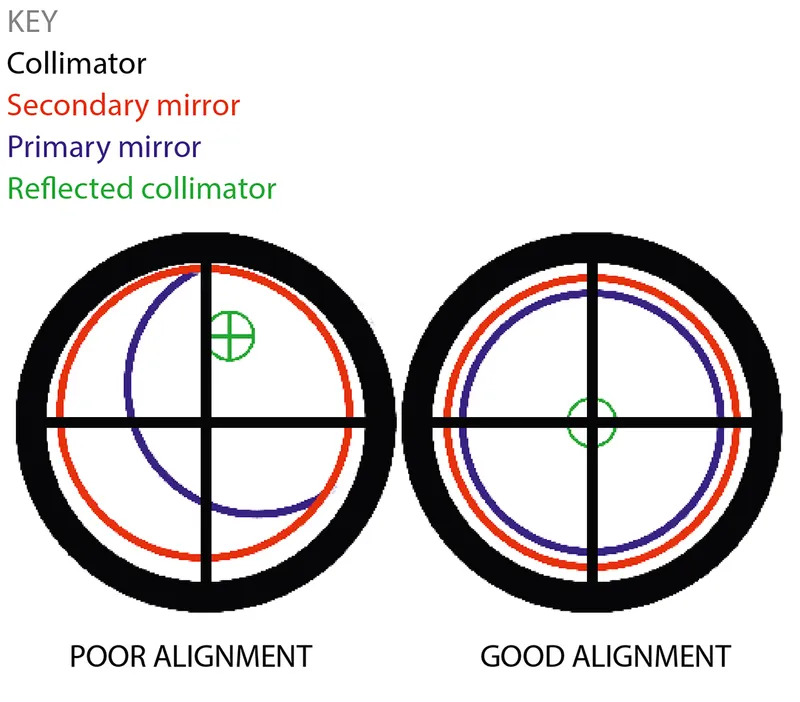
This means that the outline of the secondary and primary mirrors should just fit inside the tube as you look down it, making visual alignment fairly straightforward.
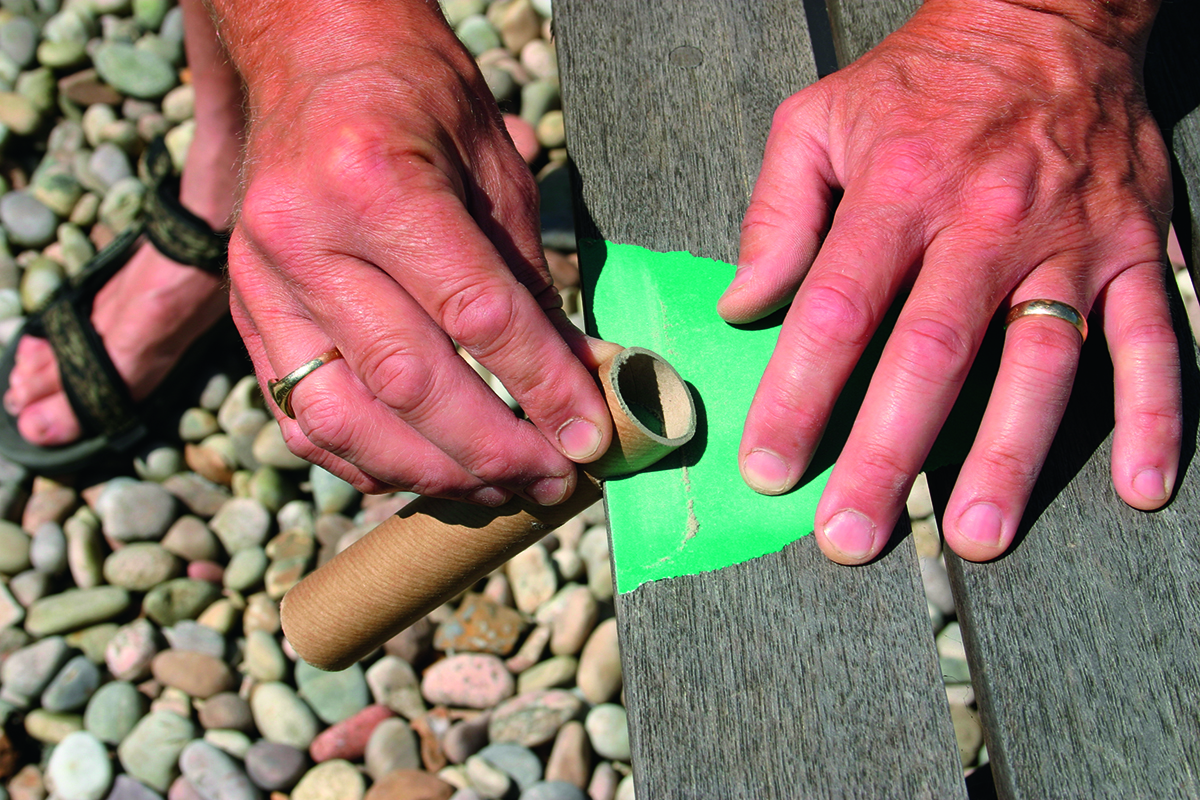
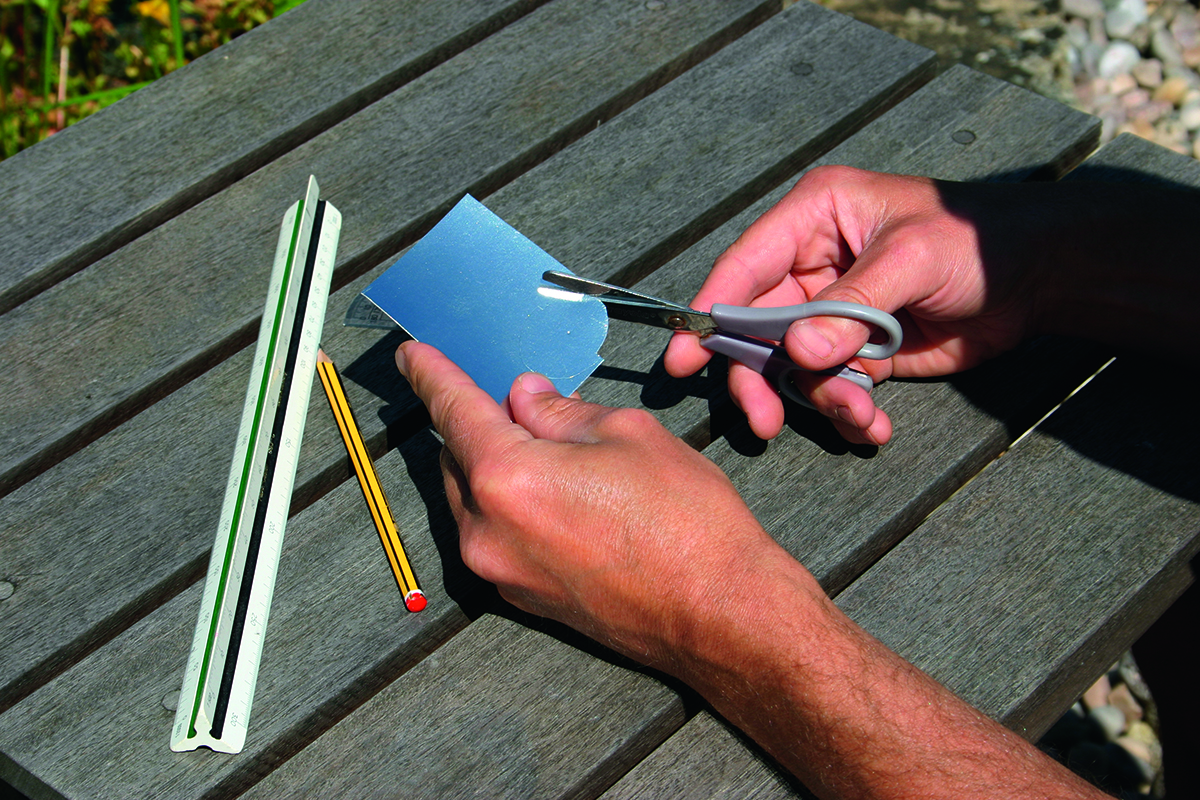
A cut-out section near the eyehole end holds a sloping, reflective piece of card.
In daylight this shows up nicely when reflected back by the mirrors and at night you can illuminate it with a red torch.
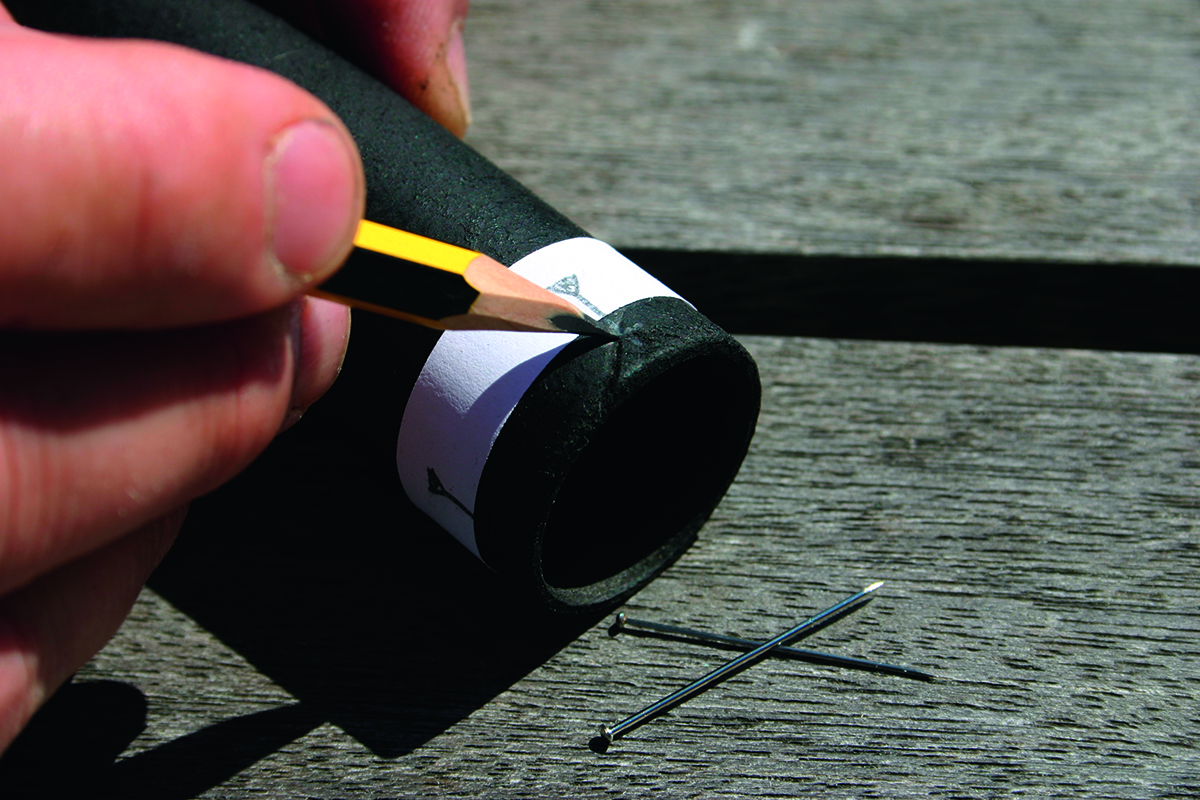
Crosshairs at the far end of the tube help with the fine adjustment of the primary mirror, which ideally should have a central ring or dot sticker on it.
Most telescopes come with instructions that explain how to adjust the mirrors.
This typically involves turning three screws behind each mirror, either by hand, with a small Allen key or with a screwdriver.
Sometimes there are locking nuts or separate screws that need to be loosened before you can adjust the main screws, and retightened after adjustment to maintain the correct position.
Using your homemade telescope collimation tool
Using our telescope collimation tool is quite straightforward.
First, position it carefully in the focuser.
When you look through the small eyehole you should be able to see the outline of the secondary mirror.
If needed, physically adjust the secondary so it appears centrally placed in the collimator tube – usually this is set up quite accurately in the factory.
Next, adjust the screws on the secondary mirror so that the reflected outline of the primary mirror also appears central.
If your primary has a central dot or ring, then you can use your crosshairs to get the best alignment, otherwise, you can align it with the edge of the tube.
Finally, make small adjustments to the primary mirror so that the reflection of your collimator appears central as well.
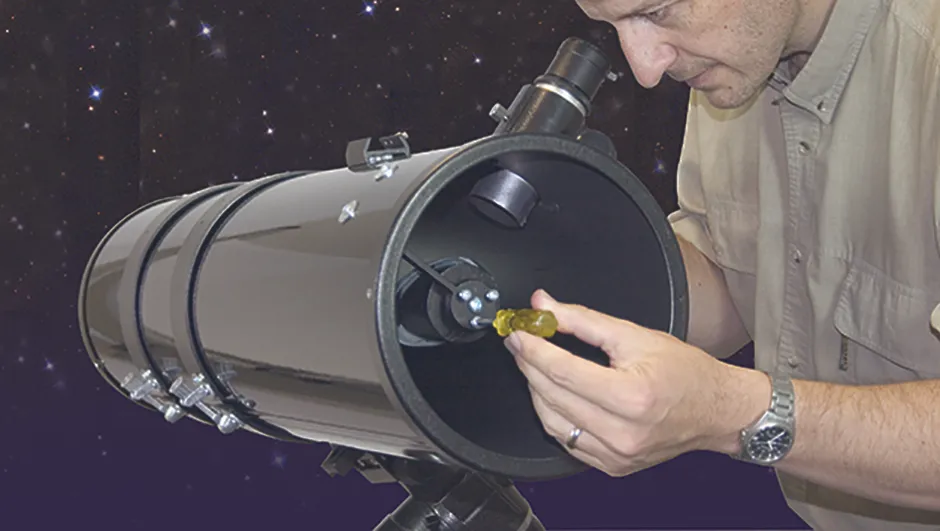
You will probably have to move between ends of the scope to make these adjustments, so make a mental note of which screw you have moved each time or you might get in a muddle.
When all the reflections and outlines appear centralised in the collimator, you know that all three elements (focuser, secondary mirror and primary mirror) are physically in line and also optically aligned.
Make sure you have tightened up any locking nuts or screws; you may need to make some further small adjustments afterwards as this can move the mirrors a little.
Once your telescope is well collimated you should only ever need to make small adjustments, usually only to the primary mirror.
It’s worth spending a few minutes before every observing or imaging session to make sure you are getting the best performance from your equipment.

Tools and materials
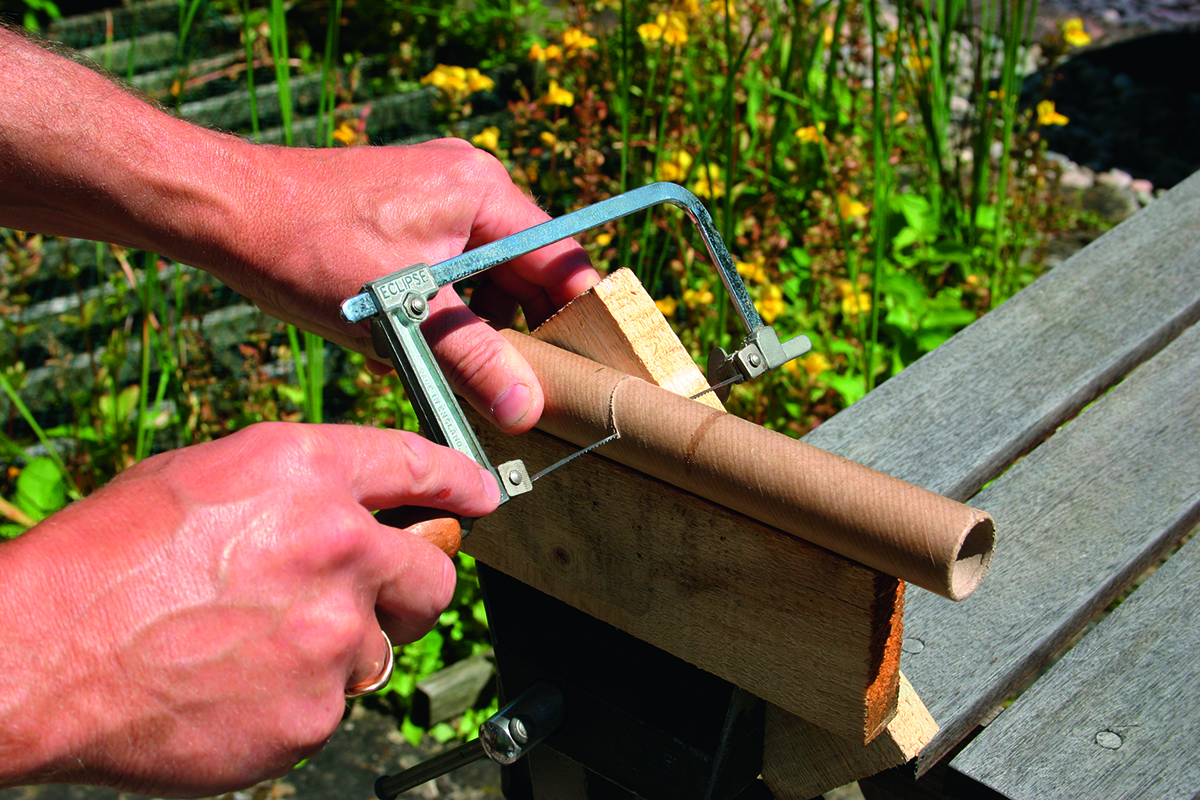
Cardboard tube
You’ll need a short length (about 150mm) of stiff tube that’s about 30mm in diameter. A good source is the middle of a roll of tin foil. Wrap with tape to increase the diameter to 31.8mm, which is 1.25 inches exactly.
Finish
Matte black spray paint works well as a non-reflecting finish, and will help to prolong the collimator’s life.
Sundries
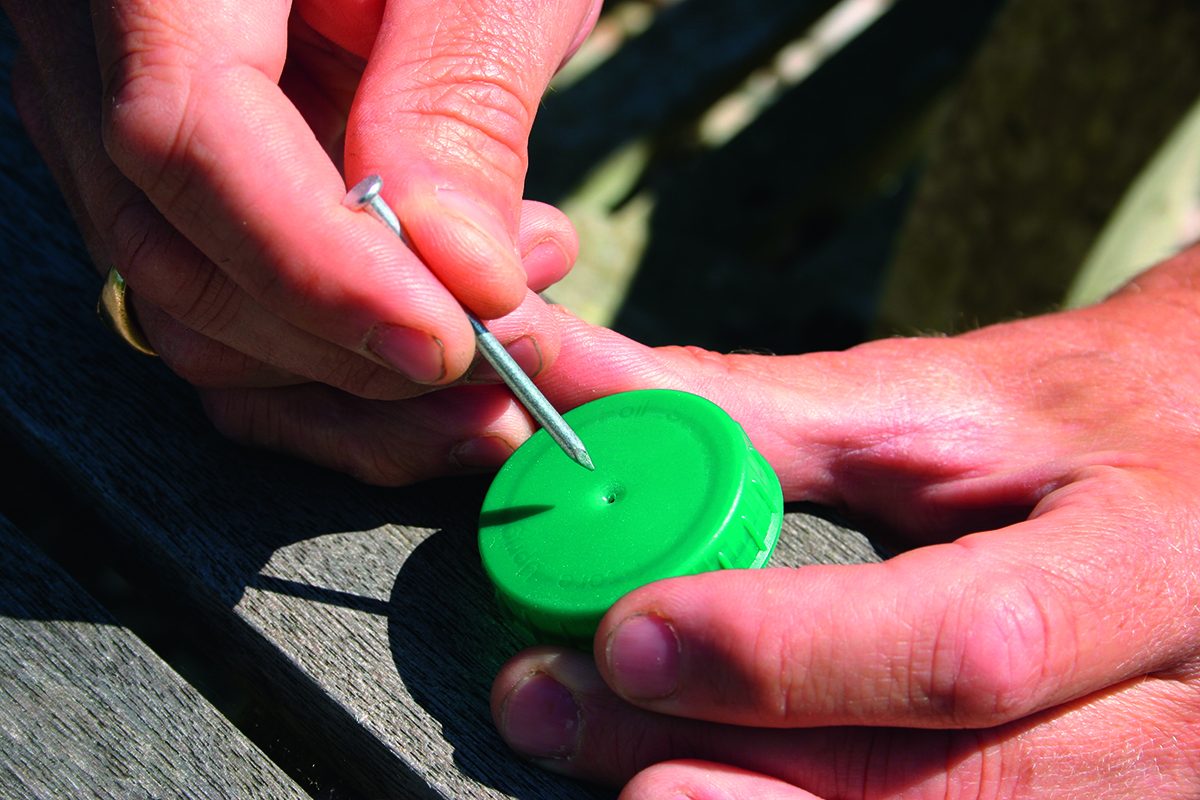
For the reflector, use small piece of bright or silvered card from a craft shop, or cut from some packaging. Use a plastic milk bottle top for the end cap and two dressmaking pins for the crosshairs.
Tools
Fretsaw, coping saw or junior hacksaw, craft knife, sandpaper, ruler, pencil, scissors, glue and electrical tape.