Why can we observe solar eclipses? How did craters form on the Moon? Why do we have seasons on Earth? Questions like these are often asked by new astronomers, but answering them can be a bit tricky.
How do you explain abstract situations where several bodies are moving around and affecting each other?
Well, it’s easier than you think!
These six experiments will help illuminate some of the complex principles of space science for the young… and the young at heart.
Great for kids at home and easy for high school science students.
For more advice, try our simple space and astronomy activities and read our guides on stargazing for kids and the best telescopes for kids.
Demonstrate how craters form on the Moon
You will need: a basin, some flour, cocoa and pebbles or marbles of varying sizes.
Have you ever enjoyed a view of the Moon? Its scarred surface is dominated by large basins and craters of varying size and shape.
But how did these craters form and why are some of them deeper or longer than others?
The following experiment will show you what has been happening to the Moon’s surface over millions of years.
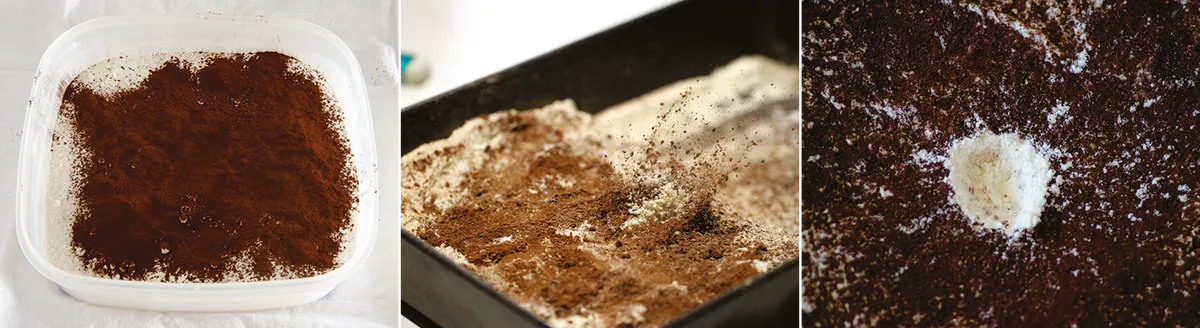
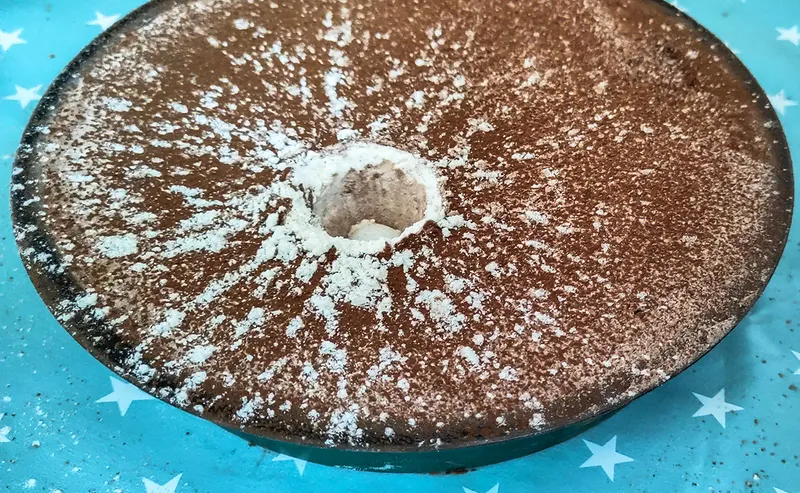
Fill the basin with flour about 2-3cm deep. Then, sprinkle some cocoa on the surface. The cocoa is just there to help the crater stand out, so any dark power will do.
Find a floor or table that’s easy to clean up and set down your basin. Then, drop your pebble into the flour. Congratulations – you’ve created your first crater!
Trying changing the speed of the pebble by dropping it from different heights, or see if you can gently throw it in from an angle (careful though, you don’t want to splash flour all over the floor). By doing so you can see how the angle and speed of impact affect the shape of the crater.
Throw a handful of smaller pebbles in with a bit of a swing and you can even create impact crater chains that resemble those on the Moon.
Measure the size of the Sun and Moon

You will need: a shoebox, some aluminium foil, sticky tape, a sheet of white paper, a ruler and a pin or needle.
Although The Sun is nearly 150 million km away from us and huge, you can measure its size from your living room.
You’re going to build a simple pinhole camera. Cut a 2x2cm square out of the centre of one of the short sides of the shoebox. Place the aluminium foil over the cut-out and tape it down.
Then, use the pin or needle to pierce the foil. Line the inside of the opposite end of the box with the white paper.
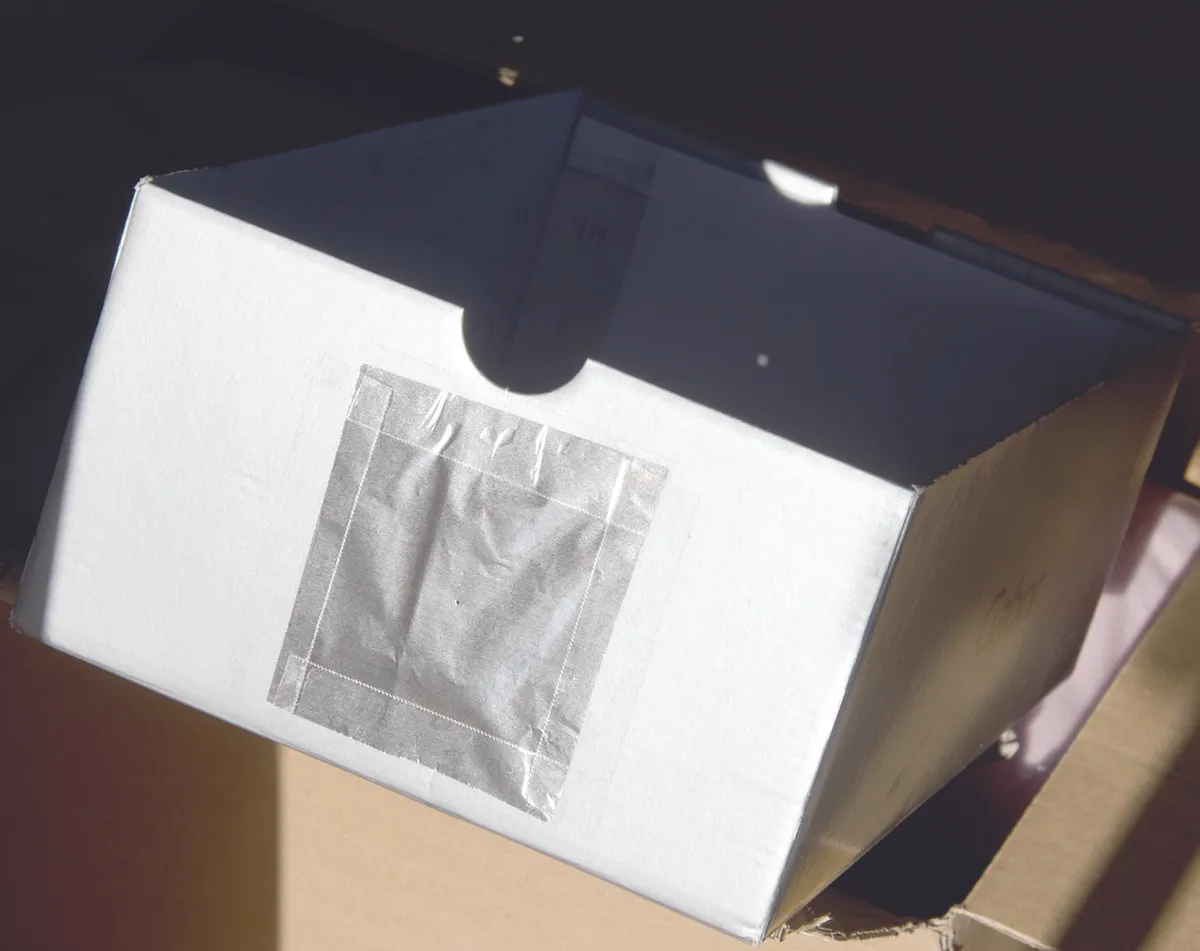
You now have a pinhole camera. Measure the length of the box, from the hole to the sheet of paper.
Point the foil-covered front end towards the Sun, being careful to never look directly at it!
An image of the Sun will appear on the piece of paper and you can measure it with a ruler. With that measurement and a bit of simple maths, you can calculate the Sun’s diameter:
- Diameter of Sun = size of image ÷ length of box x 149,600,000km
As 149,600,000km is the distance to the Sun and the ratio of size to distance from the hole is the same for both, this should give you a decent estimate of the Sun’s size.
You can use the same method for the Moon, but replace the number at the end with 384,000km.
Check your result when you’ve finished to see how close you are. The bigger the box, the more accurate you’ll be.
Show how spinning changes the shape of planets
You will need: a stick, some card, scissors, a ruler, glue and a pair of compasses.
Planets are not perfect spheres. They bulge out at the equator and flatten at their poles. The bigger the planet, the bigger the effect.
Planets are deformed this way because they spin, and this experiment will show you how.
First you need to build a model planet. Cut out three discs from the card – two need to be 4cm in diameter (we’ll call those A and B) and one should be 3cm in diameter (called C).
Next, make a hole in discs A and C just big enough for them to sit firmly on the stick. Then make a larger hole into B so that it can easily slide up and down the stick.
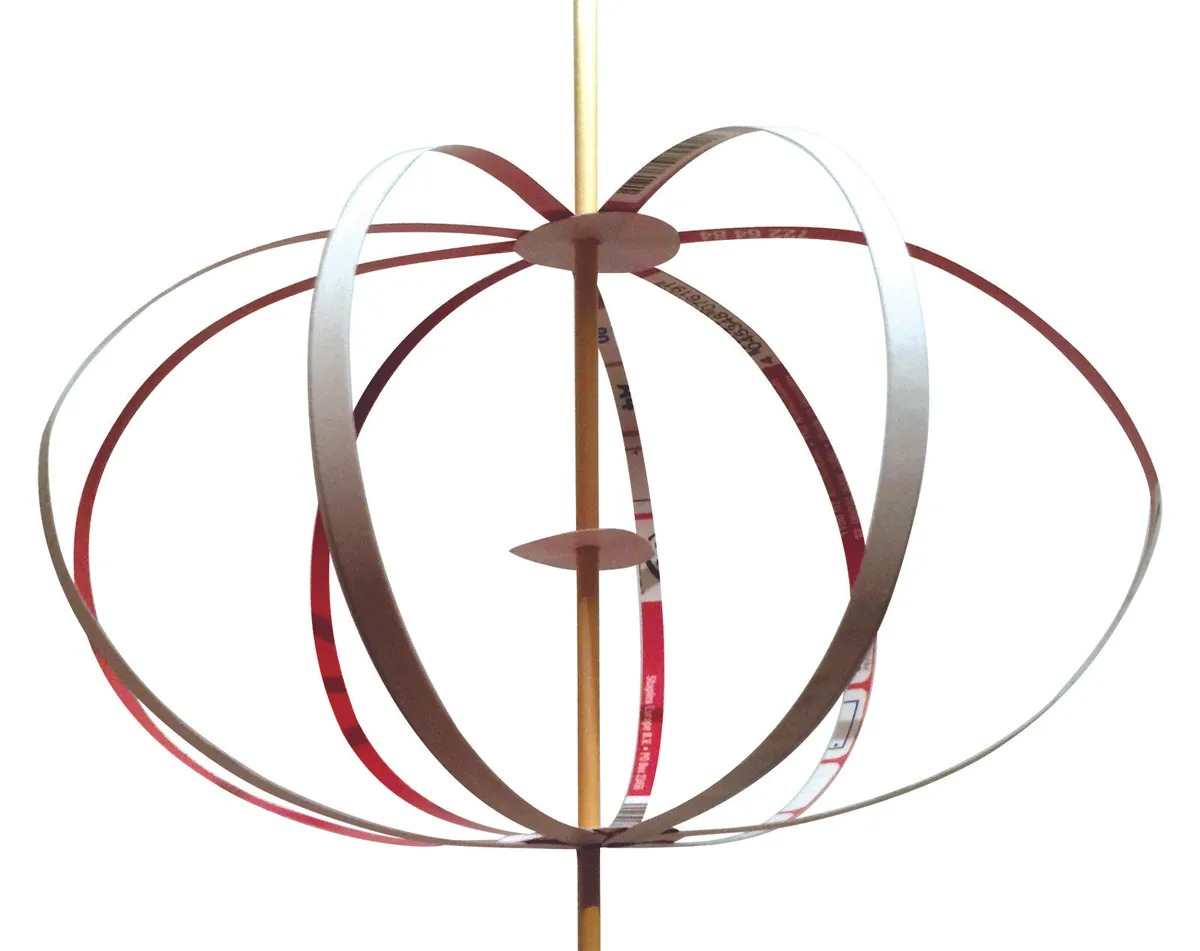
Now cut out eight strips of the card (each about 1.25x30cm). Glue one end of each strip around the edge of disc A so that it looks like spider.Then put it on the stick.
Next fix C on the stick about 15cm away from A as a reference point.
Finally, put B on the stick beneath C and glue the ends of the strips around its edge so that it looks like the model planet on the right.
Ensure that B can easily move along the stick.
Now, hold the stick between your hands and spin it.
Try changing how fast you spin the stick and see what happens. You should find the faster you spin the stick the more the ‘planet’ bulges.
Measure the size of the Solar System

You will need: cardboard, a pair of compasses and a roll of toilet paper.
The sizes of the planets in our Solar System and the distances between them can be hard to grasp, but this experiment will help you put things into perspective.
Start by drawing circles on pieces of card using the scale radii in the table below to make your planets (remember to label them as you go).

As a starting point we’ve given Earth a radius of 1cm and left out the Sun, as it would be 2.2m wide at this scale!
To represent the distances between planets we’ll use the toilet paper, as it is conveniently separated into sheets of the same size.
This time we say that one sheet is equal to the distance to Mercury. Unfortunately, this is a different scale to the planet sizes – if they were on the same scale, Neptune would be 7km away!
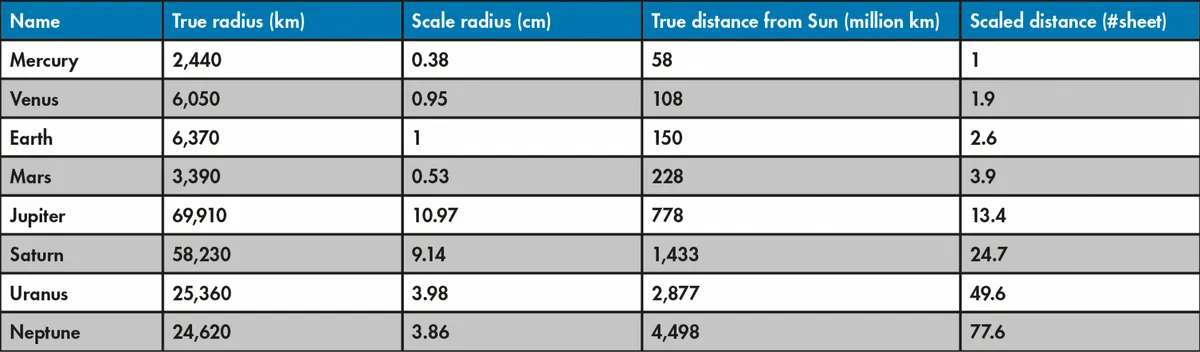
Then roll out the toilet paper and count the sheets until you reach the relevant number and put a planet on it. Isn’t it impressive how much space there is in between?
And that’s not even the whole Solar System. If you wanted to incorporate the Oort Cloud into this model, you’d need about 250,000 sheets of toilet paper.
Find out more in our guide on how to make a scale model of the Solar System.
Show why Earth has seasons
You will need: a lamp (for the Sun), an orange (for Earth) and a stick.
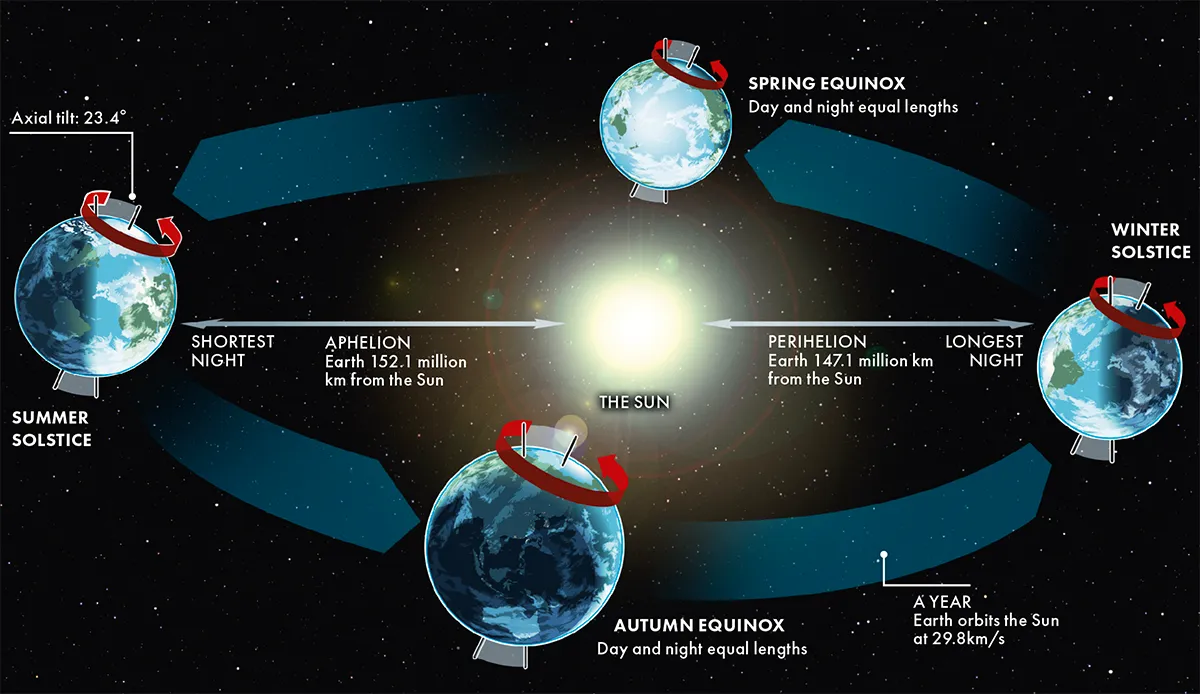
We have four seasons on Earth due to the inclination of the Earth’s rotational axis. But why does the tilt affect the weather?
Skewer the orange onto the stick, then draw around the equator of the orange. Like in the eclipse experiment, find a dark room and hold the orange up to the light so that half of it is illuminated.
Instead of holding the stick so it’s vertical, tilt it so that it’s at roughly the same angle as the Earth’s rotational axis, which is 23.5°.
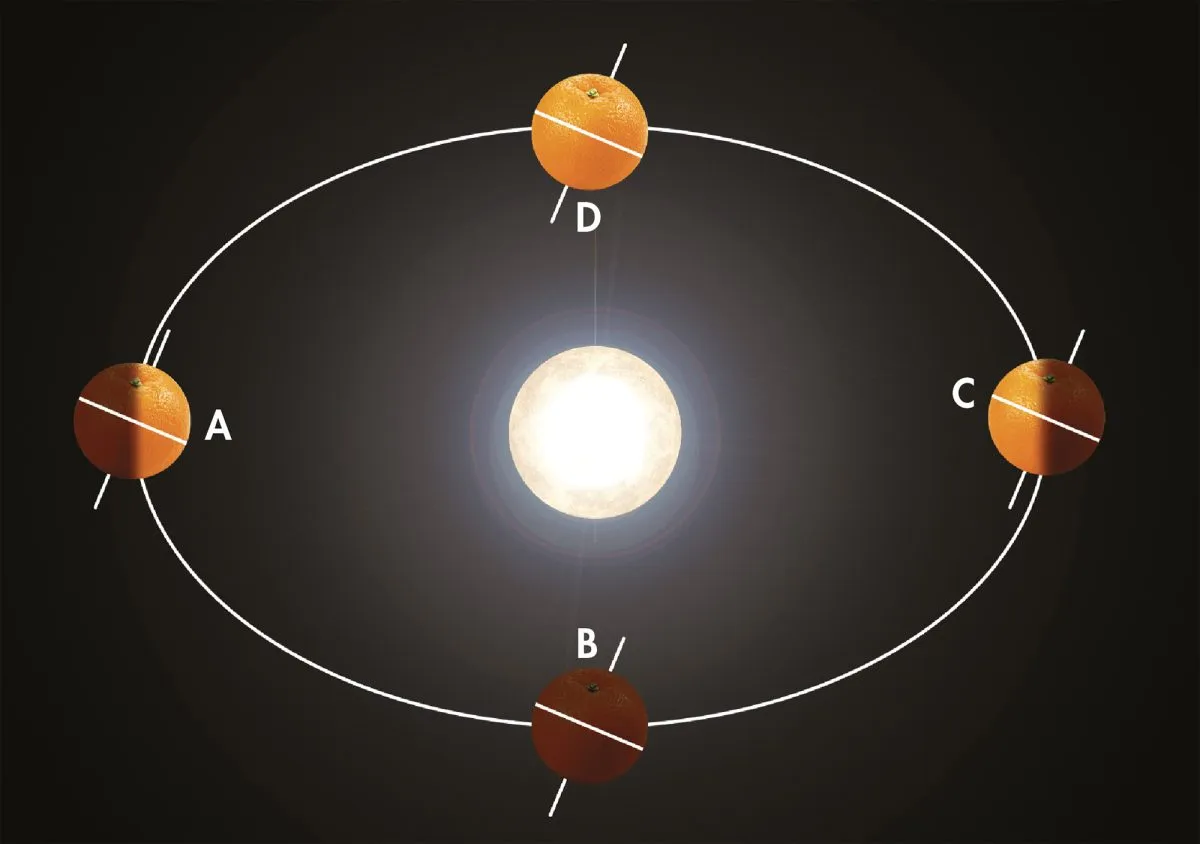
Now take a closer look at how that angle affects Earth’s exposure to the Sun. At point A the top of the stick is tipped towards the lamp.
There’s more sunlight shining on the northern hemisphere, which in turn receives more energy and warms up. The north is experiencing summer, while in the south it is winter.
We have exactly the opposite situation when our Earth is on the other side of the lamp (at point C). At B and D the stick is neither pointing away nor towards the lamp – both hemisphere’s are lit by the same amount. These points are spring and autumn.
It’s worth noting that this experiment works much better with a lamp that’s designed to light in all directions, rather than one that’s directional, such as a desk lamp.
Show why eclipses happen
You will need: a lamp, a smaller ball (for the Moon) and a larger ball (for Earth).
One of the most amazing astronomical observations we can witness is a solar eclipse. But how do they happen?
As the Moon orbits our planet, sometimes it passes between Earth and the Sun, casting a shadow.This experiment shows you how that works.
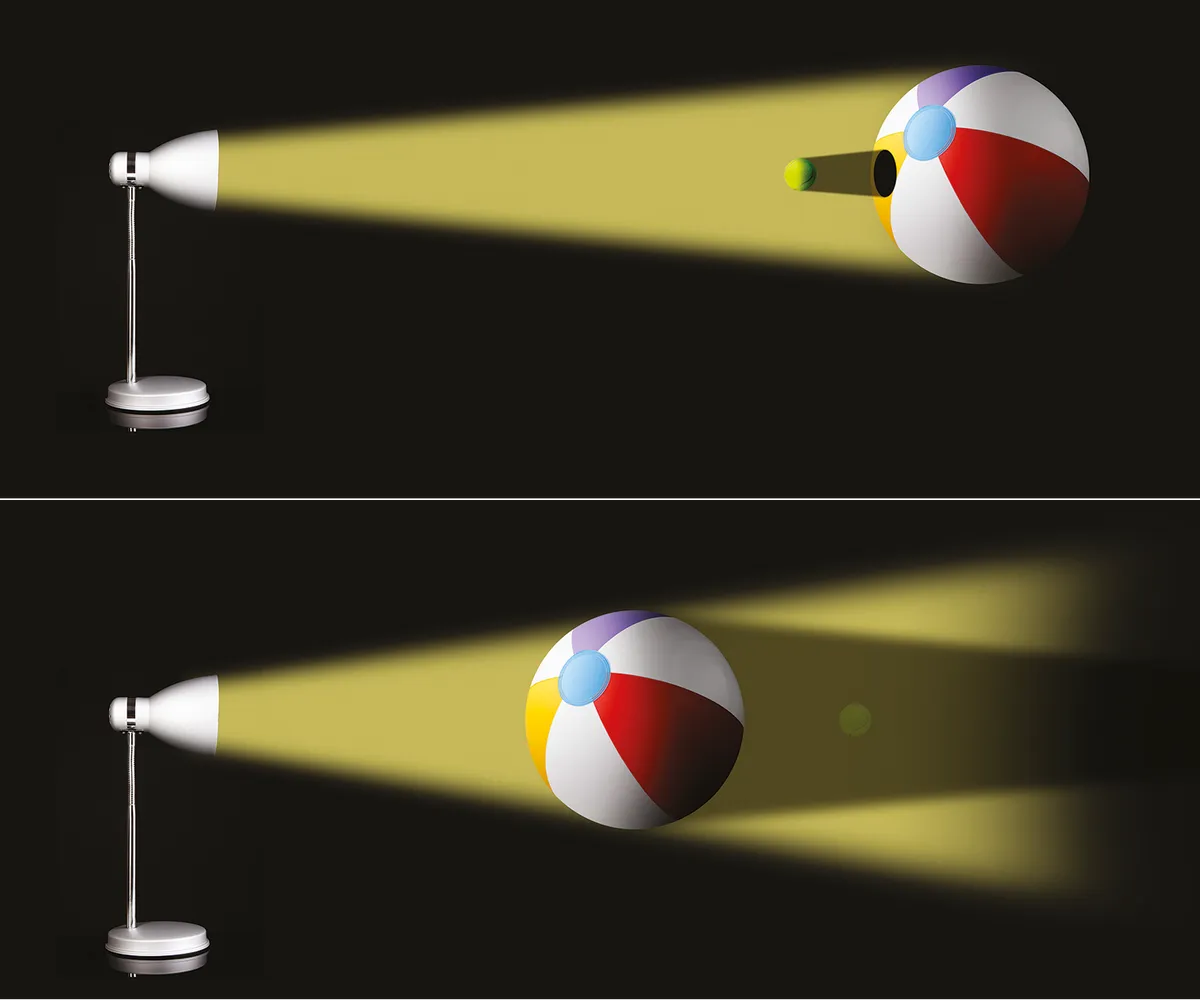
Find a dark room and switch on the lamp, then place ‘Earth’ a few metres away so that half of it is in the light. Hold the ‘Moon’ about 20cm above the lit side of the ‘Earth’ so it casts a shadow on the surface.
It’ll only be a small shadow, which explains why a solar eclipse can only be seen within a small corridor on Earth determined by the size of the shadow and the rotation of our planet.
You can use the same method for visualising lunar eclipses. For this, the ‘Sun’, ‘Earth’ and ‘Moon’ need to be in alignment so Earth’s shadow is cast on the Moon, producing a lunar eclipse.

You can vary this experiment further: what if the ‘Moon’ doesn’t fully block out the Sun, or if Earth’s shadow isn’t completely thrown upon the lunar disc?
These experiments show what happens during a partial eclipse, when the shadow falls just beyond the edges of a planet.
This article originally appeared in the January 2016 issue of BBC Sky at Night Magazine.

