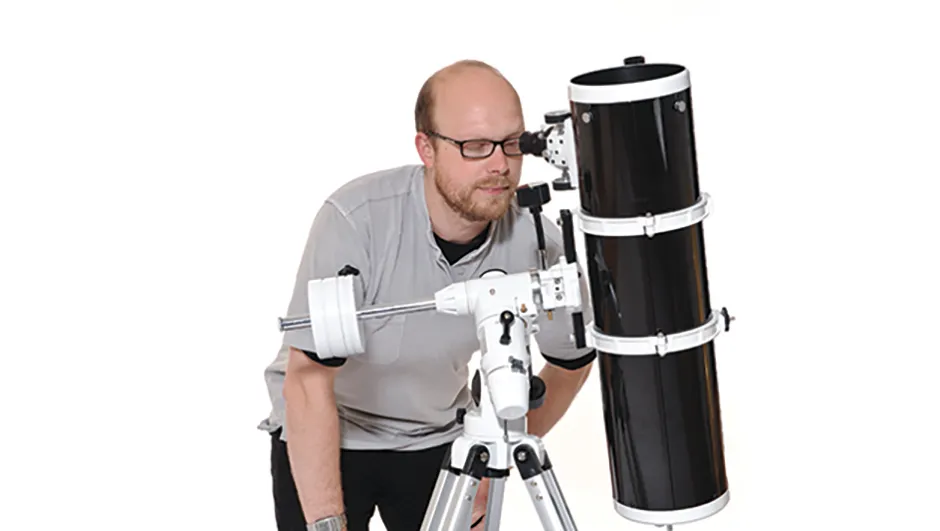
An equatorial mount is an astronomical device designed to follow the apparent movement of the stars across the night sky, caused by Earth's rotation.
The equatorial mount enables you to stay focussed on a specific target without it drifting from your field of view.
Why equatorial mounts are used
With the naked eye, the motion of the stars is barely perceptible, but look again with any form of optical aid and the fact that they appear to move presents a real problem.
For brief observing sessions you can keep adjusting a telescope’s orientation to compensate for this.
But it’s a different matter if you want to study a single target for an extended period of time, or take a long-exposure image.
This is where an equatorial mount comes into its own.
Click here to read more about how to improve your telescope set up
Most commercial models are based on the German Equatorial Mount. One axis is aimed at, and ideally lined up accurately with, Earth’s axis of rotation.
For the northern hemisphere, we have a convenient star almost on top of that point, the north celestial pole.
This star is Polaris (Alpha Ursae Minoris), which is why it is called the pole star, also known as the north star.
Southern hemisphere astronomers have much fainter stars close to their celestial pole and so offset from nearby Sigma Octantis.

Aligning an equatorial mount
By aligning one axis with the pole star, the mount’s rotation matches the rotation of Earth itself.
For most visual purposes, only a rough alignment is required to keep the target in the view of the eyepiece.
But with prolonged viewing, there will be a steady drift of the target and occasional ‘nudges’ will be needed to bring it back to the centre.
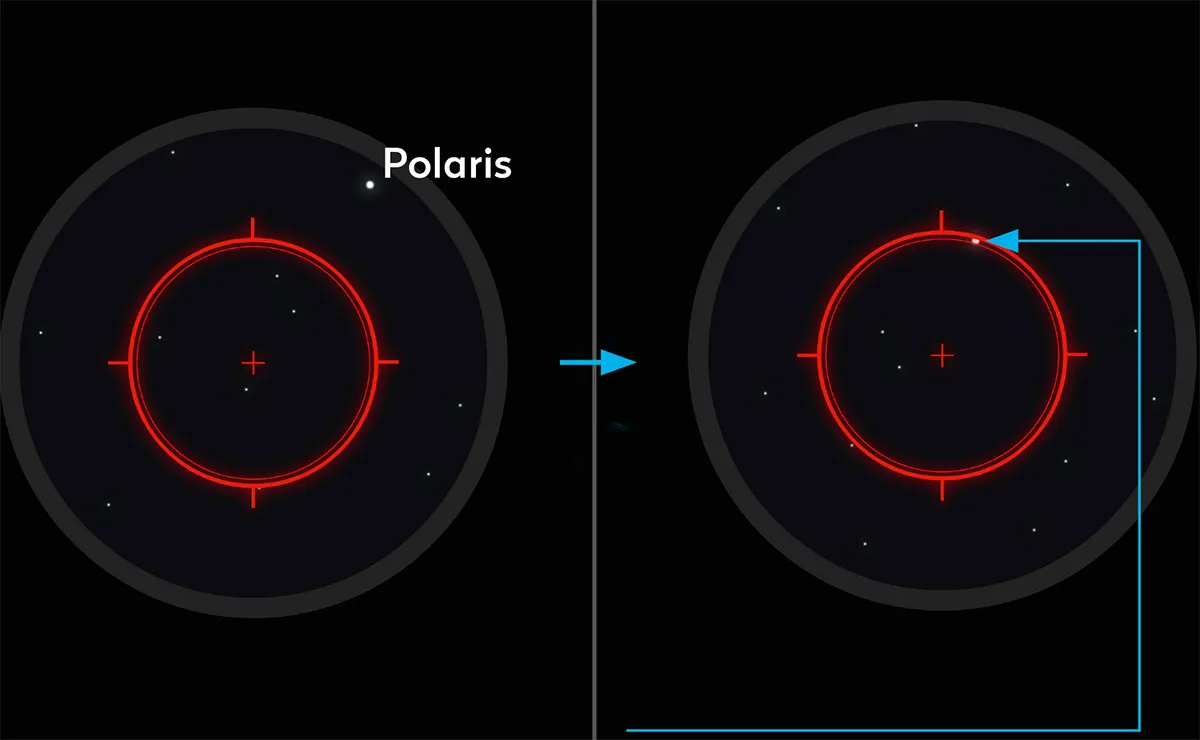
For more accurate tracking, an accessory called a polarscope, which is usually fitted on the axis of the mount pointing northwards, is of great help when it comes to alignment.

Early commercial equatorial mounts were un-driven and required users to use slow-motion hand controls to keep targets in the field of view of the eyepiece.
But today even beginner systems have drives on both axes and are supplied with a computerised Go-To hand controller.
And, as you would expect, now many equatorial mounts have their own WiFi network and can be controlled via smartphone or tablet.
We are well and truly spoiled in this modern age.
Go-To gives you the option to use up to three stars to help align the mount, assuming it has been roughly aligned already.
Once aligned then you can select and slew to a whole range of targets.
You can take a tour, locate and view deep-sky objects and the fainter members of the Solar System, such as comets, asteroids and even Pluto if your telescope has the aperture.
Computerised mounts also allow for the even finer accurate alignment needed for deep-sky astrophotography and have brought this specialty within reach of the many.
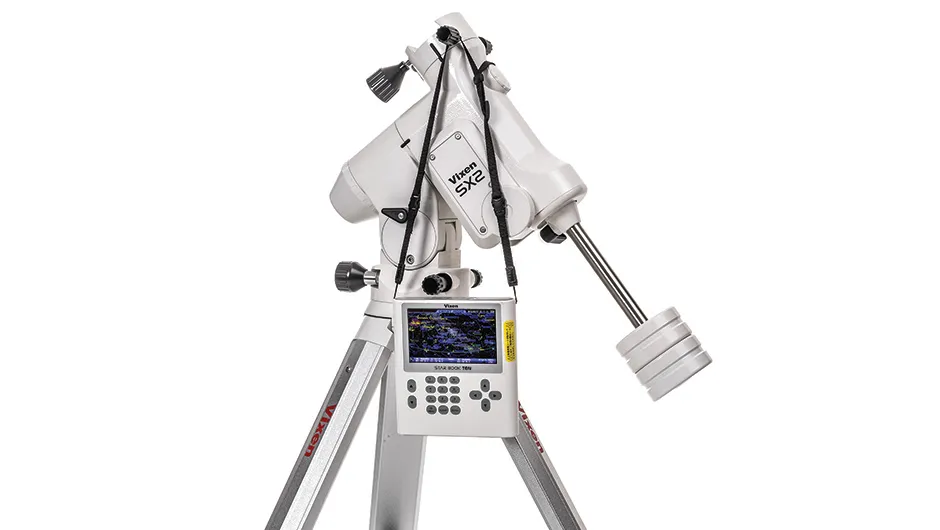
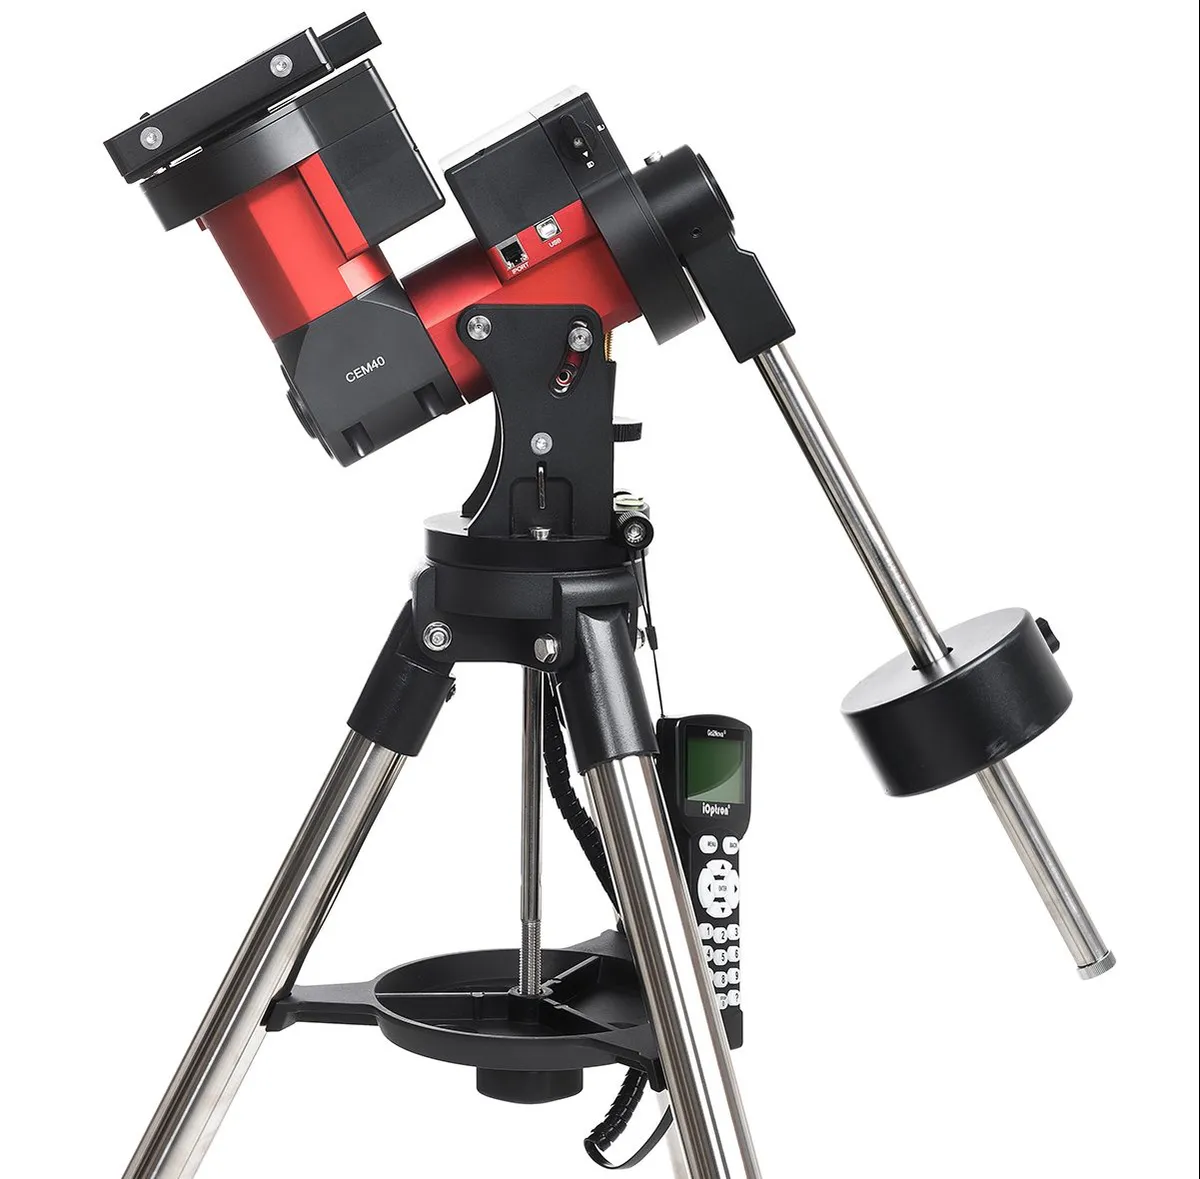
Different sections of an equatorial mount

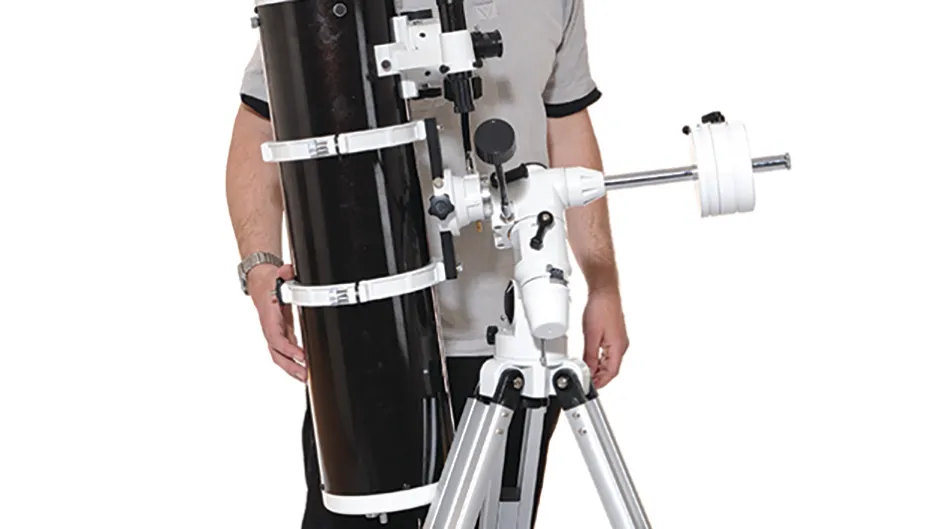
The principal part of an equatorial mount is the mount head, which has two fully rotatable axes: one in declination (dec.), the north-south axis, and the other in right ascension (RA).
It is the RA axis that needs to be aligned with the pole star and it forms the main bulk of the mount head.
On the top is the saddle, which is where you attach your telescope.
It is usually one of two variants: the ‘standard’ Vixen-style dovetail bar or the wider Losmandy-style.
Some mounts now have dual saddles, giving you both options.
The mount body also contains the electronics and has ports for connecting the Go-To hand controller, power and an autoguiding port for astrophotography.
With a German equatorial mount, counterweights are attached to the dec. axis, with the weight you need dependent upon the weight of the telescope plus any additional equipment or accessories, such as imaging cameras and guidescopes.
Finally, for stability the mount is fixed to a sturdy tripod with adjustable legs.
Equatorial mounts have become very versatile, with a wide range of carrying capacity from very portable small systems for cameras up to large systems for deep views and imaging of the cosmos.
Today there are even variants that can act as both equatorial and altaz
Putting your telescope on an equatorial mount allows you to follow stars as they continue their steady progress across the night sky.
Browse all of our mount reviews or read our guide to the best telescope mounts available.
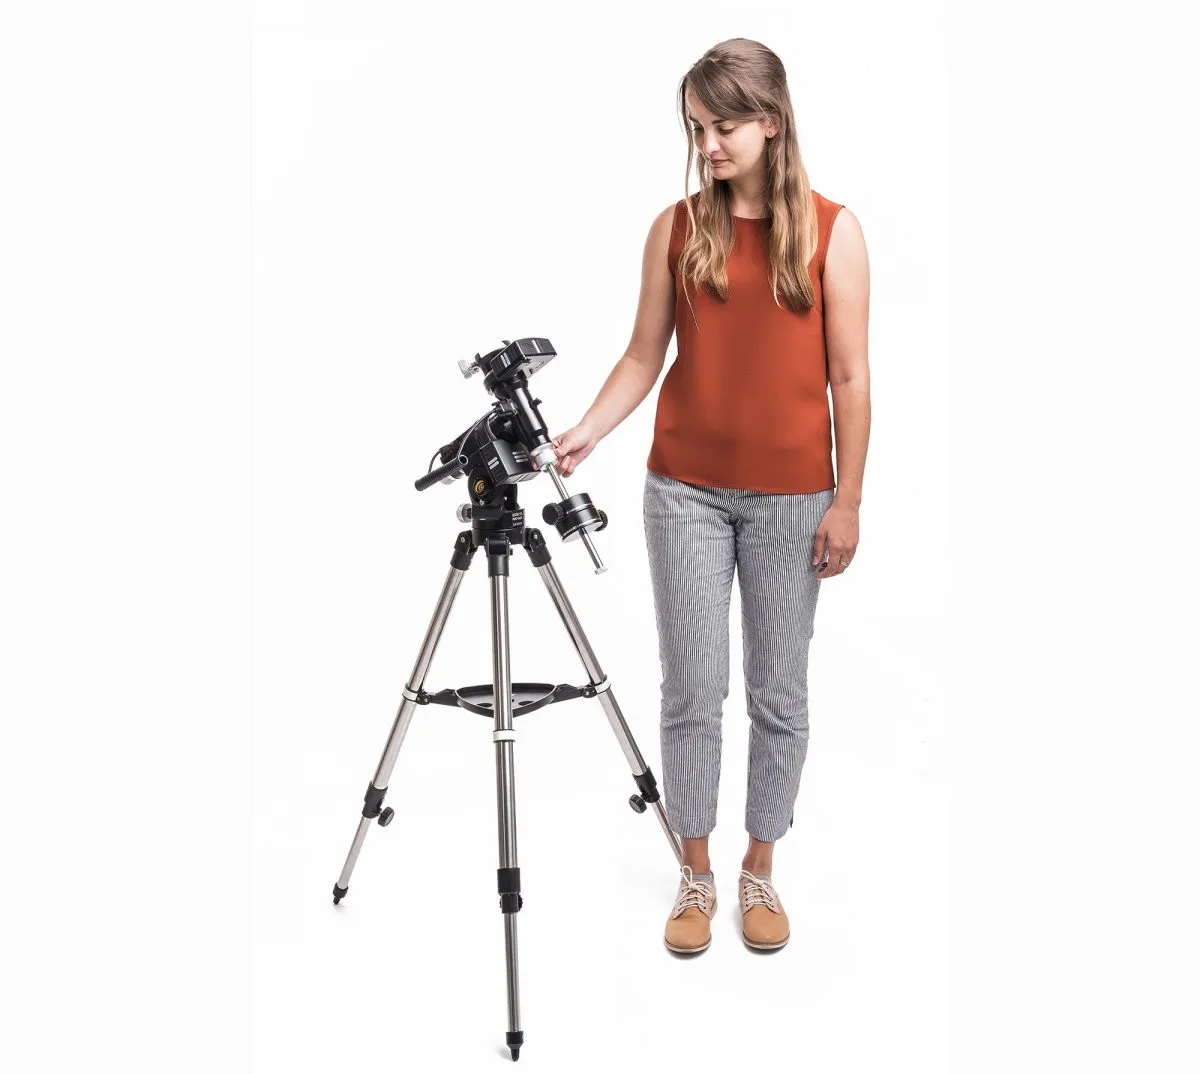
Setting up your equatorial mount
Get your tripod ready
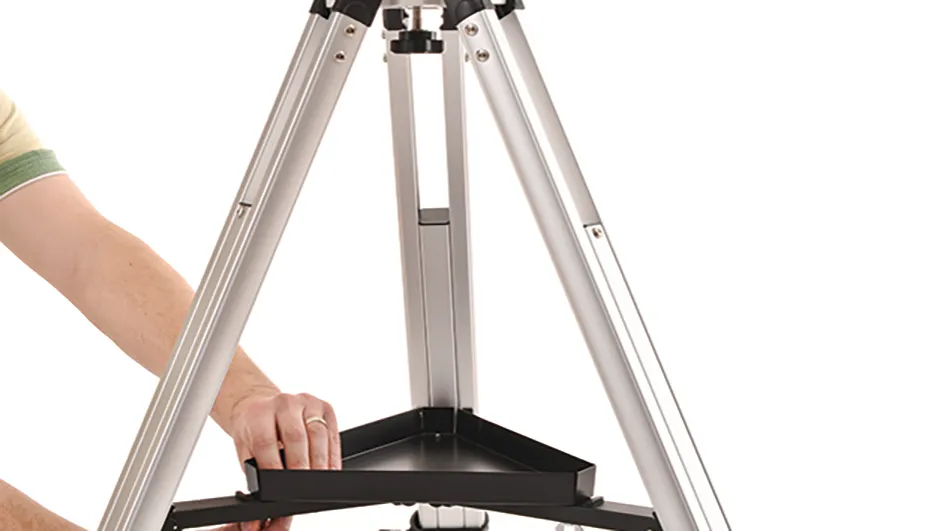
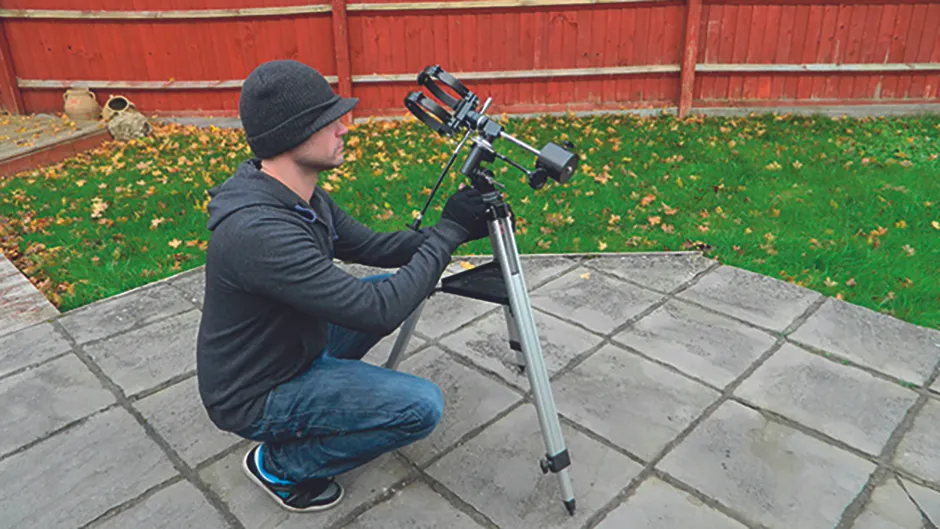
Set up your equatorial mount in daylight if it’s your first time.
Adjust the height of the tripod’s legs so the top is level with your hips and, if there is one, fit the central accessory tray.
Make sure that the top is level and that the leg labelled ‘N’ is pointing north.
Place the mount head on top of the tripod.

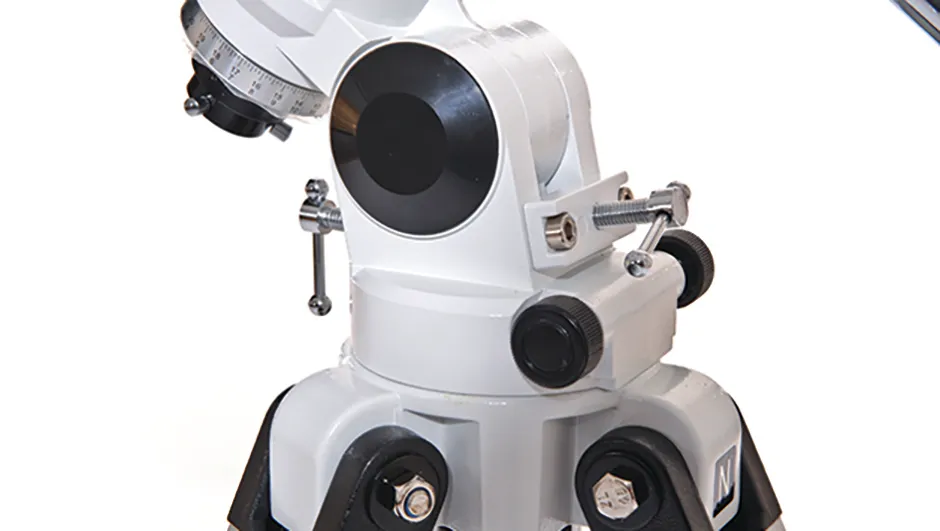
Line up the metal peg on the top of the tripod with the gap underneath the mount, between the azimuth lock’s two bolts.
Secure the mount head onto the tripod by tightening the big bolt hanging from the underside of the tripod top.
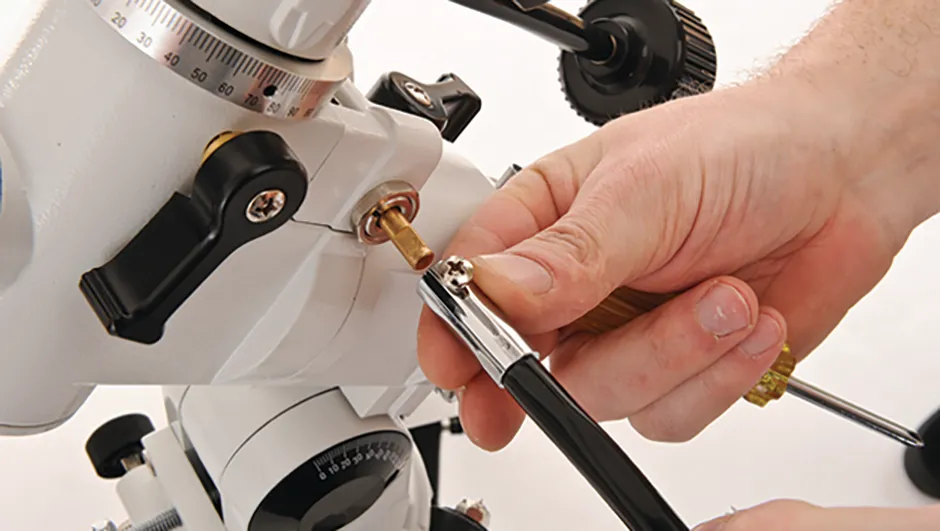
Screw the counterweight bar into the mount head.
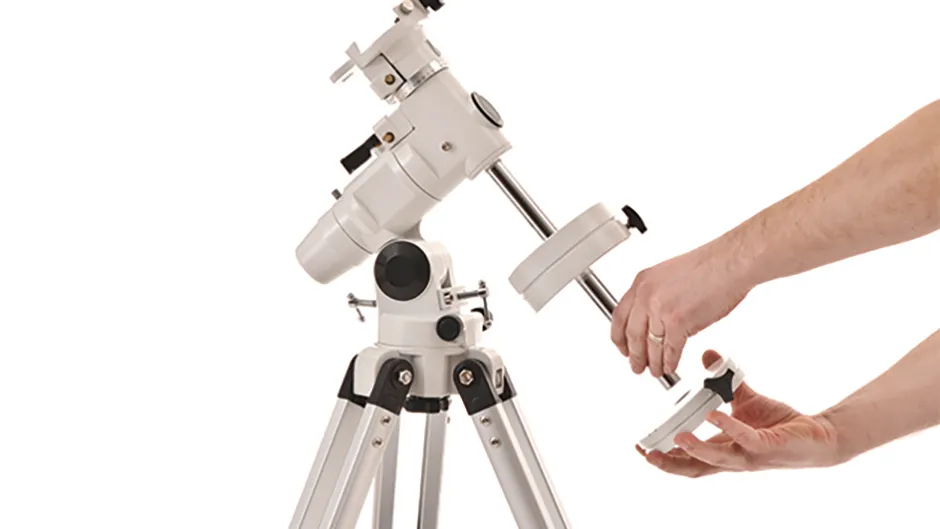
With the rod’s locknut tightened against the mount, take the safety screw off the end of the bar and slide the counterweights halfway up the bar.
Tighten the screws on the weights to secure them.
Replace the safety screw on the end.
Point the RA axis to the north celestial pole.
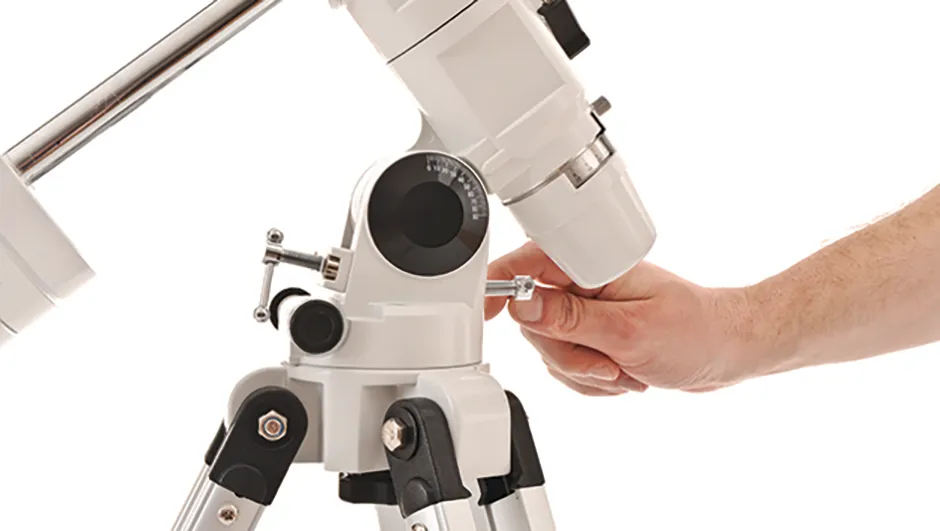
In order to get your equatorial mount RA axis to the north celestial pole, your altitude setting must be the same as your local latitude.
Release the front and back bolts and tilt the mount head so that the pointer lines up with the right number on the altitude scale, then do the bolts up again.
Fit a slow motion cable onto the small D-shaped shafts on the RA and the Dec. axes.
Tighten the screw at the end of each cable to hold it in place.
If using a refractor, rotate the Dec. axis so that the cable extends to the bottom.
For a reflector, fix the cable on at the top, closest to the eyepiece.
Set up your tube rings, to hold your telescope
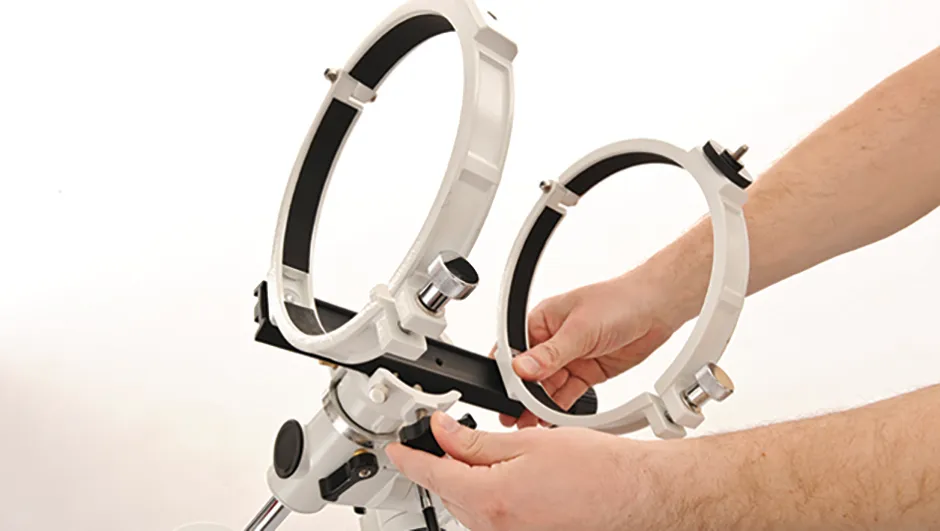
Tube rings are attached to a mounting plate clamped tightly into the mount head.
Our example has a short dovetail mounting plate with two tube rings already attached, but yours may not be fixed to the mount head.
In which case, attach the rings.
With the tube rings open, place the tube in the rings

Flip the top half of the rings over the tube and screw down the locking bolts tightly so the tube doesn’t slide out.
You might need an extra pair of hands to help you at this point.
Remember, if you’ve got a reflector the eyepiece goes at the top!
Slip the finderscope into its bracket
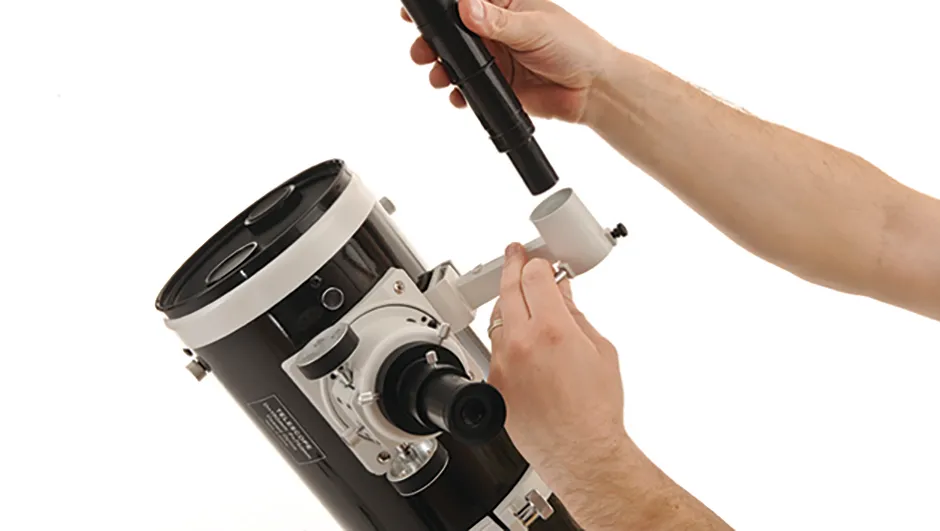
Screw finderscope into the clamp on the telescope tube.
To align it, put a low-mag eyepiece in the main scope’s focuser and find something like a pylon on the horizon.
Then look through the finderscope and adjust the screws on its bracket until the pylon is in its crosshairs.
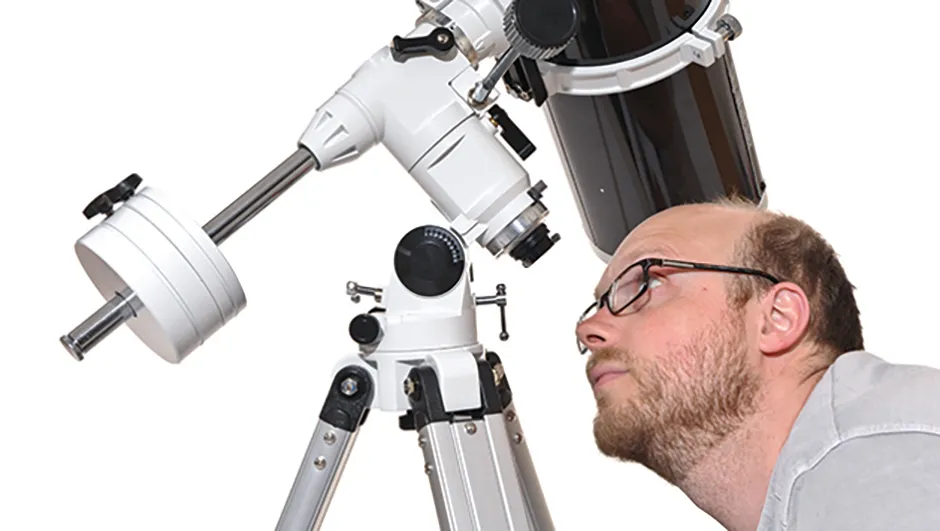
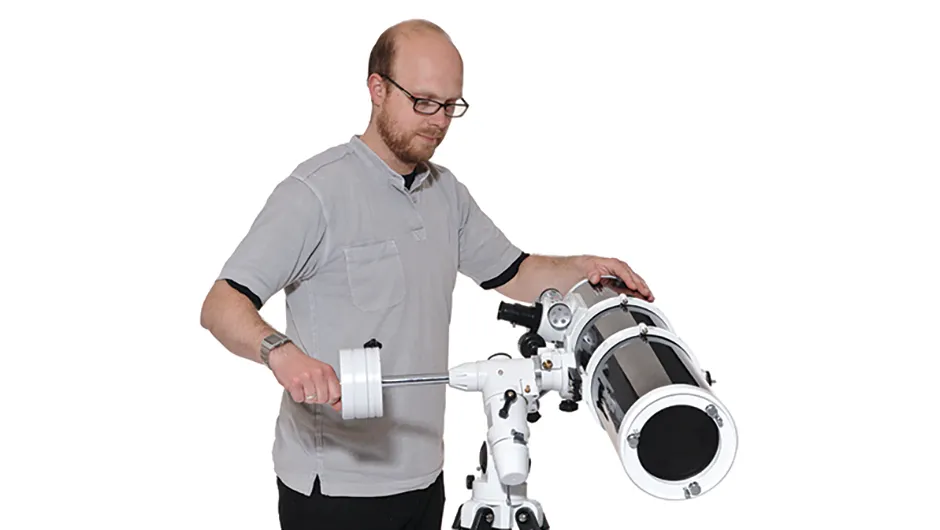
Balance your telescope
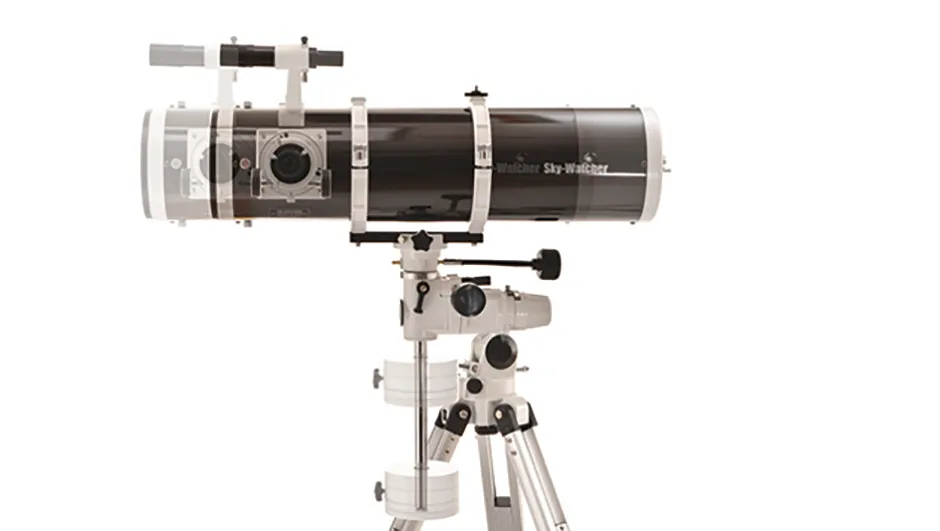
With the tube horizontal and the Dec. axis lock loose, slide the tube back and forth in the rings until the scope rests flat.
Then do the RA axis: with the counterweight shaft horizontal, loosen the lock and adjust the counterweights until the scope stays put when you let go.
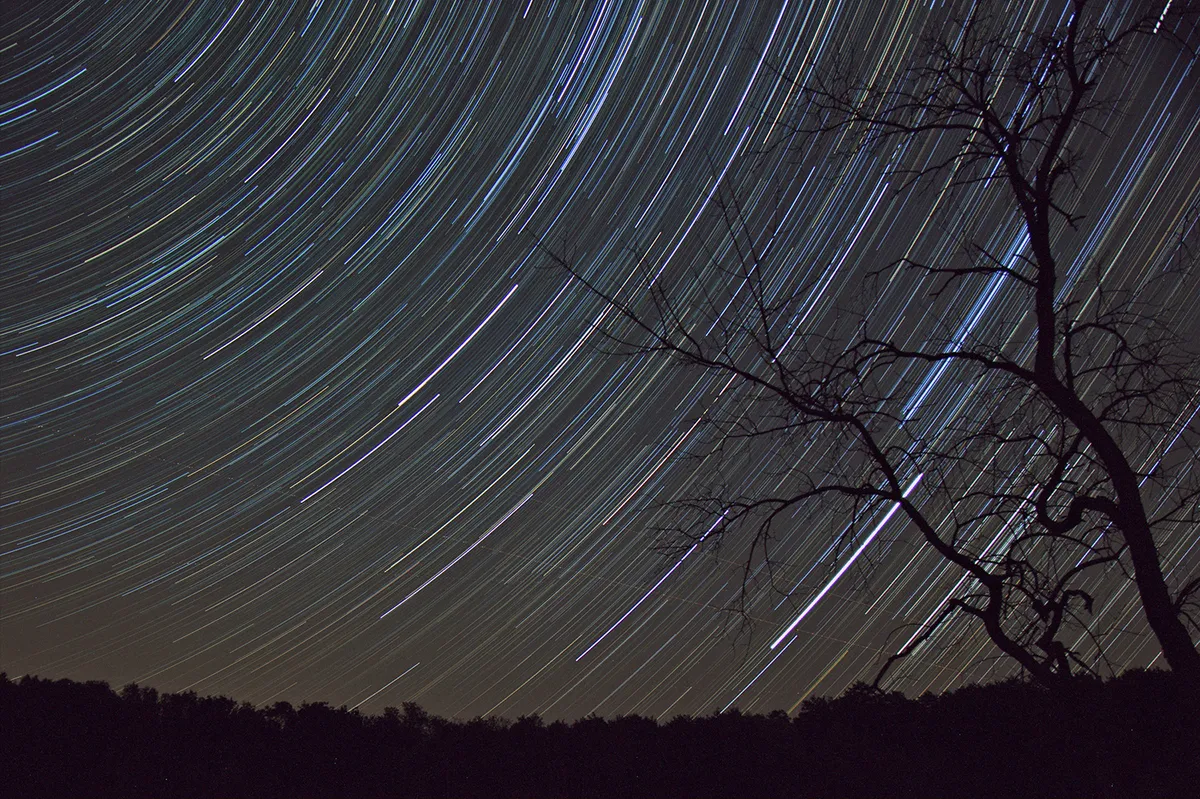
Getting your equatorial mount to track
Now we’re going to explain how to make the equatorial mount follow or track stars and other objects as they move with the night sky.
The equatorial mount has to be ‘polar aligned’: its right ascension (RA) or polar axis needs to be lined up so that it points at the north celestial pole.
You can find out more about this in our guide on how to polar align your equatorial mount.
The north celestial pole is the point that the sky rotates around.
It’s a notional spot where our planet’s axis of rotation meets the celestial sphere – an imaginary ball with the Earth at its centre, onto whose inner surface all the stars are projected.
The sky, in fact, only appears to rotate; it’s actually the Earth that’s rotating, once every 24 hours.
But since we’re observing from the surface of the spinning Earth, it looks like the night sky is rotating around us.
Since the sky rotates (or appears to) around the north celestial pole, the mount also has to be aligned to this axis of rotation to track the stars’ movement.
Equatorial mounts are designed to be polar aligned – if you don’t bother, you might as well have saved your money and bought a cheaper altazimuth mount.
Polar aligning
When it comes to getting your mount’s polar axis pointing in the right direction, we have a helping hand here in the northern hemisphere: the bright star Polaris sits very close to the celestial pole.
For visual observations, you don’t need to be overly accurate in your polar alignment.
It’s just a case of adjusting the altitude setting so it’s the same as your local latitude and pointing the polar axis north so it’s lined up on Polaris.
You’ll need to be more accurate if you take astrophotos – you should polar align while looking through the mount’s polarscope.
Once the mount has been lined up on the celestial pole, your scope will track the stars with ease and you’ll find it simple to keep objects in your eyepiece for longer.
You only need to adjust the RA or polar axis with its slow-motion control to do this.
It’s unlike a camera-type altazimuth mount, which needs its two axes to be adjusted to track objects.
But even an equatorial mount needs both its axes adjusted to move the scope so that it points at another star.
Polar alignment, step-by-step
Adjust the mount’s altitude setting so it’s the same as your local latitude.

In the UK, this will be between 58º and 50º.
Release the bolts and tilt the mount head so the pointer lines up with the right number on the scale, then do the bolts up again.
This aligns the mount’s RA or polar axis with the Earth’s axis of rotation.
The polar axis needs to be aimed so its highest end points due north.
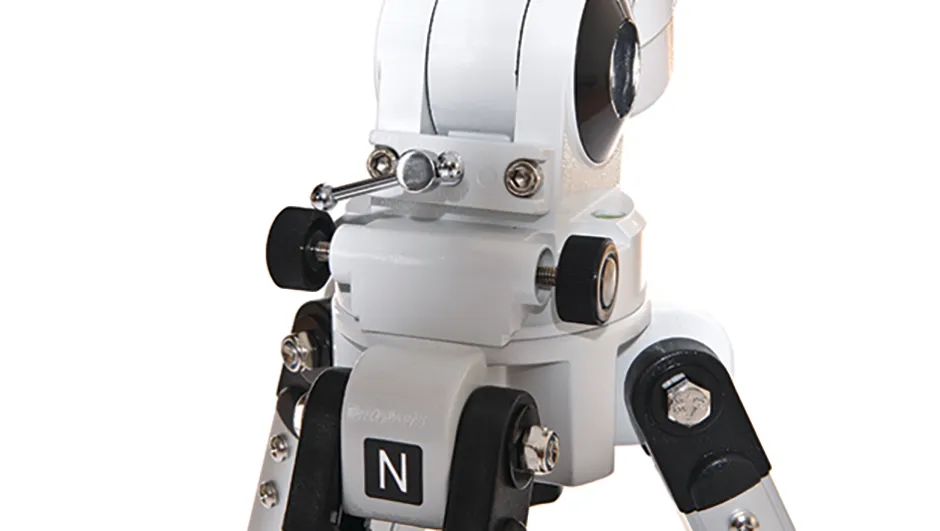
Some mounts have a big ‘N’ at the top of the tripod to show which side should face north.
You can use a compass to find out which direction north is, but remember that this will show magnetic north and we want true north, which is a few degrees east.
At night, find the star Polaris and line up the polar axis with it.
The mount should now be polar aligned.
To check, when the stars are out look along the polar axis up at the sky and make sure it's pointing at the star Polaris.
This kind of visual alignment is fine for making observations.
But for more accuracy – or for astrophotography – you’ll need to polar align looking up through a polarscope fitted in the RA axis.
If you need to make any fine adjustments, use the altitude and azimuth settings.
Make altitude adjustments like those covered in step 1.
To make azimuth adjustments, unscrew the two azimuth bolts to move the mount head and scope left or right slightly, parallel to the horizon.
This is easier than lifting the tripod and the whole setup to aim the scope due north.
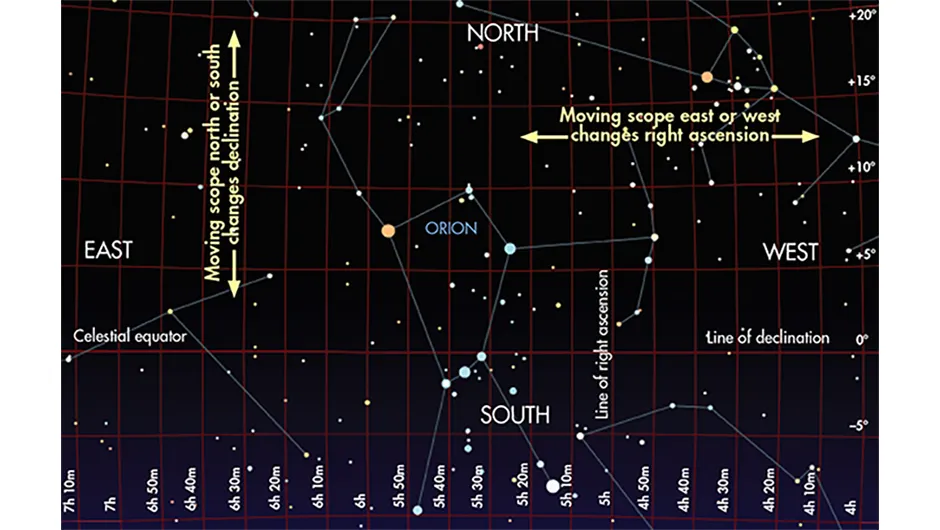
Using RA and Dec.
Declination (Dec.) is equivalent to north-south; right ascension (RA) is equivalent to east-west.
Learning which direction is which helps you understand how your mount's axes move.
A star, planet or nebula can be found by using its co-ordinates on a great imaginary sphere projected onto the night sky, with the Earth at its centre.
This is called the celestial sphere.
Finding a galaxy this way is almost identical to the way you locate places on Earth using the latitude and longitude system; you just imagine the grid projected onto the starry realm.
The only difference is that on the celestial sphere, latitude is known as declination (or Dec. for short) and longitude is known as right ascension (or simply, RA).
Both of these systems work in exactly the same way as they do for locations on Earth.
Declination (latitude) lines run parallel to the equator from east to west, while right ascension (longitude) lines run ‘up and down’, from north to south.
Every object in the sky has Dec. and RA co-ordinates, and by using the Dec. and RA setting circles on your equatorial mount, you can point your scope to find anything in the sky with just these two figures.

Testing with a bright star
Assuming you’ve already polar aligned your scope as detailed above, the first step to finding that galaxy is to make sure your right ascension setting circle is set correctly.
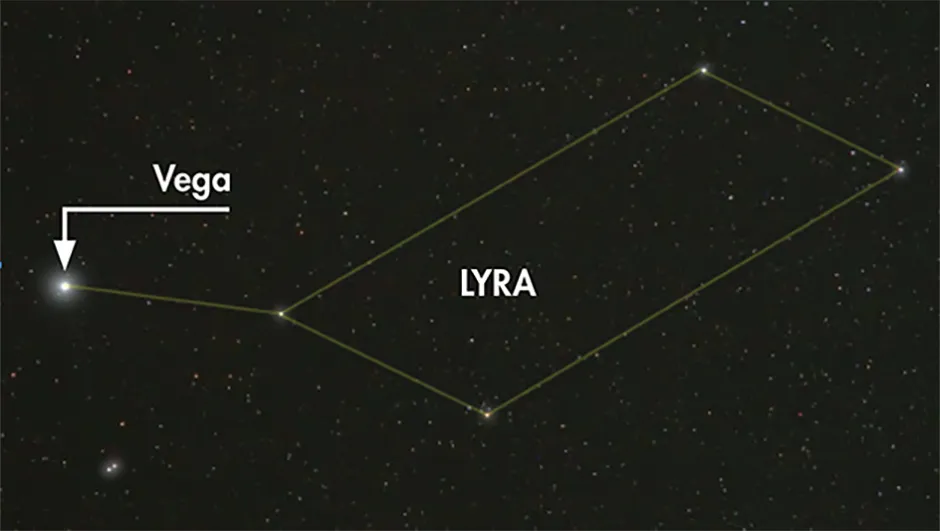
For this you’ll need the RA co-ordinates of an easily found bright star, like Vega in the constellation of Lyra.
Vega’s co-ordinates can be found from a planetarium program like Stellarium or a star atlas.
Loosen the locks on both the RA and Dec. axes and move the scope until it is more or less visually aligned with the star, then use the slow-motion controls – and your finderscope – to zero in on the target.
Now take a look at the RA setting circle dial.
If this is your first setup, it might not be reading the exact RA position you found from an atlas or software.
If this is the case, fear not: simply rotate the RA setting circle’s dial until the pointer reads the correct co-ordinate.
The Dec. setting circle’s dial is fixed in the correct position, so you never need worry about this going out of alignment.
Now you can use the setting circles to find that galaxy, simply by moving the axes so that the setting circles match the galaxy’s Dec. and RA co-ordinates.
You can find objects below naked eye visibility this way too.
The beauty of the equatorial mount now comes into play: as you gaze in wonderment at your galaxy, you only need to adjust the RA axis with its slow-motion control to keep it in your eyepiece as it moves from east to west across the sky.
And if you find the occasional twiddling of the RA slow-motion control a little tedious, you can get a motor to attach to this axis, which will do the tracking for you automatically.
As for the declination axis, you don’t have to touch that or its slow-motion control until you want to look at a different object.
Then you just look up the co-ordinates of your next quarry, and move the Dec. axis and the RA axis until the setting circle dials give the right readings.
A well-handled equatorial mount is the perfect solution to hassle-free stargazing.
There is one thing it can’t do, and that’s to track an object all the way across the sky.
There will come a point when the bottom of the telescope’s tube will bump into the tripod leg, especially if it’s a long tube.
Luckily, there’s an easy way around this called a ‘meridian flip’, which is described below.
Equatorial mount meridian flip
Ascension
If your telescope’s tube bumps into the tripod as you’re tracking an object moving with the night sky, rotate the telescope tube by 180º in right ascension.
Declination
Next, rotate the declination axis so that the telescope tube is pointing at the object again.
You can use the declination axis setting circle to get back to the original spot.
Get back to observing
The meridian flip, as it’s known, is often needed on objects that are at their highest in the sky, so the tube is pointing straight up.
Once you get set up, keep us up to date with your observing and astrophotography via our Facebook and Twitter accounts, or email contactus@skyatnightmagazine.com