An astrophotography camera is a technical marvel producing exquisitely detailed and colourful images, but you may suffer from moisture on the sensor and need to fix this.
Astrophotography cameras remain at the mercy of Mother Nature.
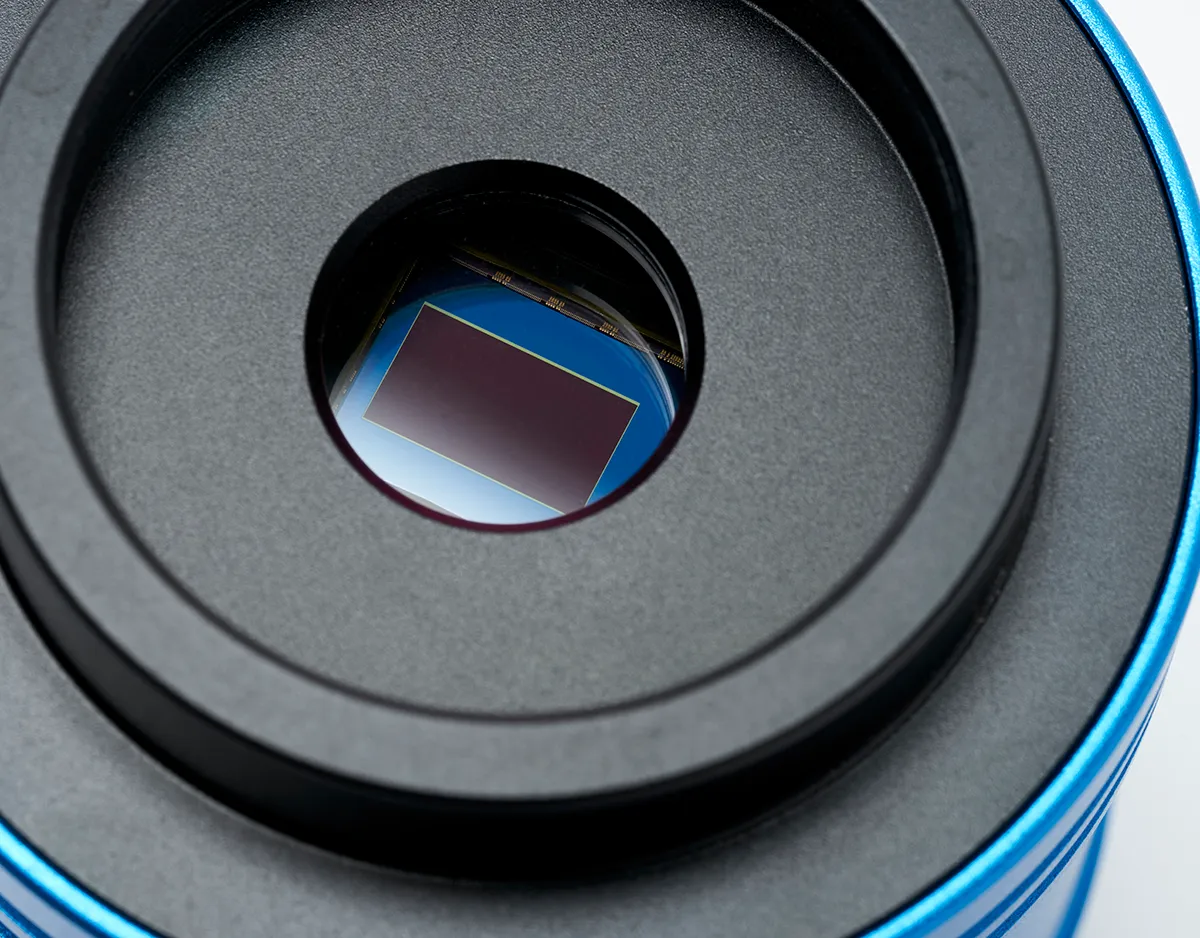
Cameras designed for deep-sky imaging need to capture long exposures, and to help combat the thermal noise generated during this process they are equipped with Peltier cooling modules that cool the sensor down to 20°C or more below the ambient temperature.
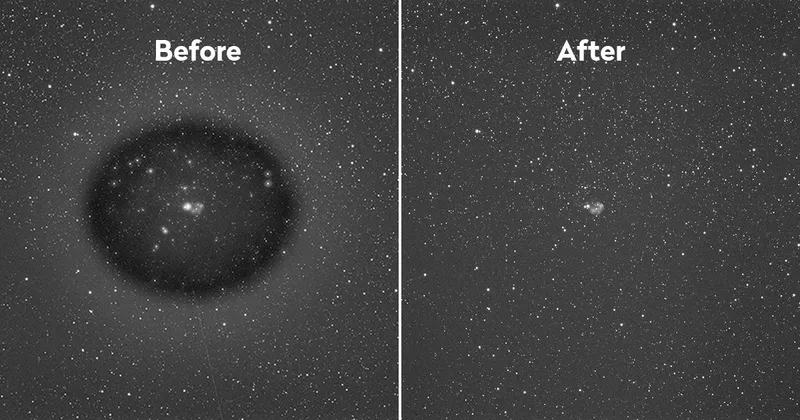
When moisture gets into your camera sensor
If moisture is present on your astrophotography camera sensor, ice crystals can form on the sensor’s surface.
These appear as irregular black dots or as condensation on the protective glass in front of the sensor.
Both will ruin image quality, but worse, the moisture threatens to damage the pin connections on the sensor.
How cameras combat moisture
To combat these issues, many astrophotography camera sensors are installed in a sealed chamber, with moisture kept at bay with either a desiccant tablet or micro-sieve desiccant plug.
Some cameras also have their sensor chamber purged with either nitrogen or argon gas to further exclude moisture and oxygen, argon being the better choice as it’s denser.
An argon-purged chamber can remain moisture-free for years, but eventually the gas leaks out and the desiccant tablet or micro-sieve plug reaches its absorption capacity and needs to be replaced or recharged.
Here we will tell you how to recharge the more complex micro-sieve plug and how to refill your sensor chamber with argon gas.
We carried out the procedure with our QSI CCD camera, but the process is similar with other brands.
Preparation
It makes sense to carry out both operations concurrently, so that the recharged plug can be inserted back into the camera to complete the sealing of the refilled chamber as soon as possible.
It is also important that the plug doesn’t start absorbing moisture from the atmosphere, thus reducing its moisture-extraction capacity.
Before baking the micro-sieve plug, first preheat your oven to the temperature recommended by the camera manufacturer for about an hour, to burn off any grease and oils in the oven.
Make sure to abort the mission if the oven is smoking after this period, or you’ll risk damaging the plug.
Unless you have access to a TIG or MIG welder that uses argon gas as a shield, the easiest way to source argon at a reasonable cost is wine preserver.
However, it is very important to only use a preserver that consists of pure argon.
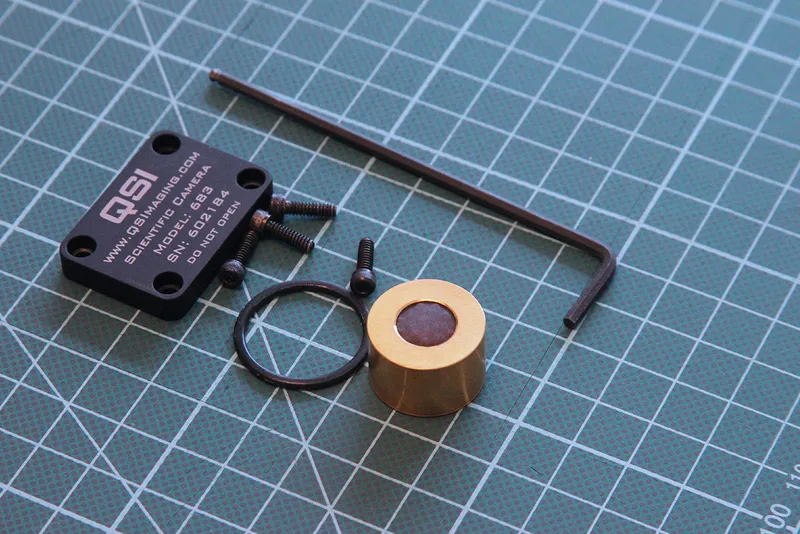
Equipment
- Camera that uses a micro-sieve desiccant plug with an argon-purged sensor chamber
- Clean oven that can reach 260°C
- Clean, dry baking dish
- Canister of pure argon gas (with no other gases included), such as that used for preserving wine
- Small screwdriver or Allen keys to remove the desiccant port
- Tweezers and needles to remove the ‘O’ rings and filter
- Lint-free lens cleaning cloth
Step-by-step
Step 1
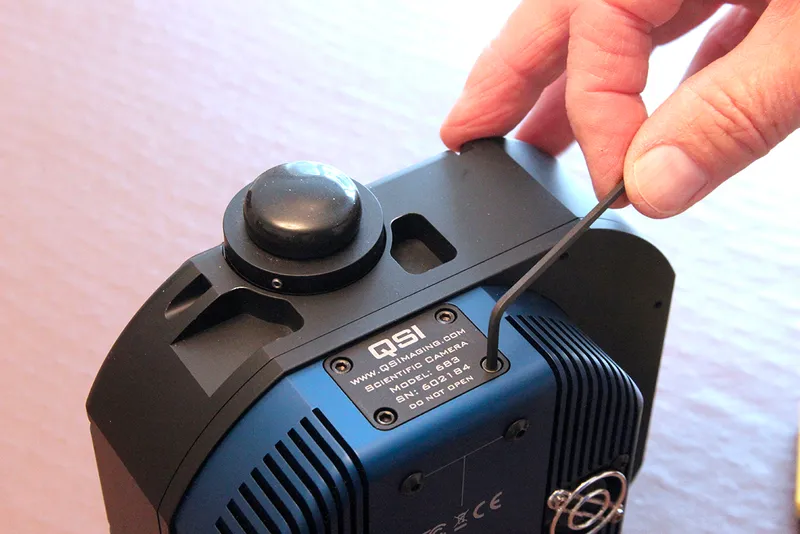
With the camera body suitably supported, unbolt the cover from the desiccant port on top of the camera using an Allen key or screwdriver as appropriate for your camera. Carefully remove the cover and place it on a clean, dry surface for safe storage.
Step 2
Remove the micro-sieve plug and carefully detach its ‘O’ ring, as under no circumstances should the ‘O’ ring go in the oven. Cover the camera’s exposed port with a clean lens cloth. With a clean, dry cloth, remove any contamination from the surface of the plug.
Step 3
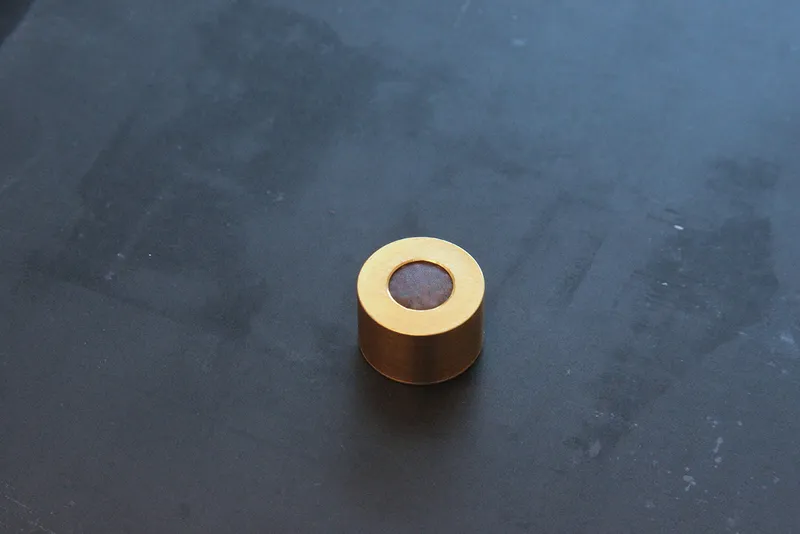
Preheat the oven, then place the plug on a clean baking tray and put it on a high shelf. Bake for the time and at the temperature recommended by the manufacturer (260°C for four hours in our case), then remove the plug and allow it to cool.
Step 4
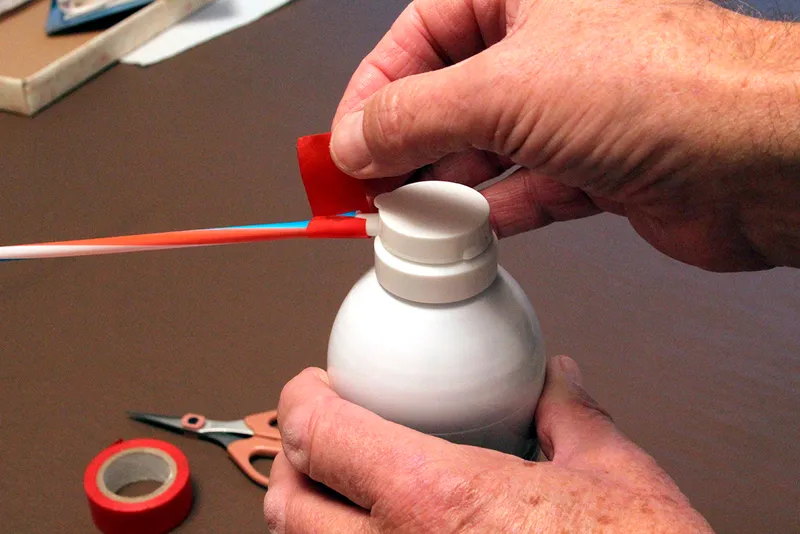
Modify the outlet of the argon gas canister by attaching a short piece of drinking straw to the nozzle with electricians’ tape. It helps to make two 10mm cuts down the end of the straw to push the straw onto the nozzle before applying the securing tape.
Step 5
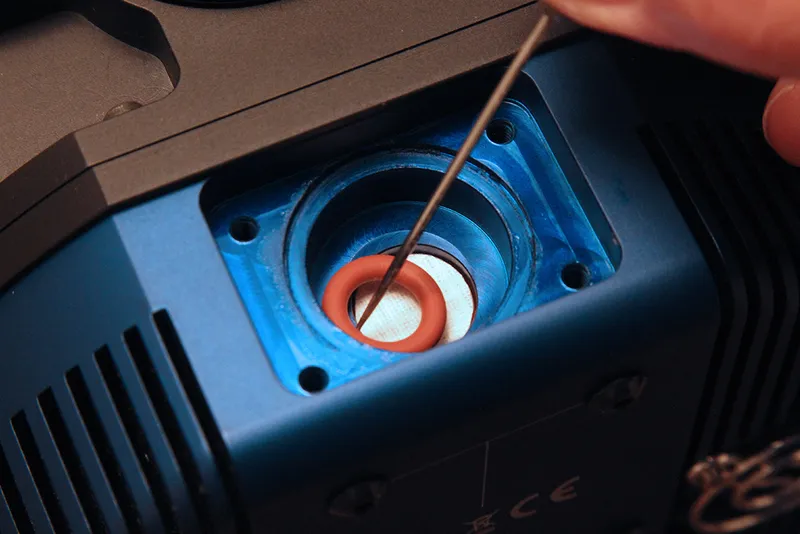
Using a needle to dislodge them, carefully remove the sensor chamber’s ‘O’ ring, followed by the micro dust filter from the inside of the port, and temporarily place the lens cloth over the port. Place the filter in a sealed plastic bag to keep dust at bay.
Step 6
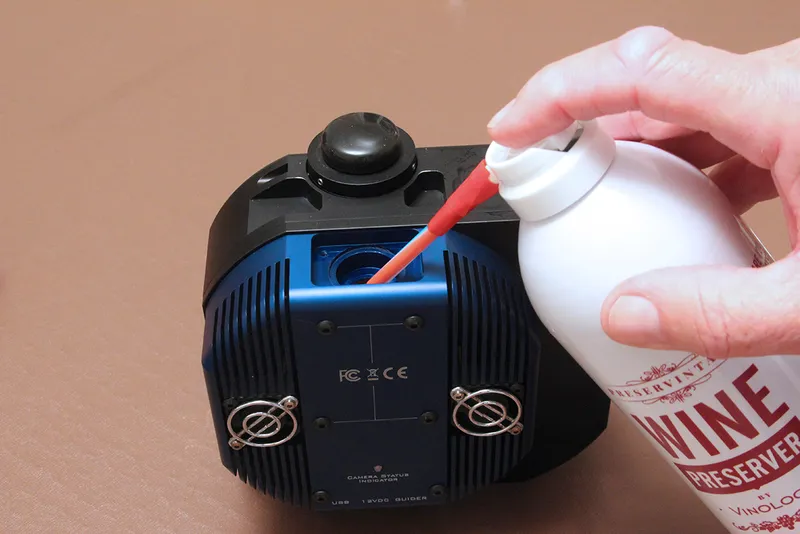
Ensuring that the port is facing upwards (so the heavier argon sinks to the bottom), release argon into the sensor chamber for at least 40 seconds to replace air with argon. Immediately reinstall the filter, micro-sieve plug, two ‘O’ rings and cover.
This guide appeared in the April 2024 issue of BBC Sky at Night Magazine