Aslender and perfect crescent hanging in the fading evening sky can be a hauntingly beautiful sight. Whether it’s a naked eye view of the young Moon a few days from new, or the planet Venus spied in the eyepiece of a telescope, there is something about these sights that stirs the soul.
My image entitled The Grace of Venus was of such a view; seen through the eyepiece of my 444mm Dobsonian reflector on 15 March 2017.
It was 10 days prior to inferior conjunction, when Venus was lit from behind by the Sun.
In order to properly convey the beauty of that view, two aspects of the image had to be just right: the geometric perfection of the crescent and the composition within the surrounding space.
The processing that was carried out was directed at optimising these two aspects.

The current best method of planetary imaging uses a high-speed video camera at the eyepiece end of a scope to capture thousands of individual images over a period of several minutes.
The sharpest frames from these videos are later aligned and stacked to produce a single master frame where much of the blurring effects of our atmosphere are reduced or averaged out.
This was the basis of the method used to capture the view of Venus. But you can’t do anything if the data is bad and care had to be taken to properly collimate the telescope beforehand (read our guide on how to collimate a Newtonian telescope), allowing the scope to reach thermal equilibrium with the surrounding air, and to focus accurately.
With Venus only 18° high that March evening I found myself imaging through a significant thickness of atmosphere.
Even though it was an exceptionally steady evening I decided to use an 807nm IR filter to help steady things further and stand the best chance of getting the fine detail I wanted in the final image.
Even operating at these long wavelengths and with a Barlow lens boosting the diameter of Venus to 600 pixels on the chip, the planet’s high brightness still allowed short exposure times of 6.6 milliseconds, helping to further reduce atmospheric smearing.
I captured nine minute-long videos, refocussing every two or three videos before the decreasing altitude took its toll and the planet was lost in trees to my west.
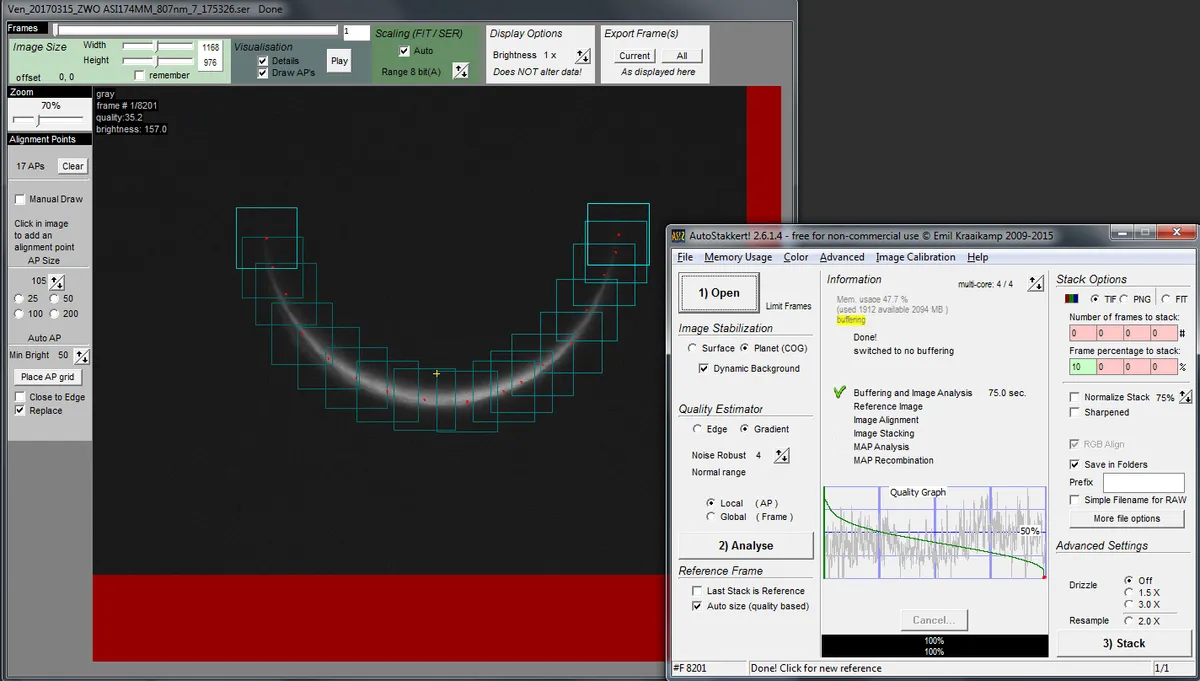
During the following evening the captured videos were run through the freeware program AutoStakkert! to place the frames in order of quality and to perform a multipoint alignment with 17 alignment squares (see image above).

With Venus being so bright I was able to select just the best 10 per cent of each video to stack without suffering unduly from shot noise (unwanted artefacts).
Despite picking this small number of frames, I discovered most of the images generated by the nine videos suffered from poor asymmetry between the fine tapering horns of the crescent.
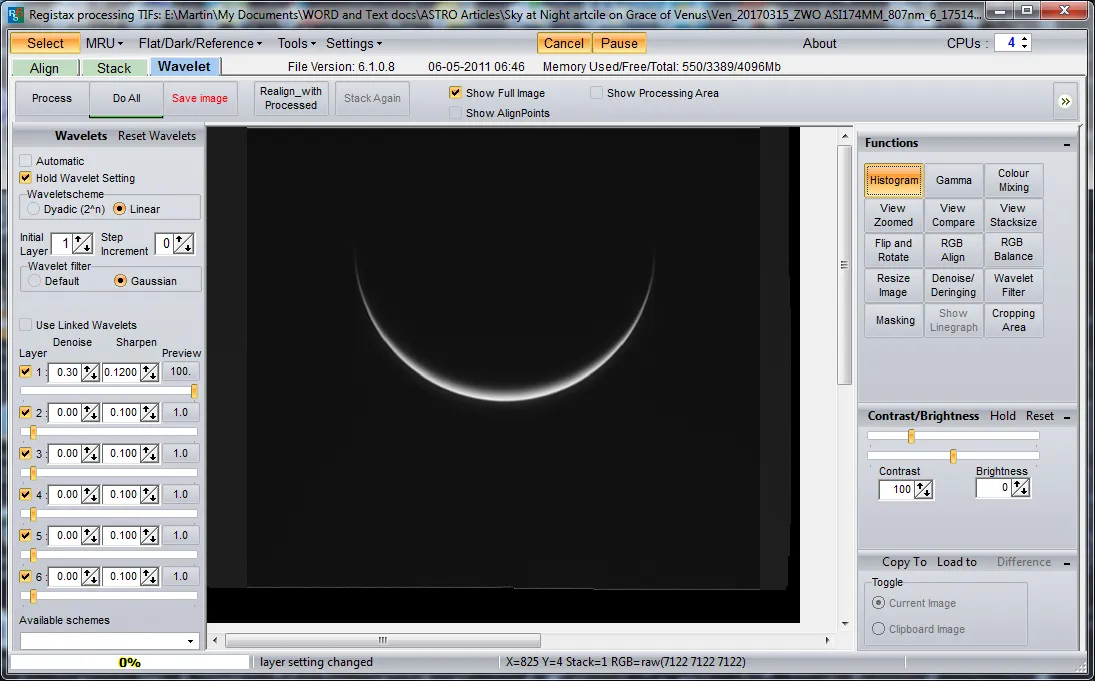
To my great relief, however, one image stood out, as near perfectly symmetrical after using wavelet processing in RegiStax (see image above) to pull out detail – it was this image which was used for the final shot.
Imaging in the bright twilight sky and with such a dazzling object, it is inevitable that some spurious background glow is seen outside the crescent after wavelet processing.
Tidying this up is always difficult, especially without affecting the smooth gradation from bright to dark at the terminator.
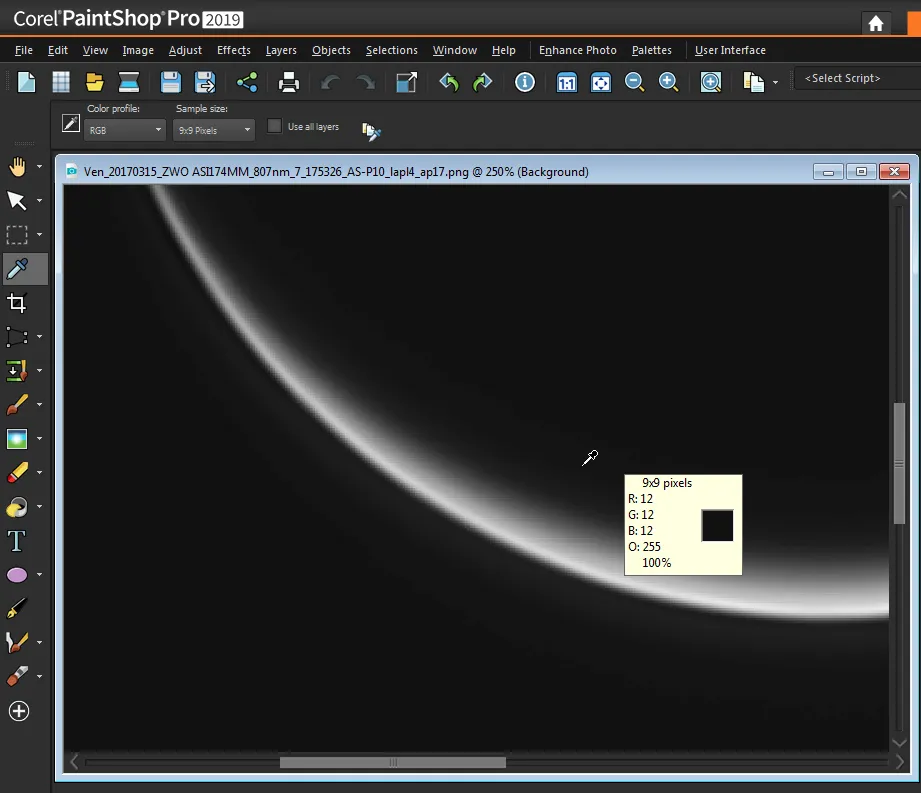
To correct this, I first used the colour picker tool in PaintShop Pro (Photoshop would be similar) to sample the brightness of the dimmest part of the terminator (see image below).

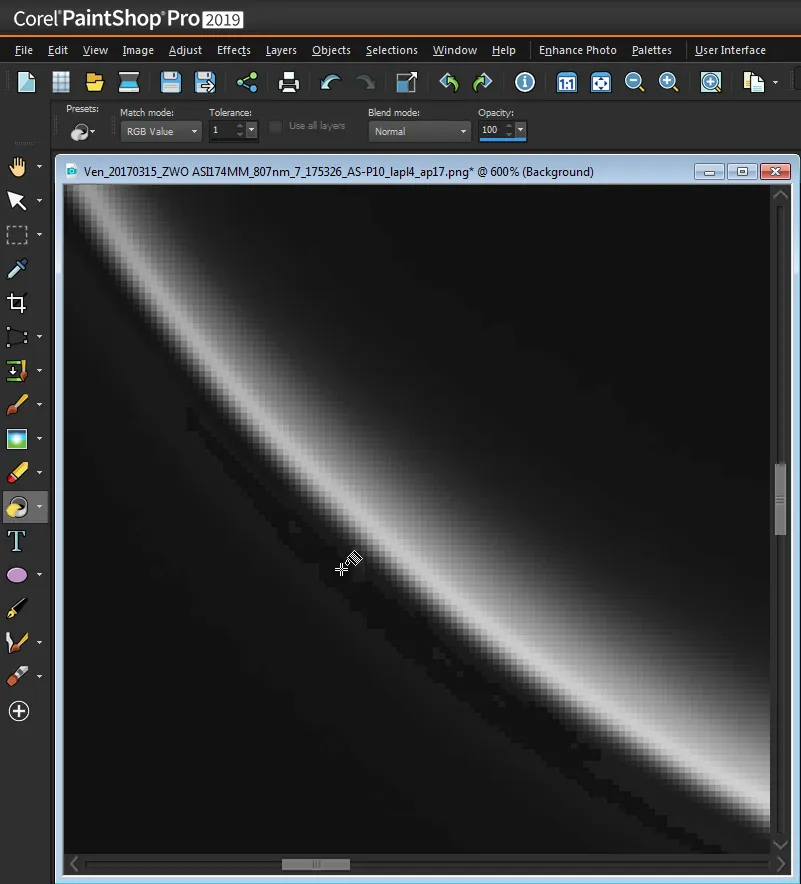
Next I selected the flood fill tool. With a small flood fill tolerance value of 1 or 2, I set about clicking on parts of the background halo and converting regions of the halo to the same brightness as the darkest part of the terminator (see image below).
Eventually, the background was tidied up without altering the planet itself in any way.
Next, the brightness tool was used to reduce the background brightness slightly to make it almost black.
Good composition was paramount for the image to have maximum impact, with the space around the crescent as important as the rendition of the planet itself.
I spent a long time in PaintShop Pro playing around with the aspect ratio of the image, the size of the planet and its position in the frame until I felt it was just right.
This is not something you can do using a formula and it was very much done by feel – making small modifications to these aspects until it just looked right with the correct balance between the planet and the surrounding space.

With the crescent detail and composition optimised it was then down to the Insight Investment Astronomy Photographer of the Year judges to decide if I had succeeded in conveying the existential beauty of an exquisitely thin crescent.
Fortunately, they were pleased with the end result.
