Creating a solar mosaic image can reveal a lot of detail that you wouldn’t achieve in a single full-disc capture of our star. They are fun to create but can be time consuming to produce, so we are going to use an automated sequence in Photoshop to help speed up the process.
You'll find more info on capturing your solar image in our guide on how to photograph the Sun, but in this article we're going to start off withprocessing the images ready for Photoshop.
There are two things to remember when recording your initial video files: your images need to have a good overlap for Photoshop’s script process to work, and your camera needs to be positioned to run horizontally across the solar disc, not diagonally, as it will help to ensure there are no gaps.
Step 1
We are going to start by running all of the video files through AutoStakkert!2 to create single frames.
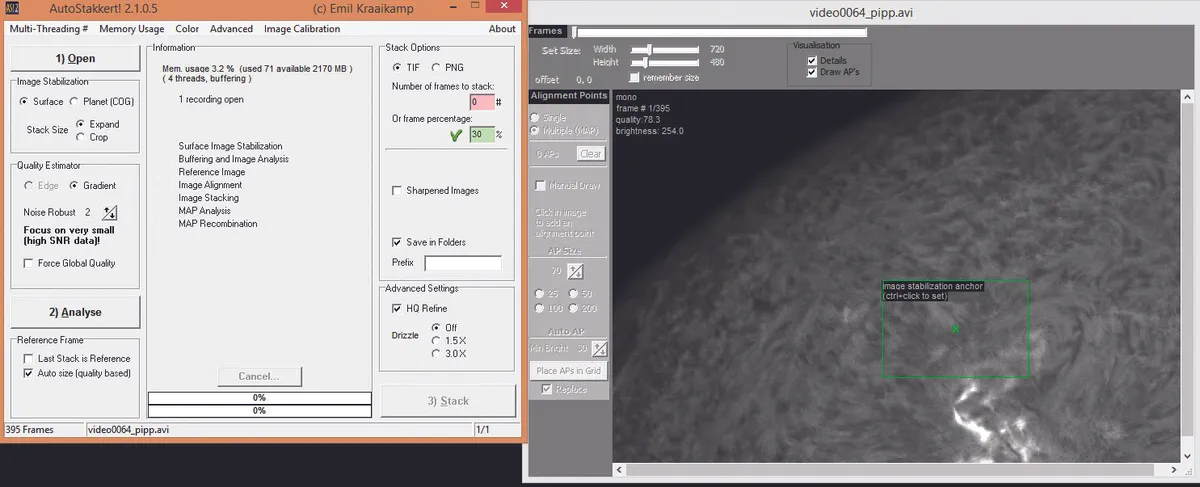
Click on the Open tab on the main page and load one of the video files. Now, in the Image Stabilization area, click the Surface and Expand check boxes.
Next is the Quality Estimator area. If the seeing conditions were good, use a figure of 2; if they were poor then 3 or 4 would be better as this will result in less noise when AutoStakkert! analyses the image.
Leave all the other settings as standard.
Step 2
Now turn to the Frame viewing window. Hold Ctrl and click in the centre of the image to set the Image Stabilisation Anchor.
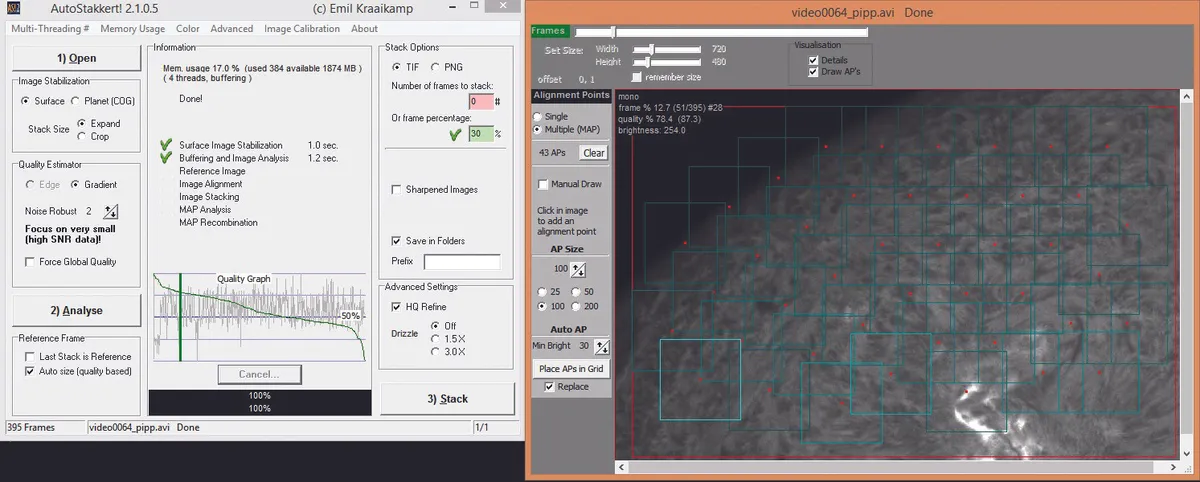
At the top of the screen, adjust the frames slider to display one of your good frames. Click Analyse on the main screen.
Once complete, you will see a graph representing frame quality appear.
You now need to select the number or percentage of frames to stack under the Stack Options; 30 per cent is a good amount to start with.
Back in the Frame window, set the AP size to 100 and click Place AP Grid.
Step 3
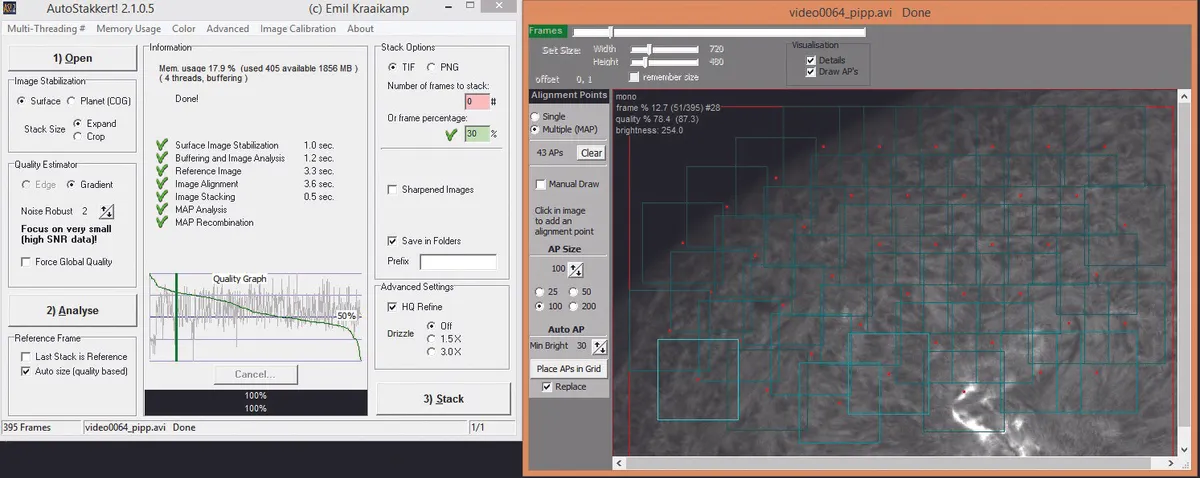
Finally, back on the main window, click Stack.
The files will be saved in the source location; you will need to repeat this process for all of your video files and to keep the settings the same for each file.
Step 4
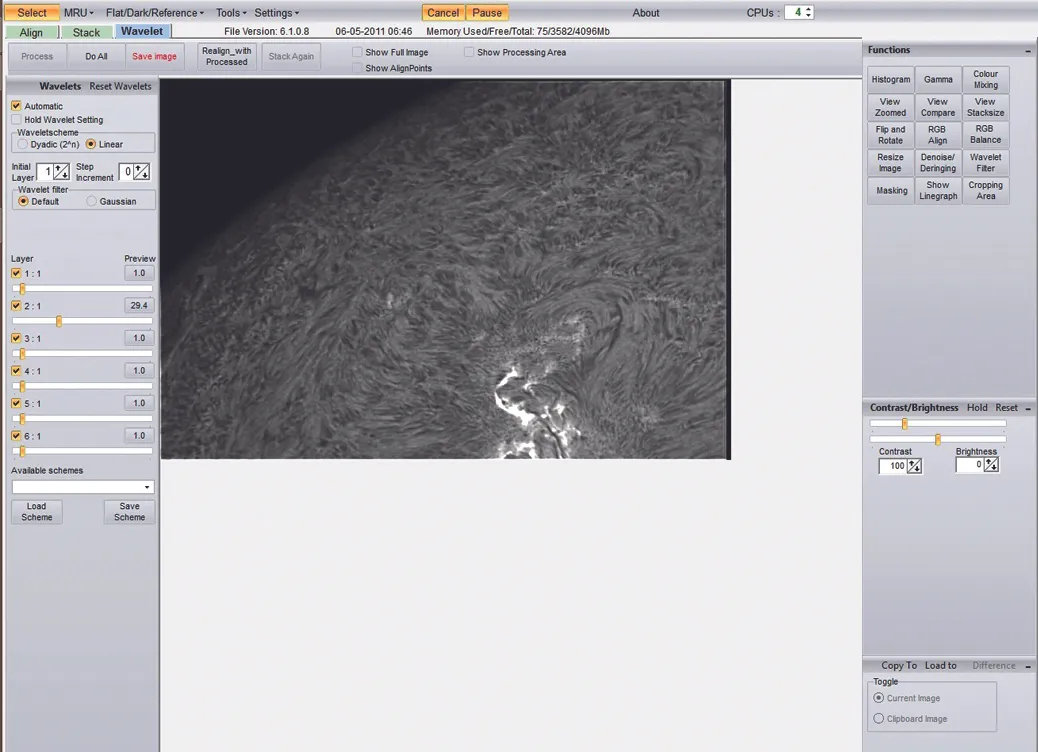
The last step of this part is to use RegiStax 6 to gently sharpen the frames, as this will help Photoshop to auto align the images.
You can drag and drop your picture from its source directory into RegiStax; it will then open the Wavelet adjustment page.
There is a control panel in the upper left: set the Wavelets Scheme to Linear and the Wavelet Filter to Default.
Below this are a set of sliders, and you need to drag the second to about 40.0. This is flexible; what you are watching out for is that you don’t introduce noise.
When you are happy with your tweaking, click Do All and then Save.
If your computer is on the slow side opt for jpeg instead of tiff; this speeds up the process in Photoshop. Repeat for each image.
Now to create the solar mosaic
Once all the images have been run through RegiStax you need to crop any stack lines from them – we’d recommend using the freeware Faststone Image Viewerto do this.
Crop each frame to leave neat edges. If you used different settings for your images of the Sun’s surface and its prominences, put them in separate folders.
Open Photoshop and click File > Scripts > Load Files into Stack.
Select all of your mosaic surface images from the folder they have been saved in, and check the box to align images automatically.
This process can take some time depending on the speed of your computer, but once complete you should have the mosaic all aligned with each image on a separate layer.
Next we need to adjust each layer with the Levels tool, as one of the problems with creating large solar mosaics is the difference in contrast between panes.

Select each layer and click the Levels icon in the Image Adjustments palette.
Adjust the middle slider on each pane to get the contrast as balanced as possible; once you are happy click Select > All Layers, then Edit > Auto Blend Layers.
When the process has finished you might see some staggered lines – don’t worry about them.
Right click on the layers and select Flatten Image. The image should now be complete, with no lines, ready for you to adjust sharpness and contrast.
For best results with the prominence images, align them manually. Open a prominence image in a new Photoshop window.

Click Image > Canvas Size, select percentage, then type 400 for horizontal and vertical. Now you can drag and drop each prominence pane in to create the complete ring.
As before, you will need to adjust the Levels to match the contrast between layers. Once done, select all the layers, auto blend and flatten as above.
Now we’ll add the two together. Go back to your surface image and select the Magic Wand tool (set tolerance to 10).
Click Select > Inverse and copy the selection, then return to the prominence image and paste it in.

The surface layer will be slight smaller than the prominence one. To adjust, select the surface layer and click Edit > Free Transform.
Drag the image by the corners to fit the prominence ring. When you are happy, click the tick in the title bar. Right click on the layers and select Flatten to finish.
Once your mosaic is complete, you can colourise it if you wish. Find out how to do so here.
This article originally appeared in the July and August 2015 issues of BBC Sky at Night Magazine. Gary Palmer is an expert solar imager. See more of his shots at www.solarsystemimaging.co.uk.

