Most astronomers would love a permanent observing setup in their garden, and to that end an observatory or a solid pier is often the dream solution.
Of course, that’s not always possible.
What if there are surrounding trees or buildings that mean you need to shift your setup to different parts of your garden to view different parts of the sky?
What if you can’t make permanent changes to your property?
Whatever limitations you face, the inevitable result is that you are obliged to use a moveable tripod.
This brings its own issues.
Taking your tripod indoors after each session loses your carefully gained polar alignment, but leaving what can be a very expensive piece of equipment outside could be a big attraction for thieves.
That’s why in this guide we’re going to explain how to build an inexpensive, stable tripod that can be left in place or moved around as needed.
Download extra material to complete this project
Brace foot and top plate (PDF)
Templates for timber sections (PDF)
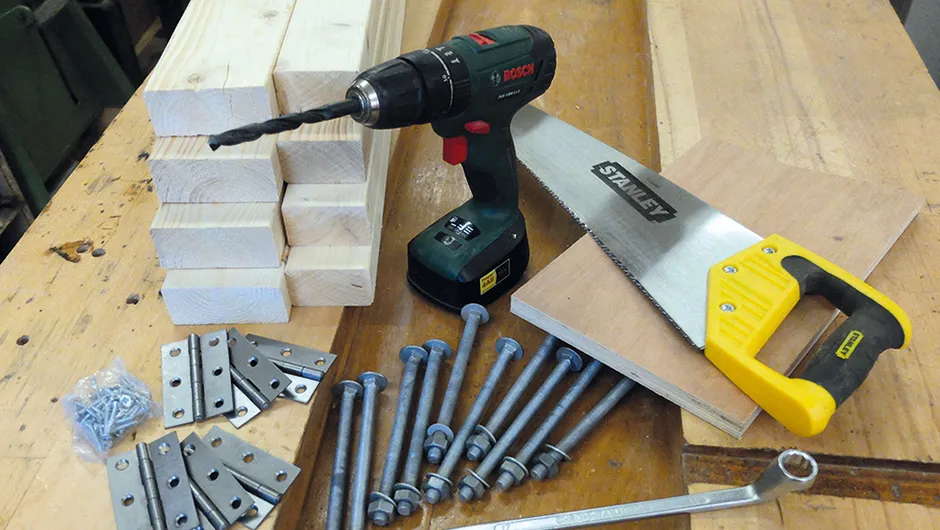
Tools and materials
Tools- Hand saw, jigsaw or chop saw, drill and bits
Materials- Two 8ft lengths of 98x38mm construction timber, four 8ft lengths of 63x38mm construction timber, 1/8th of a sheet of 18mm plywood or similar, plus a few small offcuts of plywood
Sundries- Nine M10x150mm coach bolts - with nuts and washers, three pairs of 75mm butt hinges and screws. A few each of 4-inch and 2-inch woodscrews, plus a pair of M6x60 bolts with wingnuts
Finish - Approximately 0.5l of preservative wood stain
The timber you’ll need can be readily acquired from a local builder’s merchant.
We chose ‘prepared’ (planed) timber because it is nicer to handle and looks attractive, but you could use equivalent rough-sawn wood to reduce the cost further.
The bolted construction of the leg frames and the use of hinges to join the frames mean you don’t need to have any special skills to assemble the main parts.
The tripod is immensely strong and has plenty of mass, which helps to provide a very solid platform on which to fix your mount.
Our tripod is 1,065mm (3.5ft) tall but you can alter the design of the central pier; for example, make it taller if you have a long refractor or shorter for a big Newtonian.
We used a dark brown preservative wood stain, but there are many colours available, so you could camouflage your tripod to blend in with the bushes or match other garden furniture and features.
The top of the tripod and the mount fixing consist of a number of hexagonal plywood plates.
Luckily, if you can’t remember your school geometry lessons there is a downloadable template at the link at the top of this aricle.
It’s best to cut them simultaneously so that each ends up the same shape.
If you mark one edge of the stack you can realign them easily even if they aren’t perfectly symmetrical.
Plating up
Your telescope mount will be bolted to its own removable hexagonal top plate, which fits precisely into the tray-like, fixed top plate on the tripod.
This means you can lift off the whole assembly after an observing session and then replace it the following evening, maintaining your polar alignment.
We drilled two holes through our top plates and used a couple of small bolts with wingnuts to hold them together once the mount assembly is lifted on, so there is no danger of equipment being knocked off during use.
You could also use a G clamp for this purpose.
Adapting the removable top plate to suit your mount may require a bit of careful measuring and cutting but, having examined a multitude of EQ mounts from various manufacturers, we concluded that you will normally just have to cut a large round hole (often around 60mm in diameter) in the upper, thick layer of plywood and a smaller 10mm hole in a thinner layer that is subsequently glued beneath.
Many manufacturers sell ‘pier top adaptors’ for just this kind of project, and they are worth investigating if you prefer to keep things simple.
If you need a stable, non-permanent, economical base on which to mount your equipment we hope that you will want to give this project a try.
You may have a number of mounts, in which case you could make a separate top plate for each one, so swapping them becomes a cinch, or you may decide to make a couple of tripods; locating them in the optimum areas of your garden for different sections of the sky and moving about during a night’s observing.
Step-by-step
1
Cut to size
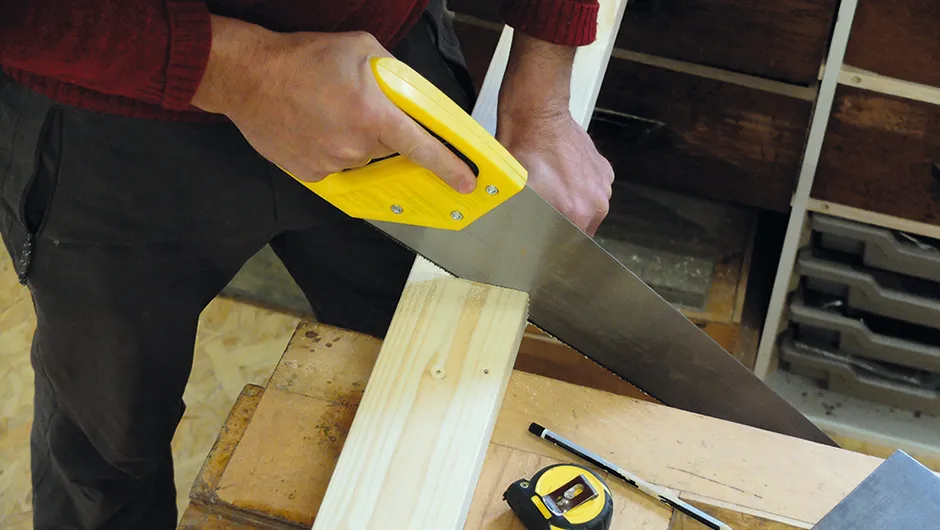
After carefully marking out the parts, use a saw to cut them to size.
You can download templates from the link at the top of this article to help you get the angles right.
If you have access to a chop saw you could save some time here. Check the similar pieces match.
2
Drill down
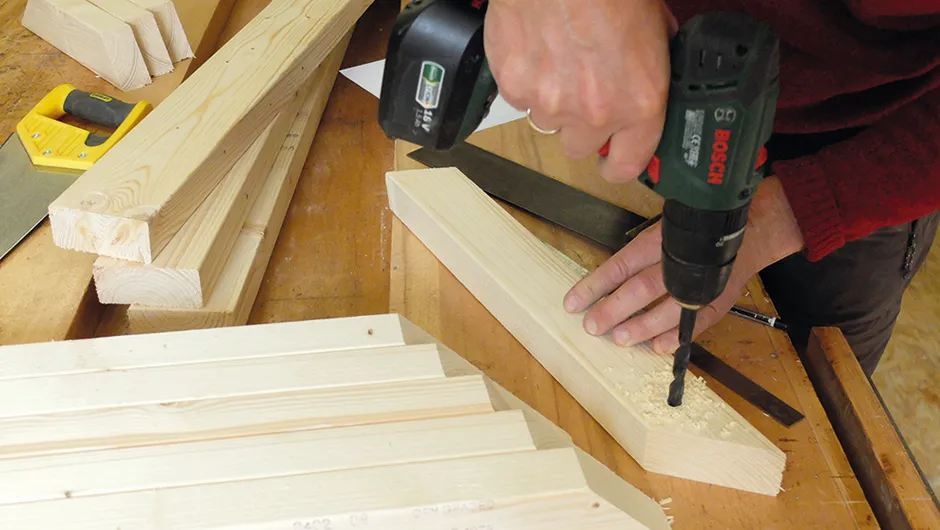
Drill the 10mm holes in one example of each part.
Use this to transfer markings to the corresponding parts.
You can line up the parts with the ‘master’ on top then put a bolt in the hole and strike it with a hammer, denting the one below.
3
Sand and preserve
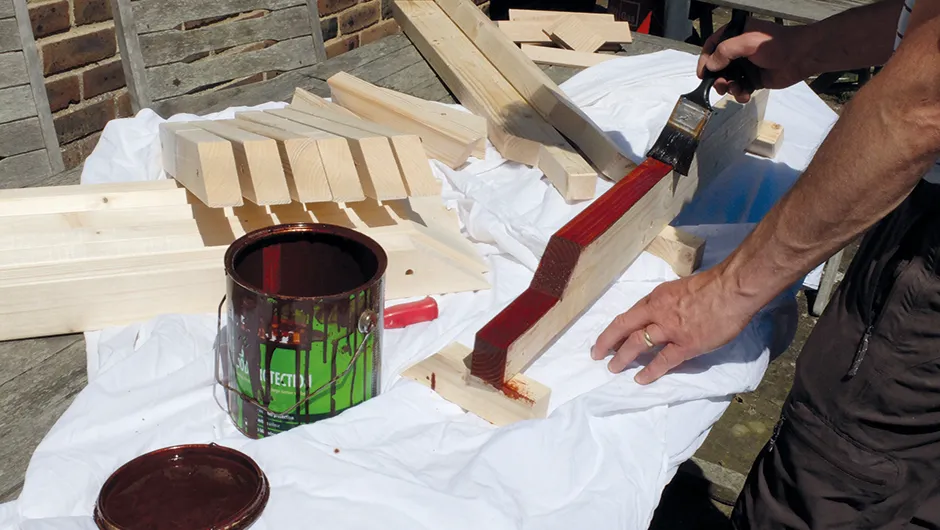
Once all the timber is cut, sand any rough edges and check it all fits together.
If the holes are tight you can ‘waggle’ the drill or re-drill them using a 10.5mm bit.
Now is a good time to paint the wood with preservative stain.
4
Bolt on
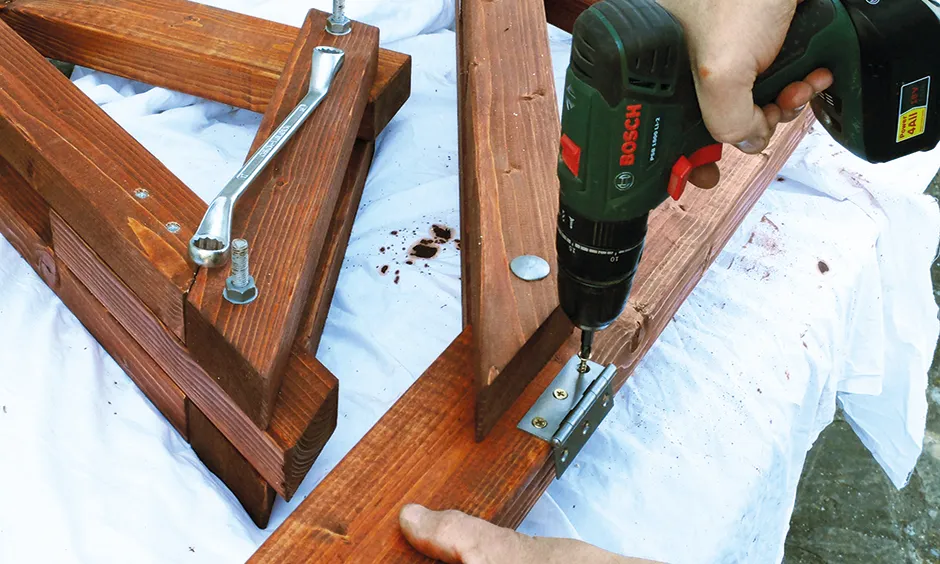
Bolt the three triangular leg frames together.
Each short ‘foot’ section should be fixed between the two leg struts with long woodscrews once you have aligned the other elements.
Fix a pair of hinges to each frame then join all three frames to form the tripod.
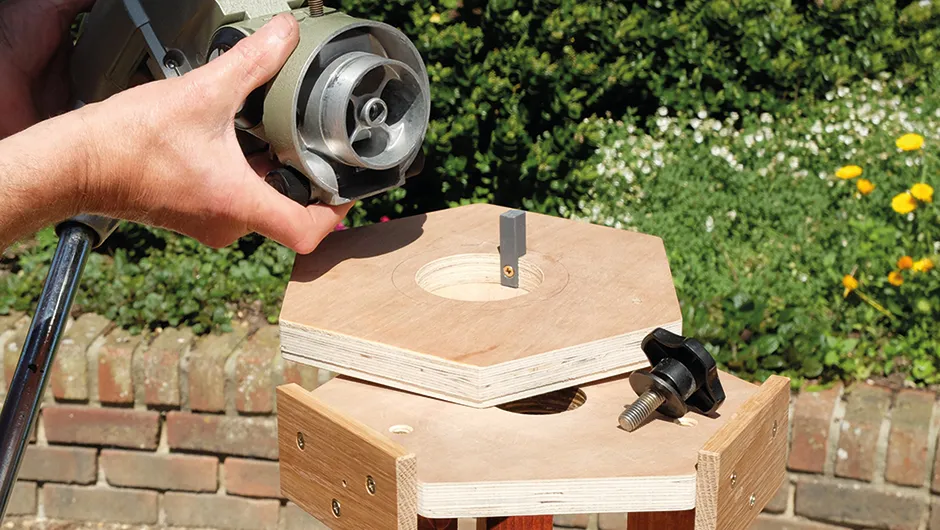
5
Hexagons

Mark out the plywood hexagons.
Drill a centre hole in each and a second hole near to one corner, then use small bolts or dowels to hold the layers together before cutting – this ensures replica shapes.
Screw one fixed top plate to the tripod and add plywood lips.
6
Final steps
Measure your mount.
Cut a suitable hole in a removable top plate.
Glue a block of hardwood or similar into a notch to form a pin for the alignment screws.
Screw a second thin layer of ply (with a central hole for the fixing screw) to the underside.


