Drawing Jupiter can be a daunting task. On a good night, a stunning amount of detail is revealed: dark storms in the belts, delicate festoons in the equatorial zone and enormous swirling cyclones in the temperate regions.
Not only is there a great deal to be seen on an average night, but the planet rotates very quickly: a day on Jupiter is less than 10 hours long.
There are, however, a few things you can do to maximise your Jupiter observations and obtain an accurate drawing.
Read more astronomy sketching guides:
First, you’ll need some accurate Jupiter blanks. Jupiter is appreciably flattened and so a circular template won’t do.
The standard Jupiter blank has a diameter of 64mm and a height of 60mm. Have a few ready to take outside.
You’ll also need a selection of pencils: some features, such as the equatorial belts, are dark and require a 3B-4B pencil, while the festoons are much more delicate and require a B pencil.
An eraser and pencil sharpener are also very useful. Finally, you’ll need a red light to preserve your night vision – for many years I managed with a normal torch that I had painted red with acrylic paint.
At a glance: what you will need to draw Jupiter
- Plenty of Jupiter blanks at the correct size (64x60mm)
- Pencils ranging from B to 6B
- A clipboard
- A red light so you can see to draw
- A selection of eyepieces, to give you a choice of different magnifications
- Some filters, ideally W#11 (yellow), W#25A (red) and W#80A (blue)
- A notebook for your observations – don’t skimp as cheap ones soon fall to bits. It needs to have a hard cover, good quality paper and be well bound
- Pencil sharpener and eraser
- WINJUPOS software (see below)

Once outside, the first task is to get the magnification right. Jupiter does not tolerate high magnification – I normally use 165x-250x.
If the seeing is poor, you’ll need to find the lowest usable magnification, with which the image is still large enough for you to see the storms in the belts and zones.
You’ll need to spend some time looking at Jupiter before you notice all of its finer features. Spend about 15 minutes examining the planet, building up a picture in your mind.
Filters are really helpful here: a W#11 (yellow) is an excellent all-round filter for Jupiter, bringing out details in the belts and zones.
A W#25A (red) filter is good for enhancing bluish features such as festoons in the equatorial zone, while a light blue W#80A filter will increase the contrast of reddish features such as the belts and the Great Red Spot.
After this time has elapsed, you can start your sketch. Spend the first two or three minutes drawing in the main equatorial belts using a 3B or 4B pencil.
Next, add in any other fainter belts you can see, along with the polar shadings.
Now spend six minutes putting in the finer details. Draw in objects near the preceding limb first, as these will soon be carried off the disc by Jupiter’s rotation.
Place the most obvious features on your blank first – these may include darker spots, bright rifts and festoons in the equatorial zone.
Spend the remaining few minutes adding details on the edge of visibility. It’s a good idea to add notes about colour and brightness for various features.
I use the British Astronomical Association intensity scale from 0 (very bright) to 10 (black sky).
Jupiter’s swift rotation means that new features are always coming onto the disc. Even after one hour it will become obvious that the planet has changed a great deal.
For a long Jupiter session, you should aim to make a disc drawing once an hour to capture the new details and show how they evolve.
Copy up as soon as you can. The most important task is to make a neat version of your drawing – this can be done either in black and white or colour, but its best to do it as soon as possible after you finish your observing session so it remains fresh in your mind.
I personally prefer to make colour drawings – easily done using crayons for the colours and indian inks for the shadows, with the drawings and notes made at the telescope for reference.
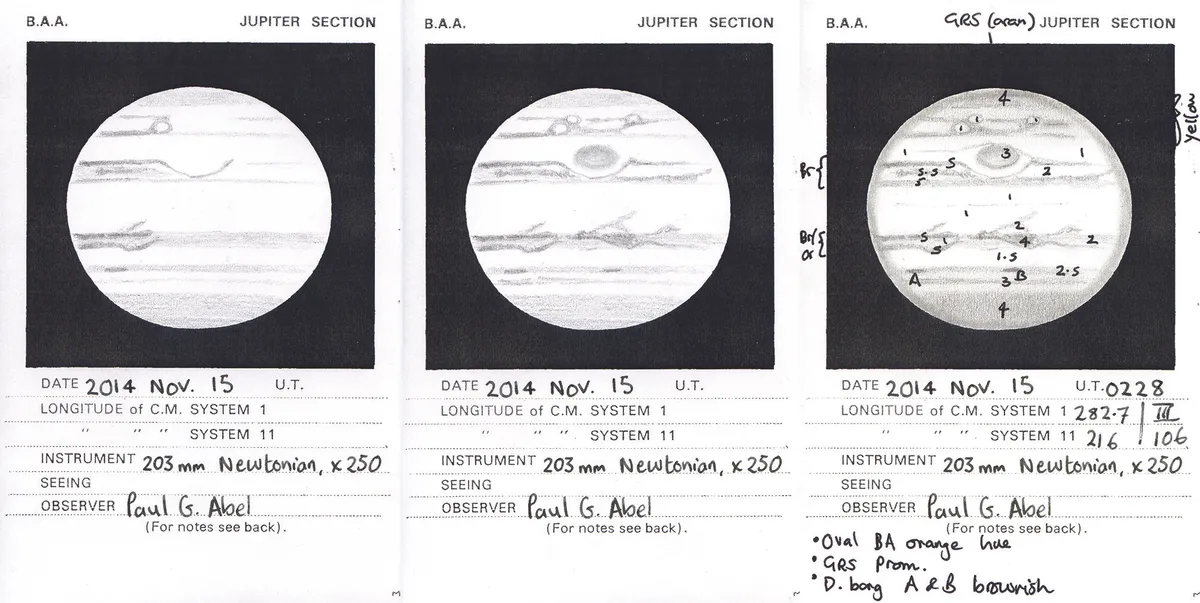
Any sketch should include details of the date it was made, the start and end time (in UT) of your observing session, along with the telescope, magnification and filters used, and the seeing conditions.
For Jupiter you should also record the values of the longitude; the planet has three longitude systems, one for features on the equator (System I), another for features everywhere else (System II) and one that measures Jupiter’s internal rotation (System III).
You can get these values from the free planetary software WINJUPOS. Finally, add any other comments or details you think important.
It won’t take long to fill up a notebook, and you’ll be able to look back and see how your observational and a drafting skills have developed.
No matter how experienced you become, Jupiter will always be an excellent target to help keep your eyes sharp.
Dr Paul Abel is an astronomer based at the University of Leicester. The article originally appeared in the April 2015 issue of BBC Sky at Night Magazine.
