In this science and astronomy project we've provided plans that you can download and print off at home to help you make your own sundial. It's a great project for kids, for teaching them about the movement of the Sun across the sky, but also a little bit of science history too.
You’ll need a good-quality inkjet or laser printer to reproduce the sundial plan from, and we've provided a downloadablesundial plan (PDF) that you can print onto A4 paper.
You'll also need a rigid piece of A4-sized card to mount the printed plan. A cereal packet will do, but make it double thickness.
Use an aerosol-based contact adhesive – the stuff used by professionals to mount photos – or a glue stick when you’re sticking the paper plan onto the backing card. Liquid PVA glue (or similar) is hard to apply evenly and may stretch or wrinkle the paper.
And a craft knife and rule is best. There are some intricate cuts and folds needed to complete the sundial model, so use a sharp blade rather than a pair of scissors, and a ruler as a guide.
The gnomon, the bit of the sundial that casts a shadow, is formed by a piece of black thread pulled taught between two points on the model. String will suffice, but make sure it doesn’t stretch under tension.
Finally, you will need clear tape to secure the thread to the sundial.
For an even simpler sundial project, read our guide on how to make a paper sundial.
History of the sundial
Before reliable mechanical clocks were invented at the end of the 17th century, the most accurate means of recording the passing of time was to trace an object’s shadow, cast by the rays of the Sun, on a graduated dial.The first evidence of a sundial is Egyptian, and dates from the 15th century BC.
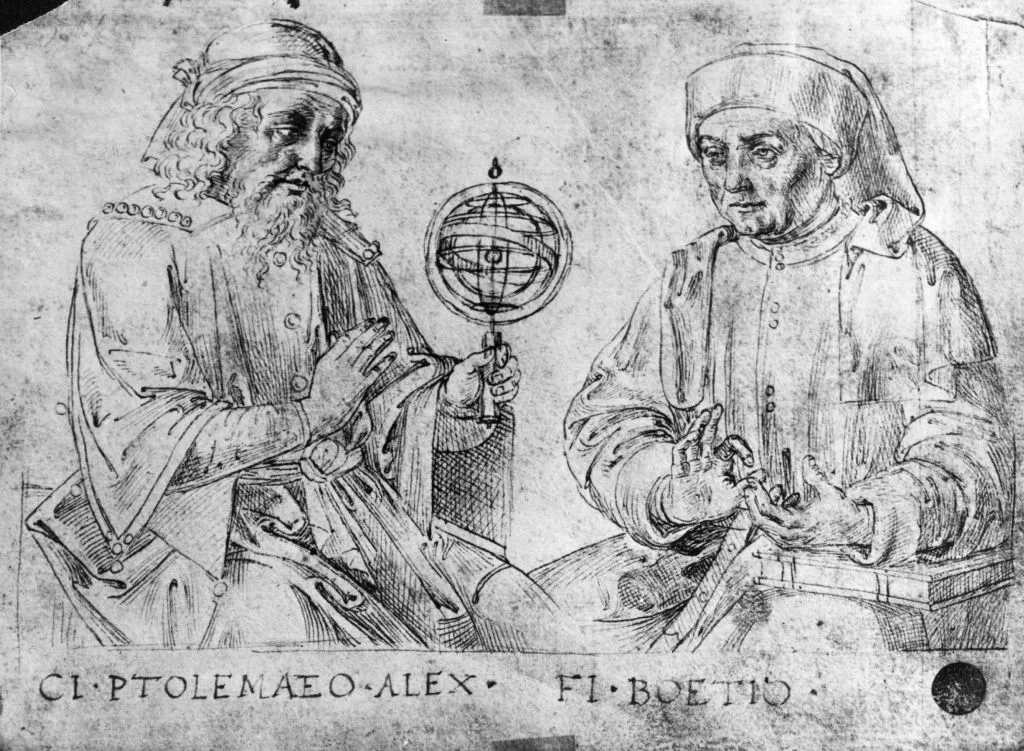
In the second century AD, Ptolemy’s Analemma describedin detail how the circles of the celestial sphere could be projected onto a flat plane using trigonometrical principles.
For the sundial maker this treatise was invaluable, since the motion of an object’s shadow – the technical term for the part of the sundial that casts a shadow is a ‘gnomon’ – could now be described with mathematical precision for any orientation of dial wherever it was on Earth.
With the invention of magnetic compasses at the end of the 14th century, portable directional sundials finally became a reality.
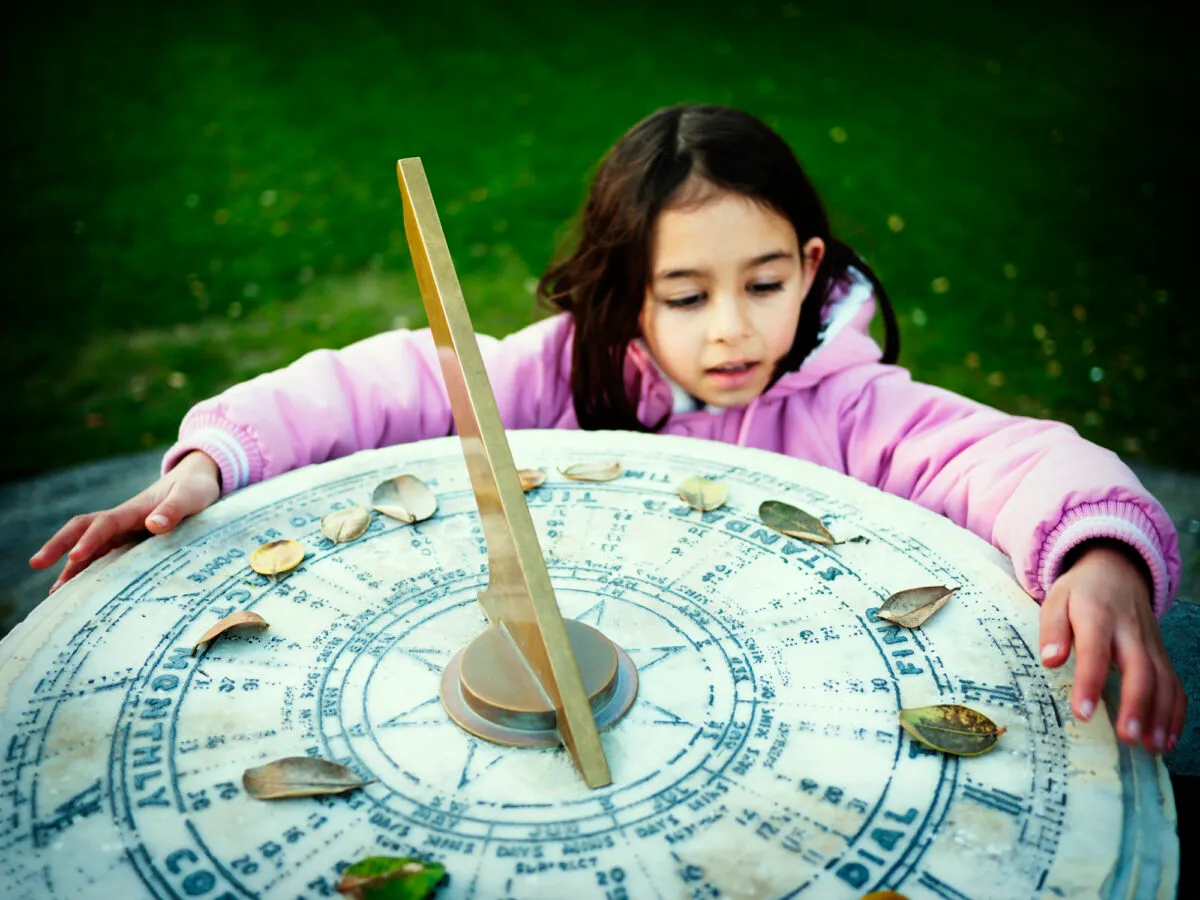
When most people think of a sundial, they picture a garden, or horizontal, dial mounted on a pedestal.On a correctly positioned example, the gnomon will point due north, and its angle to the horizontal will equal the latitude of its location.
If you own an equatorially mounted telescope, you may recognise this setup as the definition of the polar axis – parallel to the rotational axis of the Earth.A variation of this form, the vertical dial, is often found on the south-facing side of churches and buildings.
Different types of sundial
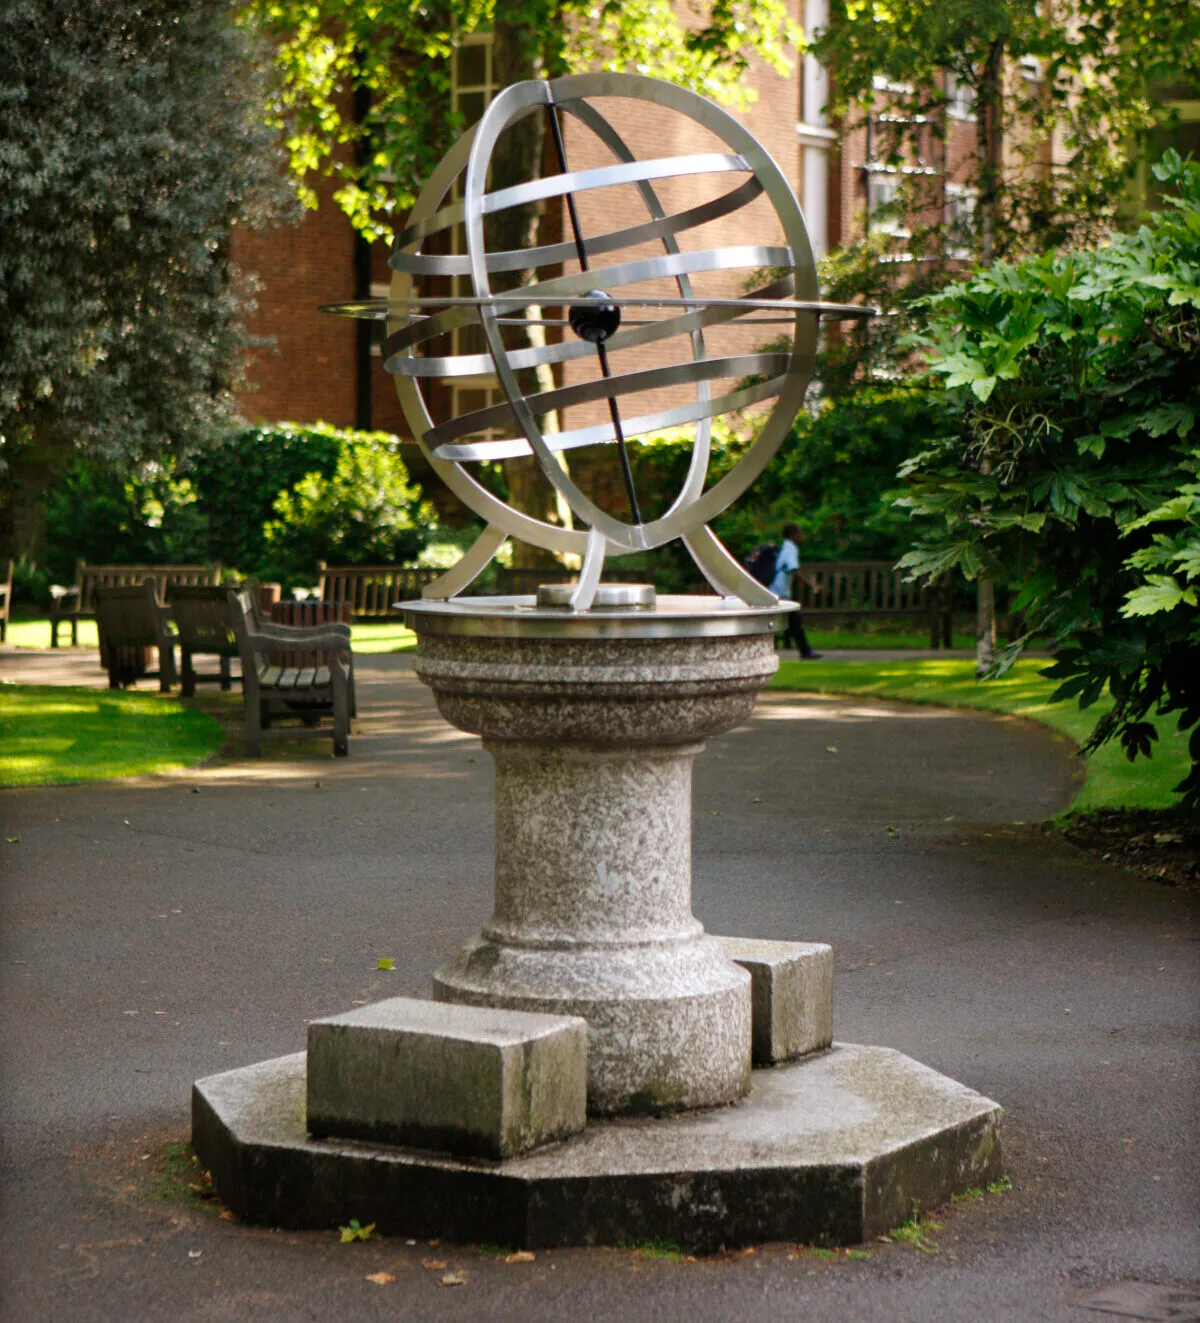
There are several other forms a sundial can take.On equatorial dials, the hour scale is a disc that lies at right angles to the gnomon, on the plane of Earth’s equator.This makes it difficult to read around the time of the equinoxes, so an improved version is the armillary sphere.
With this form, the hours are inscribed on a ring with the same centre point as the gnomon. Then there are polar dials, on which the hour scale lies parallel to the gnomon.
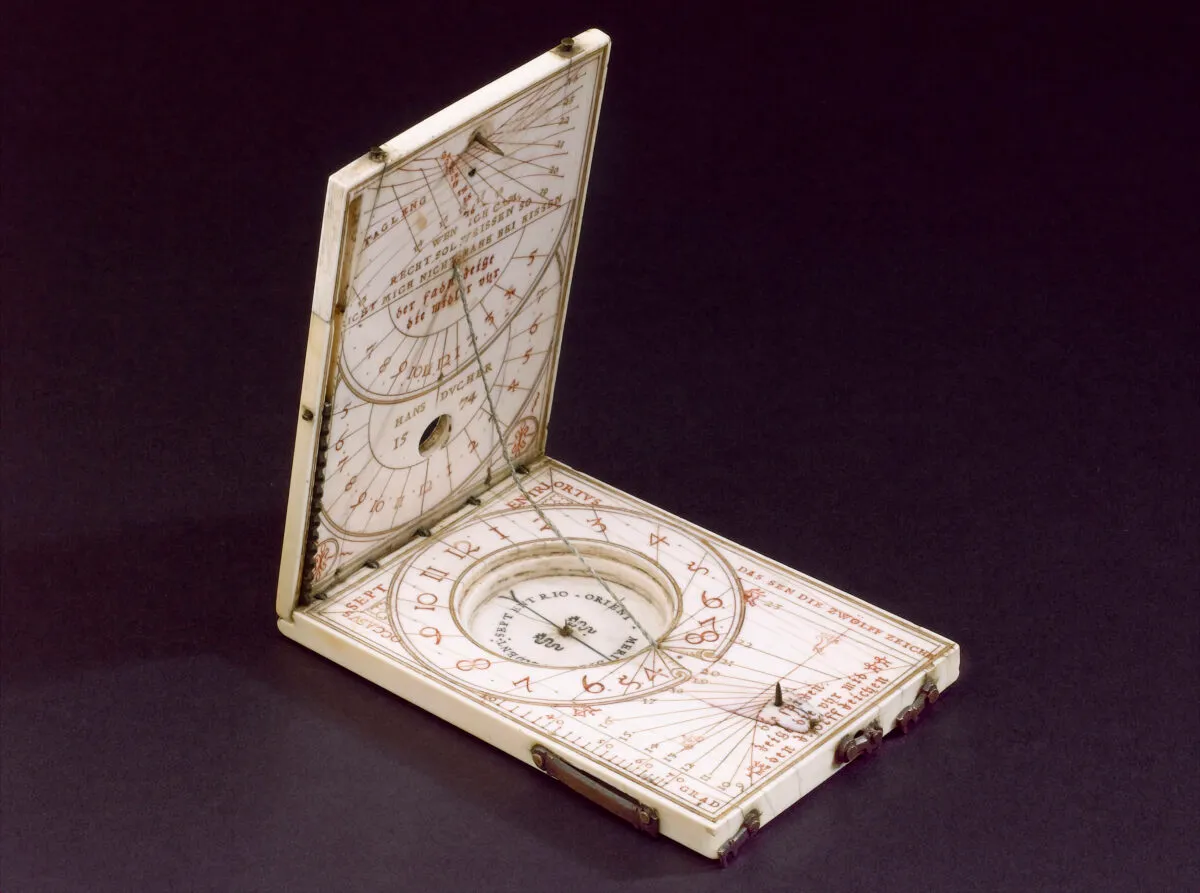
The form of sundial that we’re going to make is called the diptych.This is a development of the horizontal and vertical sundial that became popular as a portable instrument in the16th century.
Our version has been specially designed for the centre of the UK (latitude 54° N, longitude 2.5° W).
It has two dials angled at 90°; a taught thread between their centres forms the gnomon. You’ll be able to tell Greenwich Mean Time with the vertical dial and British Summer Time on the horizontal dial.
And what’s more, the shadow from a knot or bead at point C on the gnomon thread will mark the solstices and equinoxes.
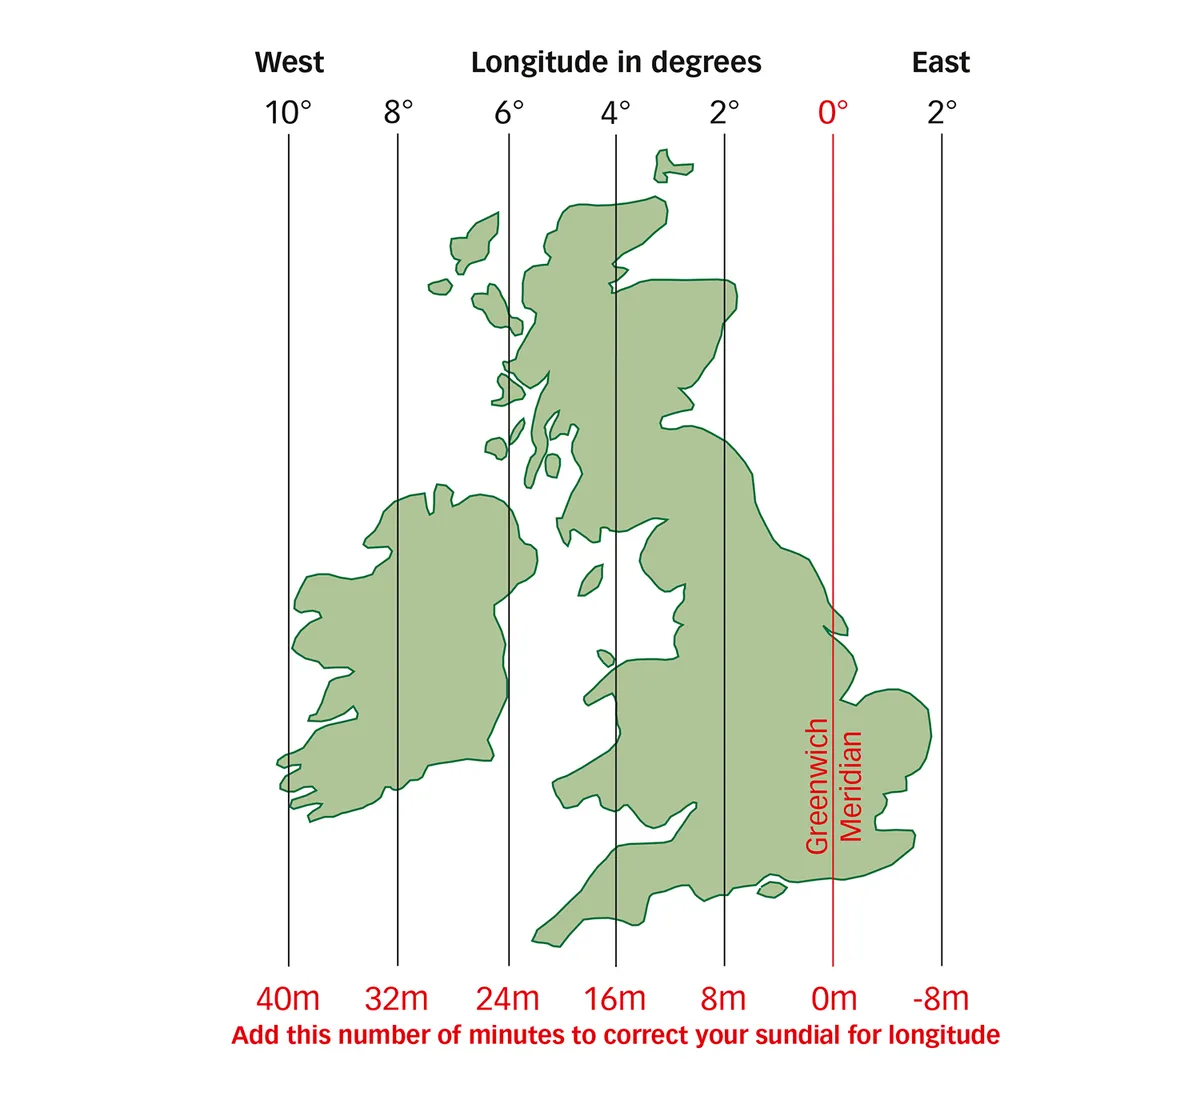
This sundial will always display local, or apparent, solar time: whenever the Sun is exactly due south, the apparent time is precisely midday.But unless you live precisely on the Greenwich Meridian, a correction has to be applied due to longitude.
This is because sundials show local midday four minutes early for every degree of longitude east of Greenwich, and four minutes late for each degree west of it.
At Lowestoft, the most easterly point of the UK, a sundial shows midday seven minutes before London, whereas at Penzance (longitude 5.5° W) a sundial displays noon 22 minutes after Greenwich (see diagram below).
The equation of time
Longitude aside, if you carefully log the apparent time of a sundial against the mean solar time shown on an accurate clock (ignoring British Summer Time) you will notice that the two still don’t match over the course of a year.
There will be periods when the sundial is fast according to your watch, reaching a maximum of 16.4 minutes at the beginning of November.There will also be times when the sundial is slow,by as much as 14.2 minutes in February.
This is known as the ‘equation of time’, and it is something Ptolemy devoted a whole chapter to in the Almagest.It can be expressed as follows:
Equation of time =apparent solar time – mean solar time
The reason for the discrepancy is down to the eccentricity of the Earth’s orbit, which causes the apparent movement of the Sun along the yearly course of the ecliptic to speed up and slow down, as well as the inclination of the Earth’s orbit to its equator.
But there are four times a year whena sundial on the GreenwichMeridian and clocks would agree: 15 April, 13 June, 1 September and 25 December.
Contemporary designs which correct for the equation of time, as well as longitude, display clock time very accurately, reconnecting human activity with the ancient cycles of the Sun and stars.
Follow our step-by-step guide below and create your own sundial.

