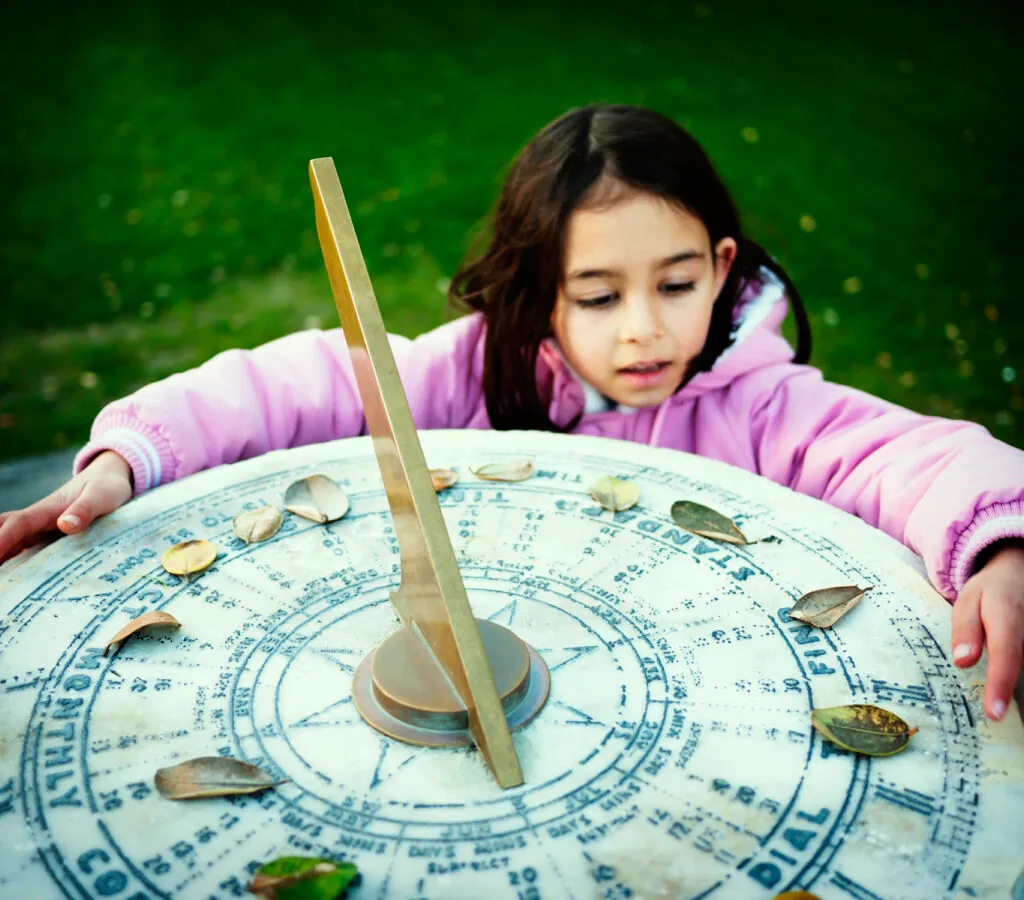
Our ancient ancestors had to use the Sun as a clock, something it’s easy to forget while surrounded by modern devices.
A fixed object on a sunny day will cast a shadow and as the Sun moves across the sky that shadow will change position.
This basic principle underpins most sundial designs and here we show you how to make a paper equatorial sundial.
This makes a great science experiment that kids can do at home or in the classroom, and could be a good option if you need a last-minute, quick and easy school project!
Telling the time with your sundial
The time told by the Sun is specific to your location and may differ from the clocks you have in your home.
Local noon sees the Sun at its highest point in the sky.
If you are on the Greenwich Meridian line, your local noon will agree with your clocks, but for every degree you are east of that line, local time will be four minutes ahead, while it’ll be four minutes behind for every degree west.
What is an equatorial sundial?
In our modern interconnected world, time zones have had to be standardised, otherwise bus and train timetables alone would be chaos!
The design of sundial we are making here is known as an equatorial sundial, as it utilises the knowledge that the Sun moves at a rate of 15° per hour, therefore any shadows being cast will also move by 15° each hour.
We can use this information to create a clock face and with it tell the local time using the shadow cast by the sundial’s gnomon (central column or pin).
It is very simple to make from just two pieces of card and a drinking straw, and is an excellent project for families as children can learn about shadows and local time.
You can use this sundial to find out the time of local noon at your location.
Will the sundial work where I am?
Technically, our sundial will work for any latitude. But because the latitude scale on the base is not linear, it would need a much longer piece of card and a much longer gnomon to cover the region between 24° north and south of the equator; so our design covers latitudes outside of those regions.
Our clock face is labelled from 06:00 to 18:00, but you can extend that if you wish.
The length of the gnomon and the angle of the clock face can be adjusted for your location using the table online.
Our clock face is for the northern hemisphere, but to adapt it for the southern hemisphere simply label your clock face in the opposite direction.
When selecting your card, chose something that is sturdy enough to hold its shape but still easy to fold.
Because this sundial will work for different locations, you can take it away on holiday with you and see how the result differs from at home.
To help with this, download our latitude line and gnomon length table (PDF).
Tools and materials
- Two sheets of white A4 card, sheet A trimmed to 23cm x 18cm and sheet B trimmed to 27cm x 18cm
- A pair of compasses that will allow you to draw a circle with a radius of 8cm (diameter of 16cm)
- A protractor so you can accurately measure your sundial clock face’s divisions
- A drinking straw to use as a gnomon. We used a straight straw measuring 19cm in length
- A compass – you can use a traditional compass or a mobile phone to align your gnomon to north (or south if you’re in the southern hemisphere)