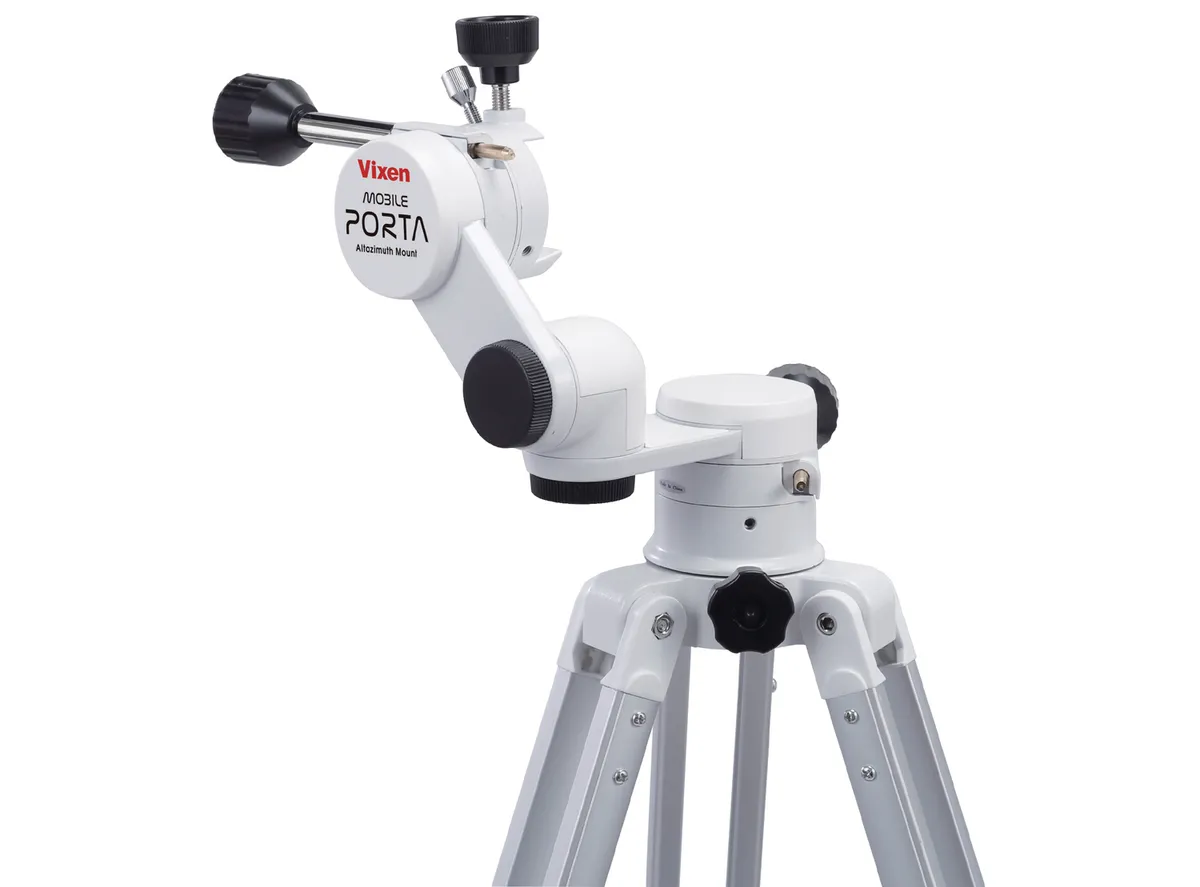
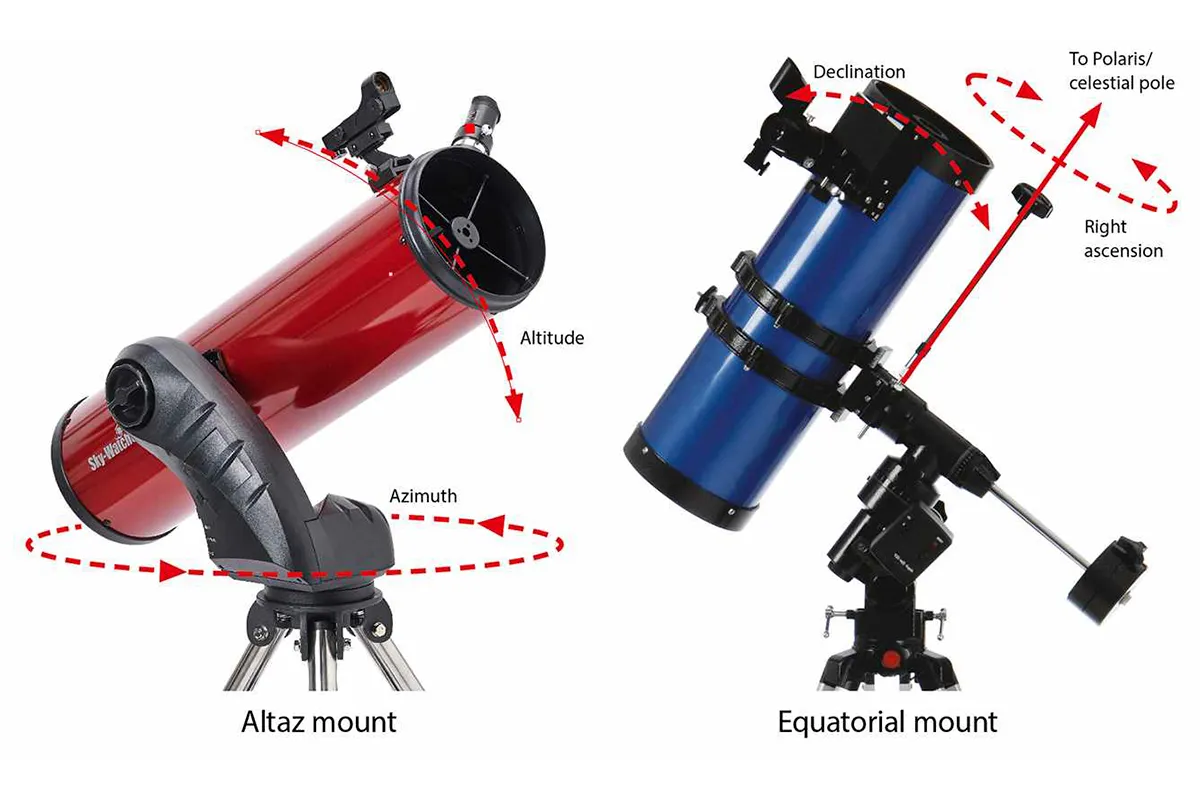
Altazimuth mounts - or alt-az mounts - can be regarded as the oldest form of mounting for a telescope.
They have two axes of rotation: one level with the horizon and the other moves in elevation (altitude).
‘Alt’ derives from altitude and ‘Az’ from azimuth, the latter being the position measured from north, usually through east along the horizon.
Equatorial mounts are technically altazimuth mounts tilted so that one axis is aligned with Earth’s polar axis.
Find out more in our guide to the difference between equatorial and altazimuth mounts.

Unlike equatorial mounts, altazimuth mount systems don’t track the stars, but they are quick and easy to set up.
Unpowered versions require no alignment whatsoever.
The simplest forms are push-pull variants and Dobsonians (for more info, read our guide to Dobsonians), where you either manually move the scope and point it at your target or have simple slow-motion controls to move the mount.
If you're on the look-out for your first mount or are after an upgrade, browse our full back catalogue of mount reviews or read our guide to the best telescope mounts.
Go-To mounts explained
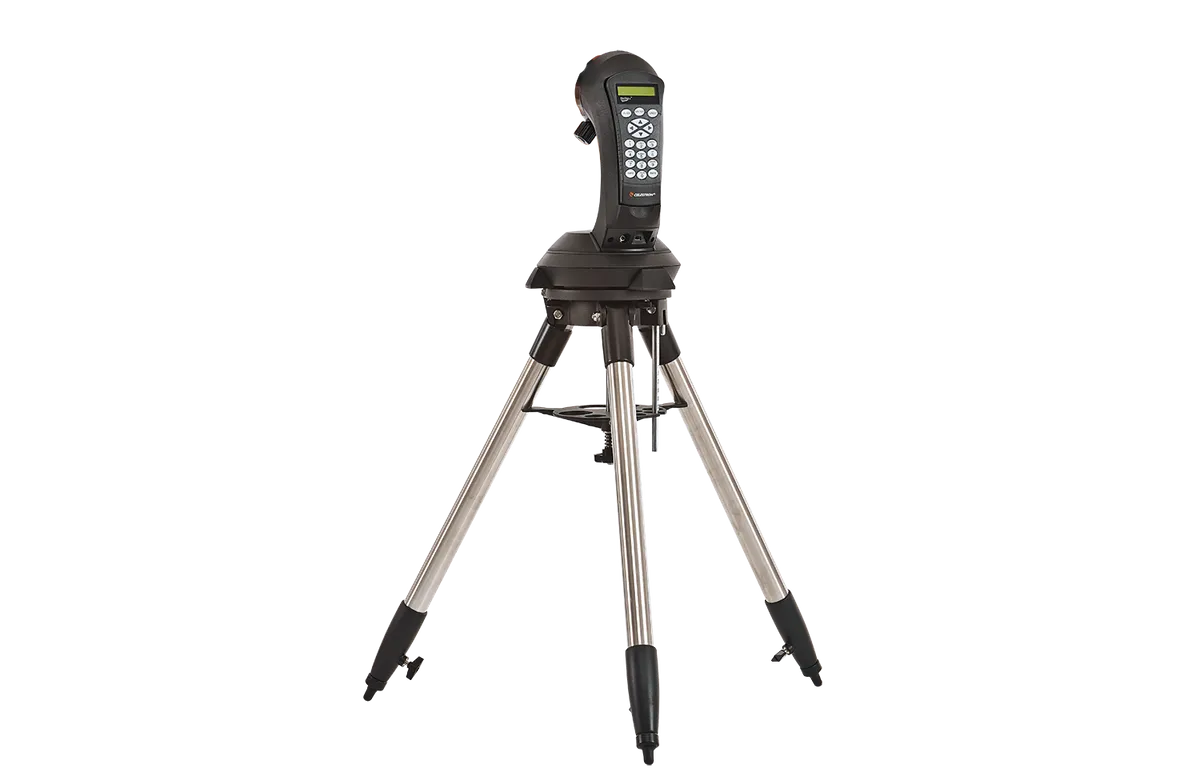
With the advent of computerised, motorised ‘Go-To’ systems, altazimuth mounts have become more sophisticated.
An altazimuith mount with Go-To and can track targets in the night sky once an alignment process has been completed.
Initially this technology was limited to high-end, high-cost systems, but no longer.
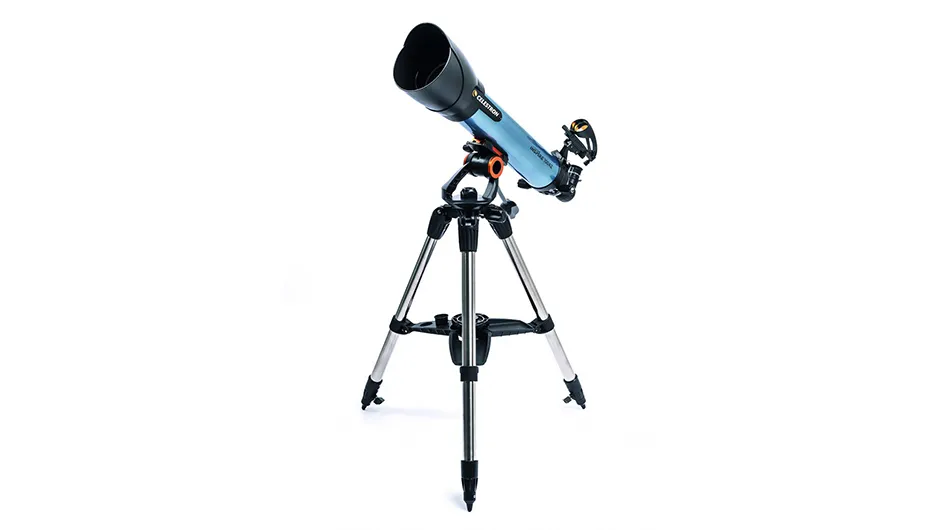
Single- and dual-arm altazimuth mounts are now widely available, for example the Meade ETX, Celestron NexStar and Sky-Watcher SkyMax series.
iOptron has also launched an unusual take on the design with the iOptron AZ Pro, where the mount has been designed as a cube.
Such systems have helped bring Go-To technology to a wider audience and to beginners who don’t mind the extra cost involved compared with basic mounts and telescopes.
Observing and astrophotography
Unlike equatorial mounts, altaz mounts don’t follow the sky smoothly in an arc as they aren’t lined up with Earth’s polar axis.
This leads to ‘field rotation’ in altaz systems, which poses a problem for anyone interested in deep-sky astrophotography.
Field rotation occurs because the altaz view remains lined up in relation to the horizon, whereas your celestial target moves with the sky.
So when you stack multiple images they won’t align.
For visual purposes, this doesn’t matter: you just keep on adjusting the mount to keep your target in view.
If your primary interest is simply viewing the night sky, or perhaps taking short videos of Solar System targets, a Go-To altaz setup could be an ideal choice.
All is not lost, however, if you do want to try out deep-sky astrophotography with an altaz mount, as two things can help:
Camera technology
Many modern DSLRs and CCDs can capture good detail in short exposures, take a lot of them and then stack them.
Stacking software such as the free DeepSkyStacker can deal with the rotation you will see in the images. Read our guide on how to use DeepSkyStacker for astrophotography.
Equatorial wedge

Some manufacturers produce equatorial wedges for their altaz systems. This add-on effectively turns the mount into an equatorial one, making long-exposure imaging possible.
Single-arm mounts can usually hold telescopes up to 8 inches in aperture and are typically supplied with an adjustable tripod.
There will be a mounting bracket for either a Losmandy or Vixen-style mounting bar, and often ports for connecting a Go-To hand controller and an external power supply.
Some will have extra ports for other accessories. Most mounts also have a battery compartment for cable-free operation.
Computerisation has revolutionised altaz mounts: some can now be controlled wirelessly, using an app on a tablet or smartphone.
Whether you want a straightforward push-pull system, one with Go-To, or one with dual arms, there is an altaz option out there for you.
Different types of altaz mounts
Single arms are the ‘standard’ type of altaz mount but, as is also the case with equatorial mounts, there are others:
Push-pull mounts
The simplest altaz design, push-pulls have no drives on either axis. You manually move the telescope on a simple tripod.
These make great, simple to operate and relatively cheap systems for beginners.
Birdwatching spotter scopes on a tripod can also be used for visual astronomy in the same way.
Dual-arm fork mounts
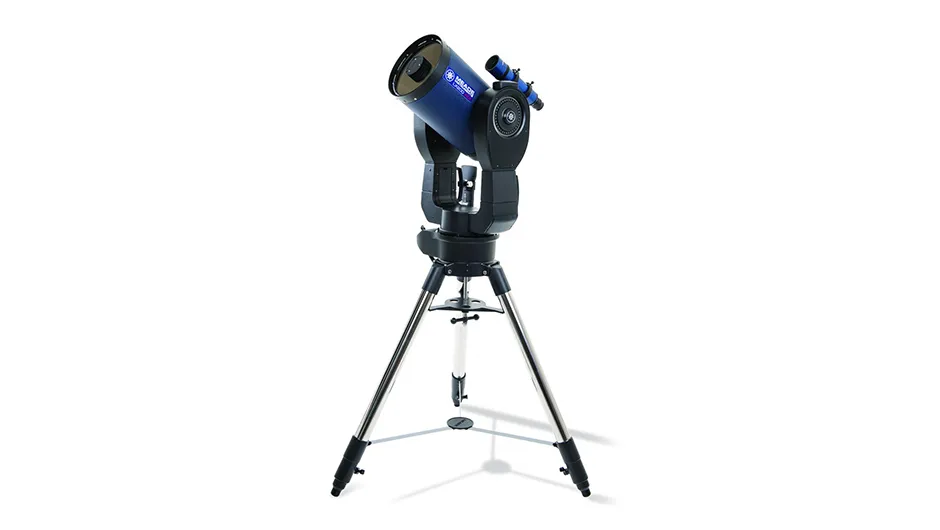
For larger aperture telescopes, turn to a dual-fork mount.
By supporting the optical tube between the two arms the weight is spread evenly between them for greater stability.
Many dual-arms support equatorial wedges, meaning they can be used for deep-sky astrophotography.
TTS Panther
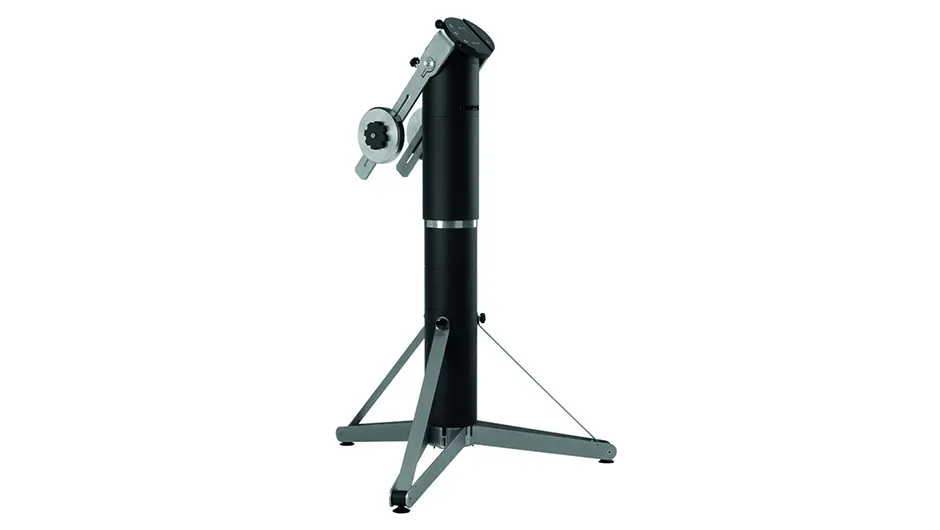
The TTS 160 Panther altaz mount from Track The Stars is a portable system that has all the same features and connectivity as other altaz Go-To systems, and with the addition of an optional ‘telescope rotator’ it can also be used for deep-sky astrophotography.
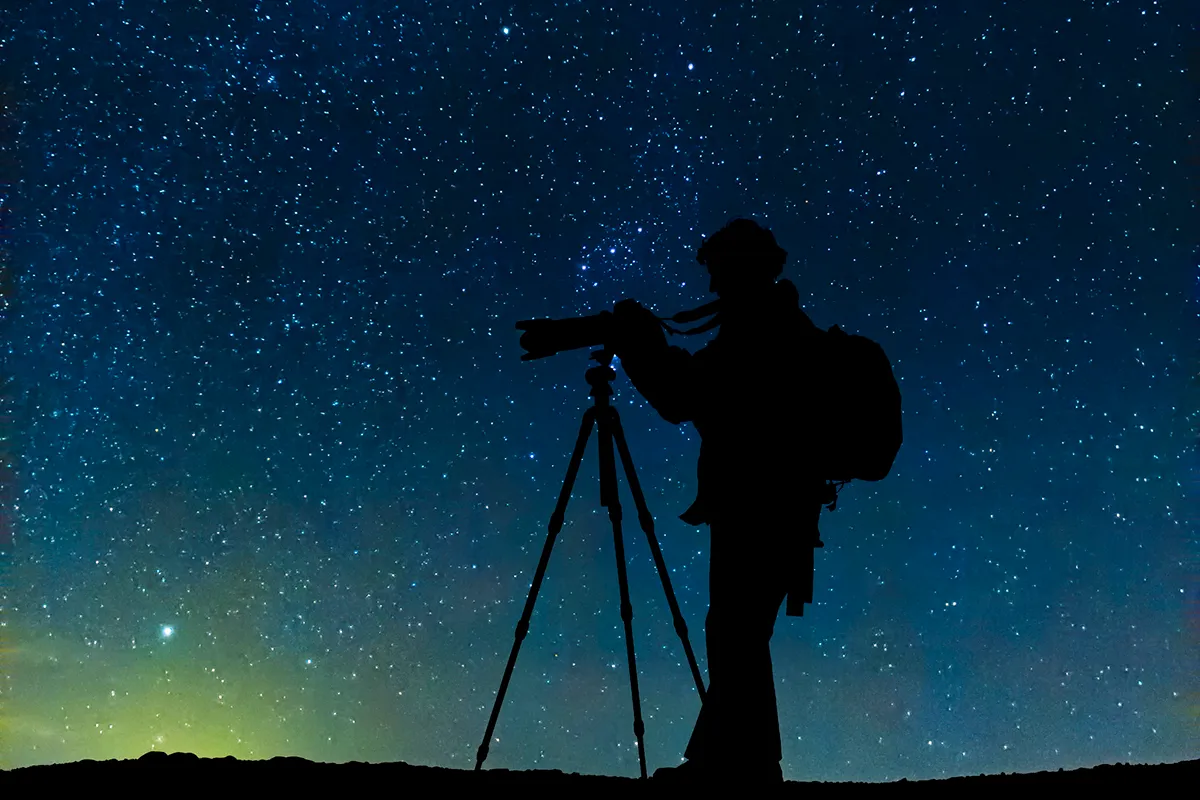
How to set up an altazimuth Go-To mount
Altazimuth mounts offer a simpler solution to your observing and, to a lesser extent, your imaging needs.
Gone is the complicated nature of the polar alignment and the need for counterweights.
Instead, as long as the mount and tripod are set level with your horizon, you can enjoy an observing or lucky imaging session for as long as your clear night sky lasts.
You can greatly improve the Go-To and tracking performance of your altazimuth mount if you pay a little more attention to the initial setup of your mount and tripod.
It’s easy to think that if you have simply placed the mount and tripod down, without paying much attention to it except for a rough levelling of the setup, that performing a Go-To alignment will take care of any errors.
But take a little more care and patience here and your night under the stars will be more productive, satisfying and useful.

Once you become familiar with setting everything up carefully and with a little more thought, it will become second nature every time you get that rare clear patch of night sky to take advantage of.
It’s especially useful if you can choose a location in your garden that you can repeatedly use.
By marking out the positions for the tripod legs, you can do the setup once and, if you need to put your equipment away between sessions, you can return to the exact same place time after time.
This enables you to use the hibernate function of your chosen mount to pick up from where you left off.
The good news is that this is independent of the make of the mount/tripod, as almost all of them require a level setup with the initial or home position of the telescope pointing north.
Paying attention to levelling the tripod and rechecking this once the mount and telescope are attached, along with knowing where true geographic north is from your chosen location, will make setting up a breeze for future sessions.
Follow our simple step-by-step guide below to getg the best out of your altazimuth Go-To mount.
Equipment
- Altaz Go-To Mount, tripod, suitable telescope
- Handset (or smartphone and app)
- Power tank, compass, spirit level
- A suitable location to set up
Step 1

Using a compass, locate north for your observing site. Set up the tripod assembly on firm ground, ensuring that one leg is pointing towards north. Spread out the legs for stability and adjust to a comfortable height suitable for the user.
Step 2

Use a spirit level, or else the tripod’s own in-built bubble level, to level the tripod. This ensures that the azimuth corresponds precisely to your horizon, ignoring anything cluttering it such as trees, houses or hills. With this done, your mount is correctly set up for when you perform a star alignment.
Step 3

Attach the mount to the tripod, orientated so that when the telescope is added in the next step it will be pointing exactly northwards. Don’t over-tighten the mount at this stage, in case you need to make minor adjustments to refine its position later in Step 6.
Step 4

Attach a suitable telescope via the saddle on the side of the mount and affix it firmly in place. Ensure the telescope is set level and pointing northwards, adjusting if necessary. In most cases this is the initial ‘home’ position you’ll use when beginning the star-alignment procedure.
Step 5

Make sure you’re using fresh batteries. Alternatively, connect a suitable powerpack and adaptor using the power port on the mount head. Attach the handset and turn power on, or power up and connect to the mount’s Wi-Fi network with your smartphone.
Step 6

As a final check, once it’s dark manually point the telescope up at Polaris to check that you’re precisely pointing north. Make any adjustments to the azimuth that are needed, then set it back to level. You can now begin the alignment process to achieve accurate Go-To navigation to your targets.
Paul Money is BBC Sky at Night Magazine's Reviews Editor.