Amateur astrophotographers have been able to detect details on Uranus and Neptune in recent years using the latest cameras and imaging techniques and by capturing in infrared light. Although relatively bland in visible wavelengths, when imaged in infrared Uranus shows belts, polar features and occasional spots. Neptune is plainer but as its northern hemisphere has moved into summer in recent years large, lighter spots have been tracked by amateurs using larger telescopes.
Planetary imagers in the UK face tough times over the next few years as Saturn, Jupiter and Mars all reach opposition well south of the celestial equator.
Distant Uranus and Neptune will remain higher in the sky and an increasing number of imagers will be turning their attention to the challenges they present.
- How to remove noise from planetary images
- Imaging planets with a Dobsonian telescope
- A guide to CMOS deep-sky astrophotography
Both planets are physically very large but their remoteness means they are angularly very small.
Uranus is 3.7 arcseconds across – just over twice the diameter of Jupiter’s moon Ganymede – while Neptune is 2.4 arcseconds in diameter.
In the outer reaches of the Solar System there’s very little sunlight and so they shine dimly with very low surface brightnesses, compounding the problems of small size.
Below we’ll look at how to reveal these elusive details in your images of the ice giants, but you might like to get started with our guide on how to see Uranus.
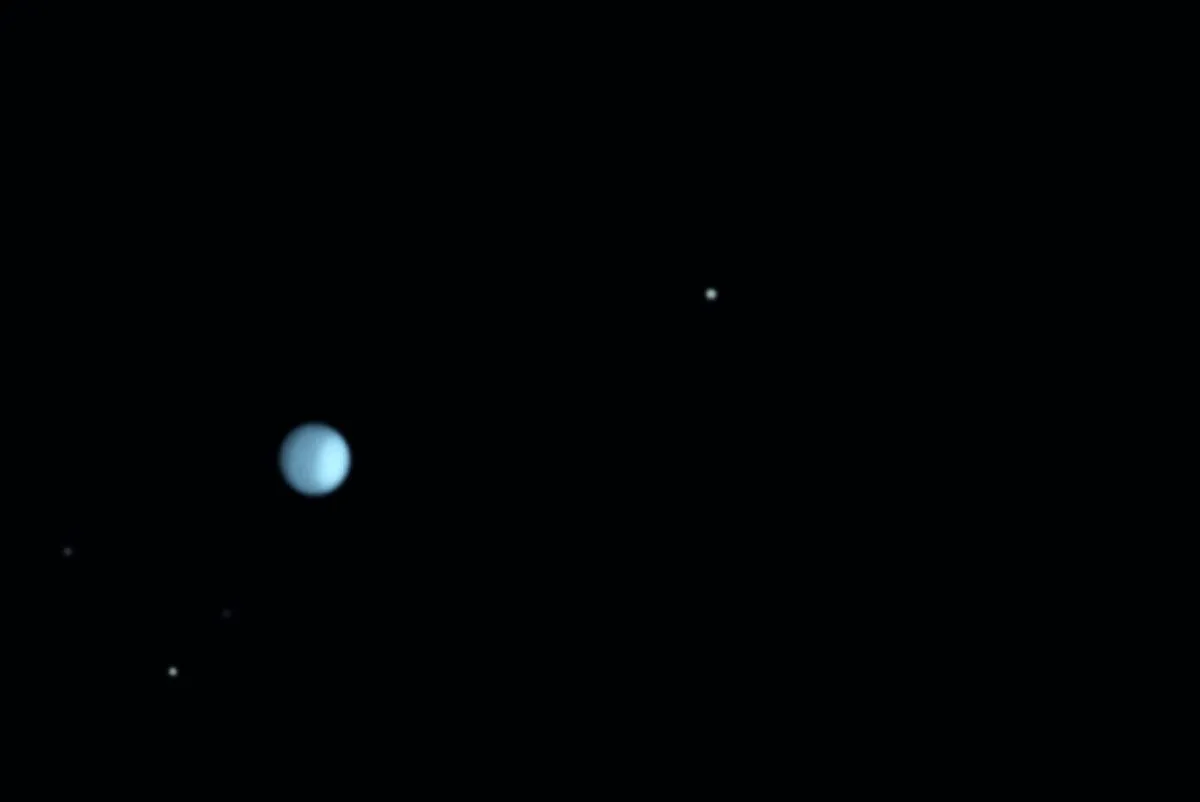
To record planetary images, astronomers usually place high-speed digital video cameras at the focal point of their telescopes.
With an intervening Barlow lens to enlarge the image, they record thousands of video frames directly onto a computer.
The best of these are later processed with special software to filter out and average the blurring effects of our atmosphere.
The software outputs a very low-noise master image that can be sharpened to show significantly more surface detail than any other current imaging method.
Uranus and Neptune are small and dim in visible light, and unfortunately even dimmer in the infrared wavelengths needed to capture surface details.
To image them successfully you need to use an infrared sensitive camera in combination with dedicated infrared filters.
CMOS chip manufacturers, in particular Sony, have made great advances in the infrared sensitivity of their camera sensors.
Sony’s chips, such as the monochrome IMX290 and even the colour IMX224, are great performers in the infrared band and are incorporated into cameras made by manufacturers such as ZWO, QHY and Altair Astro.
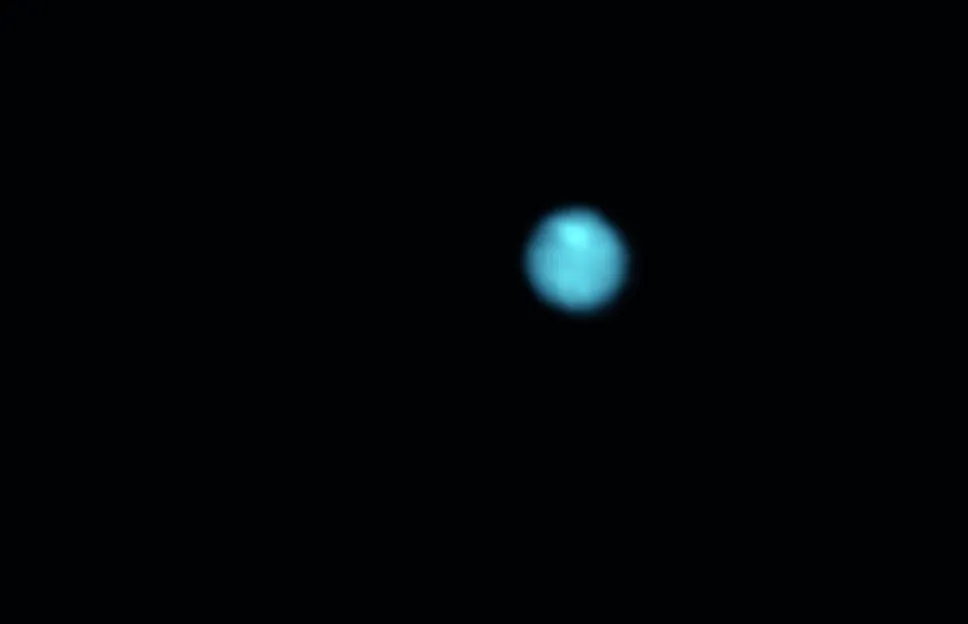
One benefit of imaging the ice giants in infrared is that the seeing is invariably better than in visible light because the longer wavelengths are less prone to the blurring effects of our atmosphere.
The steadier view in infrared goes some way to explaining why people are now having fewer problems imaging these tough targets.
Until the arrival of these new infrared sensitive cameras, frame exposure times for Uranus and Neptune were 100 milliseconds (msec) or more.
This made imaging very difficult because unless the seeing was rock steady these relatively long exposures would lead to movement that smeared the image.
One of the key features of most of these new highly infrared-sensitive CMOS cameras, however, is their very low read noise, which allows the cameras to be used at high gain.
This amplification of the image makes possible much shorter exposures while maintaining image brightness, without the image degenerating into a mess of noisy columns or rows.
Techniques for imaging the ice giants
The ‘high gain, short exposure’ developments described above open the door to a method of planetary imaging that maintains image brightness and reduces atmospheric smearing through much-reduced exposure times.
Instead of exposures of 100-200msec you can now have suitable image brightness with much more reasonable exposures of 10-20msec.
With short exposures, however, comes another challenge.
The low surface brightness of Uranus and Neptune means that the number of photons landing on each pixel of the camera sensor becomes painfully small, giving rise to high levels of ‘shot noise’.
Shot noise is the main source of noise in planetary imaging and stems from the particle nature of light.
Photons from an object arrive at random intervals, so the number captured by a pixel over the length of a frame also fluctuates randomly.
Since each image pixel varies in this way, the planet ends up looking noisy.
The fewer photons, the worse the shot noise relative to the signal.
In fact, there’s a square root relationship between the two. For a frame exposure that is 9x shorter, the frame’s shot noise (relative to the image) will be 3x worse.
But don’t be too concerned about noise in individual frames: what matters is the noise in the final stack.
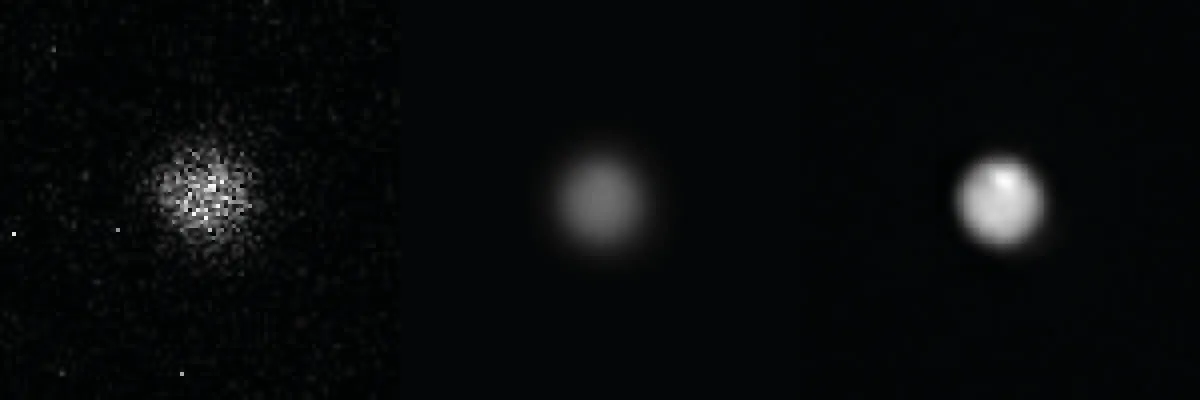
With shorter exposure times you can capture more frames in a given period, and with a 9x shorter exposure you should have 9x as many frames to stack.
Because a square root relationship exists between the number of frames in the stack and the noise, the 9x increase in the number of frames reduces the noise in the stack by 3x – exactly compensating for the 3x worse noise in each individual frame.
This balancing act between exposure time and stack size, which fixes the overall level of shot noise, gives us a key principle of modern planetary imaging.
From the perspective of noise in the stacked image, it’s not the gain and exposure used for each individual frame that matters, but the total accumulated exposure time of the whole stack.
The shorter exposures will allow you to gather more frames in your recording to make up for the high frame noise, as long as you maintain the same overall video duration.
There’s a rule of thumb in planetary imaging that will help you optimise magnification: pick a power that gives an effective focal ratio of 3x to 5x the pixel size in microns.
With Uranus and Neptune being so dim, however, don’t expect to get nice smooth images showing details with a one-minute video – you will need to stack a total of at least 5 to 10 minutes’ worth of data for the signal to start to dominate over the shot noise.
The high shot noise in individual frames can lead to focusing problems.
One technique is to carefully swap your infrared filter for a luminance filter of the same glass thickness.
Once you’ve dropped the gain, the increase in brightness will mean a much better signal-to-noise ratio, allowing you to focus more accurately. Don’t forget to switch things back after focusing and before hitting the record button.
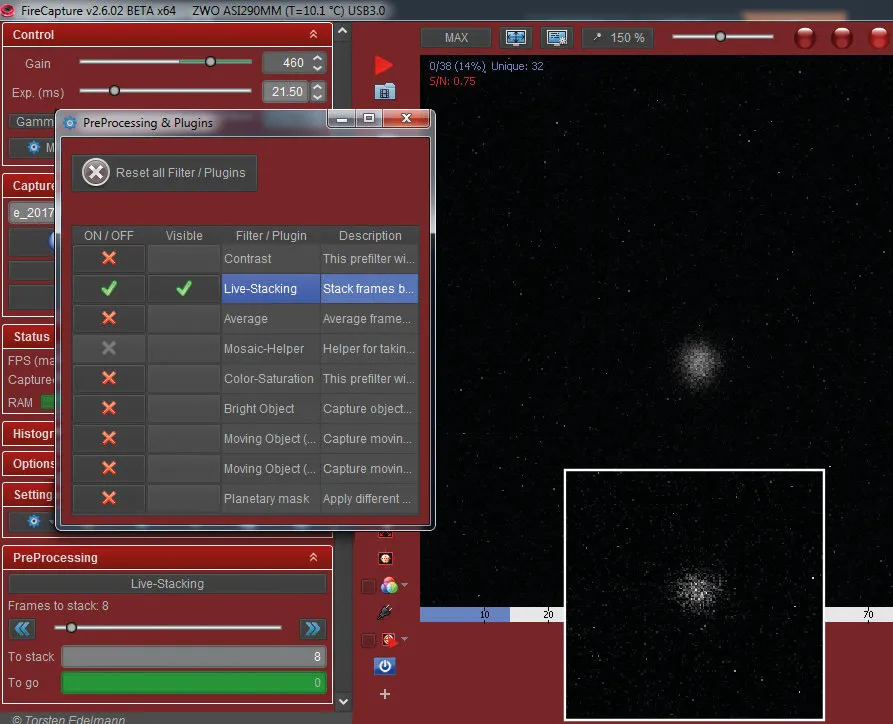
A second focusing solution uses the live stacking preview feature of FireCapture, a camera control program.
In this, the last eight or so frames are continuously aligned and stacked. This significantly reduces shot noise but overexposes the preview image, so drop the gain before attempting to focus.
Scopes, filters and magnification
Given the faintness and small size of Uranus and Neptune, imaging details in infrared only really becomes a realistic proposition with 8-inch scopes and above.
It is important that you choose a night of good seeing, collimate accurately (read our guide on how to collimate a Newtonian telescope), allow the scope to properly cool prior to imaging and choose your telescope magnification appropriately.
Too high a magnification and the planet becomes overly faint with no benefit in resolution; too low and although the planet’s brightness might be improved, you lose resolution because there aren’t enough pixels to render all the detail the scope can provide.
There’s a rule of thumb in planetary imaging that will help you optimise magnification: pick a power that gives an effective focal ratio of 3x to 5x the pixel size in microns.
With an IMX290 chip that has 2.9μm pixels, pick a magnification that gives you f/9 to f/14.5, while for the IMX224 chip and its 3.5μm pixels, you want a focal ratio of f/10.5 to f/17.5.
Selecting your Barlow lens’s power to stay within these bands gives you the best chance of imaging success.
When imaging the ice giants you need to choose a filter that lets infrared light through but blocks visible wavelengths, which would otherwise decrease the contrast of subtle surface features.
Look for infrared filters with a wide acceptance band to maintain image brightness, such as the Baader red 610nm longpass filter, the Baader IR pass 685nm filter and the Astronomik Planet Pro 642 filter.
Processing your videos
With your data captured, next you need to process it to draw out subtle surface details.
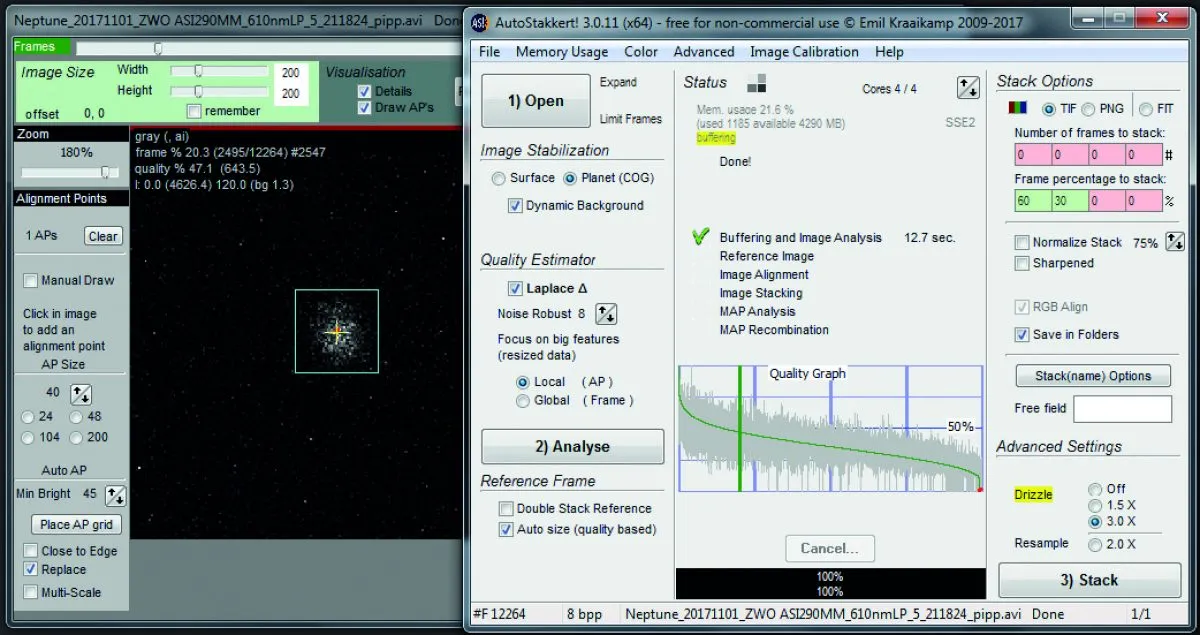
First, use the freeware program AutoStakkert! to convert your video to a stacked image.
With the frames being so noisy you will need to experiment with Planet mode and Surface mode, and use high NR (noise robust) values from six to eight.
Play with these settings and hit the Analyse button to see which setting gives the most stable planet position and the best transition from good quality to bad when you move the frame slider left to right on the analysed video.
Select your stack size to values in the range of 60 to 30 per cent of frames and then place a single alignment box comfortably around the planet.
Set drizzle to 3x enlarge (which gives a bigger planet for RegiStax wavelets to work on later) and hit the Stack button.
When it finishes, open the output in RegiStax and go to the wavelets stage.
Adjust the sliders in the same way as you would for the brighter planets to bring out any subtle details on the surface.
You can then do further processing in Photoshop to reduce noise or bring out detail – maybe even create a composite, adding in moons taken during separate exposure runs in visible light with longer exposures.
To improve the look of an image one common thing is to change the colour balance, adding false colour to give the planets the bluish or bluish-green colour they have to the eye in visible light.
So if you have a medium or large scope and want new planetary imaging challenges, have a go at capturing surface details on Uranus and Neptune.
With an infrared sensitive digital video camera and the latest imaging techniques, you too could be part of the new movement in astro imaging that is capturing surface details on these remote giant worlds.
This guide originally appeared in the September 2018 issue of BBC Sky at Night Magazine.Martin Lewis is a keen astronomer with an in-depth knowledge of how to best image the trickiest of targets. See his work at www.skyinspector.co.uk.
