The Dobsonian-mounted Newtonian was intended to be a simple push-to altaz mount for visual observing, but Dobsonian reflectors can be used to take images of the planets by recording video and then stacking individual frames using software such as RegiStax or Autostakkert!, reducing the blurring effects of the atmosphere.
Sharpened in a graphics editor, the final image shows a wealth of surface detail.
The Dobsonian design is simple. Being a pure reflector there are no issues with colour fringing, and the central obstruction also tends to be smaller than in other reflectors such as Schmidt-Cassegrains.
This means that large aperture and low-cost Dobsonians can often yield great planetary images.
Their big aperture makes the images bright and contrasted, and provides extra resolving power to see surface detail.
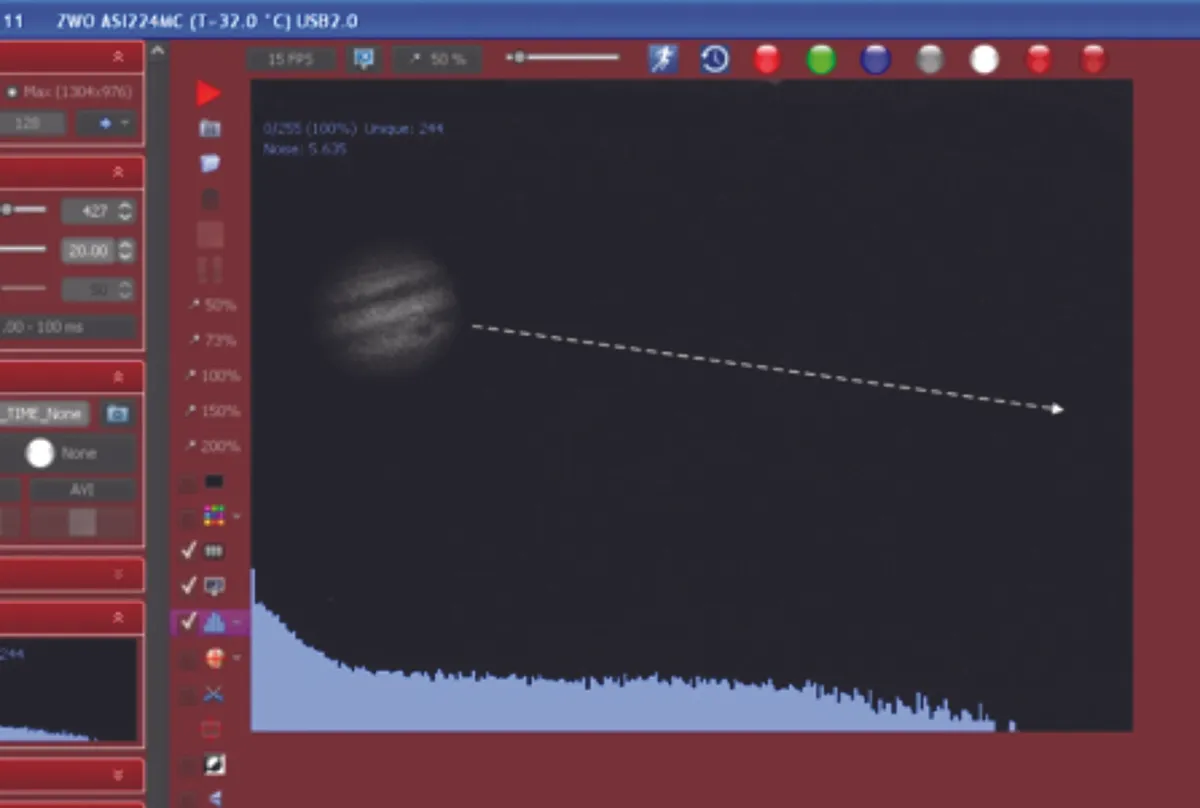
The simplest way of capturing videos is the drift method, which requires no driven mount. Capture multiple short video sequences as the planet drifts through the field and then combine the videos into one image.
A planet drifts about 15 arcseconds each second, so exposures of 30 milliseconds will lead to drift smearing of only about 0.5 arcseconds, similar to the level of detail you would see on a good night.
The true window over which you can gather videos is also limited by rotational smearing.
This is how long you can image the planets before rotational smearing of about 1 arcsecond becomes evident:
- Venus: no real limit over one session
- Mars: five minutes
- Jupiter: five minutes
- Saturn: 10 minutes
You’ll probably need to use a Barlow lens to enlarge the planet’s image, and the best magnification Barlow depends on lots
of factors.
Too low and you lose detail by undersampling, but too high and you will have to manually reposition your scope frequently.

Start with a power that gives a focal ratio of f/10 and experiment around there. If you can, use a camera with a bigger chip to maximise the percentage of time that the planet is in the frame.
Although you can get reasonably pleasing photos with the drift method, driven methods really let you pull out significant planetary detail.
With a driven scope you eliminate drift smearing and can increase the magnification to boost the image scale without worrying about getting very short drift runs.
Also, you can gather more frames to help reduce image noise because you don’t need to waste time repeatedly moving the scope to the start of the drift run.
But if Dobsonians are supposed to be push-to scopes, how do you get them to track a planet?
One method is to fit a Go-To drive system and the other is to place the scope on an equatorial platform.
Neither of these methods would probably be good enough for long exposure deep-sky photos, but because planetary images are generally a few tens of milliseconds long, and because of the frame to frame alignment capability of the stacking programs, both types are good enough for planetary imaging.
Mounting your Dobsonian on an equatorial platform gives your scope true equatorial movement for an hour or so before the platform needs to be repositioned.
Go-Tos generally use friction drives on the altitude and azimuth axes, which can be engaged or disengaged to change between ‘go-to’ and ‘push-to’.
Equipped like this, a Dobsonian should be able to keep the planet in frame and allow you to record videos to process into detailed pictures later.
The Go-To will make finding your target easy and you should be able to compensate for any inaccuracies by using the motors manually to recentre the planet.
Because you are using an altaz system, in time the planet will rotate relative to the frame of the camera.
This is less of a problem for planets than for deep-sky imaging, because the videos tend to just be a few minutes long, limiting the amount of rotation during a video.
Over the course of 10 or 20 minutes the field rotation could become noticeable if combining images from different videos.
Fortunately the very useful derotate function in WinJupos will not only compensate for the rotation of the planet on its axis, but also for orientational drift due to this field rotation effect.

How to capture images with the drift method
Set up your scope and allow it to cool to reduce thermal currents, then collimate as normal. Connect a digital video camera to the telescope and, looking at your laptop, focus critically on a star. Polaris is a good choice for the star as it won’t move while you are focusing.
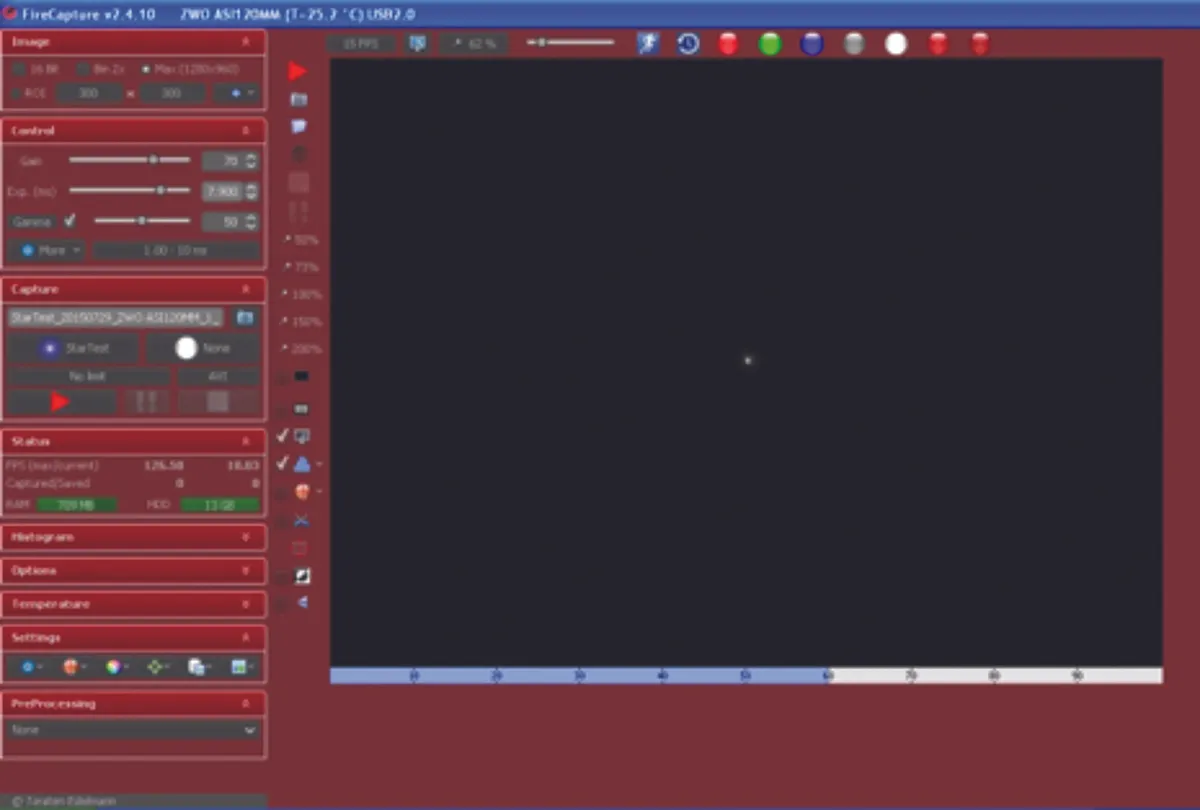
Line up your finderscope so that Polaris is near the middle of the camera frame. Align on the planet and check the chosen exposure settings. Planet brightness should be about 70-80 per cent of the saturation level and the gain about 50-75 per cent of maximum.
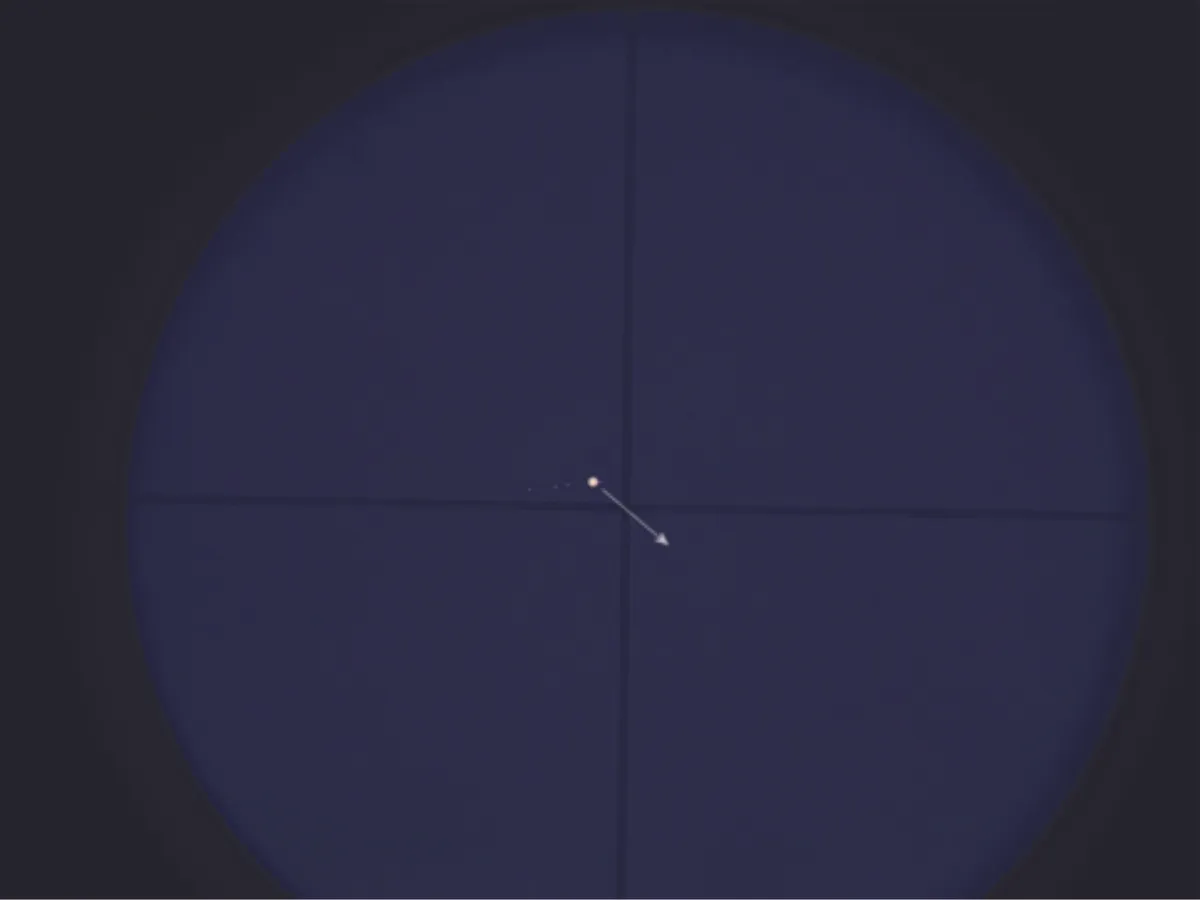
Reposition the scope so the finder cross-wires are just ahead of the planet. As soon as the planet enters the camera frame, hit record. Keep recording until the planet drifts out of the frame. Quickly repeat. Keep going until you have gone outside the time window for your target.
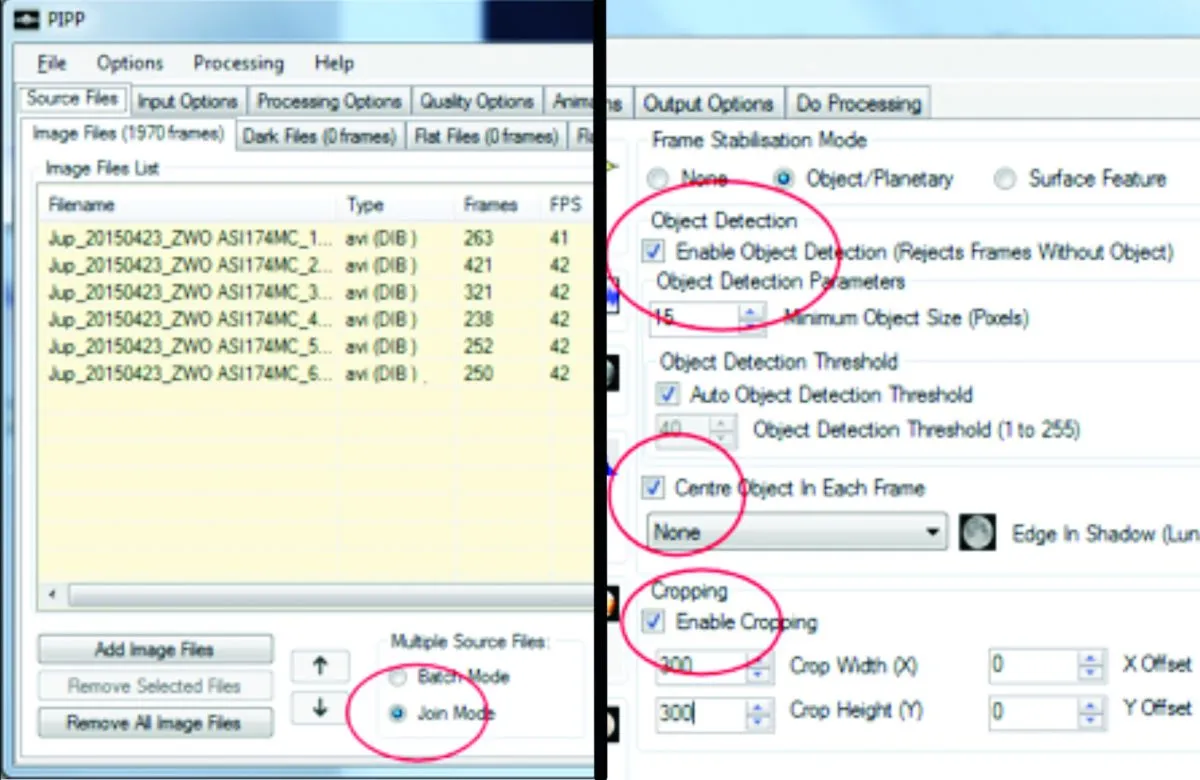
Join your videos together using PIPP’s ‘Join’ mode. Use the ‘Object Detection’ and ‘Centre and Crop’ functions to keep the planet centred and eliminate the empty frames. Process this output video in RegiStax or Autostakkert! to finish.
The equatorial approach
Mounting your Dobsonian on an equatorial platform is your second option and gives your scope true equatorial movement for an hour or so before the platform needs to be repositioned back to the start.
Like the Go-To drive method, it maintains the low, stable centre of gravity of the Dobsonian design.
With it you can continue to use the normal push-to altaz movements of the Dobsonian mount that are so much more in tune with the human frame of reference, but as soon as you have found the target it stays put in field as the equatorial platform tracks it.
An equatorial platform can be moved between scopes and even used to place a normal camera tripod on to turn your DSLR into a fully tracked camera.
Commercial equatorial platforms are available from a number of different suppliers and generally are made for a specific latitude.
For planetary imaging, absolute tracking accuracy from the drive system is not essential but it is useful to be able to adjust the drive speed slightly to keep the target in the field.
Some platforms also have a screw jack on the southern end to help move the object up and down in the field.
One of the most important characteristics of a telescope drive system, if you want the highest resolution images, is that vibration should have an insignificant effect on the image.
Equatorial platforms are prone to such vibration as they often use stepper motors as the main drive.
You may not see signs of this vibration in normal use at the eyepiece but if it is there it will prevent you from achieving full high-resolution imaging.
A simple test involves inserting a high power eyepiece and checking the smoothness of the twisted track of a bright star when you firmly tap the eyepiece to shake the scope.
Vibration will be seen as a saw-tooth on the smooth path.
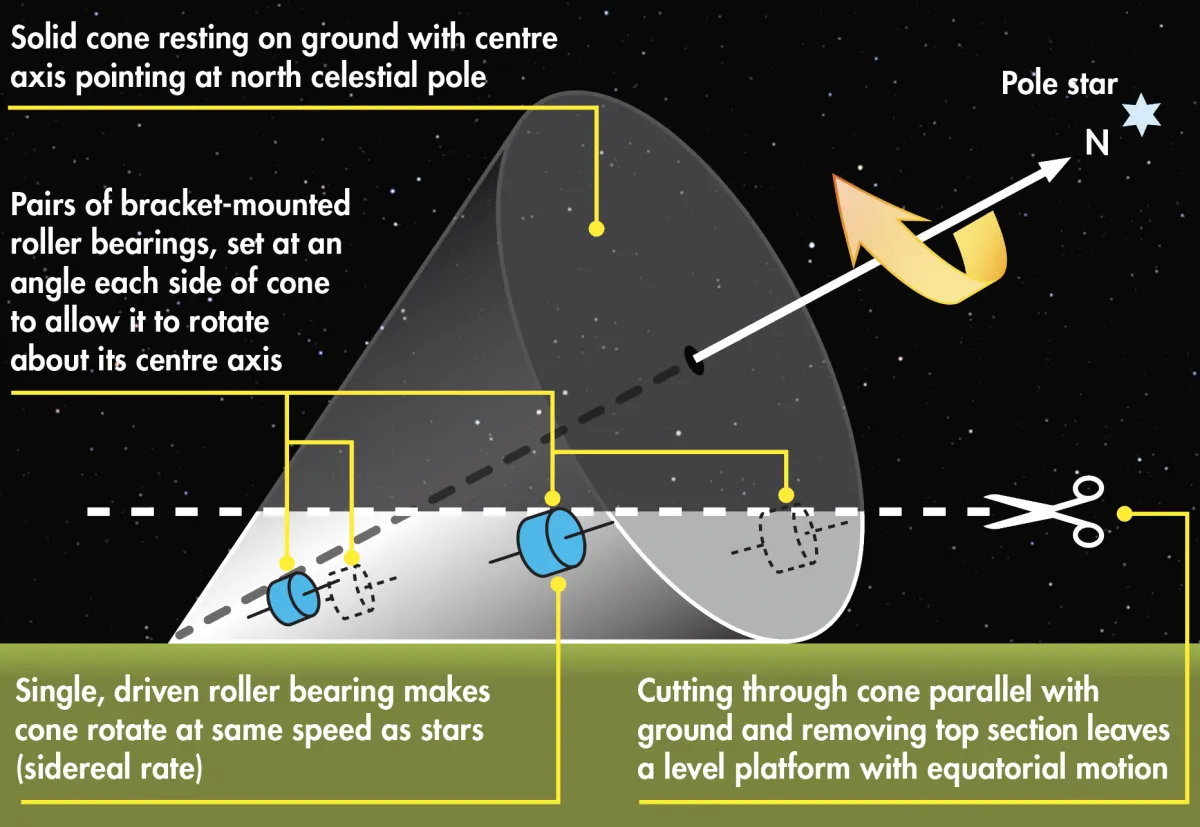
Understanding how an equatorial platform works can be confusing. They look so different from most other types of equatorial mount and do not seem to have an obvious rotation axis.
To help withunderstanding imagine this:
- There is a large solid cone on the ground with its centre axis pointing at the North Celestial Pole.
- Two pairs of roller bearings are fitted on brackets running against the outside surface of the cone, one pair near the narrow end and the other pair near the wide end, angled so their axes point towards the apex of the cone.
- These should restrict the cone to rotating about its axis.
- One roller is driven so the cone rotates to follow the stars.
- Cut through the cone parallel with the ground and dispose of the top section. The flat platform that’s left will have equatorial tracking properties.
- Anything placed on this platform will automatically follow the stars as it will have an axis pointing at the Pole Star and be rotating at the same rate as the night sky.
Martin Lewis is an experienced astronomer and astrophotographer whose work can be found at www.skyinspector.co.uk.