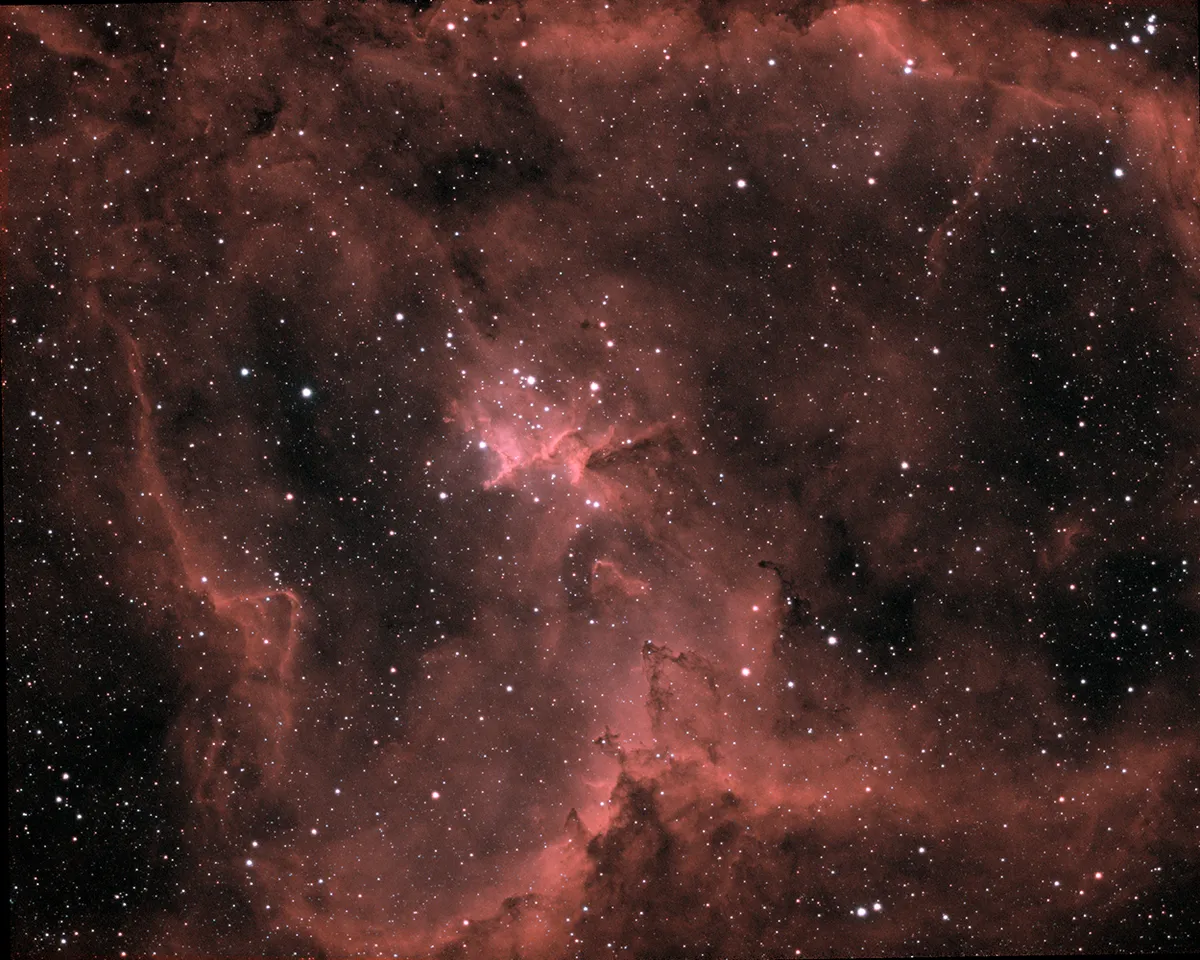
Masks can be found in many image processing and editing software apps. Here we take a look at how they can be used in Adobe Photoshop to improve an image of the Heart Nebula, IC 1805.
Photoshop masks allow us to cover an adjustment we make to an image with a screen and control the areas in our final image where the adjustment shows through.
By using masks, we can be specific with our image enhancements. Two popular masks for astro-processing are Hide All and Reveal Allmasks.
These are found in the Layer menu (Layer > Layer Mask) or accessed via shortcuts, which is covered below.
More image processing guides:
- Bring out the best in your astrophotos
- Processing the Andromeda Galaxy in Photoshop
- How to get rid of unwanted colour fringes on stars
Hide All and Reveal All masks perform opposite functions. After carrying out an adjustment on a new layer, Hide Allmasks create a screen from the previous, unaltered layer, and place it on top of the adjustment.
This means that you can select areas where you want the change to appear by ‘rubbing’ through the screen.
Meanwhile, Reveal Allmasks use the adjusted layer as the screen, placing it on top of a copy of the preceding layer.
This allows you to select the areas you don’t want the change to appear. Out of the two, we use Hide Allmasks more often.

How to apply Photoshop masks
Applying Hide All and Reveal Allmasks in Photoshop consists of several stages.
The first involves creating a new layer on which you perform adjustments (press Ctrl, Shift, Alt, N and Esimultaneously for this).
In this example we are using an image of the Heart Nebula, IC 1805, to demonstrate a Hide Allmask.
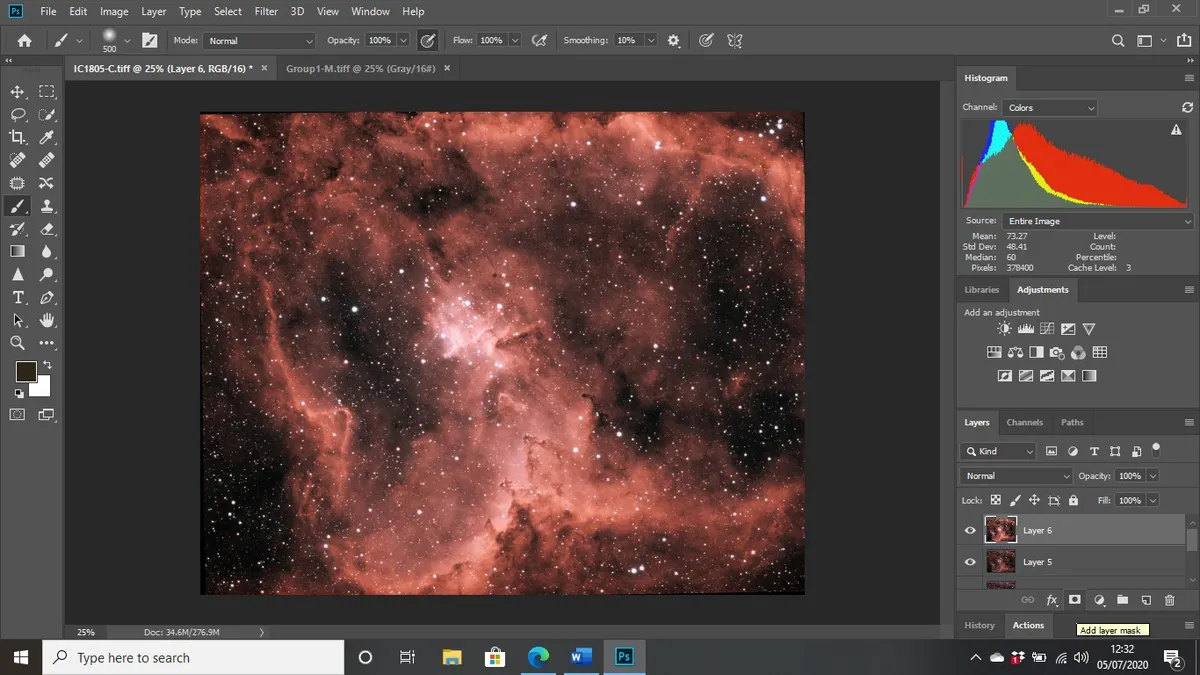
We’ve used the Levels function (Image > Adjustments > Levels) to stretch the image (see above) and we are now ready to get more precise with our adjustments.
The second stage is to perform an amendment via Photoshop’s Adjustments menu (Image > Adjustments) and adding the adjustment into the new layer (right click and select Merge Down).
We want to boost the brightness of our image and increase the contrast of some of the nebulosity.
The image below shows our Heart Nebula image after the Brightness/Contrast function is applied and merged. However, we only wish to make this adjustment to some outer parts of the nebula – not the core, which is now overexposed.

This is when we can apply our mask. In this instance, we will use a Hide All mask because it will allow us to ‘brush in’ the Brightness/Contrastchange to the areas we want.
A shortcut to the Hide All mask is to press Alt while clicking the mask button (indicated in the image above). This is in the toolbar directly under your layers. (To get a Reveal All mask, click on this icon without pressing the Altkey).
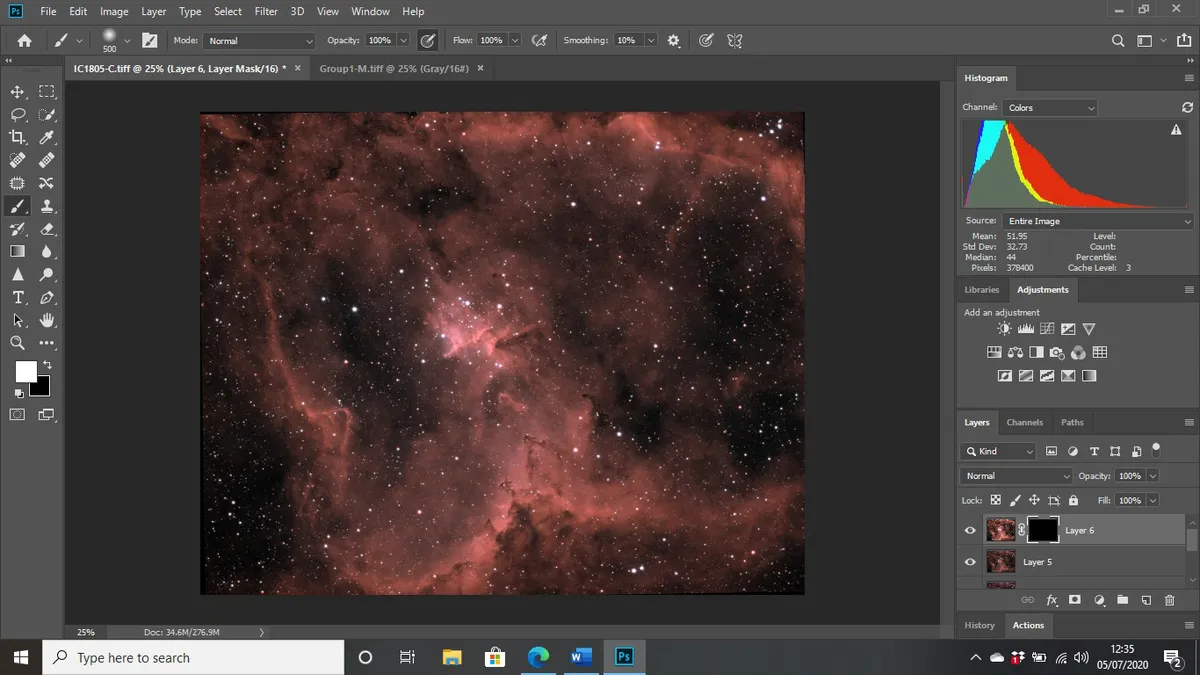
For the Hide Allmask you’ll notice this action makes the main image revert back to its appearance before we made our adjustment. This is because our adjusted image is now sitting beneath the layer.
Next to the layer, a black screen appears (see below). If a Reveal Allmask is used, the screen is white. We then click the brush icon.

We can alter the size of our brush by using the square bracket keys – [ makes our brush size smaller, and ] larger. Ensure for a Hide All mask your brush is white.For Reveal Allmasks the brush needs to be black.
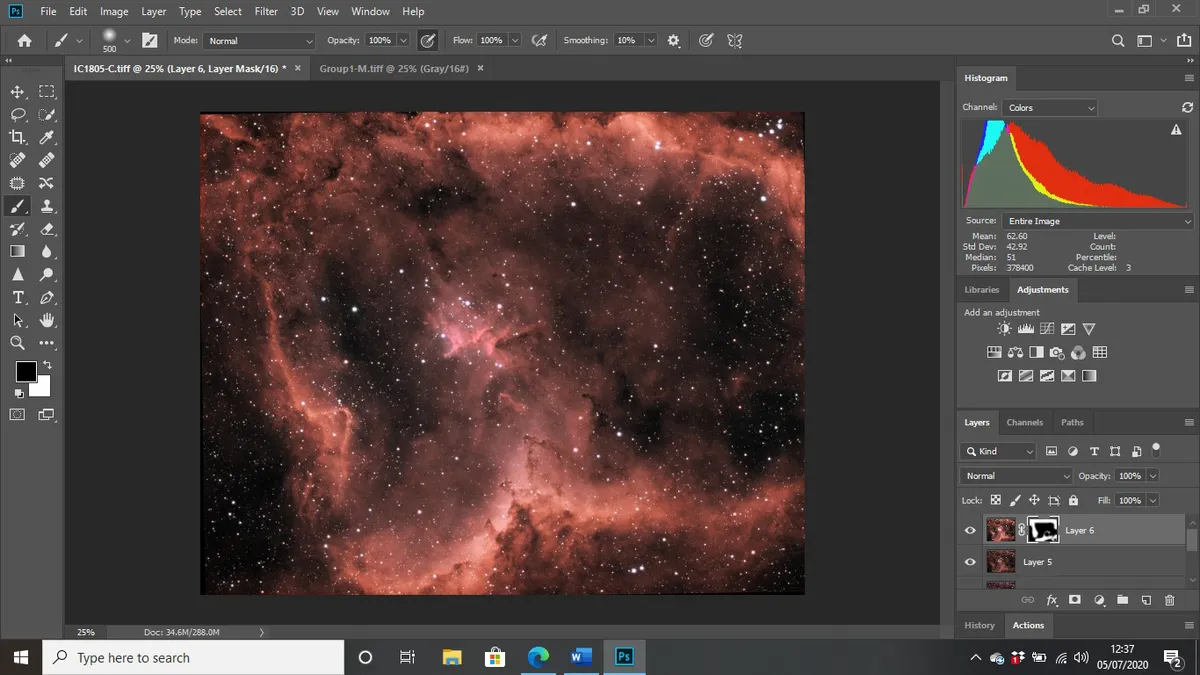
We now brush in the areas we want to see the increased Brightness/Contrastadjustment. As we move over these areas, we can see the change we saved down to the layer below appearing through without affecting the rest of the image (see below).
The black screen next to our layer also shows the areas we are amending.

The last stage is to apply a Gaussian Blur (Filter > Blur > Gaussian Blur), which enables us to blend our brush strokes.
This means our changes are subtly integrated into our image. It is an essential follow-on step after using either mask.
The Radius slider allows us to control our blur, so that changes appear natural. Each time we make a change that we are happy with, we start a new layer that carries these changes forward by pressing Shift, Alt, Ctrl, N and Esimultaneously.
We repeat these steps with other functions in Photoshop’s Adjustments menu. Our final image (see at the very top of this page) shows vibrance, selective colour and Hue/Saturation amendments applied with our Hide Allmask.
3 tips for using Photoshop masks
1
If only making changes to small areas of the image, use the ‘Hide All’ mask and a small brush.
2
Don’t worry about being too accurate with your brush strokes – applying a blur softens their edges.
3
Use the square bracket keys to quickly alter the size of the brush used with your masks.
Charlotte Daniels is an amateur astronomer, astrophotographer and journalist. This guide originally appeared in the September 2020 issue of BBC Sky at Night Magazine.


