It is possible to make your own homemade telescope with a few basic materials.
And once the DIY project is completed, you'll have your very own telescope with which to observe the stars and planets.
The good thing about building a small refractor telescope is that they're light and portable, making them idea for taking to dark-sky sites.
What’s more, their optics need little or no adjustment so they are ideal scopes if you’re a beginner.
Our telescope design also makes a good science project for kids and young astronomers to complete at school or at home.
Get help with this build by downloading our Make your own telescope guide (PDF)
How does a telescope work?
Building your own telescope from simple components will help you understand how telescopes work.
You’ll get a great sense of achievement when you glimpse Jupiter’s Galilean moons for the first time.
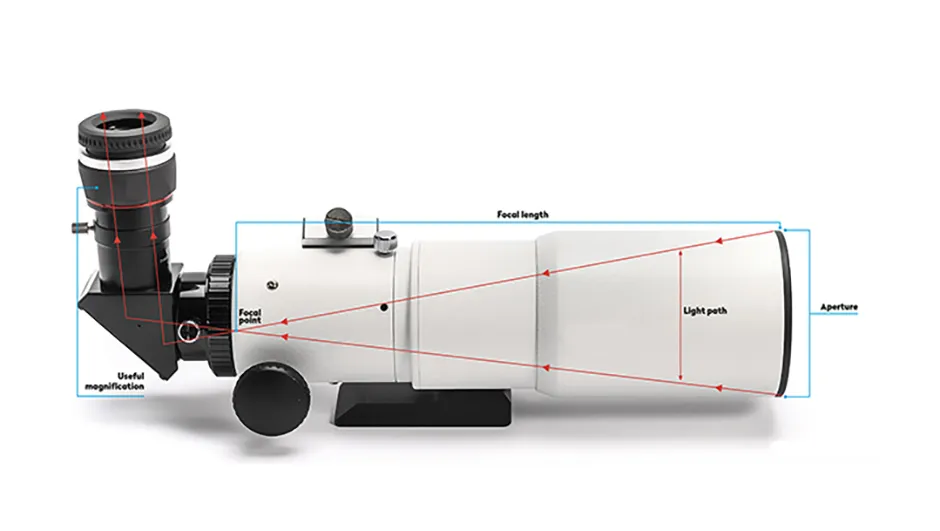
The heart of any refractor is its convex glass objective lens, which is mounted close to the front of the hollow telescope tube.
Rays of light from distant objects like the Moon pass through this and are bent or ‘refracted’ (hence the name) towards a point just inside the far end of the tube.
This point is the objective lens’s ‘principal focus’ and the distance from here to the centre of the lens is called the ‘focal length’.
Selecting the eyepiece

At the far end of the tube from the objective lens is the eyepiece, arranged so that its principal focus coincides with that of the objective lens.
If you don’t have one, a 1.25-inch Plössl eyepiece will cost you around £25.
The eyepiece refracts rays of light into your eye.
A telescope’s focuser allows small adjustments to be made to the distance between the eyepiece and objective lens to accommodate different sizes of eyepiece and the standard of your eyesight.

The eyepiece usually has a much shorter focal length, which means that the final image is magnified.
To calculate the magnification, divide the objective’s focal length by the eyepiece’s: an objective with a focal length of 400mm and an eyepiece of 10mm magnify 40x.
The aperture of the objective is larger than that of your naked eye, which means it can capture more light.
Selecting your telescope's lens
The telescope’s ability to magnify faint objects changed the face of modern astronomy and, even today, a small 70mm refractor is still a useful tool.
The first telescopes consisted of a single convex objective lens with a concave eyepiece lens at the other end.
Unfortunately, not all wavelengths of light are refracted by the same amounts, so single lenses cause the coloured components of the white-light spectrum to focus at different points.
The image of a bright star, for example, may appear blurred and suffer from a distracting coloured halo around it.
To overcome this, modern telescopes have ‘doublet’ lenses that use two different glass elements to bring most of the colours to focus at the same point.
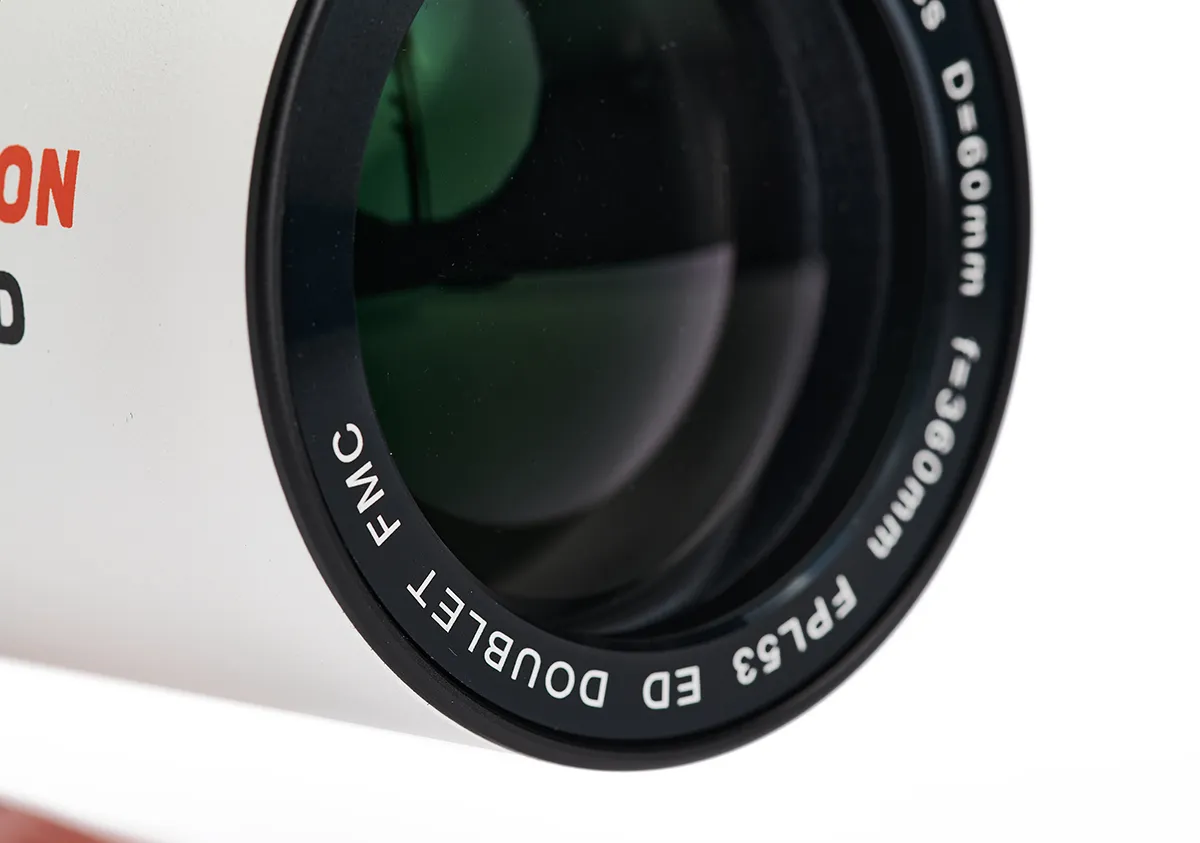
These lenses, which can be cemented together or separated by a small gap, are called ‘achromatic’ objectives.
This is the kind of lens we will be building for our refractor.
Very expensive objectives, which often employ three specialist glass elements (triplets), focus all the visual wavelengths at one point and are called ‘apochromatic’, but they’re more expensive.
Unlike mirror making, grinding and polishing an achromatic doublet lens is not something most amateurs would consider.
Thankfully, lenses are relatively easy to come by and can be surprisingly cheap at around £20 for a 60mm lens.
There are a number of surplus companies offering mounted telescope objectives – see Surplus Shed, for example.

You may even have a pair of broken binoculars with one salvageable objective lens.
The other parts of the scope are made from plastic pipe that can be bought from a builder’s merchant for around £20, or donated by a friendly plumber.
The first stage of the build requires you to measure the focal length of your lens.
The easiest method is to make a simple wooden stand for the lens and another with a sheet of white card fixed vertically to it.
Align these on a flat surface so the view through the lens is projected onto the card.
Then aim the lens at a distant object – the view through a window works well – and move the lens back and forth until a focused, upside down image of the outside world appears.
Measuring the distance between the glass of the lens and the card gives you an approximate value for its focal length, which will help you design the rest of the telescope.
At this stage it’s a good idea to make a temporary stand for your eyepiece and replace the card with it to confirm that the optical arrangement works effectively.
Use the measurement with the plan on the PDF in the link at the top of the article to calculate the required tube lengths and get sawing!
Aim for the heavens

You can hold the finished telescope for terrestrial use (slide the focuser in and out to achieve good focus), but for astronomical observations, a tripod is desirable.
You may eventually want to get a small altaz or equatorial telescope mount for your telescope.
With the latter, you’ll be able to guideit precisely by small movementsof the slow motion controls.
Tools & materials
- Eyepiece: A medium focal length (say 20mm) 1.25-inch Plössl type telescope eyepiece is a good choice.
- Tripod: With a little ingenuity you can mount your telescope on a standard camera tripod.
- Focuser: For the sliding focuser you need an offcut of 43mm diameter plastic waste pipe about 160mm long. You also need a small piece of flat timber (plywood, MDF or softwood) for the end of the main tube.
- Telescope tube: Use tube with a diameter larger than your objective lens. It needs to be at least as long as the objective’s focal length.
- Dew shield: You also need about 125mm of tube similar to your telescope tube for the dew shield. We used some 110mm plastic drainpipe.
- Objective lens: A 60-80mm objective lens won’t cost you much to buy from a surplus store. You could use an old projector, camera, photocopier, damaged binoculars or even a broken telescope.
- Handsaw or hacksaw: To cut the tube
- Coping saw: For the round wooden end


