The Moon passes through Earth’s penumbral shadow on 10 January, producing a penumbral lunar eclipse.The event starts at 17:08 UT and ends at 21:12 UT, the point of greatest eclipse occurring at 19:10 UT.
Any shadow cast by an object from an extended light source has two components; a dark, inner, umbral shadow and a lighter, outer, penumbral shadow.
With an apparent diameter around half a degree, the Sun is an extended light source and Earth’s shadow on the Moon has two parts to it; a dark umbra and weaker penumbra.
Umbral lunar eclipses are visually impressive. Rather than being completely dark, Earth’s umbra is infilled with light refracted by our planet’s atmosphere.
This light’s blue component is scattered away leaving the umbra a dark orange-red-brown colour.If you were lucky enough to see the total lunar eclipse on 21 January last year, you will have seen this beautiful colour.
If Earth had no atmosphere, Earth’s umbral shadow would be completely dark.The penumbral shadow is completely different and it’s important to realise that it doesn’t produce the visual spectacle you get with a partial or total umbral eclipse of the Moon.
If you missed this one, find out when the next eclipse is happening.

The darkness of the penumbra becomes deeper the closer you get to the edge of the umbra. At the extreme outer edge, from the vantage point of the Moon only a tiny part of the Sun’s disc would appear clipped by Earth.
However, as you move closer toward the umbra, looking back from the Moon you’d see increasing amounts of the Sun’s disc blocked from view. The penumbral shadow therefore creates a weak gradient across the Moon’s disc.
- The Moon enters Earth’s penumbra at 17:08 UT on Friday 10 January. This is unlikely to be noticed. It’s only when the Moon passes closest to the umbral shadow (but not inside it) that one edge begins to appear slightly darker than normal.
- The maximum eclipse occurs at 19:10 UT and it’s the Moon’s southern limb that will be closest to the umbra. As a result, the bright lunar highlands, sometimes referred to as the ‘lunar badlands’ because it’s a region so heavily pock-marked with craters, will appear slightly darker than normal.
- The Moon leaves the penumbral shadow at 21:12 UT marking the end of this penumbral eclipse.
You can see the effects of a penumbral eclipse visually, but they creep up on you so slowly and the shading is so slight, that it’s easily missed.
Perhaps a more reliable way to record such an event is by using a camera.
Comparing two correctly exposed images of the Moon’s disc before and after the eclipse will reveal the penumbra beautifully.
How to photograph the penumbral lunar eclipse

The best way to secure a positive observation of the 10 January eclipse is to use a camera and capture the subtle darkening of the Moon’s surface by combining views from different times.
It’ll be the southern portion of the Moon’s disc that moves deepest into the penumbra and it’s here that the shadow will appear darkest.
The effect we need to reveal is how much this portion of the Moon’s disc appears to darken due to it being inside the penumbral shadow.
The easiest way to do this is to take one image before or after the eclipse and one at the point of greatest immersion.
As the Moon will appear higher in the sky towards the end of the eclipse, this is the best time to capture the ‘control’ (uneclipsed) image, a result that will reveal how the full Moon looks normally with no effects from any part of Earth’s shadow.
Taking the shots correctly exposed is made harder by the Moon’s change in altitude, together with any variation in the transparency in the sky.
It’s possible to apply a degree of calibration to the shot by getting the northern portion of the Moon’s disc – the part which is least affected by the penumbral shadow – to look the same in both the eclipsed and control image.
Once you’ve managed this, the darkening of the cratered southern region will be evident when eclipsed.
As the Moon is a bright astronomical object, it’s well suited for DSLR imaging. A low ISO is recommended to maintain a good tonal balance and to keep noise at bay.
Even with such a setting, it should be possible to maintain a short exposure time, which means you don’t absolutely need equatorial tracking.
A lens on a tripod will work just as well here. However, equatorial tracking will make it easier to keep the Moon in frame.
This task is suitable for all camera-lens combinations as long as the lens is capable of showing the Moon as a disc with recognisable features.
A DSLR attached to a scope with around 1m of focal length is ideal, but a setup that has the Moon’s disc almost filling the short dimension of the camera frame will require tracking.The rest is down to presentation.
We recommend a DSLR camera and a 200mm or longer focal length lens or telescope.
1
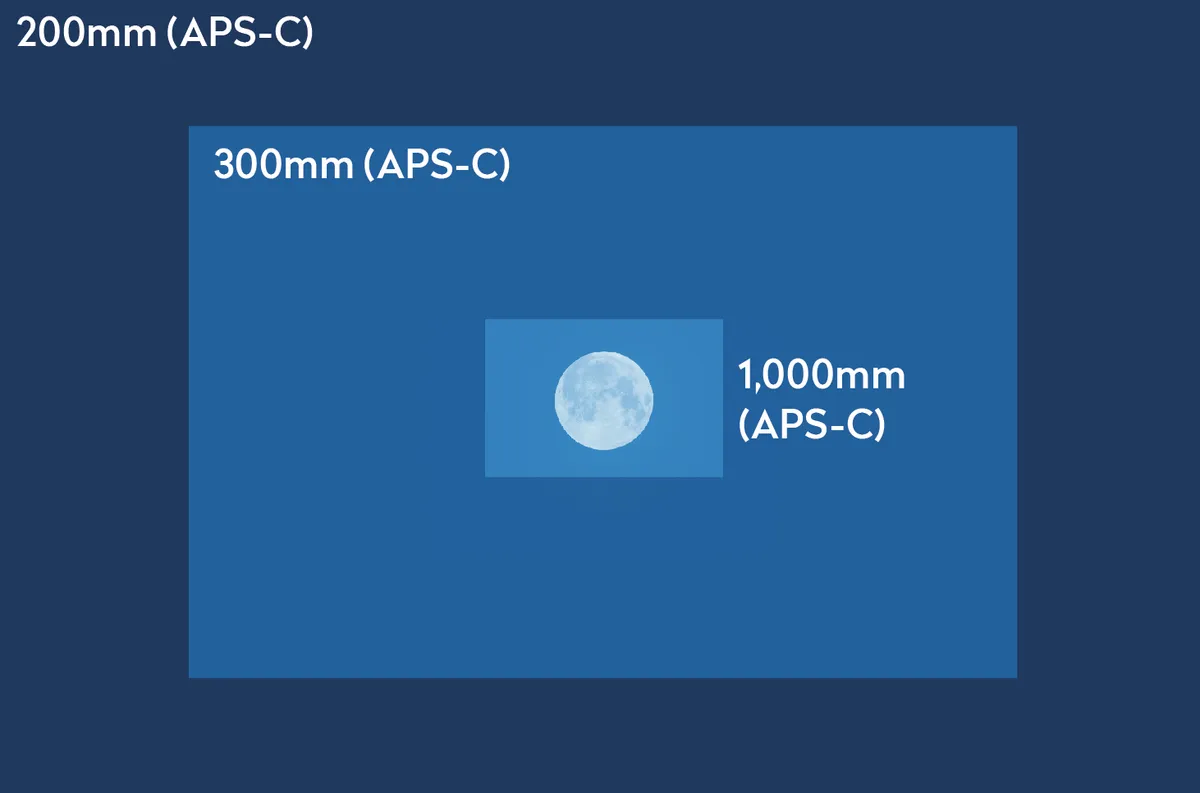
Choose which lens or scope you intend to use. A longer focal length gives a larger image scale. We’d recommend a minimum 200mm lens to show the Moon’s disc together with the region most affected by the eclipse shadow. A 1m focal length will give close-up detail, but anything longer will need tracking to keep the Moon in frame.
2
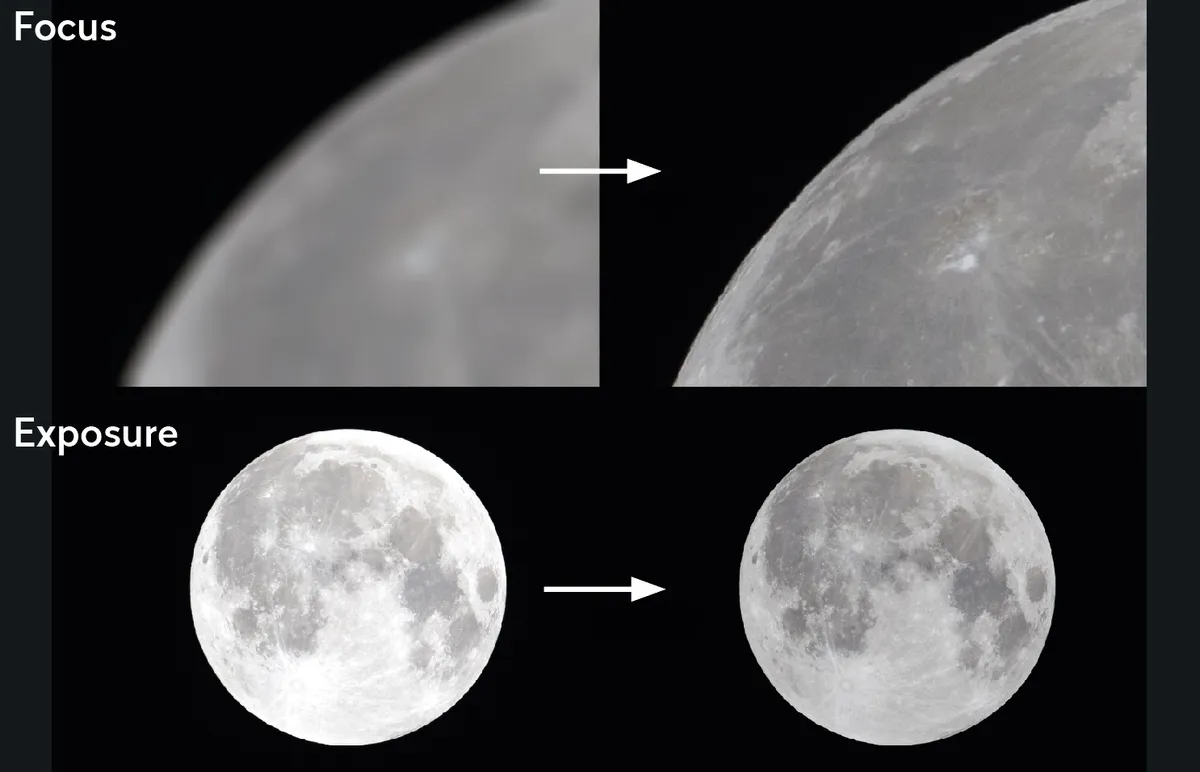
Focus is critical for the best results so take your time. If your camera has Live View use that, magnifying the Moon’s edge. Set a lowish ISO, 100–200. If using a lens, stop the aperture down to f/8–11. Adjust exposure time accordingly. Ensure that your images don’t have regions that over-expose. If so, shorten the exposure time.
3
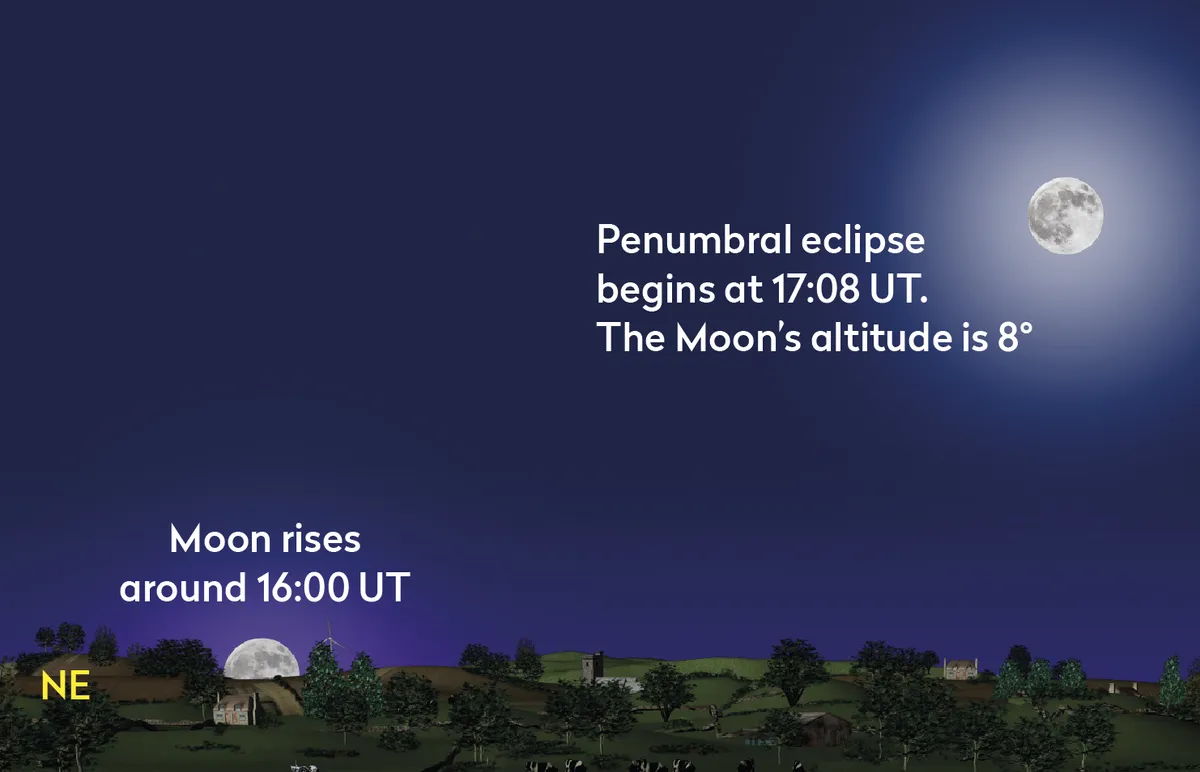
Moonrise on 10 January is around 16:00 UT as seen from the centre of the UK, varying slightly with location. Try to obtain an image of the full Moon as close to the start of the eclipse as possible (17:08 UT). The Moon’s altitude will be 8˚ at this time. This is a safety control shot in case it clouds over later.
4
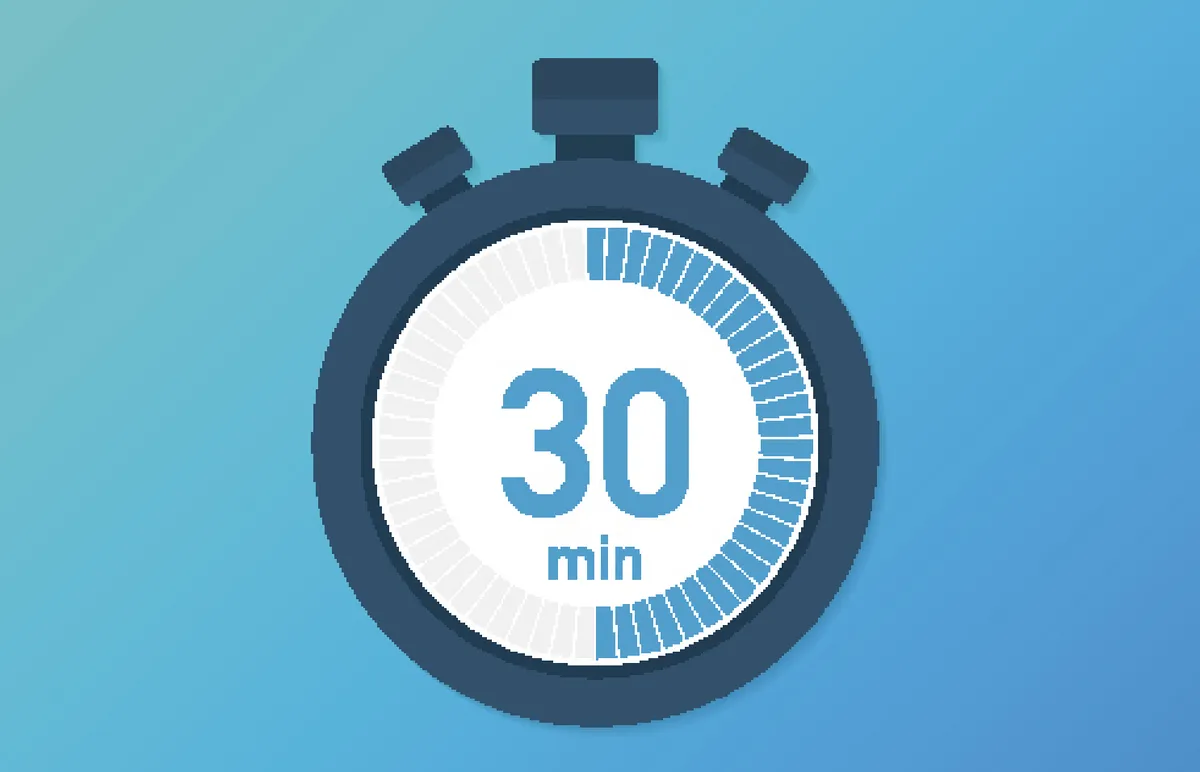
It pays to decide early on your imaging cadence, or how frequently you intend to take images during the penumbral eclipse. Unlike an umbral lunar eclipse, a penumbral eclipse doesn’t show dramatic changes during the event. As a consequence, a shot every 15 or even 30 minutes should be sufficient to show the nature of the event.
5
If the weather is clear after the end of the eclipse (21:12 UT) this is the time to take the second control image of the uneclipsed Moon. If this image is successful, the earlier image can be discarded. The second image will have the advantage of appearing clearer due to higher altitude. If the weather is bad, use the first image.
6
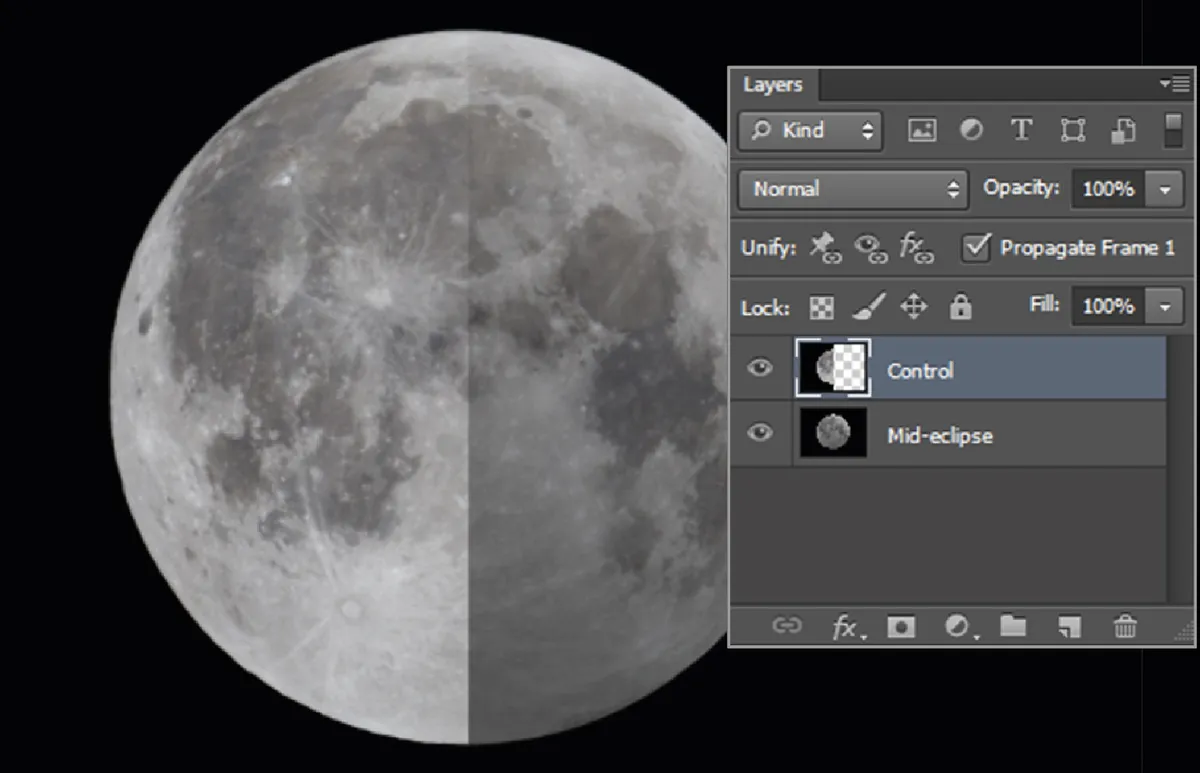
To show the penumbra shadow darkening, layer and align an eclipsed image over a control image. For the 10 January event, select half the upper Moon image and delete. In our main image (at the top of this step-by-step guide), the penumbra’s orientation was darkest towards the northwest of the disc. On the 10th it’ll be darkest at the south.
This article originally appeared in the January 2020 issue of BBC Sky at Night Magazine. Pete Lawrence is an experienced astrophotographer and a co-presenter of The Sky at Night.

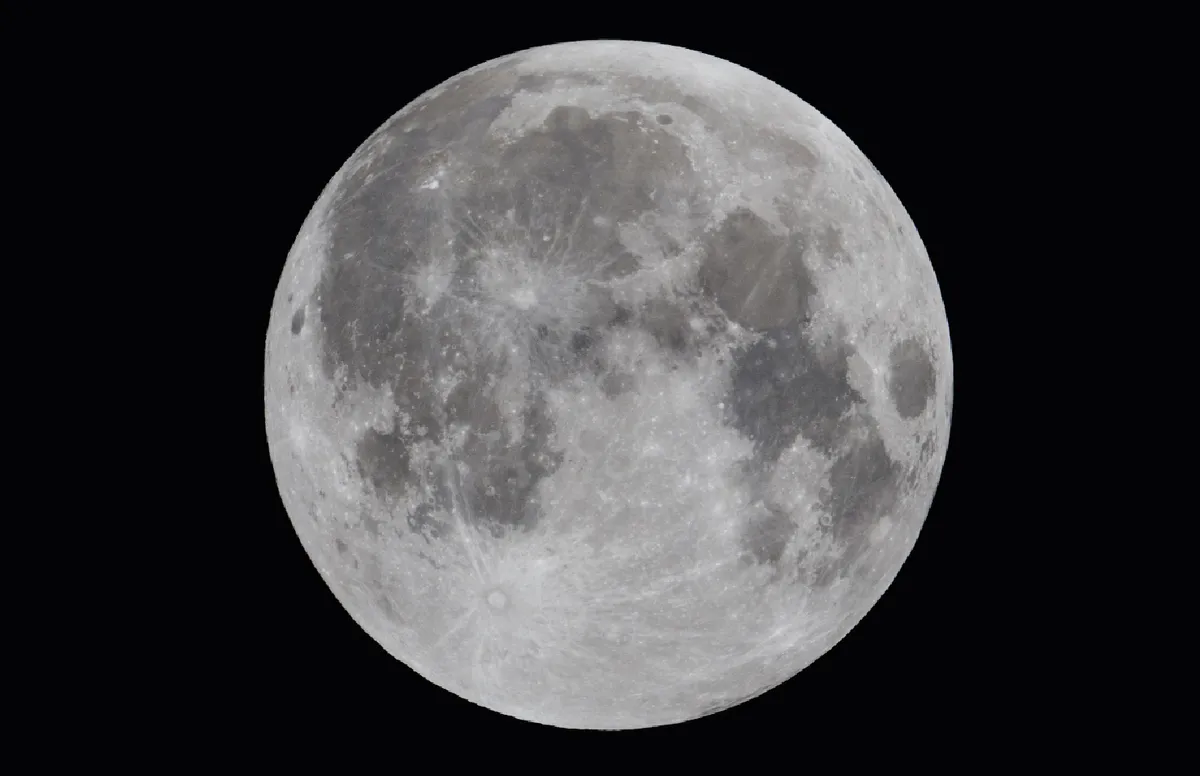
 versus a regular full Moon (left); the shading is subtle. Credit: Pete Lawrence")
