The steadiness of the atmosphere is one of the biggest factors influencing success in planetary imaging. If you image when the seeing is good, your data will be less affected by the smearing and blurring effects of air at different densities chaotically moving above. Subsequently, your plantery astro images will be richer in detail.
A rewarding time to image is around sunset, and just afterwards when the sky is in bright twilight.
The wind dies down, the clouds dissipate, and a calmness reigns. Later on, the coldness cools the ground and convection currents worsen the seeing.
Read more astrophotography guides by Martin Lewis:
- Use WinJupos to derotate your planetary images
- How to photograph Venus with a digital video camera
- How to remove noise from planetary images
Twilight astro imaging can have benefits, but can also create hurdles. Finding the planet in a bright sky can be one issue, especially if you can’t align to use your Go-To system.
Even if you find the planet, the wash of bright bluish light that partly drowns out the object can reduce the contrast between the planet and the background, making it hard to focus.
The extra light will also increase the disc’s brightness, requiring you to reduce the exposure.

At sunset the light from the planet itself would have been reduced by a factor of 2.5x, leading to 1.6x the level of noise, or unwanted artefacts, in the final processed image.
Using an infrared filter and a monochrome camera can help, by dimming the background more than
the planet, allowing longer exposures without overexposing.
If you stick with colour imaging, you’ll need to gather more frames than normal to bring the image noise back down.
Be careful not to set up too early, as later on, when the skies are still steady but have darkened a bit more, things will be easier.
Colour imaging in twilight will also produce a bluish wash over your processed image, upsetting the colour balance of the planet.
It may be tempting to try and correct this using Red, Green and Blue sliders in RegiStax or Photoshop to give a more neutral balance, but this is difficult and can give odd results.

A better solution is to remove the bluish wash from the whole of the frame. This will improve image contrast and reset the colour balance back to that which would be achieved in a dark sky.
This is quite easy in an image-processing program such as Photoshop or PaintShop Pro and it provides the image-to-image consistency that is needed if you are going to combine separate images in WinJUPOS to improve signal-to-noise ratio.
To apply the correction method, you should first process your videos as normal using a stacking program such as AutoStakkert! or RegiStax and then bring out the details using the wavelets tab in RegiStax.
Avoid any histogram or gamma adjustments to the image. Once done, open the output image in your favourite image-processing program; here we are using PaintShop Pro.
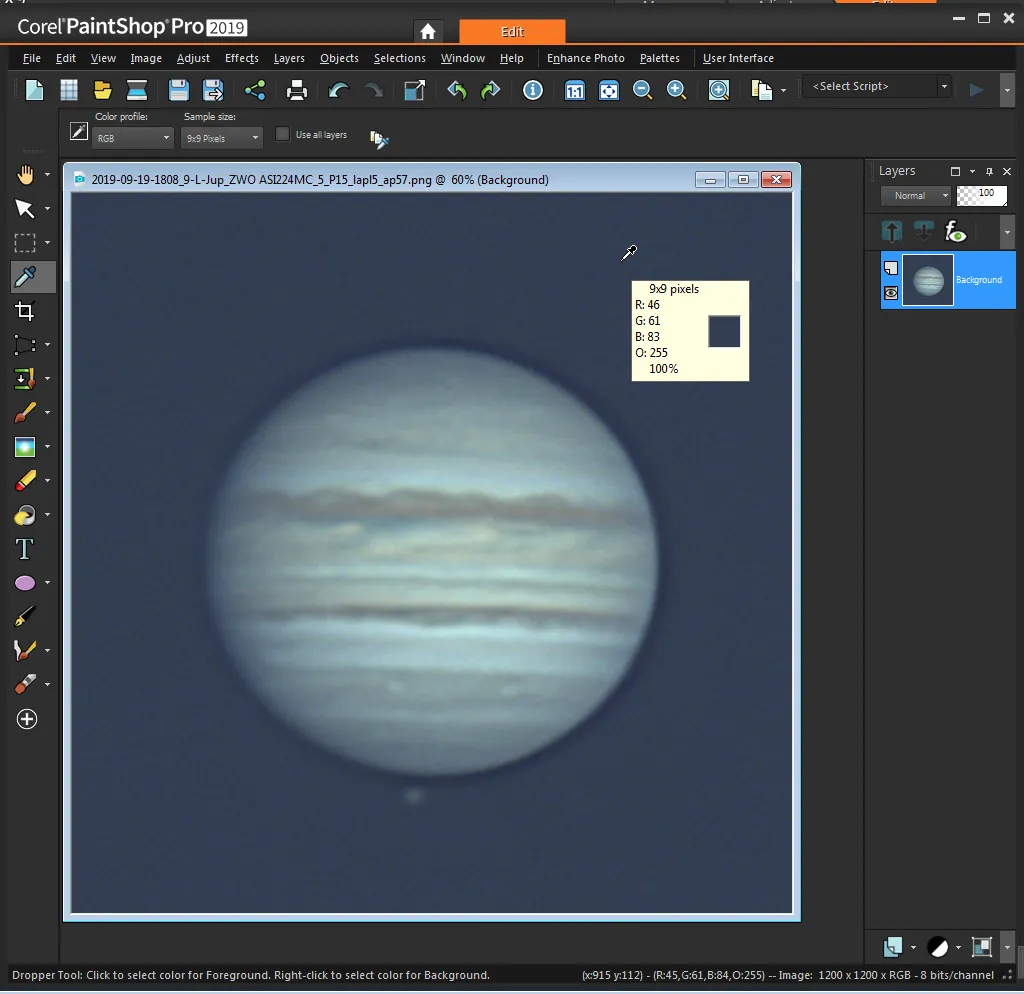
Select the Eyedropper tool and set it to a largish selection area like 9x9 pixels. Use the dropper to sample the exact colour of the bluish background sky – clicking it on an area a bit away from the planet (see Stage 1, above).
Doing this sets the program’s default colour to match the sky background in hue and brightness.
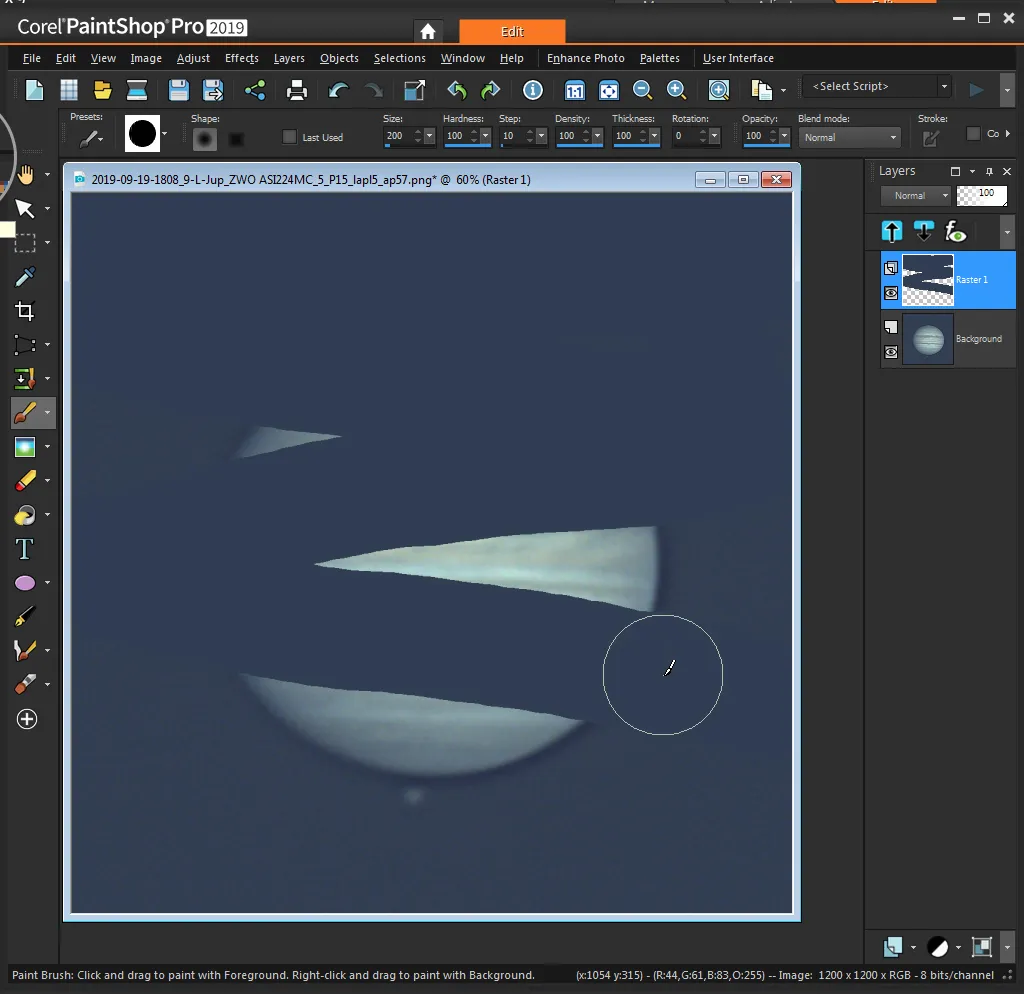
Next, go to Menu > Layer > New Raster Layer, to create a new layer on top of your twilight-affected planet image.
This newly created top layer should now be filled with the colour that’s just been selected. Select the layer and fill it all in with the selected foreground colour using the Paintbrush tool, or with the Flood Fill tool (see Stage 2, above).

After this you will have your twilight-affected planet as the bottom layer hidden by the new top layer which you have filled with the same colour as the bright twilight sky.
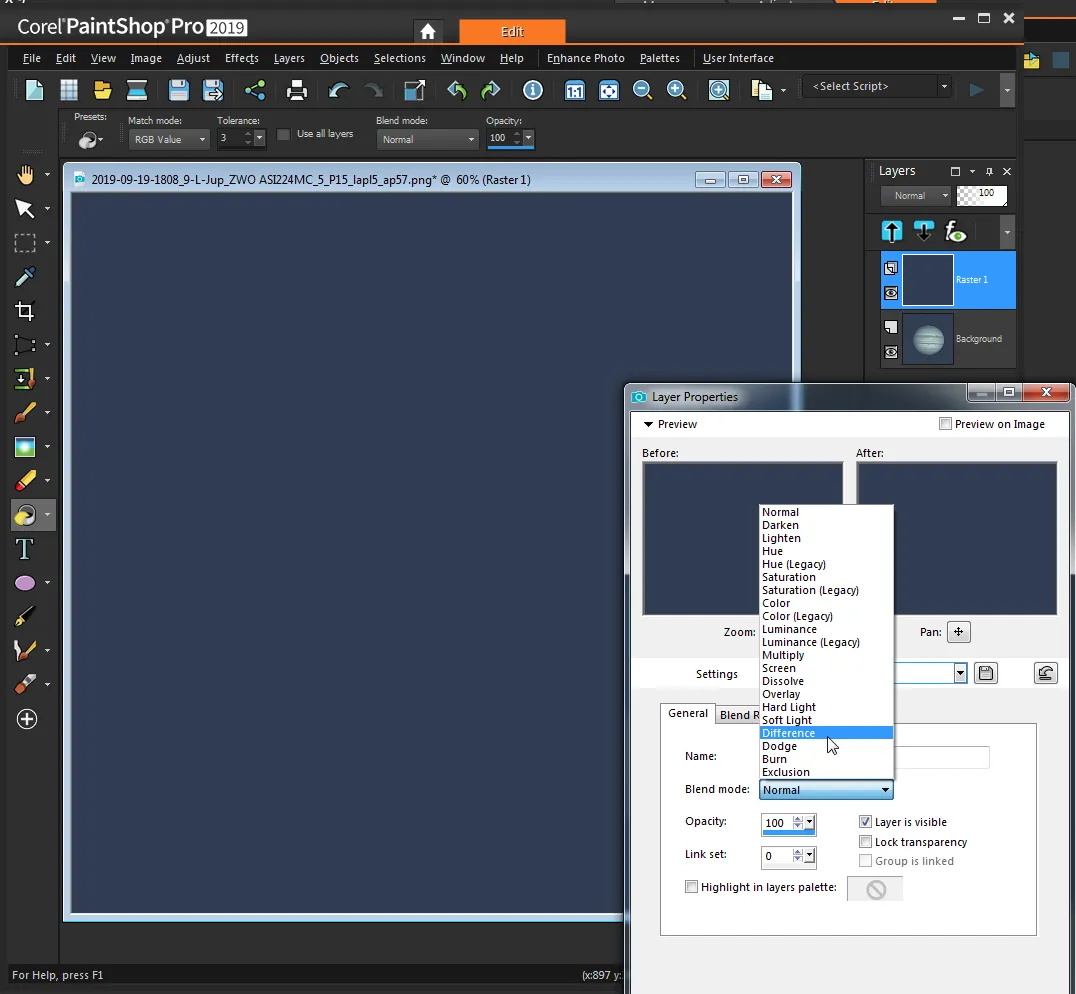
Now for the magic: in the Layer palette double-click on this colour-filled top layer and change the Blend Mode for that layer to Difference and click OK (see Stage 3, above).
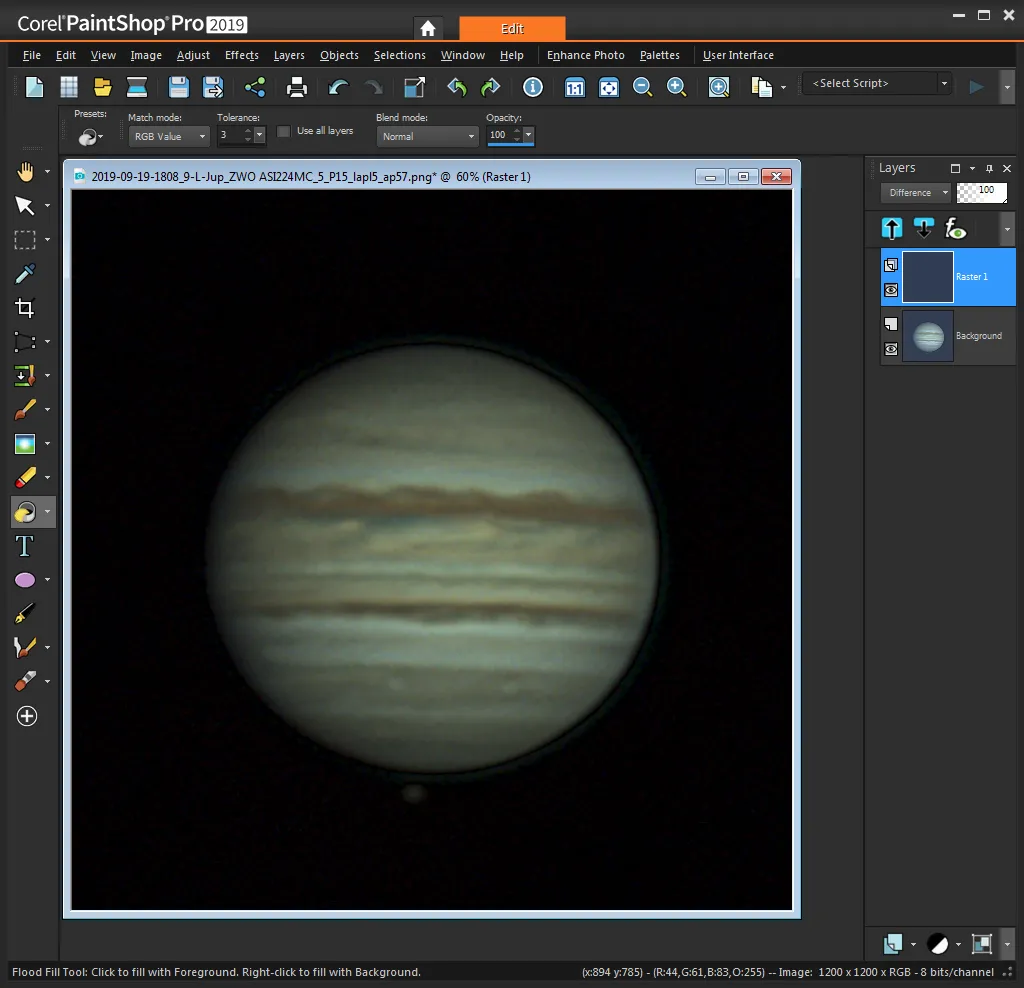
Suddenly the twilight wash is subtracted from the planet layer and you’re left with an image without the contrast-robbing, colour-changing effects of the bright twilight sky.

The image may be dim, but the colour will be reset to what you would get with a dark sky and the background should now be properly black (see Stage 4, above).
Finally, merge the two layers: Menu > Layers > Merge all. You can now finish your processing as normal to achieve the final image (see at the top of this article).
Martin Lewis is an experienced planetary imager. This article originally appeared in the December 2019 issue of BBC Sky at Night Magazine.


