Compile a library of star photos and see their true colours

Compile your star photos by spectral type to create a spectacular display.

Published: October 7, 2023 at 7:40 am

How many times have you seen a star described as ‘red’ appearing slightly orange, or called ‘blue’ but looking white?

We all know that some stars are red and some stars are blue, but often this doesn't immediately seem the case.

By building a library of star photos through your astrophotography you’ll be able to see their subtle colour variations.

A large library will create a very impressive display and will spectacularly show just how different star colours can be.

Photographing stars isn’t hard, but capturing their colour is a bit more challenging.

Starry skies over Ellerburn, North York Moors. Credit: Tony Marsh

A star is a point source of light, which normally photographs as an over-exposed white dot.

In addition, Earth’s atmosphere wobbles the star’s light due to micro-refraction, causing it to ‘paint’ over a larger area.

The worse the seeing, the larger the star’s dot becomes in your photos.

The colour is there, but forced to a region that isn’t over-exposed.

Star Sirius is the brightest star in the night sky. Credit: iStock / Getty Images Plus
Credit: iStock / Getty Images Plus

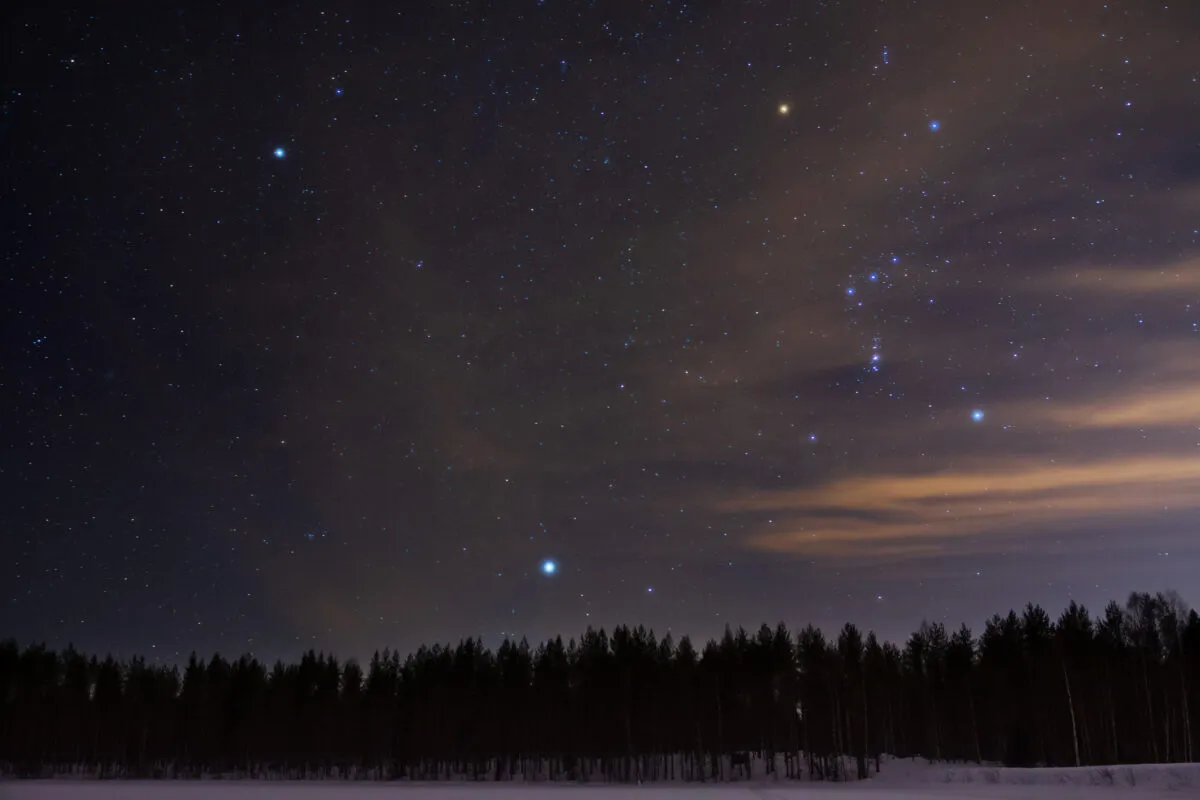
This is on the very edge of the star’s image.

Examine a star image up close and you’ll see the colour preserved in a narrow, few-pixels-thick ring around the bright inner ‘white’ over-exposed core. 

There are various tricks to make this colour more obvious.

How to bring out colour in your star photos

Star trails over Zselic Starry Sky Park in Hungary, captured by Zoltán Kolláth. Credit: Zoltán Kolláth

Theere are numerous ways to bring out star colours in your astrophotography.

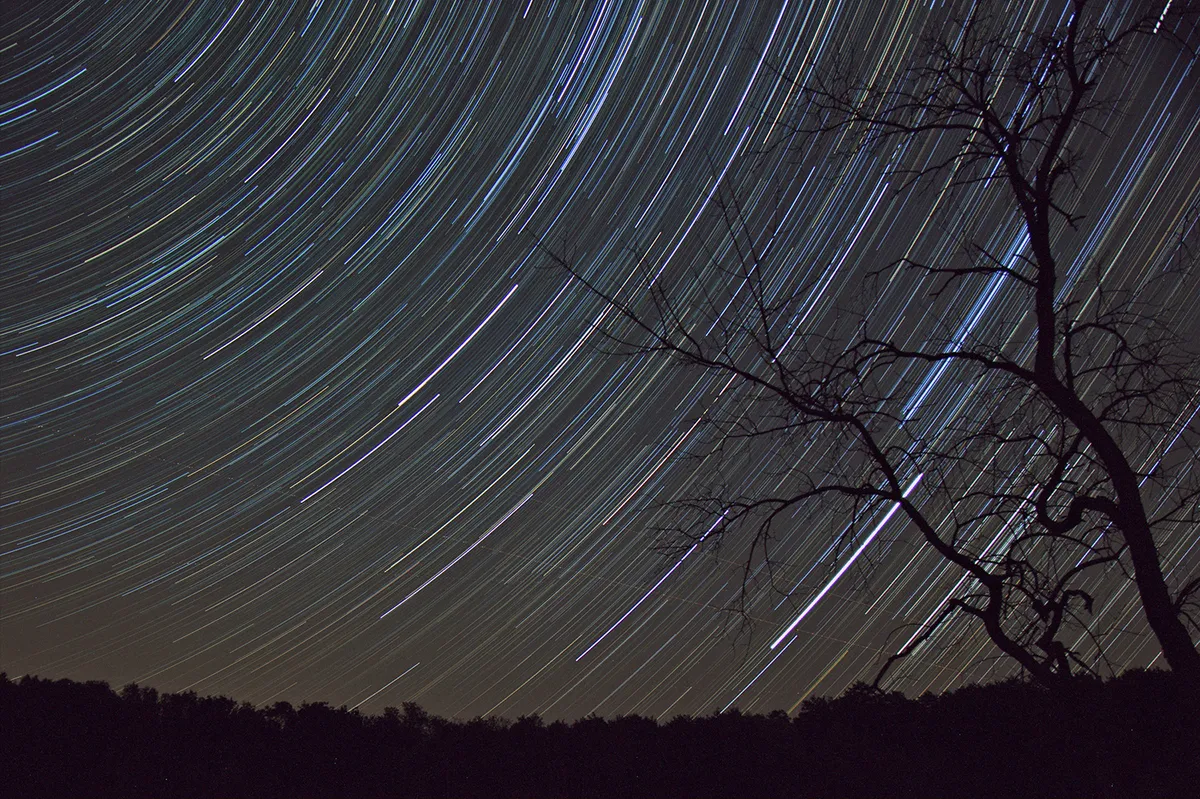
Star trails bring out colour beautifully as, with the correct settings, stars don’t over-expose and their colour is simply smeared into a line.

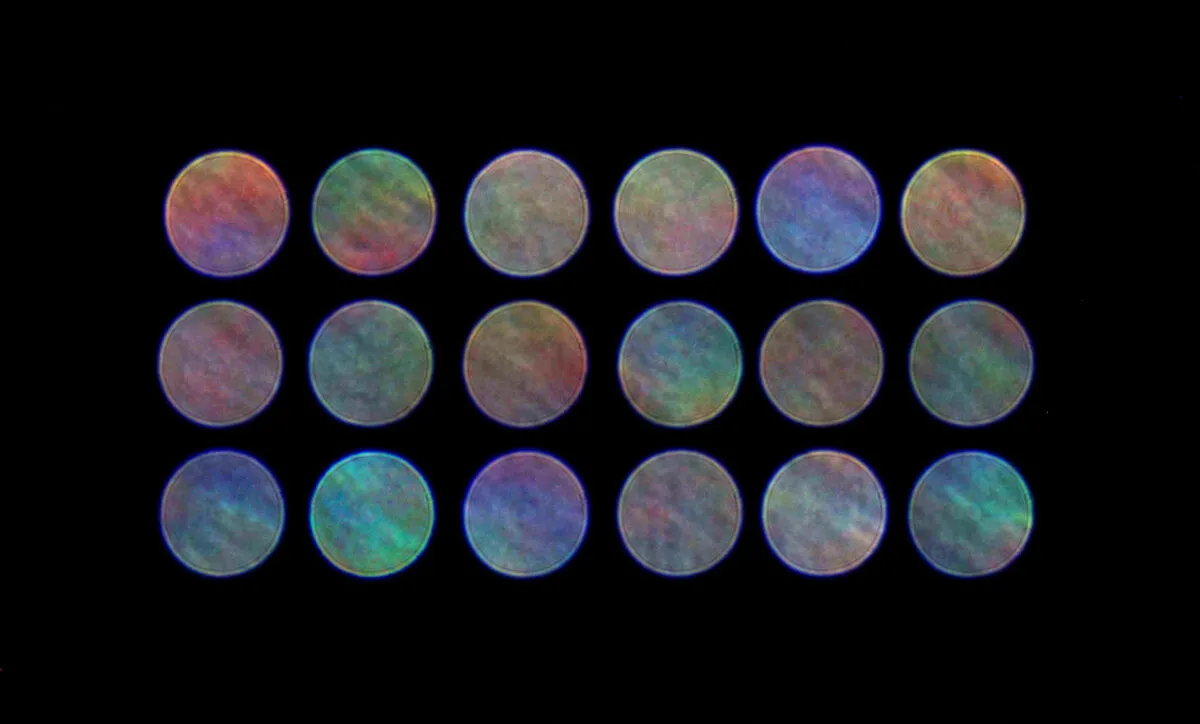
Another involves de-focusing the image, causing the star’s light to expand into a blurry disc that contains a spread of the star’s colour.

Another is shooting in haze or fog, when starlight scatters into a disc which can be photographed for a record of the star’s colour. 

You can re-introduce colour in image processing too.

Double Star Albireo. Credit: BBC Sky at Night Magazine

Select the outer colour rings of stars, isolate this and blur it into an artificially larger area which can then be carefully re-introduced into some of the over-exposed star disc as a colour wash.

It does take a bit of skill to make this look natural.

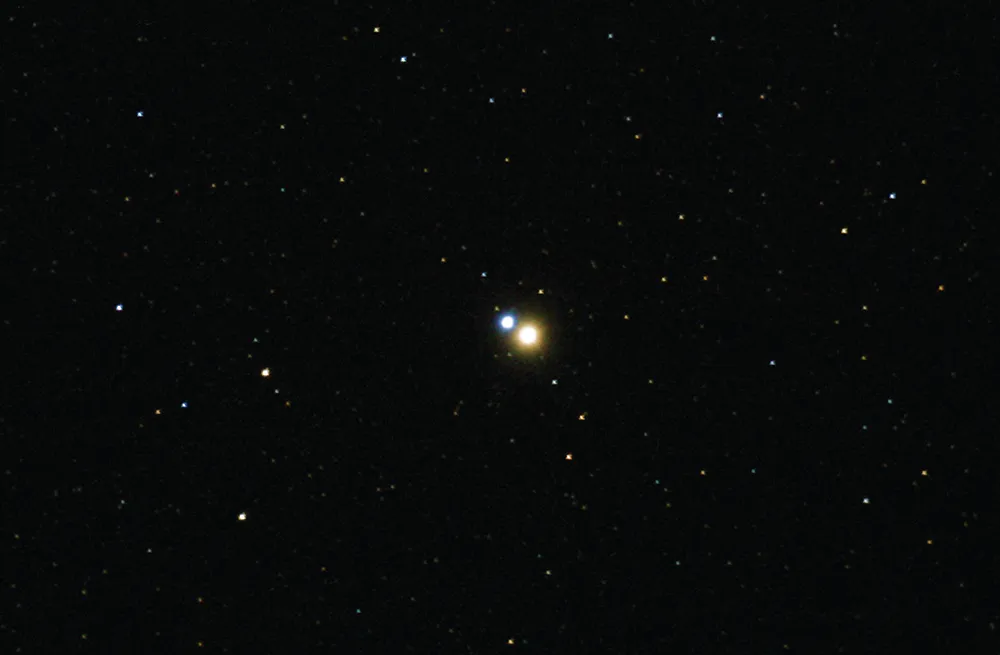
However you do it, capturing a star’s colour lends itself nicely to comparison purposes.

There is literally a whole spectrum of colours to choose from, with the exception of green (stars that peak at green wavelengths are swamped by the adjacent spectral colours and don’t look green as a result). 

Sirius, defocused Brendan Scoular, Redhill, Nottingham, 22 February 2021. Equipment: Canon 700D DSLR, Ascension 127ED triplet refractor

Morgan–Keenan (MK) star classification system

There are several stellar colour classification methods, the modern one being the Morgan–Keenan (MK) system.

This ranks stars from blue to red, the main categories identified by the letters O, B, A, F, G, K and M.

These are broken down into 10 sub-divisions represented by a number suffix: for example O4, B0, B1, A3 or K5. Our Sun’s colour classification is G2.

The categories and sub-categories are ordered by hottest O0 through to coolest M9, determined by using one of the many digital sky apps. 

Armed with this information, see how many star colour variants you can identify, capture and present.

A large number of examples displayed side by side will finally show once and for all why that orange-looking star is described as red!

Good luck with gathering your collection.

Equipment

  • DSLR or equivalent
  • Telephoto lens or telescope
  • Driven equatorial mount (optional)

Step-by-step

Step 1

Compile a library of star photos and see their true colours step 01

Selecting a target star is relatively easy thanks to apps such as Cartes du Ciel or Stellarium.

Look for ‘spectral type’; it’s the letter plus its following number that you require.

It will take a bit of research to locate examples in every category, the internet being a good place to look for examples if you’re stuck.

Step 2

Compile a library of star photos and see their true colours step 02

Decide how you’re going to capture your star to best reveal its colour, or consider using several methods together.

For the best star trails, set a relatively low ISO, say 400–800, with aperture fully open then closed by several stops.

Try a 5-minute exposure to test and adjust (final settings will depend on your setup).

Step 3

Compile a library of star photos and see their true colours step 03

For the defocused method, we’d suggest using a tracking mount for the best results.

Focus on the target star as accurately as possible, then defocus slightly until the star appears as a disc.

As you do this, the surface brightness of the disc will decrease.

Aim for a low ISO to maintain tonal quality.

Experiment with settings to achieve the best result.

Step 4

Compile a library of star photos and see their true colours step 04

Atmospheric halos are produced naturally and are best seen around brighter stars when conditions are foggy or at least quite misty.

These conditions are difficult to predict, but it’s always worth staying alert.

Maintain focus and take an exposure that reveals the star disc clearly.

A tracking mount is recommended.

Step 5

Compile a library of star photos and see their true colours step 05

Create a table in which you can place your results.

You can start easy by selecting a star from each spectral class, near the middle if possible.

As time goes on, you can always swap these out for better examples if you find any.

You may encounter delays if a specific star is only visible at a certain time of year.

Step 6

Compile a library of star photos and see their true colours step 06

You can take your time over filling the table, swapping in better candidates if they arise.

If you complete the basic class table, you could expand the project by adding additional sub-categories for each main class.

You could, for example, choose a 0, 5 and 9 candidate or, if you’re feeling brave, subdivide into all 10.

Have you managed to create a star colour library? Let us know by emailing contactus@skyatnightmagazine.com.
This website is owned and published by Our Media Ltd. www.ourmedia.co.uk
© Our Media 2024