
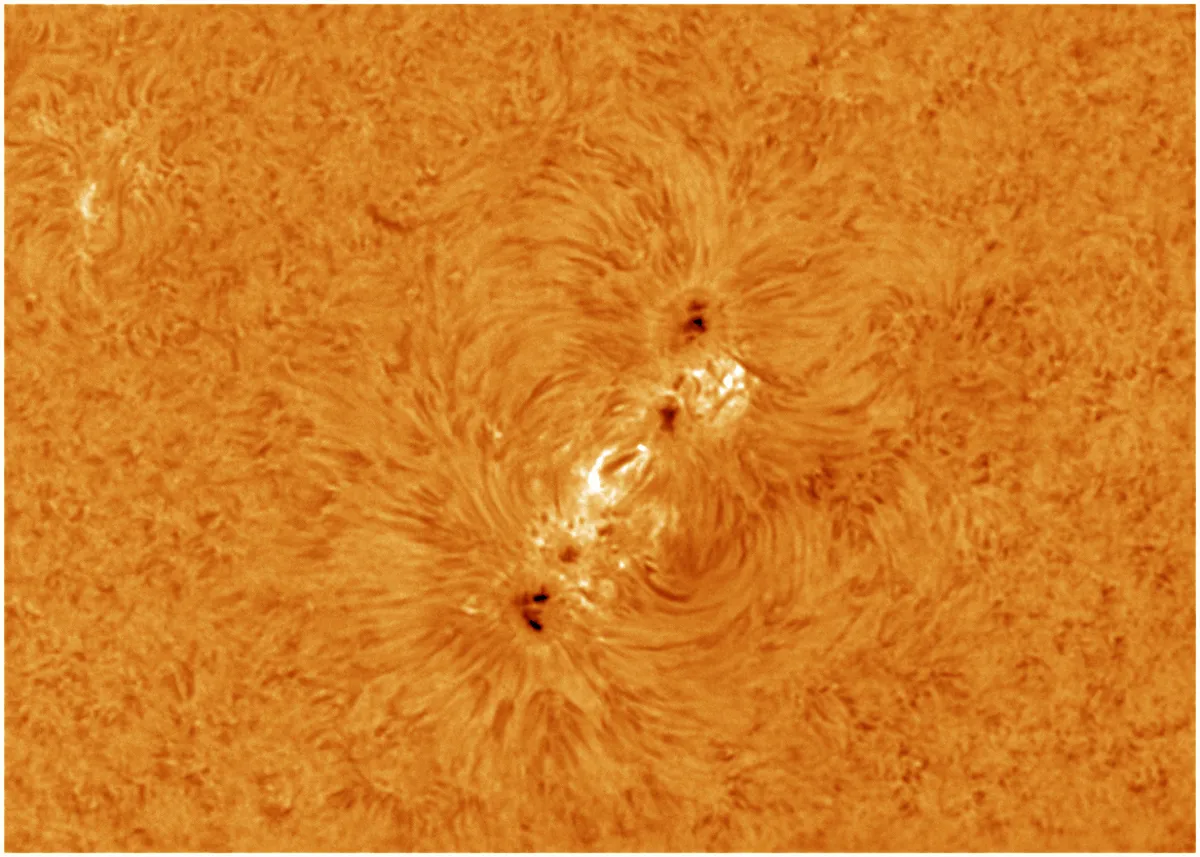
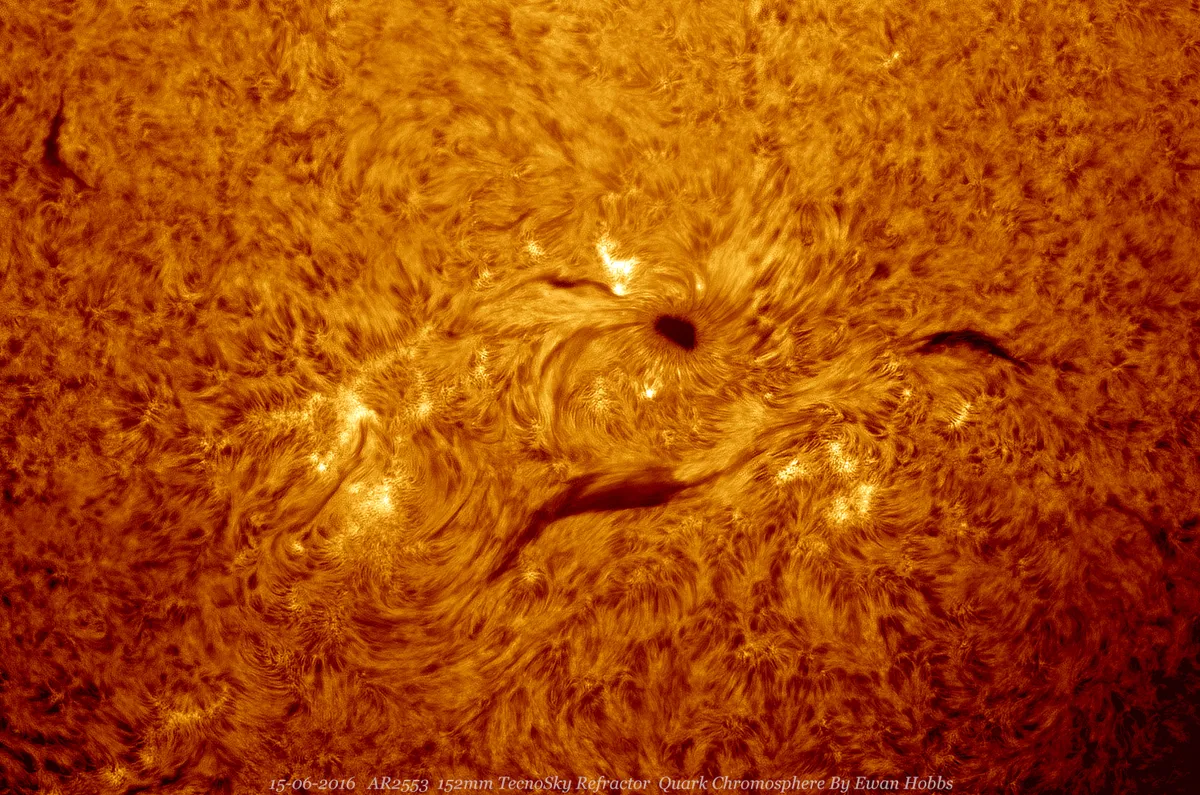
Taking the time to photograph sunspots on a daily or near-daily schedule can become a fairly rapid process, and provides an important record of how solar activity is progressing.
With the next solar maximum expected to occur in 2025, this is a great time to start imaging the Sun in white light.
As ever, for your photograph of sunspots to carry any scientific weight, it’s key to record time, date, observer location and image orientation, along with details of the equipment used.
And it needs to be pointed out that any equipment to be pointed at the Sun needs to be appropriately filtered first.
Failure to heed this warning could lead to equipment damage and potentially damage to your eyesight.
Read our guides on how to photograph the Sun and how to photograph solar activity.

Using filters to photograph sunspots
The safest way to image the Sun and photograph sunspots in white light is to fit a white-light solar filter over the full aperture of the scope.
Any attached finders need to be filtered, capped or removed for safety too.
If you’re using a large scope, an offset aperture filter can be used.
This is achieved by covering the entire aperture with an opaque cover such as thick card.
A smaller hole is created in the card and this is covered with filter material.
As larger scopes tend to have secondary mirrors, the hole is offset to one side to avoid being blocked by the secondary.
The most common type of filter material is Baader AstroSolar film, although there are several other types available too.
AstroSolar film is available in A4 sheets or in larger rolls 0.5 x 1.0 metres in size, and reduces the incoming light sufficiently to allow the Sun to be viewed and imaged in much the same way as you would the Moon.
Once the scope has been filtered, it can be turned to the Sun and imaging can take place.
Which camera to use
The best type of camera for photographing sunspots will be a monochrome high-frame-rate camera.
The reason for this is that a monochrome sensor will not suffer from the effects of atmospheric dispersion, where an object’s light gets smeared into a rainbow of colour.
What colour is the Sun anyway? Click here to find out.
The effect is worse with decreasing altitude, so with the Sun high in the sky it may not be that noticeable.
As altitude lowers, however, dispersion starts to cause blurring and colour fringing for colour cameras.
Actually, the same is true of monochrome cameras, but you can’t see the colours.
Here, the effect is easily reduced by using a single-colour imaging filter.
Typically a green filter works best, as it picks out solar granulation better than other colours.
Specialised solar continuum filters are also available for this.
Of course, a filter could be used with a one-shot-colour camera as well, but this has the effect of reducing the camera’s efficiency quite dramatically due to the Bayer colour filter matrix used on such cameras.
Once you’re filtered and have your camera fitted, you’re good to go.
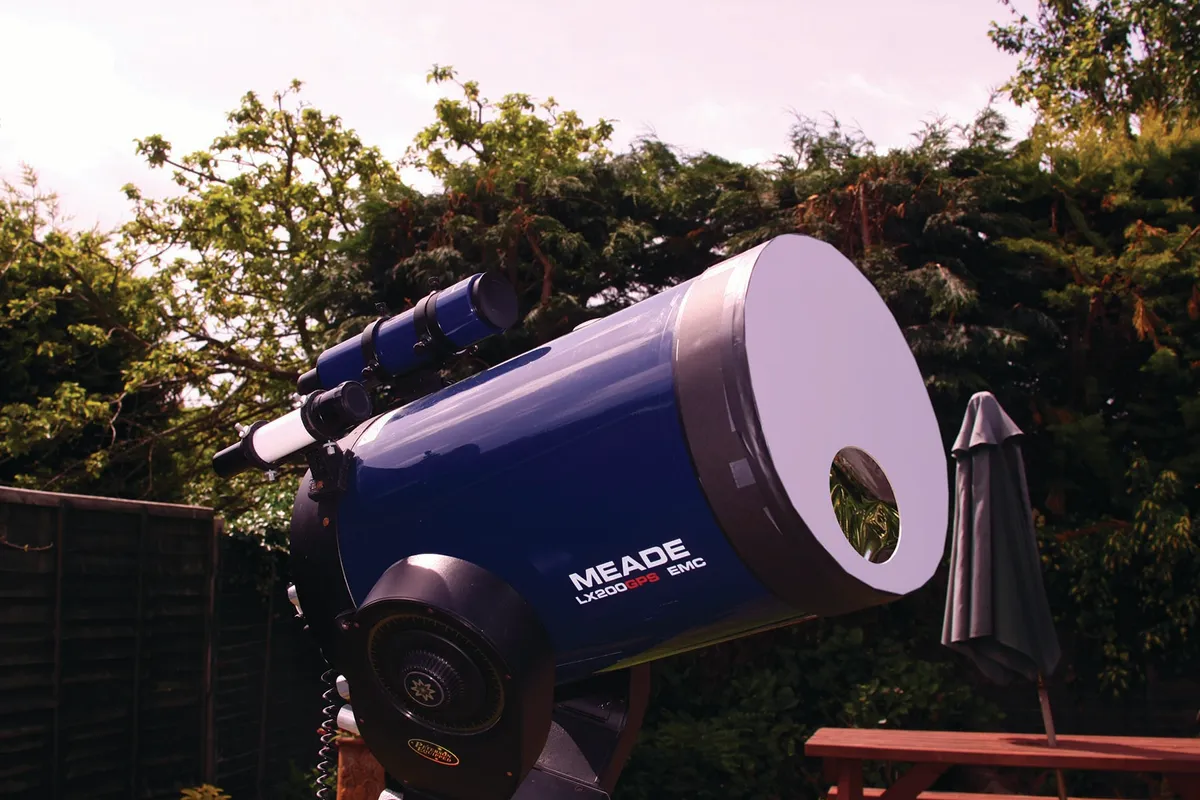
Equipment
- Scope with a white-light solar filter
- Mono high-frame-rate camera
- Motorised equatorial mount
Photograph sunspots step-by-step
Step 1

Before pointing any equipment at the Sun, prepare a solar filter for protection. Check the filter’s integrity before fitting it by holding it up towards the Sun and looking through it. Look for tears or holes. If any are found, reject the filter and get another. Remember to cap, filter or remove any attached finders.
Step 2

Once fitted, look at the shadow of the scope on the ground or on a wall. Adjust the position of the scope to minimise the shadow area. In this way you can safely point the scope at the Sun without having to look at the Sun yourself (something you should never do unless using certified filter protection for your eyes).
Step 3

Place the Sun approximately in the centre of your imaging frame and roughly focus. Adjust the camera’s physical orientation so that any disc features (if none are visible, use the edge of the disc) move parallel to the bottom edge of the frame when you slew in RA. The image is now north–south and east–west aligned.
Step 4

Identify north by applying gentle fingertip pressure on the front of the scope to lower the pointing declination. Note how the Sun moves; the first edge to touch the frame border will be north. Repeat, nudging the scope east. The first edge of the Sun to touch the imaging frame border will be west.
Step 5

Secure the camera in place and focus accurately. Take your time, as heat-generated seeing can make identifying true focus tricky. Sunspots make excellent focus targets, but if none are present, use the edge of the disc. Aim to capture at least 1,000 frames per session. Register and stack them with AutoStakkert! (freeware).
Step 6

Include the date and time you made the capture, the orientation and what equipment you used. This will make your image a useful record of activity that can then be compared with other results. Aim to capture as many images as possible over the next couple of years to show how solar maximum progresses.
Have you photographed sunspots on the Sun? Don't forget to send us your images.
This guide appeared in the June 2024 issue of BBC Sky at Night Magazine.

