The GNU Image Manipulation Program (GIMP) is free image-processing software that can be used to process astro images.
Its layout, adjustment and filter capabilities are very similar to Adobe Photoshop and it can be a good alternative for newcomers to astrophotography.
Plug-ins are an excellent way to automate, simplify and speed up some of the complex image adjustments astrophotographers often need to make, such as star removal, colour (or ‘chroma’) control and data stretching.
While Photoshop and PixInsight have some well-known examples, GIMP also has a few options that have been around for over a decade.
We take a look at a couple of Georg Hennig’s from his ‘Astronomy’ suite of plug-ins.
To begin, if you don’t already have it, you can download GIMP at www.gimp.org. It is free, open source and cross-platform.
To download Georg Hennig’s plug-ins, visit hennigbuam.de/georg/gimp.html and navigate to the appropriate compressed file for your version of GIMP. In our case, this was the Windows version.
Locate the compressed file (usually in the Downloads folder), right-click on it and select Extract All.
Move the released files to C:Program FilesGIMP2libgimp2.0plug-ins.
You will then find all 12 plug-ins by clicking through Filter > Astronomy in GIMP.
A portion of the plug-ins are used for stacking and calibrating astrophotos, which today is more commonly performed with designated stacking software such as DeepSkyStacker or Sequator.
A couple have a more artistic purpose. For example, one will draw a border around your image and will allow you to annotate it with key information.
The two plug-ins we will focus on are the Background Gradientand Rounds Stars functions, to first flatten an uneven background and then control bloated or trailing stars.
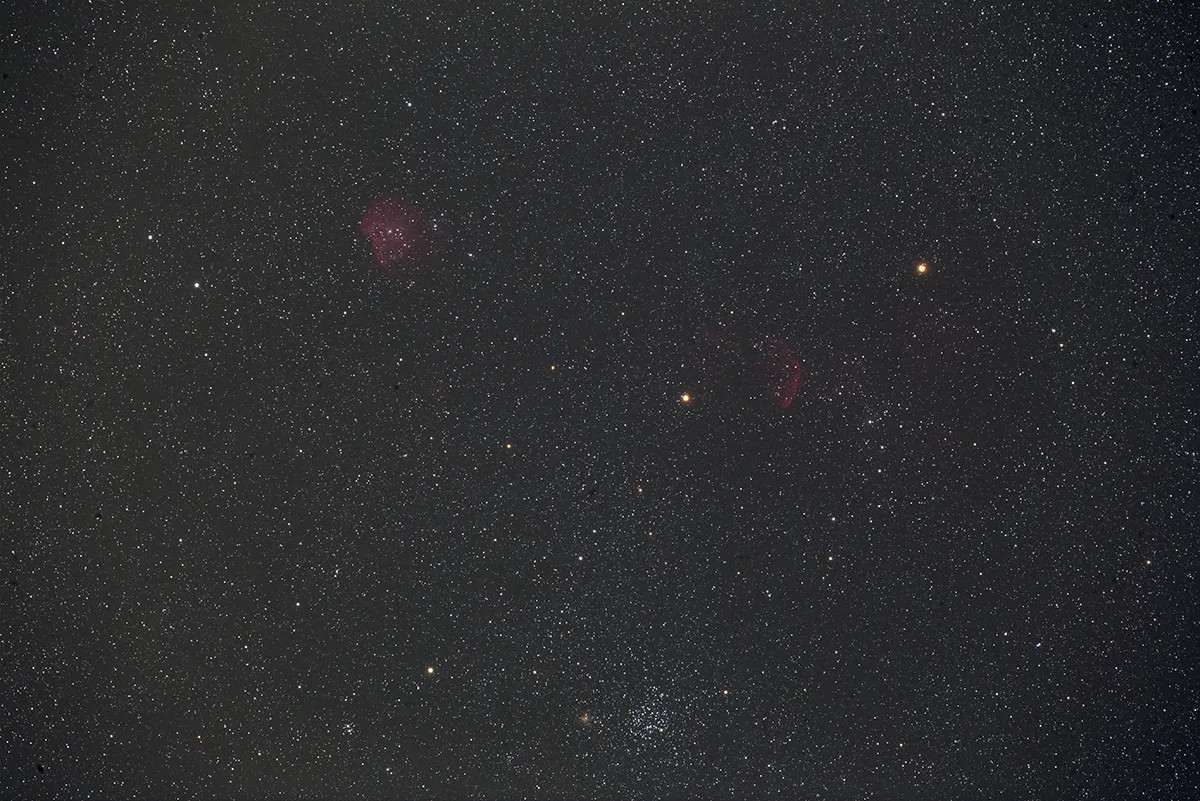
We applied these to our image of the Monkey Head Nebula and Jellyfish Nebula (the start image, above), which had already been stacked in DeepSkyStacker.
While the main background appeared even, there was some vignetting in the corners which created a noticeable gradient.
This was where Background Gradientcame in, as we could create a gradient map that could be subtracted from our image to remove the vignette.
Before we applied this, however, we had to hide all the bright objects in the image (except for the stars); in this case, the nebulae and star cluster.
Hennig’s instructions propose cutting out the objects before applying Background Gradient.
However, he also highlights that results are inconsistent and depend heavily on the size of the nebulae or galaxy in the field of view.
We suggest the following method, which requires some trial and error to get right, but achieves consistent results.
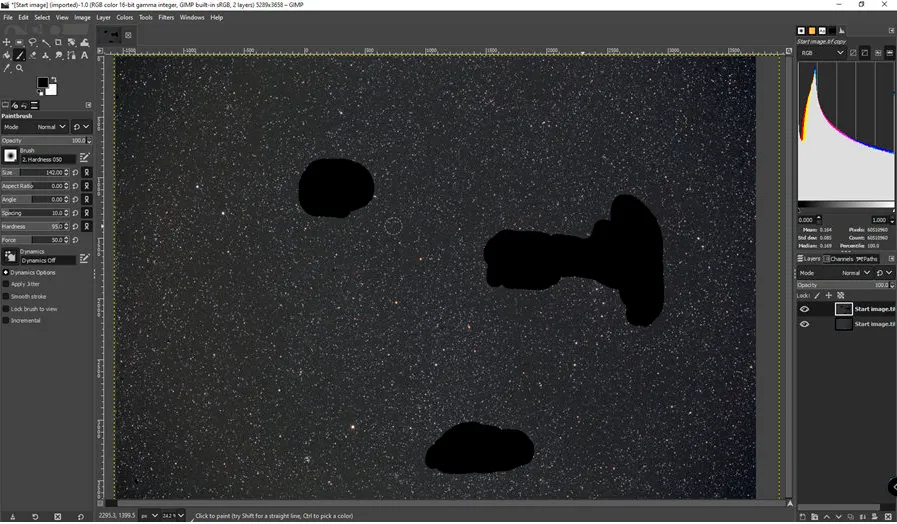
First, right-click on the base layer and select New from Visible.
This creates an identical layer above (see right-hand side of image above).
Click the paintbrush icon on the left-hand side and ensure the colour is set to black or grey.
A menu will pop up that allows the size of the brush to be altered by clicking and dragging the anchor point.
Paint over the brightest areas in the image, trying to ensure that only the bright areas are covered.
This removes bright patches that the plug-in will (incorrectly) map and so provides a dark field for the correction.
You can now apply Background Gradient(click Filters > Astronomy).
A menu will pop up that allows you to select the size of the area to sample, to flatten the background. However, leave the default values.
Click OK and let the program run. The resulting background has a reduced vignette and flatter background (see image above).
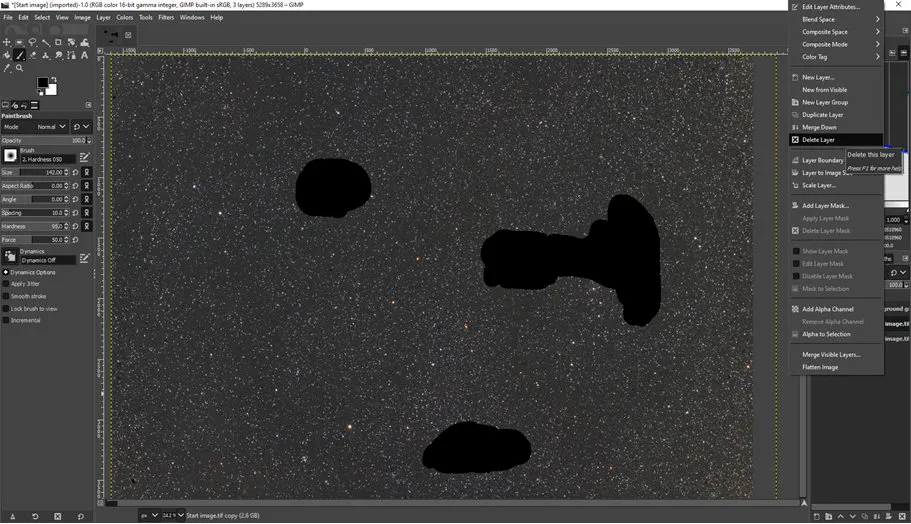
Right-click on the layer you added and select ‘Delete this layer’ to reveal the nebulae again.
Now to reduce the appearance of the background stars that currently overwhelm the image and detract from the main target.
Apply Rounds Starsto control these (click Filters > Astronomy). The menu allows you to determine the extent to which the stars need correcting (see image below).
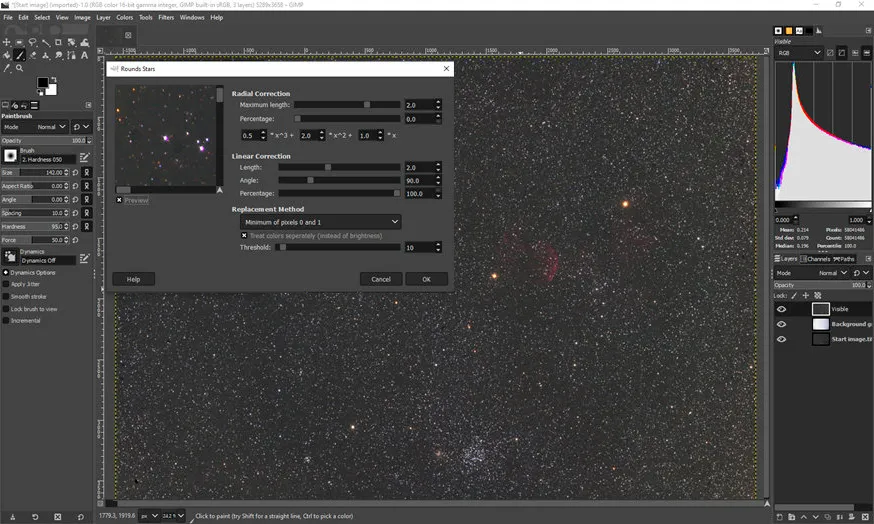
Click and drag options in the preview window to assess whether the corrections are appropriate.
The final image (at the very top of this article) has a flatter background and more refined star field, ready for any further processing, such as applying GIMP’s Levels, Brightness, Contrast and Colour functions.
3 quick tips for gradient removal
- For gradient removal, make your paintbrush as small as possible to cover bright areas with precision.
- If your gradient removal is too severe, use the opacity slider to reduce the effect on your image.
- After applying ‘Rounds Stars’, use a black layer mask to paint through any bright stars you’d like to keep.
This guide originally appeared in the January 2023 issue of BBC Sky at Night Magazine.


