A modern astronomy observatory is a mixture of complex and simple systems that must operate coherently to perform at their best. Spring is an excellent time to catch up on the maintenance duties you might have put off whilst observing at night, and are often impossible to carry out during winter days because of the weather.
Winter is often an astronomer’s most busy and hopefully productive season, but the ravages of the winter weather can play havoc with the general fabric of the observatory, and the extra use that the long winter nights allow also take their toll.
A spring clean is both literally and metaphorically called for.
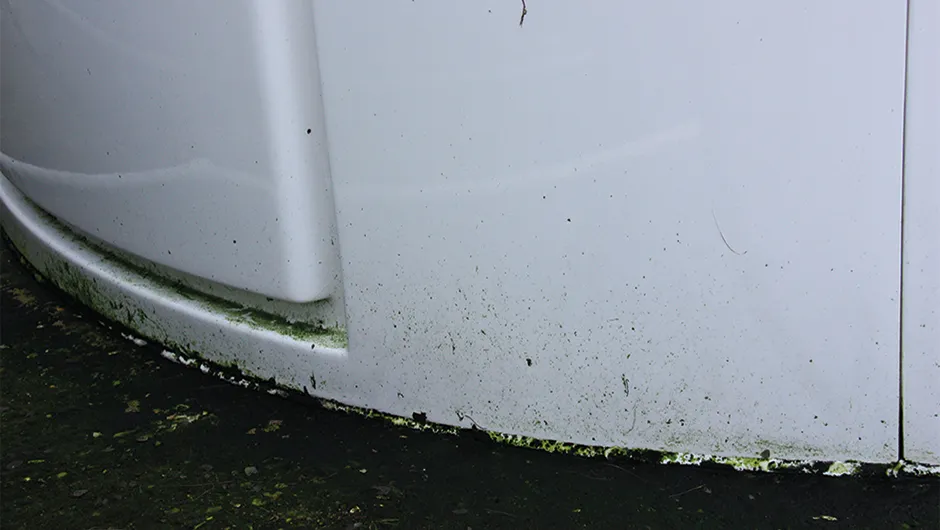
Starting with the outside, you can’t fail to notice the mould that grows on the permanently damp surfaces, and the dirt and grime generated by rain, especially near the base of the observatory, the roof and around the drainage channels.
Although this will hardly affect your observing, keeping on top of this will ensure the long life of your equipment-protecting canopy.
A good-quality car shampoo and sponge should be used to wash the whole of the external structure.
Rinse off with liberal amounts of fresh water dispensed from a watering can fitted with a rose attachment – don’t use the spray from a garden hose as observatories were never designed to keep horizontally driven water at bay!
Examine all the external metal fittings for signs of rust or oxidation.
Any corroded hardware should be replaced with stainless steel components if possible, and given a coating of silicone lubricant to repel further attacks from moisture.
Pay particular attention to the observatory door’s lock mechanism.
Internally, this is the time to remove cobwebs and dust using a vacuum cleaner and brush if required as a clean observatory helps to keep the optics in good condition too.
If you have an ‘owls nest’ cut-out in you observatory pier, pay particular attention to this area – spiders appreciate this area just as much as you do.
If you have a motorised dome, check the drive mechanism for dead insects – we have found more than our fair share of flattened ladybirds embedded in our friction drive and dome-supporting rubber wheels.
We have a nylon chain-driven aperture slit and like any chain, a little silicone lubrication will ensure that its runs smoothly in its guides and around its sprocket drive.
Digging deep
If you have a removable floor, lift it up and check for damp ingress, although bear in mind that if you have a concrete base it is normal to find a thin layer of moisture under any loose membrane material that you might have installed.
Many observatories are carpeted for comfort and to protect dropped items so give these a thoroughly good going over with a vacuum cleaner.
If you have a permanent installation on a pier, unless you bump the equipment, there is no reason why you should regularly check your polar alignment but now is a good time to do so.
But make it really worth your while.
Carefully remove your telescope(s) and associated equipment, take them inside and clean their external surfaces with a well-wrung sponge, being particularly careful to avoid going anywhere near the optics.
Back outside, clean down the mount, saddle and counterweights to remove any dust before re-installing the equipment and tightening everything up correctly.
Re-attach the wiring loom and tidy up any additions that you may have made to it over the course of the last year to ensure that there can be no risk of any cable snags.
Re-balance your equipment on the mount accurately and on the next clear night carry out a full drift alignment to give you another year’s worth of good polar alignment.