Warning: never look at the Sun directly or through equipment not designed specifically for safe solar viewing, as this can cause irreperable damage to your eyes.
Although most astronomers observe the night sky, many also turn their attention to the closest star to Earth – the Sun.
Inexpensive solar film filters provide an affordable way to adapt small telescopes for solar observing and imaging, revealing sunspots and bright faculae.
If you invest in a Herschel wedge you will get an even better view, while narrowband hydrogen-alpha and calcium-K filters enable you to see a greater range of solar features.
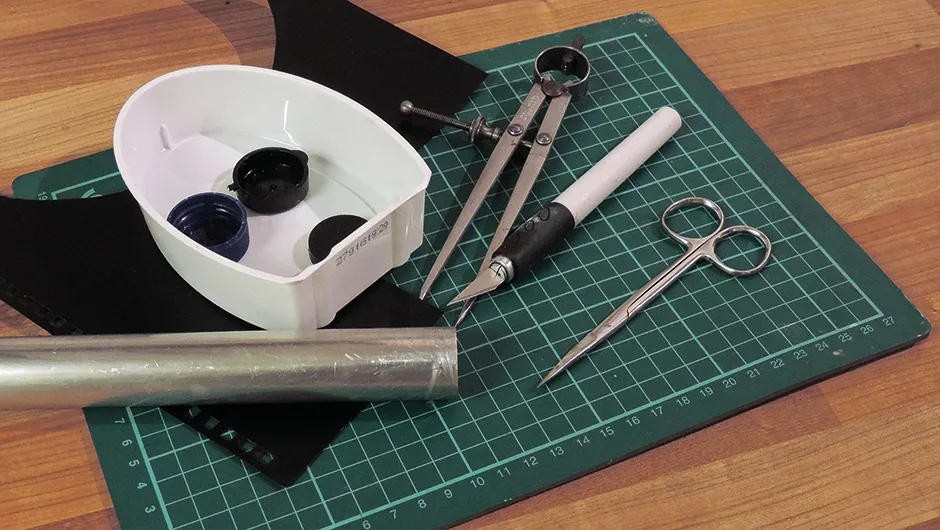
- 150mm length of plastic or aluminium tube, 25-32mm in diameter (ideally a good fit for your existing finder bracket); two end caps that fit the tube (a pair of spare eyepiece caps or bottle caps); black and white plastic.
- Junior hacksaw, craft knife, abrasive paper, dividers, scissors, glue.
Just as it isn’t safe to view the Sun through a telescope without having a certified solar filter fitted, the same is true of a much smaller finderscope.
Looking at the Sun through a finder will cause instant damage to your vision.
How then, do you centre the Sun in your field of view?
One way is to line the scope up so its shadow on the ground is as small as possible, but this isn’t very accurate, especially if you have your scope set up on grass.
The most accurate way is to use a dedicated solar finder, a device that uses the ancient principle employed by pinhole cameras.
Instead of using a lens, a small hole acts as an objective that projects a small image of the Sun onto a screen at the far end of a tube.

It is attached and adjusted in the same way as an ordinary finder, but instead of looking through a solar finder you watch the screen on the finder’s rear and adjust the telescope until the image of the Sun is in the centre.
The brightness of the Sun means that a hole less than 1mm across is sufficient.
The resulting projection will be about 2mm across, and our screen about 150mm from the finder.
Although the image is slightly enlarged, the light gathering power of the pinhole is puny – so it is completely safe.
How pro will you go?
Our prototype finder was made by simply taping a piece of black plastic with a pinhole to one end of a metal tube and a white plastic screen to the other.
This wasn’t very durable but proved the principle, allowing us to align a telescope with the Sun in a matter of seconds.
Having access to a mill and a lathe, we then made a deluxe version using a black anodised tube from some bicycle forks with neatly knurled end-caps to hold the plastic discs in place at each end of the tube.
You could, optionally, also mill a slot in the side of the tube so you can view the screen from either side.
This finder worked so well we decided to dedicate a small achromat refractor to solar work by swapping out its regular finder for our solar one and semi-permanently fitting a Baader solar filter to the telescope’s main lens.
With a small, equatorial tripod it’s a great solar grab-and-go kit for those days when the Sun is only peeping out from behind the cloud for a few minutes at a time.
The solar finder described in the Step by Step does not require the machine shop – the tools you need are no more elaborate than a junior hacksaw and a craft knife.
The end result may not be quite as pretty as the machined version above, but it works equally well as it has the same ‘high-tech’ optics.
A lick of spray paint or even an offcut of carbon fibre wrap will easily make it look good enough to complement any solar scope.
In use, you should swap it for the normal finder on your solar-filtered telescope (never, ever leave an optical finder on a solar setup).
You may need to use some packing around your home-made finder if it is smaller in diameter than your finder bracket.
Once you have your scope aligned with the Sun, just use the usual adjustment screws to centre our star on the screen, and that’s it.
Whatever mount you have, manually tracking the Sun is now no more difficult than keeping it in the middle of the screen.
Setting up the scope at the start of a session will now only take moments.


