While it’s not uncommon to think of the night sky as being essentially monochrome, white stars on a black canvas, in truth there is a lot of colour to be found in the cosmos. And it can be used to add detail and interest to your astro images.
We’re not talking about the false colours here, but bringing out the natural colours in images of Solar System bodies taken with an ordinary unmodified DSLR.
We’ve used Photoshop in this tutorial, but you could do the same thing in Photoshop Elements or GIMP.
Taking a picture of our old friend the Moon often leads to a very white body on a very black background, thanks to the brightness difference between the two.
The subtle use of colour can bring out detail in the Moon’s craters and emphasise the difference between the higher and lower areas without adding more black and white contrast.
If you're new to lunar astrophotography, read our guide on how to photograph the Moon.

Unfortunately, you can’t just raise the colour saturation in the image – doing this leaves it looking extremely artificial.
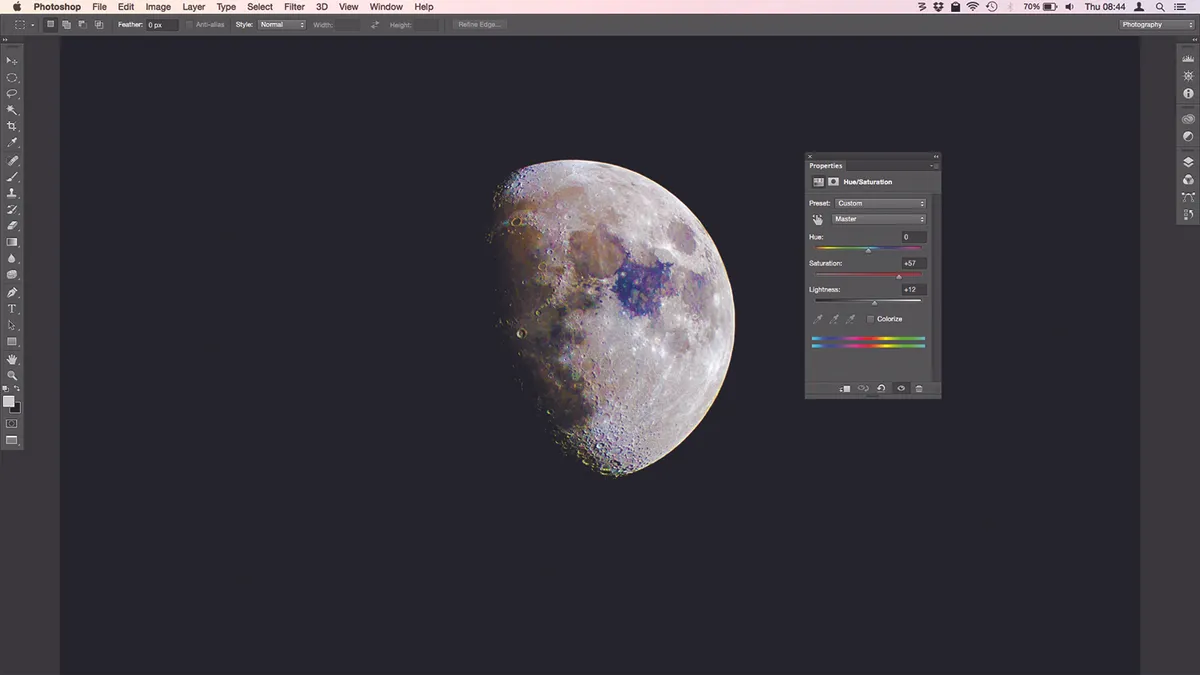
If you want to try it, in Photoshop click Image > Adjustments > Hue/Saturation and slide the Saturation slider all the way to the right. The result isn’t very nice.
It’s far better to apply Hue/Saturation as an adjustment layer, as you have more control over the effect.
Do this by clicking Layer > New Adjustment Layer > Hue/Saturation.
The Hue/Saturation Properties palette will open, and you can slide the Saturation slider to the right until you’re happy with the colours in the darker parts of the Moon.
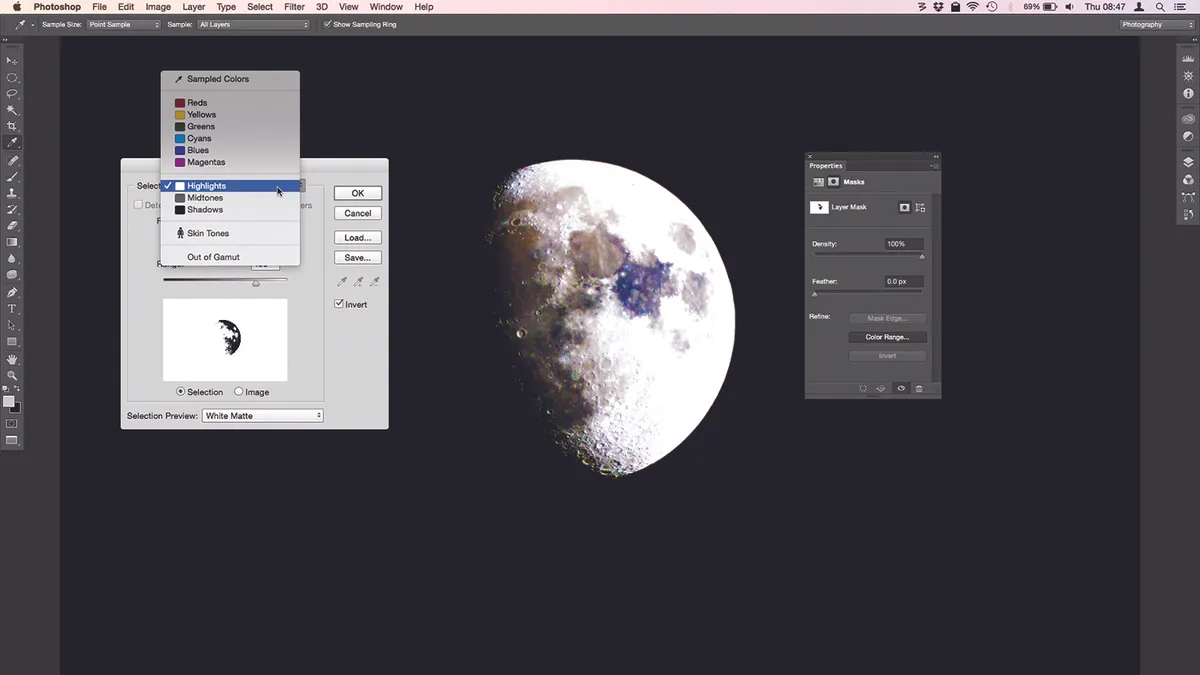
We only want the effect to be applied to the dark areas, as that’s where the colour is. Click the Masks tab at the top
of the palette and select Layer Mask.
You can then use the Colour Range slider to mask off the bright lunar uplands.

We used the dropper to sample a light spot and turned the Fuzziness up to about 130 to get a good range of highlights selected rather than just the sampled colour.
You could also select Highlights from the menu at the top of the palette to get a similar effect.
Now these areas are masked, the Hue/Saturation adjustment won’t affect them, and they stay white while the Moon’s seas show off their purple and orange hues.
This process is known as creating a Layer Mask, and is one of Photoshop’s most powerful tools.
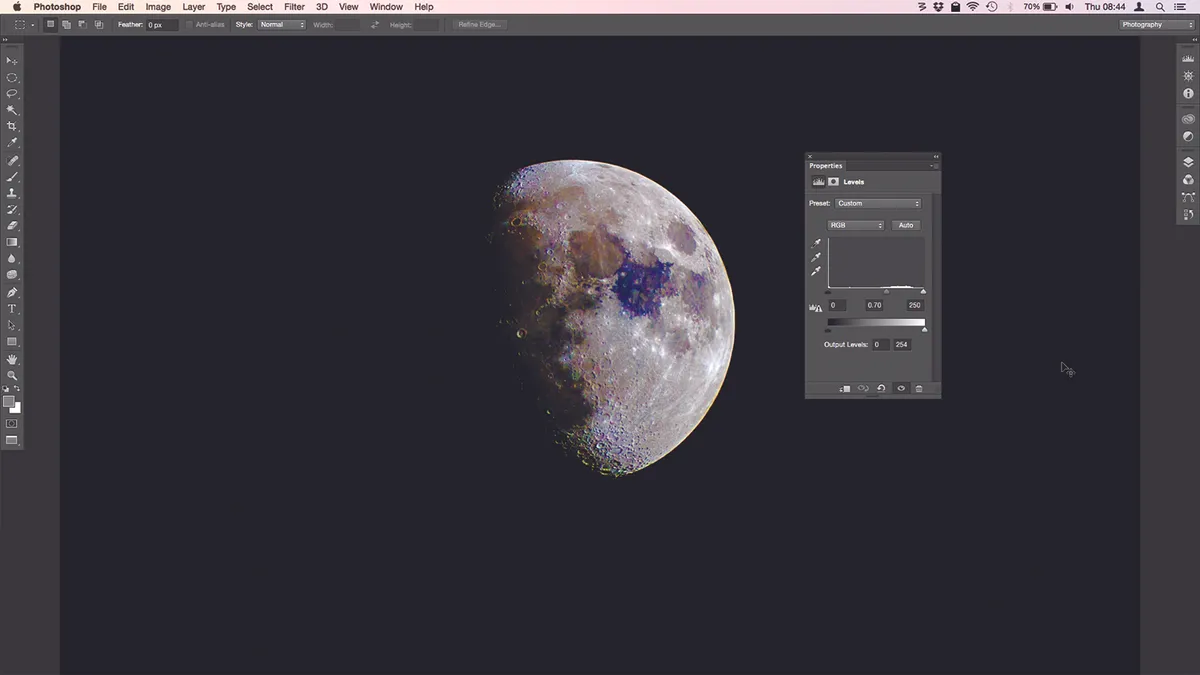
On our image, the Moon’s uplands are still too bright, so we can apply another adjustment layer, this time for Levels (Layer > New Adjustment Layer > Levels), in exactly the same way.
We used it to darken off the bright areas, again using a layer mask.

Save the file as a layered PSD; that way you can come back to it in the future to make tweaks.
Click Layer > Flatten Image to merge the layers and then save as a JPEG to finish the shot.
This article originally appeared in the June 2015 issue of BBC Sky at Night Magazine. Ian Evenden is a journalist working in the fields of science, tech and photography.
