Astrophotography is an extremely rewarding aspect of astronomy, but as any astro imager will know, conditions often aren’t in our favour, which is why we have to take advantage of those rare clear nights whenever they come around.
It can be disappointing, then, after capturing those precious images, to discover that they suffer from star trailing.
Often, star trails are the desired end result of certain astro imaging sessions, and you can find out how to do this in our guide to photographing star trails.
However, if your star trails are unwanted, read on and we'll reveal how to remove them via image processing.

What causes star trails in photos?
Slightly trailed stars can be caused by a misbalanced mount or one not quite correctly aligned with the polar axis, making your stars look either stretched or appear as short lines.
It would be easy to delete your images and accept that your night’s work was in vain, but wait: in some circumstances, you may be able to salvage something from those images by using a simple but effective tip.
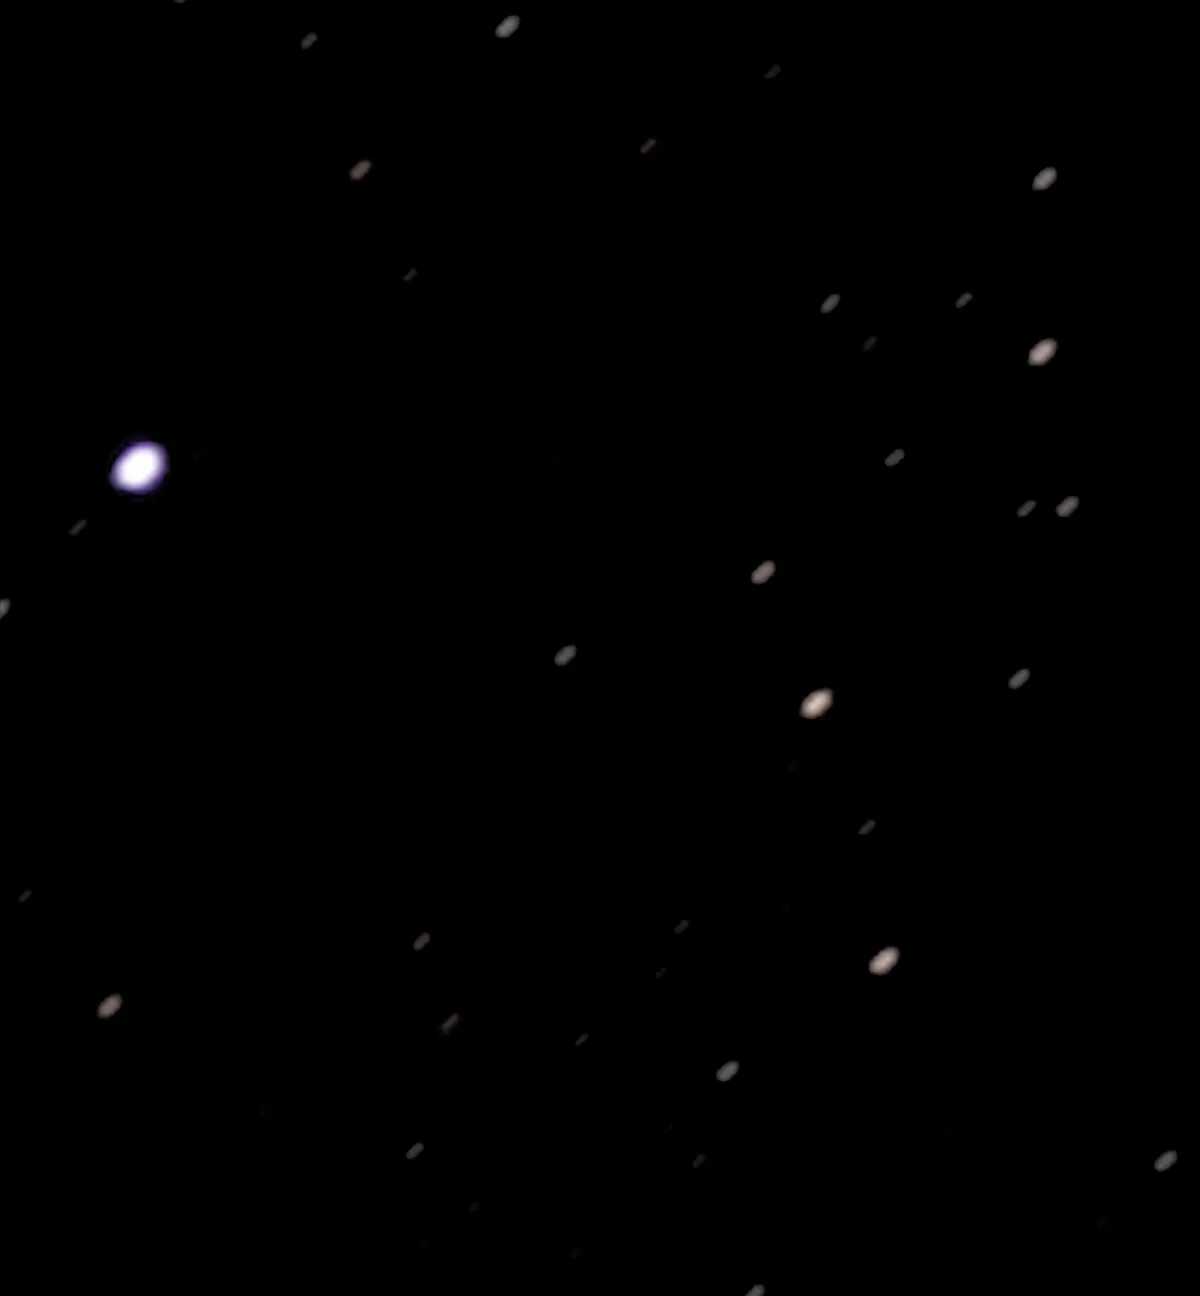
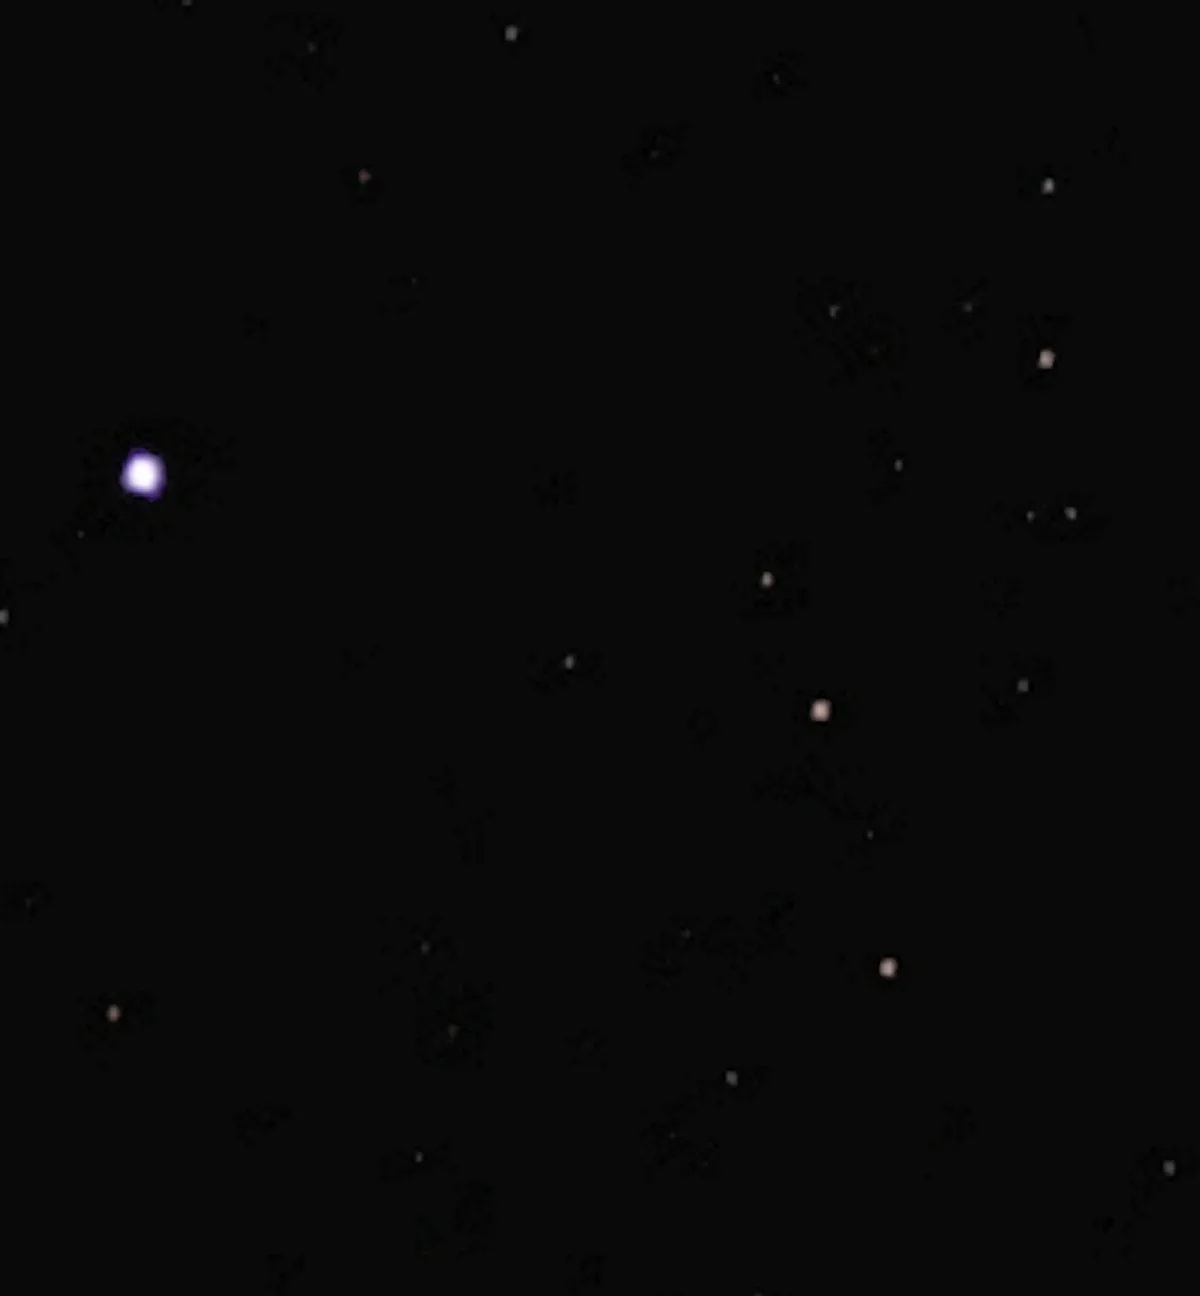
In this example we took 21 images of Brocchi’s Cluster, also known as the Coat Hanger Cluster, a tiny asterism shaped like a coat hanger in the constellation of Vulpecula.
On cursory examination, the stacked image looked good, but when we looked more closely we noticed the stars were slightly trailed (see below).
Use image processing to sharpen your stars
With our technique it is possible to improve the star shapes, making the overall image look sharp, and enabling you to process it a bit more to bring out detail.
Note the following caveats: this technique works best on images that only contain stars taken through a telescope, not widefield constellation images taken with a camera lens suffering from sky rotation trailing.
With images of galaxies or nebulae, the effect of this procedure will slightly blur them while improving the stars, and noisy data will create some interesting unwanted artefacts, so it is not an answer for all situations.
Indeed, ideal subjects are star clusters without nebulosity such as our Coat Hanger Cluster image.
Note also that images with wiggly trails due to windy conditions won’t work as you will end up with some very interesting artwork!
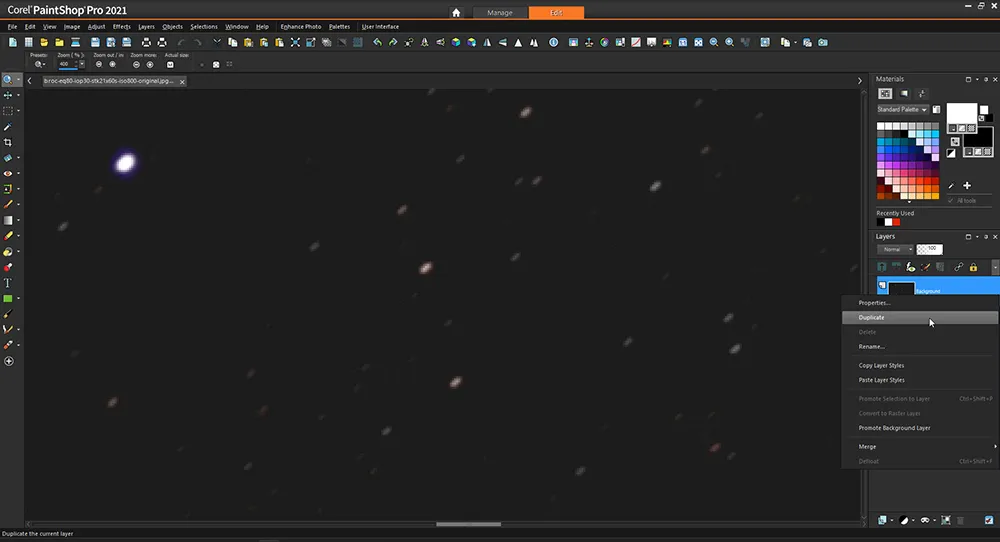
First, if needed, stack your captured images to make a master image, then load this into your favourite image-processing software such as Photoshop, or in our case PaintShop Pro 2021 (see above).
Right-click on the image shown in the Layers tab on the right, then select Duplicateto create a copy of the image exactly overlaid on the original.
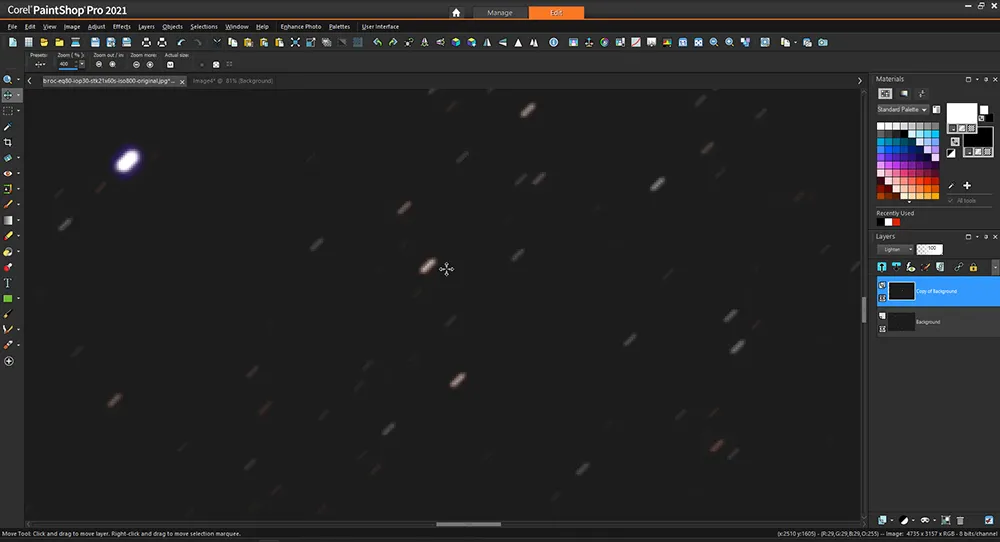
It is this layer we will be working with. Now use the magnify tool to zoom into the image.
It is better to focus on mid-range brightness stars, as the brightest ones may be a little overblown, whereas mid-range stars have a better shape and it is easier to see their trail.
Next, in the Layers tab select Lightenfor the blend mode (see below).
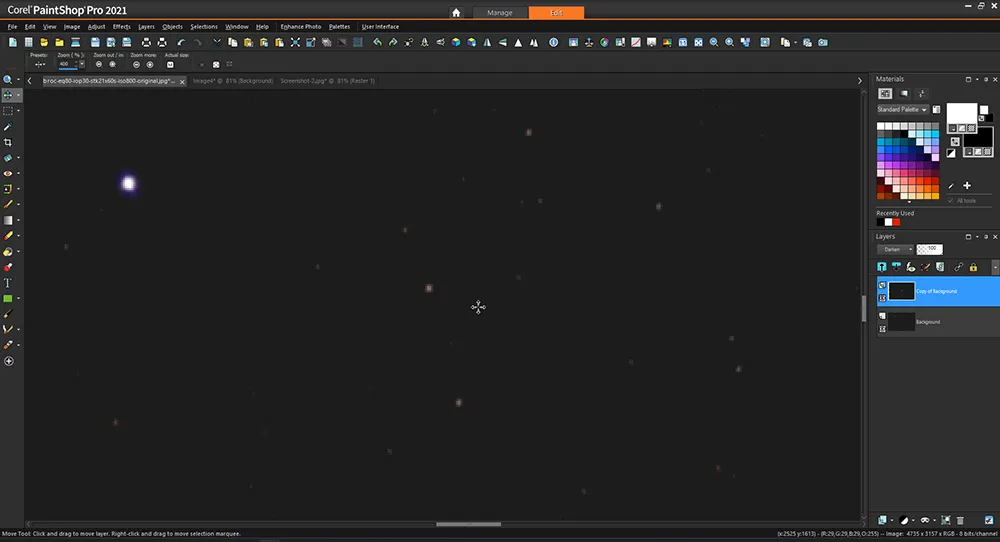
At this stage you won’t see any difference; that’s normal. Now select the Movetool and the pointer turns into a cross.
Holding the left mouse button, carefully drag the copied (top) layer in small increments, keeping an eye on where the trail is moved to.
It is here that the lighten blend mode now shows both the upper and base layers’ trails.
The aim is to nudge the upper layer until the lower end of its trail overlaps the top end of the trail of the base layer.
It will look like all you have done is double the length of the trail, but fear not!
You can click the ‘eye’ icon on the topmost layer, which is the visibility toggle, so you can swap back and forth between seeing both layers or just the original layer, to gauge just how much you have moved the top layer by.
Once you are happy with the right amount of overlapping on the trails, you can select Darkenblend mode for the top layer and voilà: you now have nice round stars instead of trails (see above).
Right-click on the topmost layer tab and select Merge allto flatten the image.
Zoom back out to see the full image with sharp stars.
You may find you can further enhance the final image with histogram adjustments and a little extra saturation.
In our final image (see below), this even brought out the small open cluster NGC 6802 at the bottom left of the Coat Hanger Cluster.
This guide originally appeared in the February 2023 issue of BBC Sky at Night Magazine.