Removing image noise, or unwanted artefacts, is one of the main aims of deep-sky astrophotography processing.
The more we can reduce noise, the more freedom it allows us to process our images of nebulae and galaxies.
This is particularly true for nebulae, where delicate gaseous details are easily overwhelmed or hidden.
There are various noise reduction tools to help overcome the issue, but care needs to be taken applying them; use them too heavily and the target will look soft or blurry.
Here we'll showy you how to apply just the right amount of adjustment to the stars in a deep-sky image of the North America Nebula by using the StarShrink plug-in.
For more adjustment advice, read our guide to astrophotography image processing.

Removing stars from deep-sky images
Stars are one of the main causes of unwanted artefacts in astrophotos, and this complicates noise reduction processes because there are often hundreds, if not thousands of them in an image.
One way to manage this is to remove stars from the image so that they can be processed separately.
While software to remove stars exists (including StarNet++ in PixInsight) these work best for CCD cameras and can struggle with DSLR camera data.
Also, if you are using Adobe Photoshop or GIMP image-editing software, it is often the case that both the nebula and stars must be processed at the same time.
This is where a plug-in (software add-on) that specifically targets the appearance of the stars is very useful.
How to download and install StarShrink
Russell Croman’s StarShrink plug-in is purchased and downloaded from his website at www.rc-astro.com/resources.
It has a 30-day free trial and works with both Windows and MacOS operating systems.
Once the file is downloaded, you need to locate it. For Windows computers it is found in C: drive > Downloads.
This file needs to be transferred to your Photoshop Plug-ins directory, the location of which is dependent on the version of Photoshop you are using.
For Photoshop 2022 on a Windows computer, click and drag the file to C:Program FilesCommon FilesAdobePlug-InsCC.
We recommend applying StarShrink at the end of your processing workflow, once adjustments to the main objects in a deep-sky image have been made.
The reason is because the appearance of the stars will change throughout most of the image amendments you make in Photoshop, often increasing their size.
This is the case for our initial processing of the North America Nebula.
Processing your nebula astrophoto

In our example image above, we have already made all adjustments to maximise the appearance of the nebula itself, including Brightness/Contrast, Levels, Colour Balance and Hue/Saturation; all of which are accessed by clicking Image > Adjustments.
A median filter has also been applied by selecting Filter > Noise > Median, to reduce some of the overall image noise, but the stars are still looking bloated in our image.
We can manage these stars to an extent by applying Dust & Scratches, which is achieved by clicking Filter > Noise > Dust & Scratches, but it is easy to overdo this function and soften the appearance of the target (see image below).
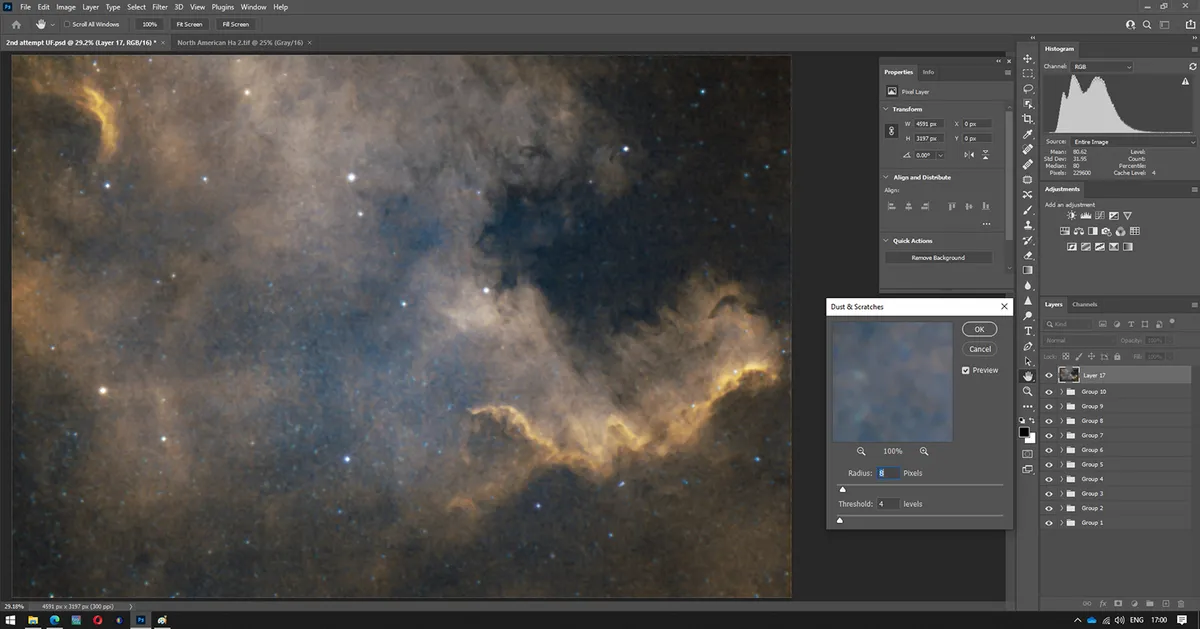
To prevent this, we will use StarShrink to target and ‘shrink’ the stars.
Using StarShrink to adjust the stars in your image
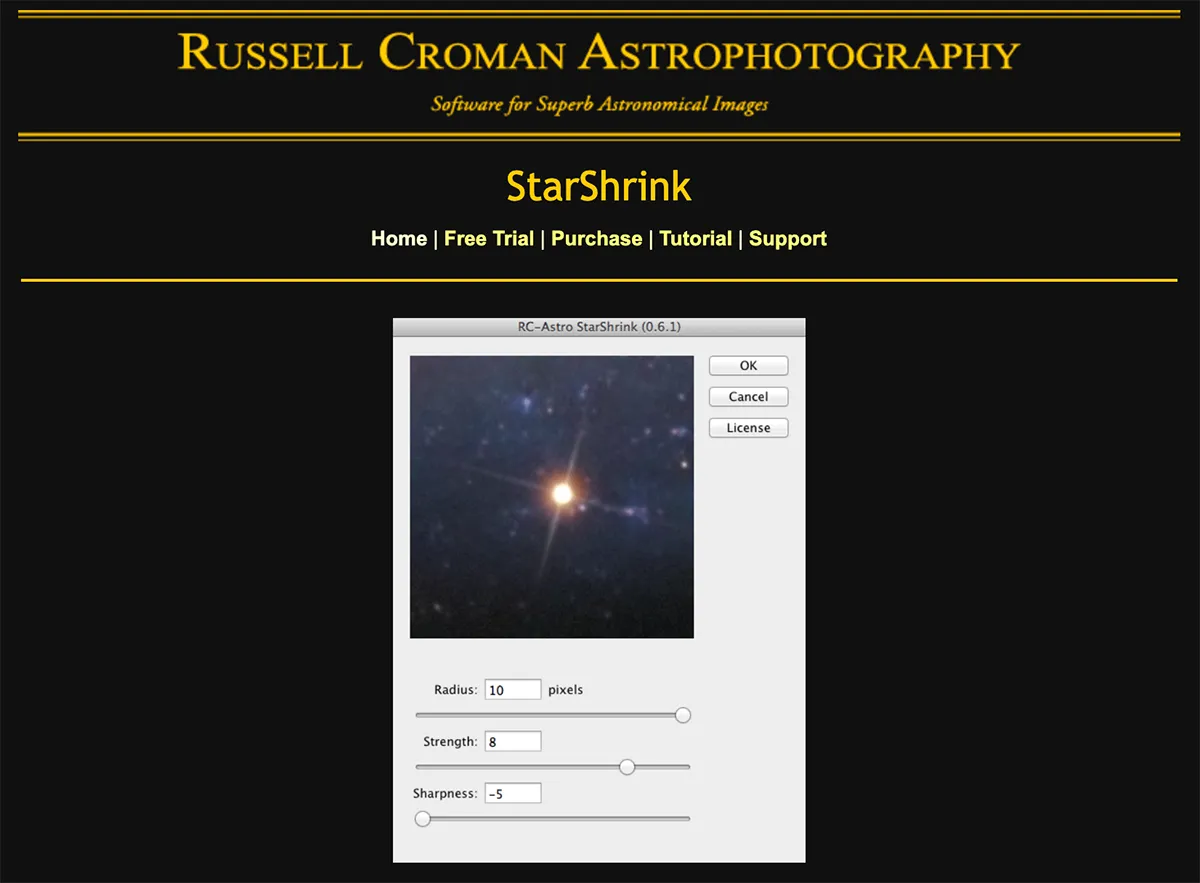
Once the StarShrink plug-in is opened by clicking Filter > StarShrink, the preview window will focus on a region of your image (see image below).
To move to another region, just click and drag within the window.
At the bottom of the preview window are three adjustment sliders.
By moving the top one, Radius, you can adjust which stars will have a shrink applied; a smaller radius will target smaller stars.
The middle slider, Strength, allows us to determine how strong the shrink we apply is, and the bottom slider option, Sharpness, helps to maintain a natural star profile.

If the Sharpnessvalue is too high, stars will appear as tight white pinpricks with hard edges, but a lower value will retain colour around the stars' edges, allowing them to subtly complement the image.
Be careful not to shrink every star to the same size, as this can make your image look over-processed.
While stars are responsible for noise, we don’t want them to look artificial as they are still an important part of the overall image.
We can use a layer mask to select any stars we’d like to leave unamended.
Once we have performed a shrink, we can do this by clicking the mask icon with the star shrink layer we’ve highlighted (see image below).
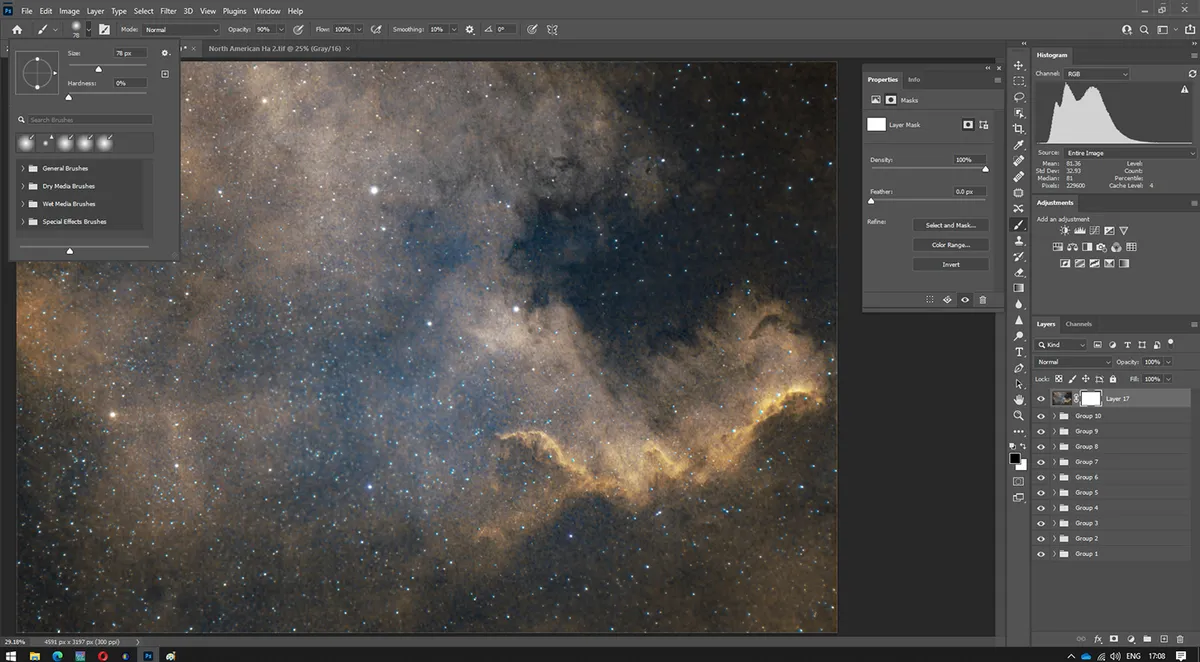
Next, a white mask will appear next to the layer.
After we have altered our brush size (see top left window in the image above), we paint over selected stars to undo the change and then choose which ones we want to stand out in our image.
Be sure not to overdo the shrink, as this will create unwanted warping around the larger stars.
In our final image at the top of this page, you can see that the North America Nebula’s starry regions are now far less noisy. The attractive, natural looking stars add to the depth and beauty of the deep-sky picture.
3 tips for using StarShrink
- Click and drag the image screen within StarShrink to see the effect of your adjustment.
- If there are varying sizes of stars, apply StarShrink more than once and change the radius each time.
- If using a mask, you can alter the brush size by using your bracket keys.


