Image sharpening is a crucial part of astrophotography processing, allowing you to make your images look crisper and enhance fine detail. Traditional sharpening and ‘unsharp mask’ methods are to be found in programs like Photoshop and Paintshop Pro.
These rely on local contrast enhancements around the edges of objects within a picture to make the overall image look sharper, but can make images look unnatural and introduce unwanted artefacts.
Focus Magic is available to download as a stand-alone program or as a plug-in for Photoshop or Paintshop Pro.
It works slightly differently, using a deconvolution routine to determine why an image is out of focus, then reverses and restores it.
If you need more help with your solar astrophotography, read our guide on how to photograph the Sun.
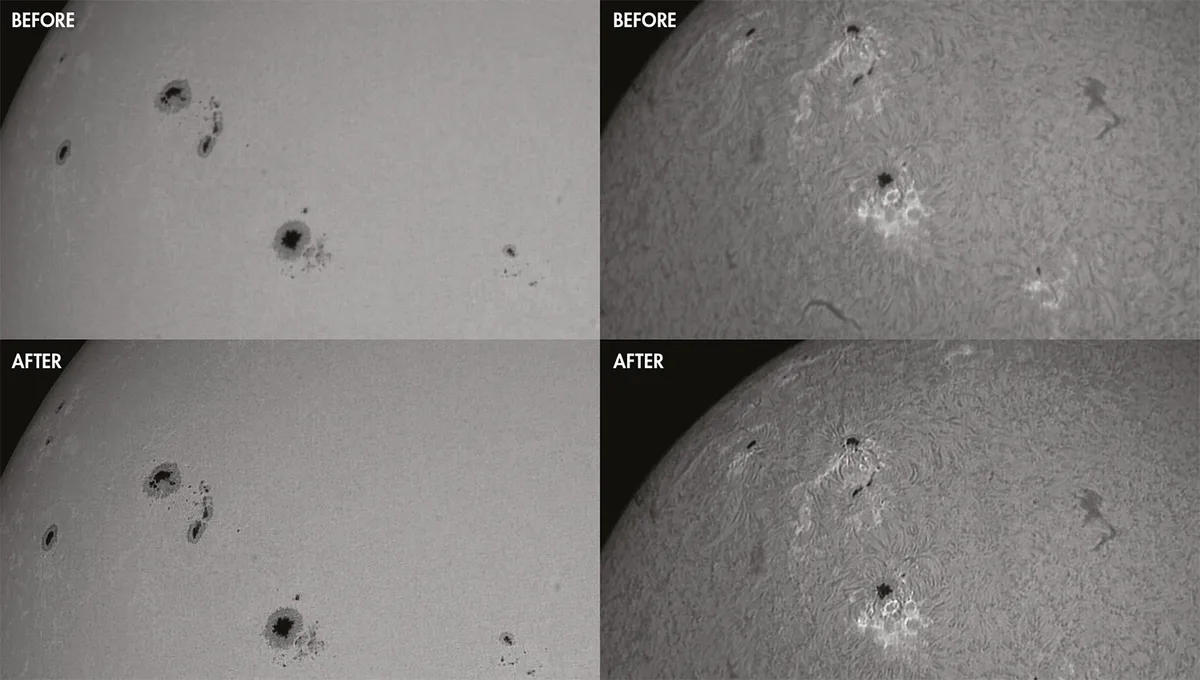
In an out of focus image, what should be a point source (a star) is an unfocused spot.This becomes a small circle with traditional sharpening methods.
Focus Magic tightens those circles again and delivers a dramatic sharpening.
Focus Magic can be used to correct images that are slightly out of focus due to poor seeing conditions or if your focus wasn’t as tight as it could have been at the time you took your shots.
There is also the option to correct for motion blur, which can be an issue if your telescope mount didn’t track properly or your images are beginning to show star trailing.
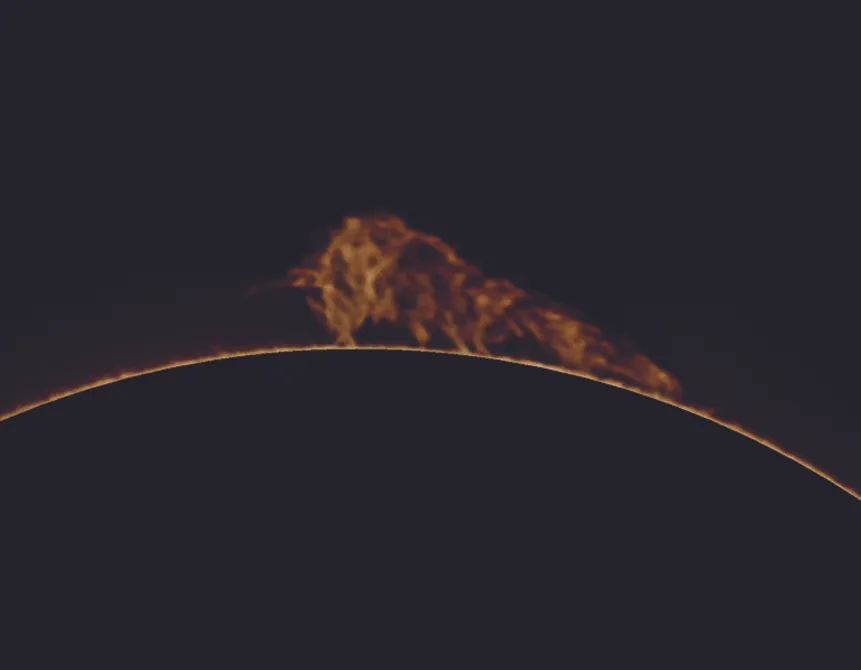
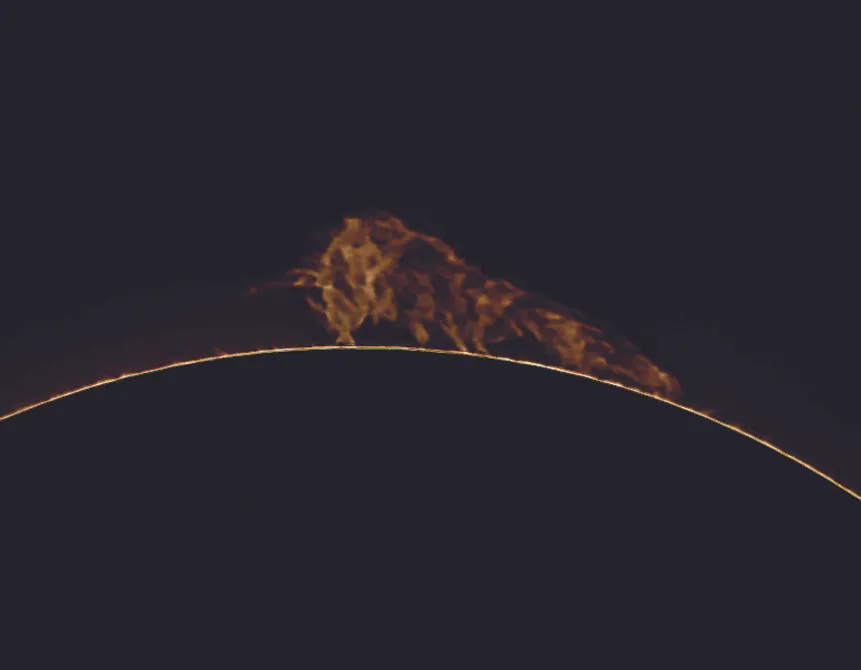
Here we will show you how you can transform an image of a solar prominence using the ‘focus’ function – the same steps can be applied to solar surface features shot in white light or through a hydrogen-alpha solar telescope.
The software is compatible with Jpeg and Tiff files.
The starting image is of a large prominence that was visible on 23 April 2015, taken with a Canon EOS 1100D DSLR attached to a Coronado PST on an EQ5 Pro mount and with a 2x Barlow lens fitted.
It is a stack of 195 images. You will get the best results if you work on an image which has already had noise reduction applied to it.
Begin by opening Focus Magic. Click File > Open then select the image you want to sharpen.
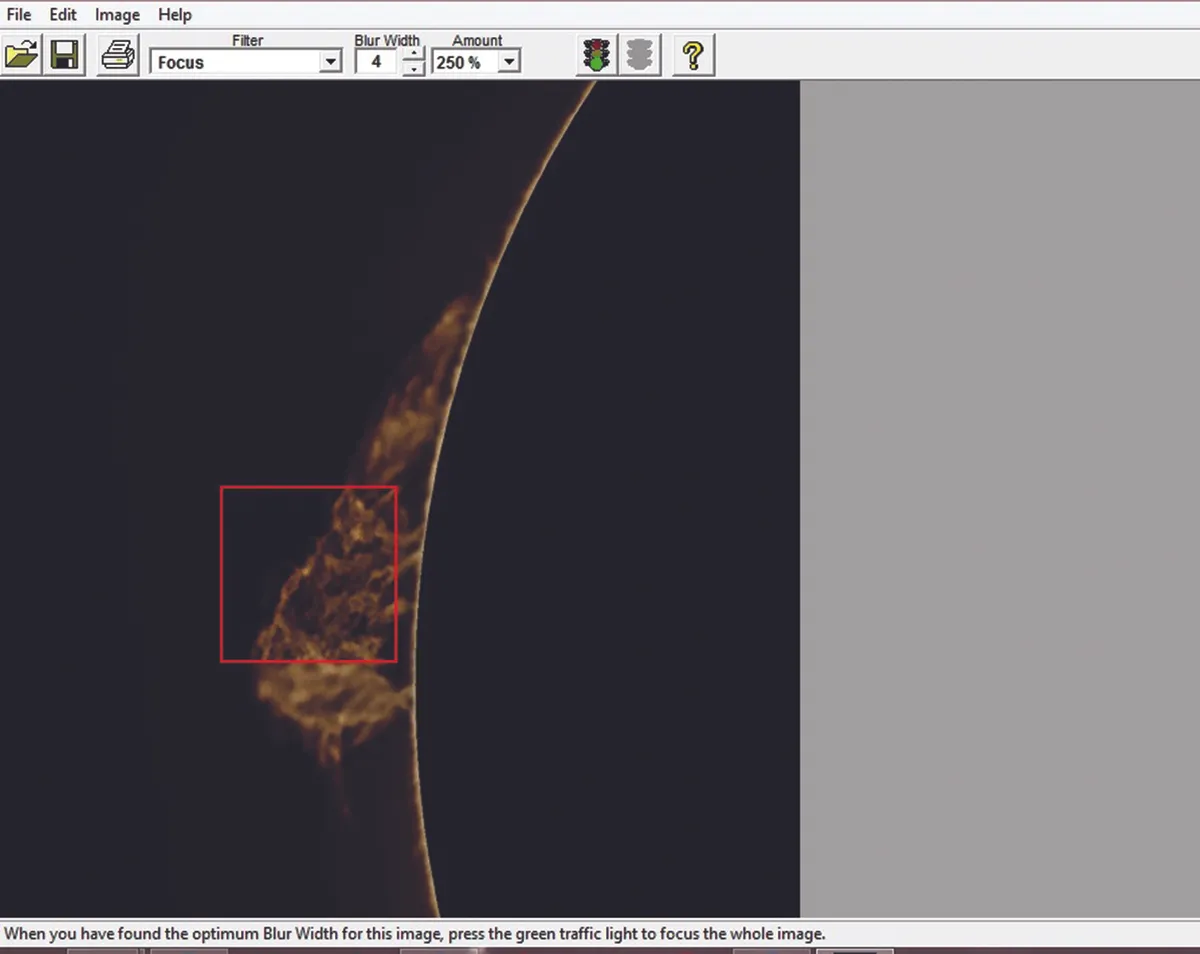
The first step in the sharpening process is to determine the blur width; this is a measure of how out of focus your starting photograph is.
When you open the image, Focus Magic automatically determines this value for you and it is displayed in the Blur Width box at the top of the page.
Click on the drop-down menu at the top of the page labelled Filter and select Focus.You will then see a small red box appear on your image; this is the preview box.
Focus Magic will by default focus using the blur width value that it determined automatically when you opened the image.
To move the box around and preview the effect of that level of focus adjustment, simply click on your image.
Experiment by changing the blur width value using the up and down arrows alongside the box until you are happy with the result.
If you push this value too much higher than the starting point, you can begin to introduce artefacts into the image.
Once you’ve decided on the optimum blur width, move onto the percentage box. Once again, use the preview window to test different percentage levels and select the value that gives you the best result.
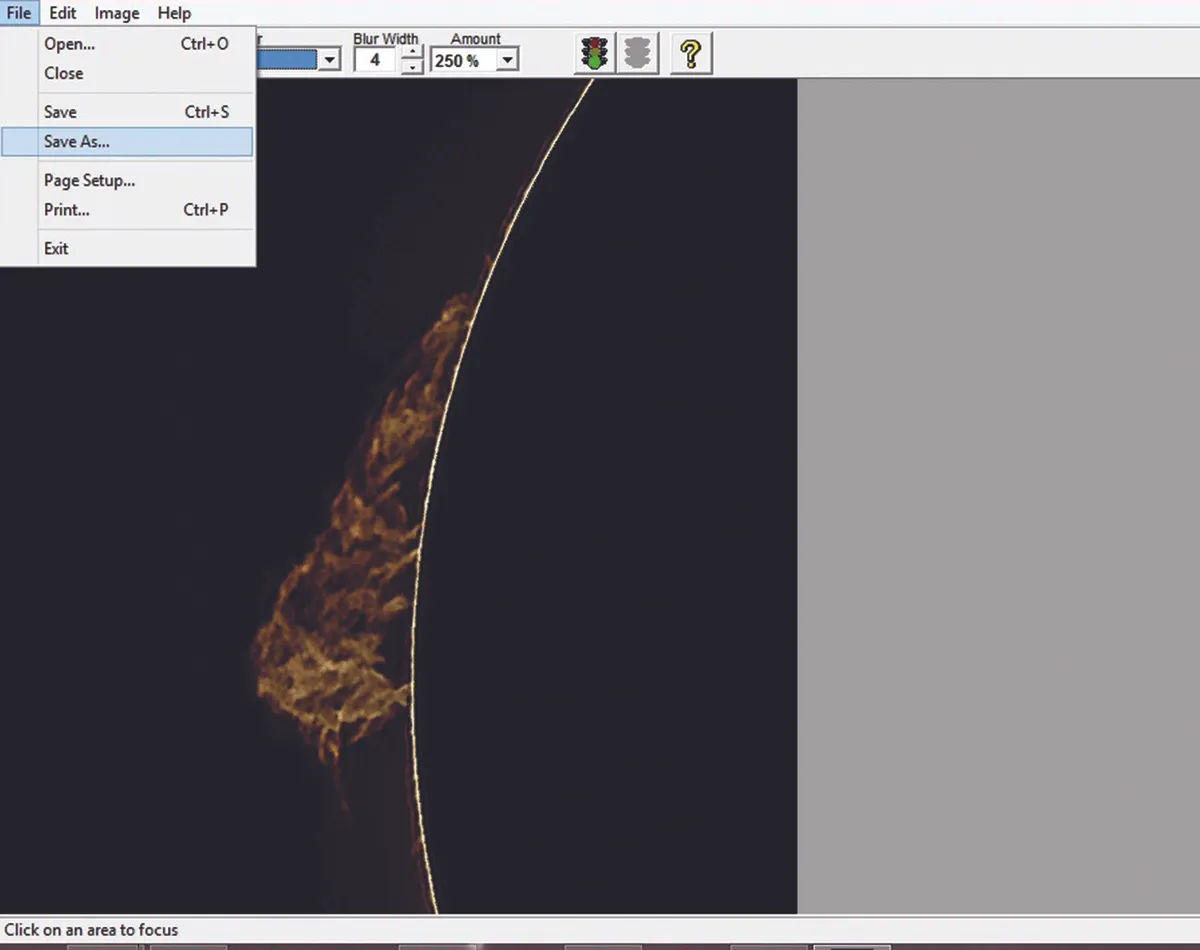
When you have found the optimum values, click on the green traffic light box at the top of the page and it will apply the settings to the rest of the image.
To save your adjusted image, click File > Save As and input the file name. Your image is finished.
This article originally appeared in the July 2016 issue of BBC Sky at Night Magazine. Mary McIntyre is a passionate astro imager based in Oxfordshire.
