CCD and CMOS astrophotography cameras have been on the market for many years and allow amateur astrophotographers to produce stunning image results.
But to get the best from your astro camera, you need to really understand and master its settings.
More astrophotography tips

If you’ve just bought one or you’ve had one for a while but you’re not getting the results you hoped for, it’s time to learn all about it – and learn from examples of good (and bad!) imaging results.
There are four main settings to focus on: exposure, binning, gain and offset.
We’ll run through how to judge your settings both during and after a ‘first light’ session.
Much can also be learned in post-processing, meaning you can tweak settings on the next clear night.

Equipment
- A cooled CCD or CMOS astrophotography camera
- A telescope to which the camera can be attached, with an adequate image circle to cover the dimensions of the camera sensor
- Control software for your mount and camera
- An equatorial mount
- Processing software

Exposure
Exposure is how long (in seconds) each frame is.
Finding your camera’s ideal exposure length depends upon many factors, including device sensitivity, sky conditions, light pollution and your astronomy target.
Longer exposures can lead to more signal and detail, but also introduce noise.
This could be system noise (created by the electronics) or shot noise.
While system noise is reduced by taking calibration frames, shot noise can be reduced by taking multiple frames to stack together later.
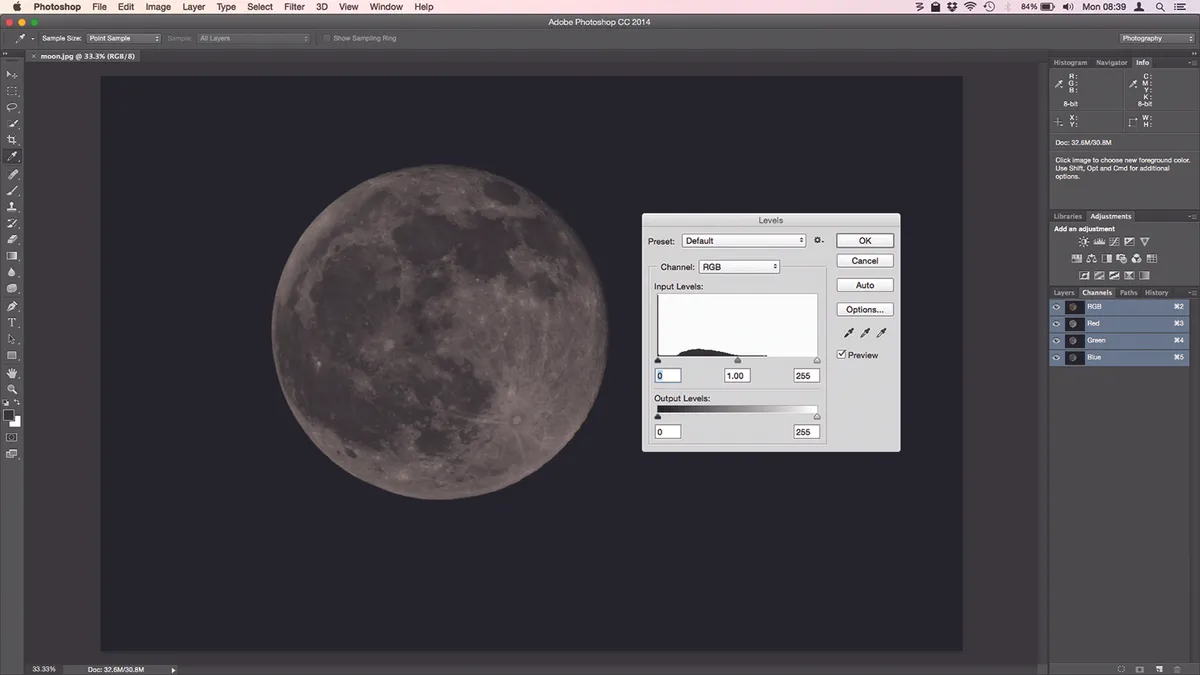
A careful examination of the histogram curve in your capture software will show if an exposure is too long or short.
If the curve is fully towards the left axis, shadow detail may be lost in post-processing, whereas a curve that extends to the right will clip highlights, leading to blown-out areas.
Binning
The next consideration is your binning setting.
In normal operation, each pixel acts on its own to record the photons hitting the sensor; this is known as 1x1 binning.
Binning at 2x2, however, combines the output from four pixels, which provides an increase in sensitivity, but four times less resolution.
You’d usually pick 2x2 binning to speed up the collection of colour data when using red, green and blue filters.
Separate exposures binned at 1x1 through a luminance filter can then be used to provide the finer detail.
Gain
Camera gain is important for CMOS cameras and is usually given by the manufacturer as a number, called the ‘unity gain’.
This means that one electron produced by the sensor will be recorded as one digital unit.
Changing gain is like turning up or down the number of electrons required to produce the same signal.
Increasing gain results in less signal being required to activate a digital unit, but more noise and less dynamic range.
While many CCD cameras have a gain setting, often they can’t be changed. An incorrect gain setting is difficult to identify before processing your image.
Look out for a tightly compressed curve on the temporarily stretched histogram during capture and lots of image noise once processed.
An image taken with a high gain will look flat without a full range of tones. Start by using the manufacturer’s recommended gain setting.
Offset
The camera offset setting determines the image’s black level. Manufacturers normally quote an offset for their cameras.
If the offset is set too low, dark blotches can appear in your image background.
Image processing

Much of what you'll achieve with you astrophotography will be achieved via processing, after the shot has been taken.
Most image-capture software provides a temporary stretched image.
Check the histogram: the left of the curve should show a small gap between it and the left axis, otherwise darker areas will be clipped.
Changing the offset setting adjusts this gap.

You can also check your offset setting when processing. Above is the Screen Transfer Function in PixInsight.
The histogram (top right) shows a gap from the left axis; the bottom menu shows the rest of the image is adequately spread between the other tones.

Above, the curve is shifted too far to the left (extending beyond the left axis).
The image suffers from loss of detail in the darker areas.
If you see this in your test images, change your offset in the capture software to move the curve further to the right.

In the image above, the curve is too far to the right (extending beyond the right axis) leading to burnt-out highlights (lower left).
Shorter exposures are required. This is particularly important when imaging galaxies where the core may burn out even with fairly short exposures.

These principles also apply to narrowband data; above is from an Ha frame.
A visual assessment of the image confirms there are subtle dark tones and detail in the light areas, meaning no details are clipped.
This implies that our camera settings are correct.

While processing your first-light images, note the settings you’d like to tweak.
Gain and offset are then changed in your capture software, eg Equipment Profile Manager in SGPro.
Exposure and binning settings can be changed in the image-sequence section.
Are you an astrophotographer? Whether beginner or seasoned expert, send us your images and they could appear in a future issue of BBC Sky at Night Magazine.
This guide appeared in the June 2025 issue of BBC Sky at Night Magazine