Star trails images are a very rewarding type of nightscape photography and there is a host of software out there that will enable you to produce them.
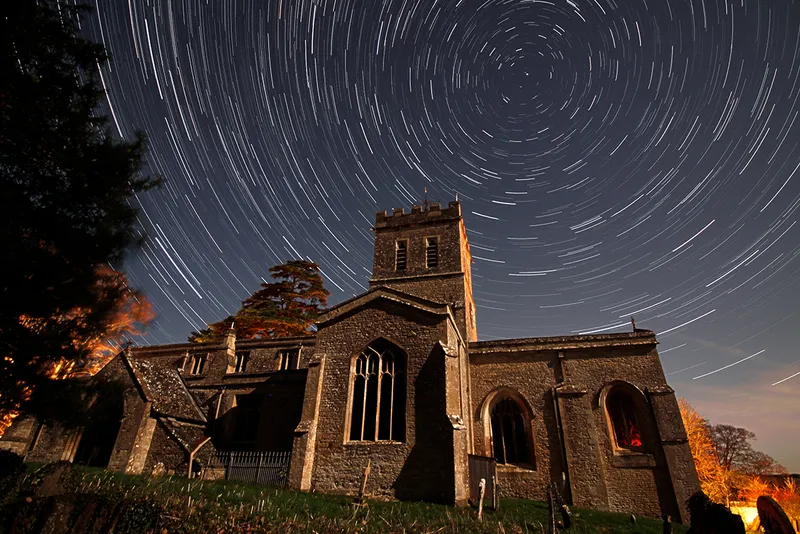
A star trails image captures the apparent movement of the stars as Earth rotates on its axis.
That's beautiful in itself, but when it incorporates a nice foreground it really elevates the shot.
The great thing about star trails photographs is that they’re very easy to produce and can be done with very basic camera equipment.
In addition to shooting images with the intention of creating star trails, you can also create them from photographs taken during other imaging sessions.
For example, if you’ve been photographing a meteor shower, aurora display or even a noctilucent cloud display, as long as your camera was on a static tripod and has not been nudged, you can take the images and create a star trail photograph with them.
This means that even if you don’t capture many meteors or your aurora alert resulted in a no-show, you’ll still get a lovely image from the data.
There are several free pieces of software available that will create star trails, but in this example we are using Sequator.
This star trails software is free, easy to use, stacks quickly and also has several useful features that can be applied to the output image during the stacking process, reducing the need for further image processing.
Simple steps
For this star trails software guide, my images were taken using a 10-year-old Canon 1100D DSLR camera fitted with a Canon 10–18mm wide-angle lens.
But you could use an 18–55mm or fixed 50mm lens instead.
I took 83 exposures of 30 seconds at ISO 800 and f/4.5.
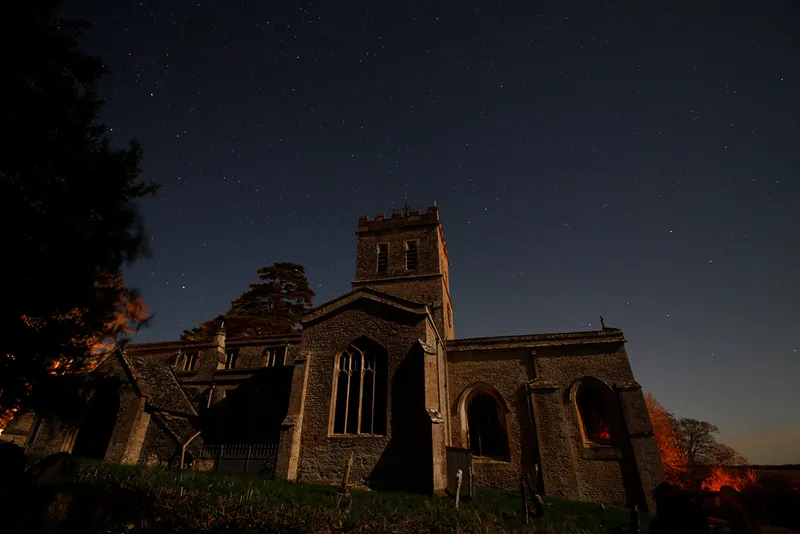
The photos were taken during a full Moon and from a position where moonlight nicely illuminated a church.
This is the beauty of star trails photography: as long as you’re not pointing directly at the Moon, you can still create gorgeous images in a moonlit sky.
To help reduce signal noise from the camera and other artefacts in my image, dark calibration frames were shot at the end of the imaging session.
These were captured by simply putting the lens cap on the camera, covering the viewfinder and then taking 20 images with the same settings.
Using Sequator software to create star trails

To make your star trails image, start by opening Sequator software.
Select all of your image files and drag and drop them into the program.
When the image category box pops up, select Star images.
If you have taken dark calibration frames, then once you’ve finished importing your star images, select all of your dark frames and drag and drop them into Sequator too, this time selecting Noise images from the image category box so that they don’t get accidentally added to the star image frames.
In the top-left box you will now see that your images and dark files have been loaded into those tabs.
Underneath them double-click the Output tab, then choose the folder you want to save the stacked image into.
Click the Filename box and type in a suitable file name.
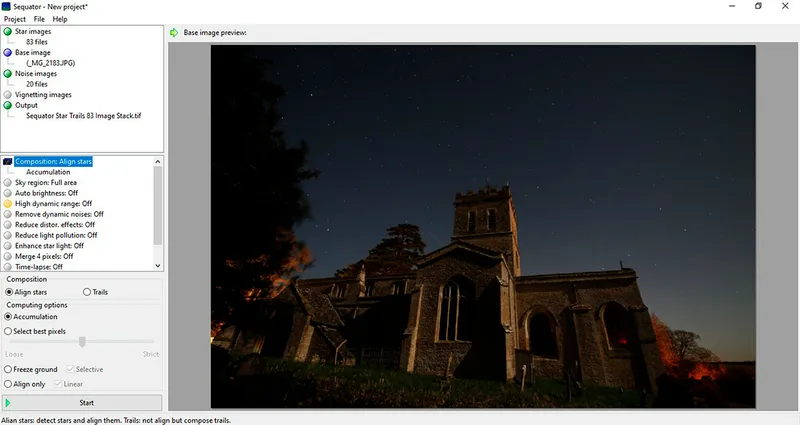
In the next box down on the left side, double-click the Composition tab.
From the box that pops up at the bottom, select Trails – otherwise the software will align the stars, which will blur the foreground.
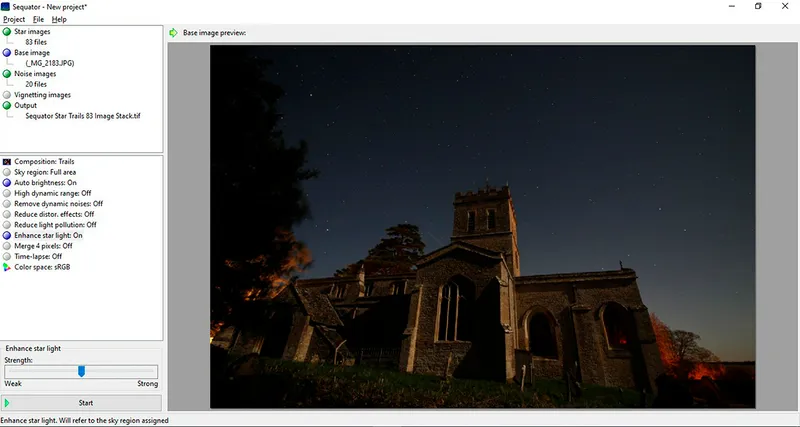
Below this, double-click the Auto brightness tab.
This can help to lift areas of your image that are a bit darker; in this case, it brightened the foreground light on the church.
Double-click the Enhance star light tab.
In the box that pops up at the bottom set the Strength slider to half-way.
This will increase the brightness of the stars in your image, which is a very useful feature if your images were taken under a lot of moonlight.
Applying too much can look unnatural; less is more.
Finally, click the Start button at the bottom and the final stacked image will be created.
It took less than 30 seconds for the stacked image to be produced and the result was good enough without any additional processing.
However, just to make the final image even more polished, Fast Stone Image Viewer, a free image-processing program, was used to slightly crop the image and make the church tower more central to the composition.
And the clone tool was used to remove aircraft trails and any hot, cold or dead pixels that were visible.
3 quick tips
- In Sequator, light frames are called ‘Star images’ and dark frames are called ‘Noise images’.
- Choose the folder and a file name for your stacked image before you stack the photos.
- Select ‘Trails’ in the composition tab to ensure you get a star trails image rather than a photo with all the stars aligned.
Have you managed to captured any star trails images? Don't forget to send us your images.
This guide appeared in the December 2023 issue of BBC Sky at Night Magazine