A webcamscope provides a simple and cheap introduction to astrophotography. As its name suggests, it’s built around the sort of webcam you might buy for Zoom meetings, rather than a DSLR camera.
The components you need to make a webcamscope are widely available and, whether you choose brand-new or second-hand parts, they won’t cost much. You may even have some of them in a spare drawer.
I paid £11 for the webcam and £16 for the 200mm M42 lens on eBay, while the eyepiece adaptor, which replaces the webcam’s lens, was £10.
Second-hand M42 lenses are commonly available and, as they use a screw thread rather than a bayonet fitting, you can make a mount for one from an old rear lens cap.
Lenses can be heavy, though, so you can adapt the wooden mount to incorporate a cradle to support the front part as well.
When building your webcamscope, it’s important to get the correct distance between the backplate of the lens and the surface of the sensor in your webcam (the registration distance).
For M42 lenses, the registration distance is 45.5mm. If you vary this by too much, you might not be able to focus.
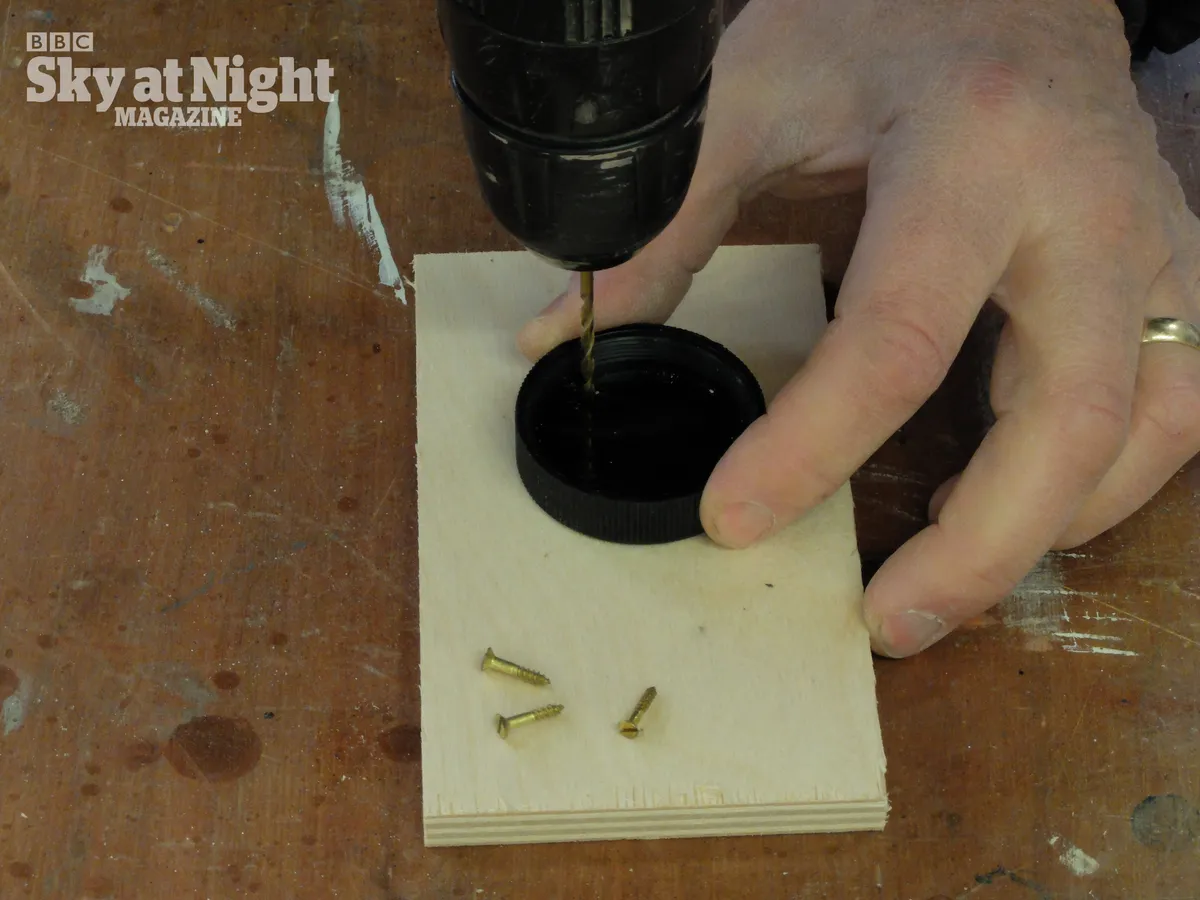
I drilled a 32mm-diameter hole through the wooden mount to hold the webcam adaptor, with a wider recess for the M42 rear lens cap, so the webcam and camera lens were held close together.
A little masking tape wrapped around the adaptor stops it slipping out.
Once set up, you shouldn’t need to make big changes to the focus, but it helps to be able to turn the lens’s focus ring if you shift targets.
Cutting away the sides of the wooden mount will make it easier to access the ring.
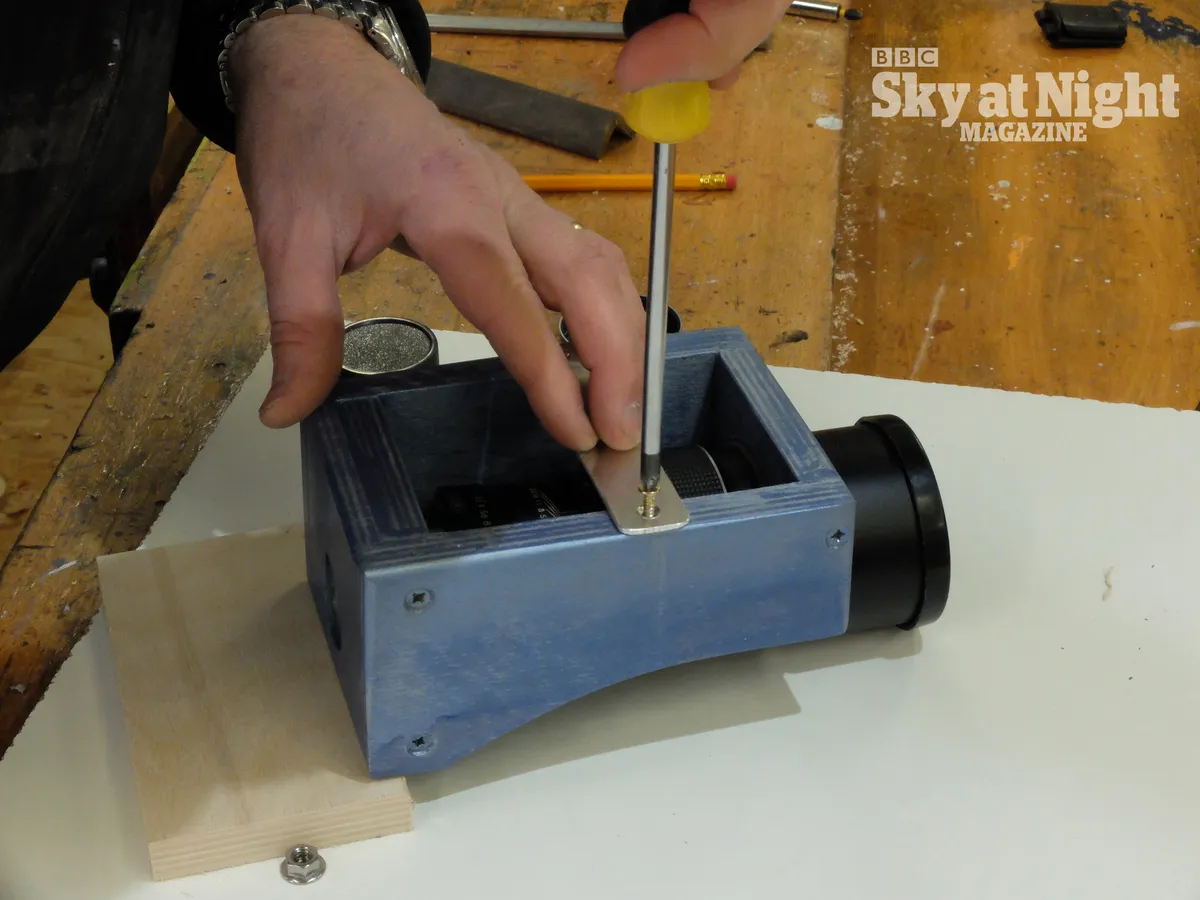
A metal strip with a ¼-inch hole allows the mount to be fixed to a tripod.
Position this once you’ve established the balance point of the assembled instrument, to reduce any tripping potential.
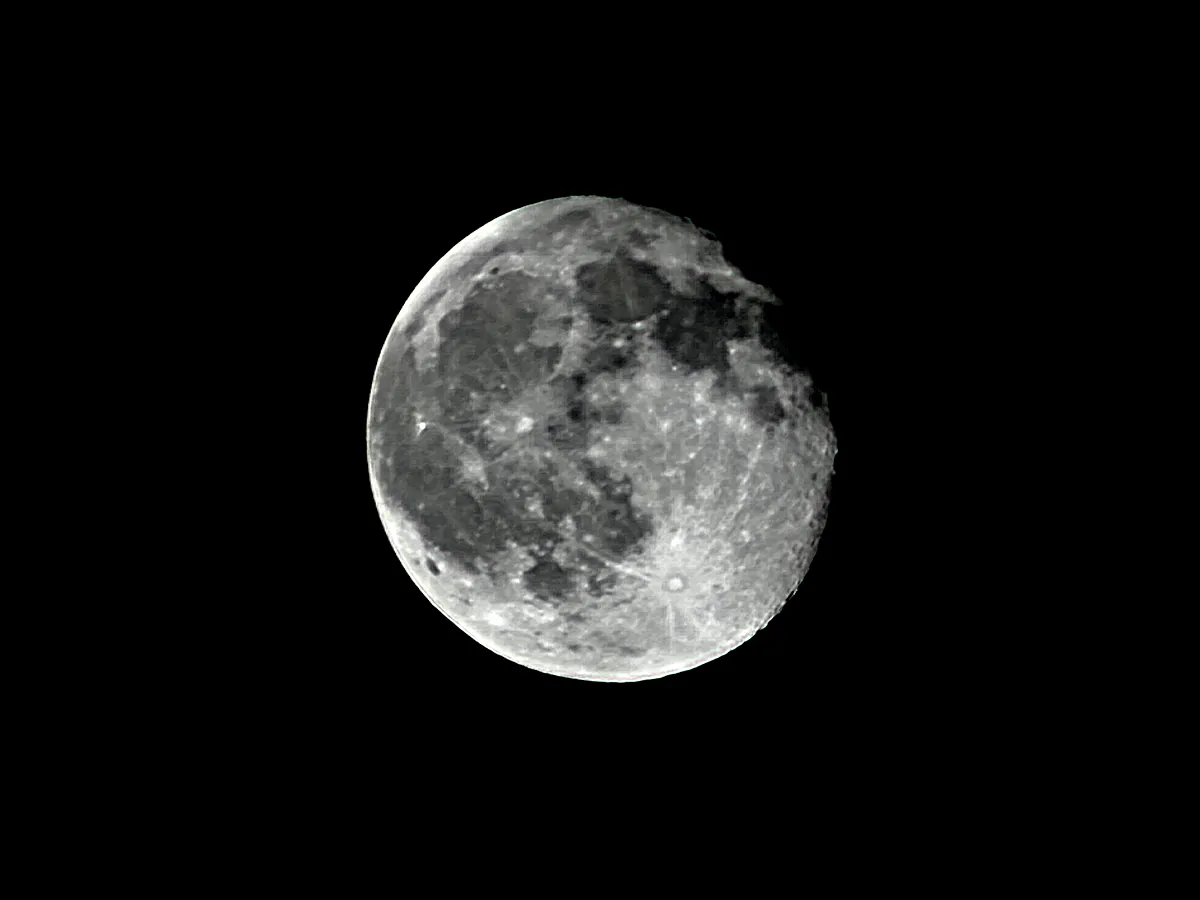
How to take a photograph with your webcam telescope
To create an image, you’ll need to capture a video clip. You can use a SharpCap on a Windows computer or Open Astro Project on a Mac.
Once you have a clip you can use stacking software to align and stack the best frames from the video, as well as to remove any noise, and produce a high-quality, still image.
Lynkeos is a stacking application for Mac, while RegiStax is popular for Windows.
Using this webcamscope is as easy as making it: point, focus and record a video clip.
Experiment with different exposure settings to see which clips are better to process. You’ll become addicted.
Tools and materials
- Marking-out tools (a ruler, compasses and a pencil)
- Coping saw (or drill and hole saws)
- Plywood or softwood, approximately 600mm x 80mm x 15mm (or 12mm)
- Small strip of stiff metal (approximately 100mm x 25mm x 3mm)
- Small screws
- Wood glue
- Paint
- M42 camera lens (with a focal length of 200mm or similar)
- M42 screw cap
- Webcam (and a laptop)
- 1.25-inch webcam eyepiece adaptor
