The plaintive call we’ve heard from many a novice telescope user is, “I can never find anything. What am I doing wrong?”
Very often there’s a simple reason that is easy to rectify.
First, always check that your finderscope – typically a small, wide-field-of-view optical instrument mounted like a gun sight on the side of the telescope – is correctly aligned.
Then you can be sure that what you see at the centre of the finder’s eyepiece will also be visible in the main telescope.
But what if the object you wish to locate is too faint to see in the finder, or maybe it’s in an area of sky that you’re unfamiliar with?
A good technique is to use the setting circles on your telescope mount. We'll come to that in a bit, but first let's look at some other ways of successfully tracking a celestial object in the night sky.
There are three ways to track it down.
Star-hopping

This is the process of following a trail of interlinked and easily recognisable patterns of faint stars starting from a readily identifiable naked-eye star in the general area of your target.
You will need a detailed star atlas, or charts printed from a desktop planetarium package to a scale large enough to match the field of view of your finder/telescope.
A helpful hint to remember here is that at a magnification of about 50 times, your scope’s field of view is around 1º wide, or twice the width of the full Moon, while most optical finders have fields of around 7º.
Celestial coordinates
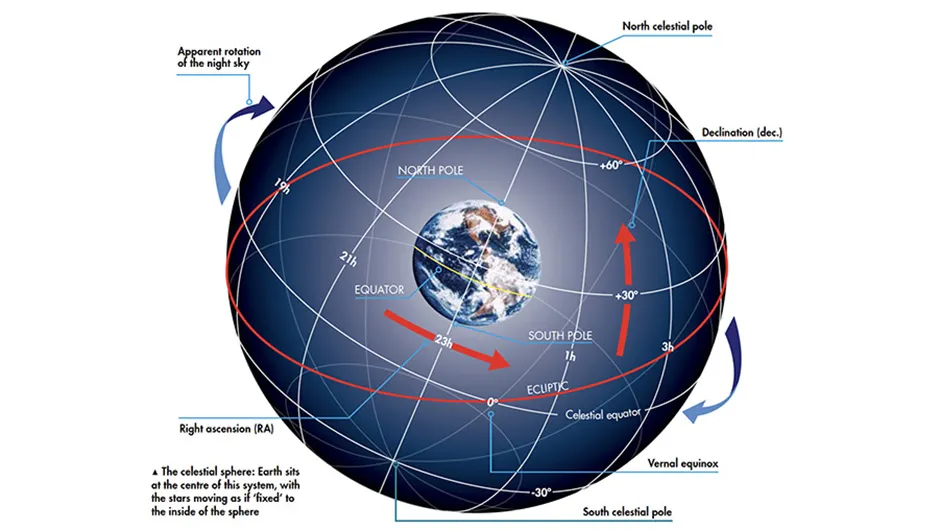
Celestial coordinates are a more accurate way of locating an object in the night sky.
The coordinate conventions we use in the sky are extensions of their familiar terrestrial counterparts, latitude and longitude.
Just as latitude ranges between zero and 90 degrees north and south of the Earth’s equator, so too does declination range between zero and 90 degrees north (+) and south (-) of the celestial equator.
Whereas terrestrial longitudes range between zero and 180 degrees east and west of the Earth’s Greenwich meridian, the celestial counterpart – right ascension – is measured in hours, minutes and seconds over a zero to 24 hour range.
Go-To mounts

Still perceived by some old-school observers as cheating, the modest prices of entry-level computerised telescope mounts make them very appealing to beginners as well as experienced observers.
After performing a brief alignment procedure at the start of an observing session, the mount’s computer can accurately model the sky above and will automatically drive the scope to an object selected from a pre-programmed menu and track it.
However, for all their convenience, Go To telescopes are anathema for those with a dislike of computerised technology, whining motors, or a reliance on power sources in the field.
Setting circles
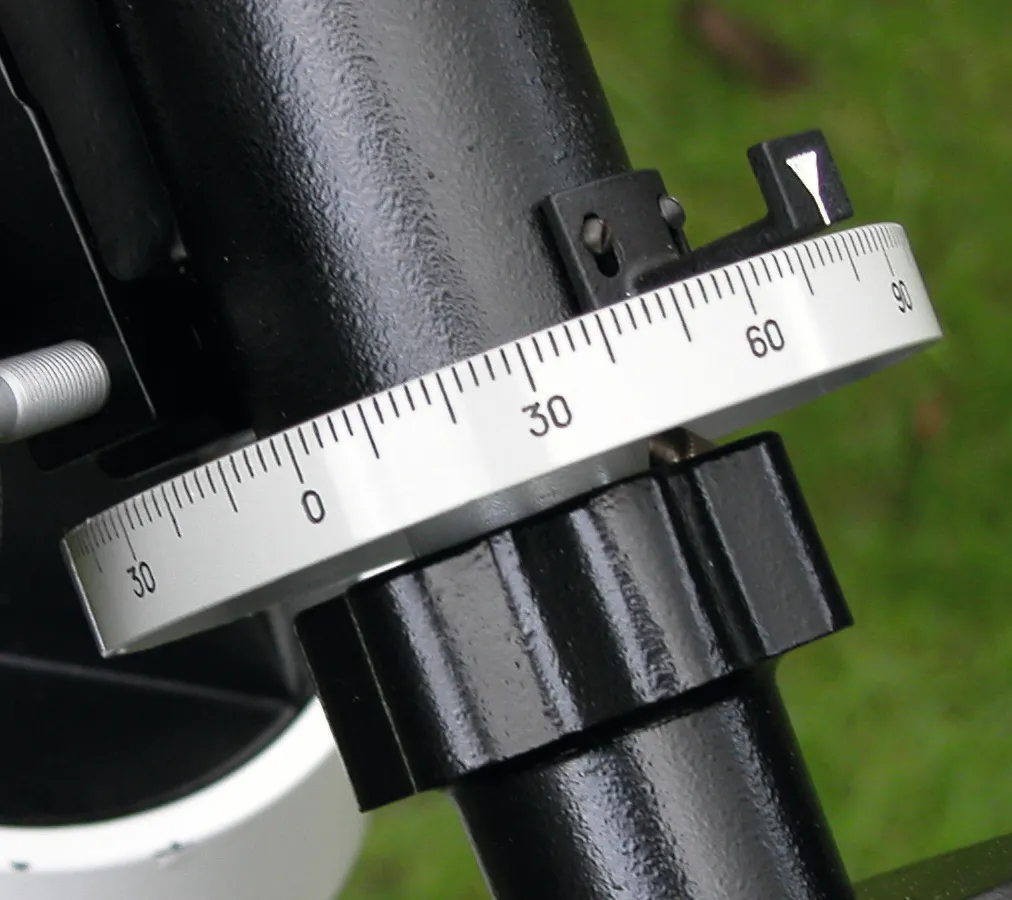
The third and time-honoured method of locating celestial objects is to make use of the setting circles built into an equatorial mount.
They offer a convenient way of locating what you want to see by ‘dialling in’ their positions from the coordinates published in catalogues.
It's much easier to track celestial objects once the equatorial mount’s polar axis was made parallel to the Earth’s axis of rotation.
You can find out more about this in our guide on how to align a telescope mount.
Accurate polar alignment is an essential prerequisite to the following procedure.
The best way to find a faint object from its catalogue coordinates is to offset from a readily identifiable nearby object like a naked-eye star.

The reason for choosing a starting point reference object close to your intended target is that it minimises any errors you may have inadvertently made in setting up and aligning your mount.
Use a low-power eyepiece to give you a wider field of view, too.
The rest of the procedure is best illustrated by the example described below and pictured in the step-by-step guide.
It involves finding the popular summer deep-sky object the Dumbbell Nebula (M27), which is in the relatively obscure Milky Way constellation of Vulpecula.
M27 lies about 24º from the brilliant blue-white star Vega in the constellation of Lyra.
Vega, then, will be our starting point.
Consulting a catalogue gives us the following set of coordinates:
Dumbbell Nebula

- RA = 20h 00m
- Dec. = +22.7°
Vega

- RA = 18h 37m
- Dec. = +38.8°
Loosen the clamps locking the axes of the mount and swing the scope to point at Vega, carefully centring it in the field of view before locking the axis clamps once again.
Note the declination reading for Vega; if it doesn’t read close to +39°, very carefully adjust the indicator pin or the declination scale until it reads the correct value (consult the manual that came with your scope if necessary).
Note that checking and adjusting the declination scale is something you only have to do once with a new mount.
Check that Vega is still centred in the field of view and slip the right ascension scale until it reads the value of the star (again, consult your telescope manual for specific instructions).
The coordinate reference frame of the mount is now ‘locked’ to that of the sky.
Unlock the declination axis and move the scope down (south) by just over 16° until it reads the value of the Dumbbell Nebula: +22.7°.
Lock the declination axis once more.
Now unlock the polar axis to adjust the right ascension.
Since M27 has a right ascension greater than Vega, you need to rotate the polar axis by 1h 23m in an anti-clockwise direction (as viewed from the north) until the right ascension scale reads 20h 00m.
Carefully lock the polar axis and look through the finder or the main instrument.
You may need to use your slow motion controls to refine your pointing, but the soft glow of the nebula should be there to greet you.

Equipment
Torch
Preferably a head torch with a red Cellophane filter to preserve dark adaptation, or a small red LED keyring flashlight that you can hold in your teeth – you will need your hands free.
Watch
An accurate watch is an essential tool for astronomers. Not only will you need to time when astronomical events will occur, but it’s useful for setting your planisphere (see below) and logging observations. Remember that all your observing records should show the time in 24-hour format, Universal Time (BST minus one hour).
Planisphere
This is a tremendously useful accessory for planning a night’s viewing session and everyone should have one. By setting the date and time (rememberto take an hour off your watch time when BST is in force) you can see at a glance which stars will be visible for the given instant.
Star charts
A detailed set of charts complements a planisphere beautifully. They are essential should you wish to star-hop from readily identifiable stars to objects too faint to see in your finder, or to confirm that the patterns of faint stars visible in your scope are indeed the same as those you wanted to target.


