It is possible to observe the Sun safely, provided you have the right equipment and take the proper safety precautions when doing so.
At the height of summer, as truly dark nights become a thing of the past, many astronomers turn to our nearest star the Sun as the focal point for their observing sessions.
There are numerous space missions dedicated to the study of the Sun, but the good news is that you can observe features on the Sun yourself, provided you do so safely.

What you'll see
You can get great, close-up views of our star with the right observing equipment, be that solar filters or specially-designed solar telescopes.
But it’s important to realise that the Sun’s intense heat and light can be very dangerous if not treated with respect.
So you must always observe the Sun safely, using the right equipment.
It is also possible to capture an image of the Sun, and do it safely. For more on this, read our guide on how to photograph the Sun.
You should never observe the Sun with any optical apparatus that has not been fitted with a proper solar filter.
Don’t use sunglasses or layers of photographic film – it’s just not worth the risk.
We have numerous guides that might be of use to your solar observing, such as how to make a pinhole camera, how to build a simple solar finder, how to build a solar projection screen and how to safely polar align an equatorial mount using the Sun.
Many of the techniques described below can also be used to help you observe the next eclipse.
Equipment for safely observing the Sun
There are numerous ways to safely observe the Sun, such as
- Solar filters
- Eclipse glasses
- Solar projection
- Solar telescopes
We'll cover each below.
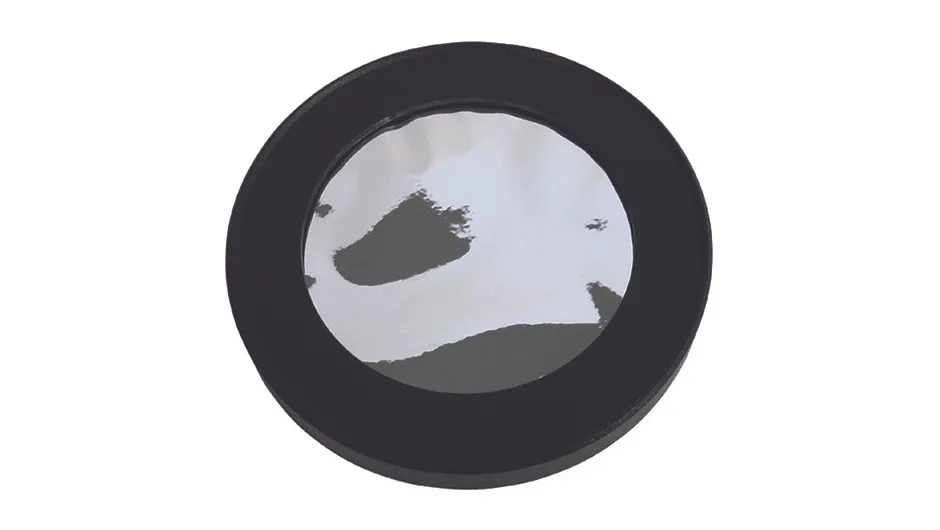
Solar filters are a great way to safely observe the Sun, but they are very dense.
They have to be able to filter all visible wavelengths to a safe level, as well as blocking infrared and ultraviolet light: wavelengths that can cause permanent damage to the eyes.
You can also use eclipse glasses, with which you can safely get the same views. But make sure they are absolutely clean and scratch-free.
If they've been lying around your house for sometime, they may no longer be safe. Never take chances when attempting to observe the Sun.
For more advice, read our guide on how to make sure your eclipse glasses are safe.

If you want to get more than just a safe, naked-eye view of the Sun you’ll need something a bit more substantial than basic protection.
With a telescope or binoculars on a tripod, you can project the Sun’s image onto a large piece of white card to see features on the photosphere (its visible surface).
The card is simply placed in front of the eyepiece where your eye would normally go.
If attempting this method, do not look directly down the eyepiece, and make sure your finders are covered.
This method is for indirect observation only.
And never leave your telescope pointed at the Sun unattended.
Once everything is set up, and after some focusing, you can easily see any sunspots.
For more on this, read our guide on how to observe sunspots.

You can also get safe solar views through reflectors and refractors by fitting a solar filter over the front, objective end of the telescope.
These cut out all of the ultraviolet and infrared radiation (heat) from the Sun and also 99.9% of its brightness, so the internal workings don’t heat up.
Solar filters are made from materials such as aluminium-coated Mylar, or coated glass – but do get advice from a reputable dealer.
It’s important never to use a solar filter that screws into an eyepiece.
These are very dangerous because they sit at the point where the full power of the Sun is focused and could shatter and let in blinding sunlight.
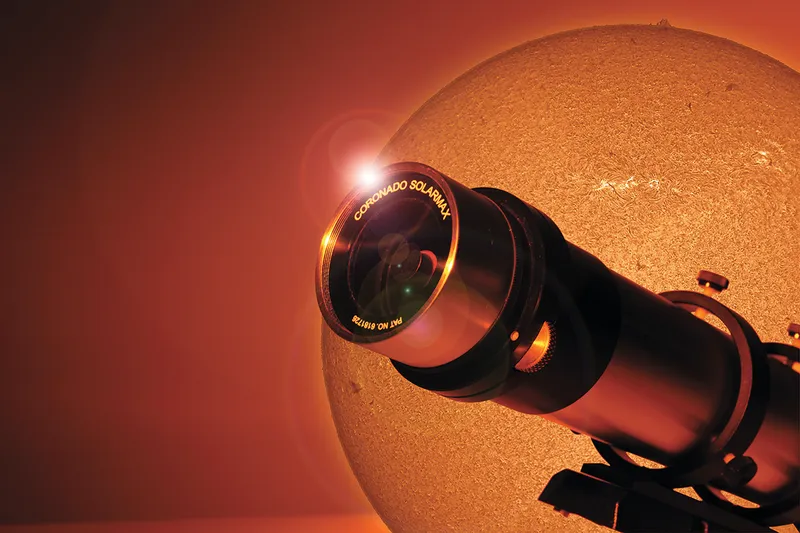
There are also specialist solar telescopes. The most popular and affordable of these is the Personal Solar Telescope, or PST, from Coronado.
This shows just one wavelength of light – the most active – that’s given off by hydrogen atoms.
This will reveal features such as prominences and filaments – solar activity that is invisible when projecting the view or using solar filters.
Have a search online and you should be able to get your hands on a good selection of solar filters.
Remember only to buy from reputable suppliers who are selling professionally-made products.
Avoid buying any 'homemade' solar equipment.
Safe solar-observing techniques
Solar observing is the one time that astronomy poses a real risk of physical injury. Here’s how to do it safely...
Solar Projection
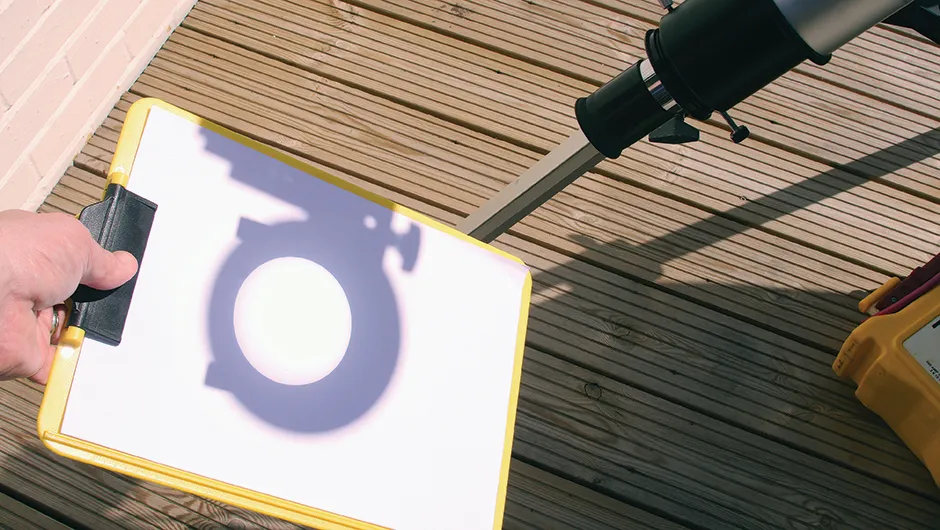
All you need is a piece of white card, onto which you project the image of the Sun from your scope or binoculars.You could also fix another piece around the front end of the scope to create a shadow around the projection.
This technique is easy to create at home. Read our guide on how to make a solar projection screen.
Advantages: Good for eclipses and sunspots.
Cardboard sun projector

These kits are simply a small telescope and mirror that projects an image of the Sun onto a white screen on the inside of the box.
Advantages: It will show much the same views as the solar projection setup – great if you don’t have a scope.
Solar filters
These glass or film coverings fit completely over the light-gathering front end of the scope, stopping all heat and virtually all light from the Sun entering the scope.
Advantages: Good for viewing sunspots and granulation.
Personal Solar Telescope

The Personal Solar Telescope (PST) is made to reveal one specific wavelength and can show much more than your naked eye will see with film or glass filters.
Advantages: Good for prominences, active regions, filaments and faculae.
Features to observe on the Sun
So you're set up and ready to safely observe the Sun. What can you expect to see?
Prominences
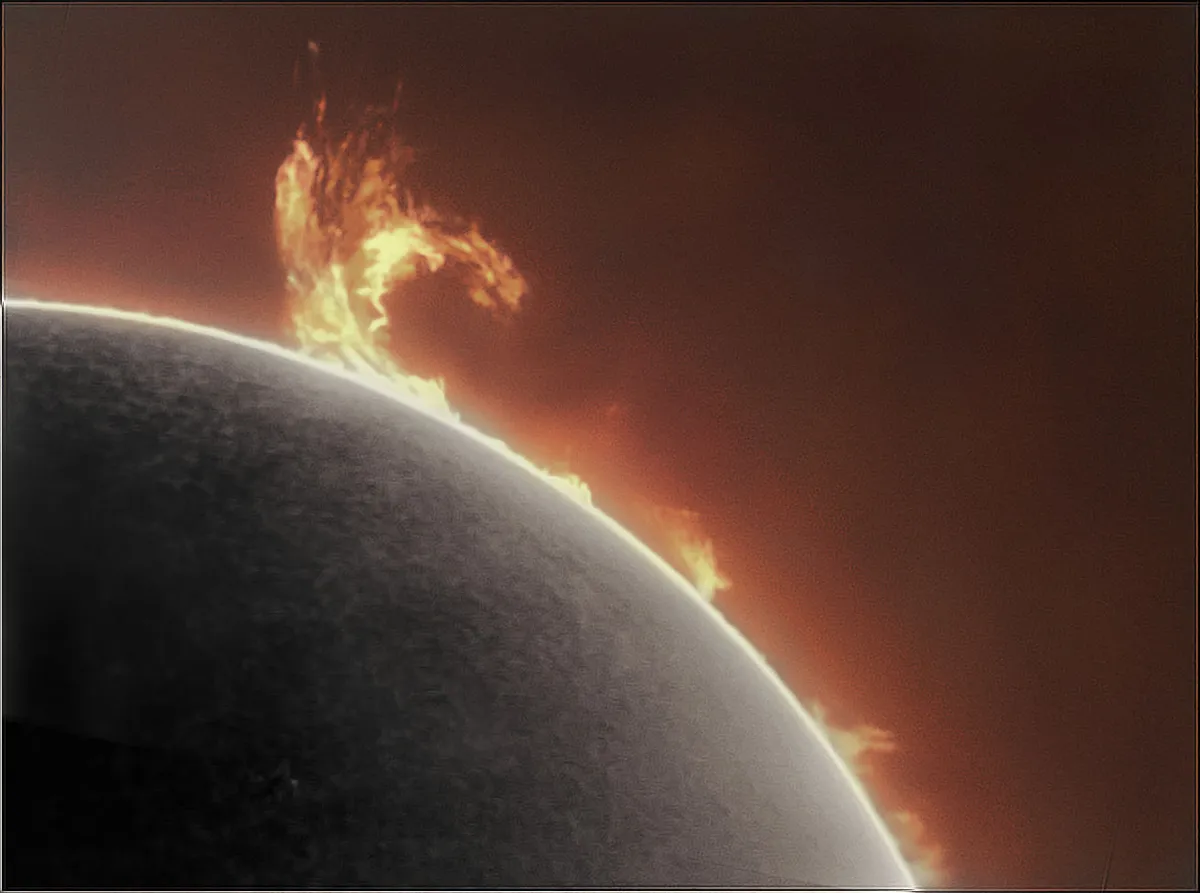
A prominence is a dense cloud of material that can be seen just outside the bright photosphere of the Sun.The gas is created and held there by the Sun’s vast, arching magnetic fields.
Best seen with a PST.
Sunspots
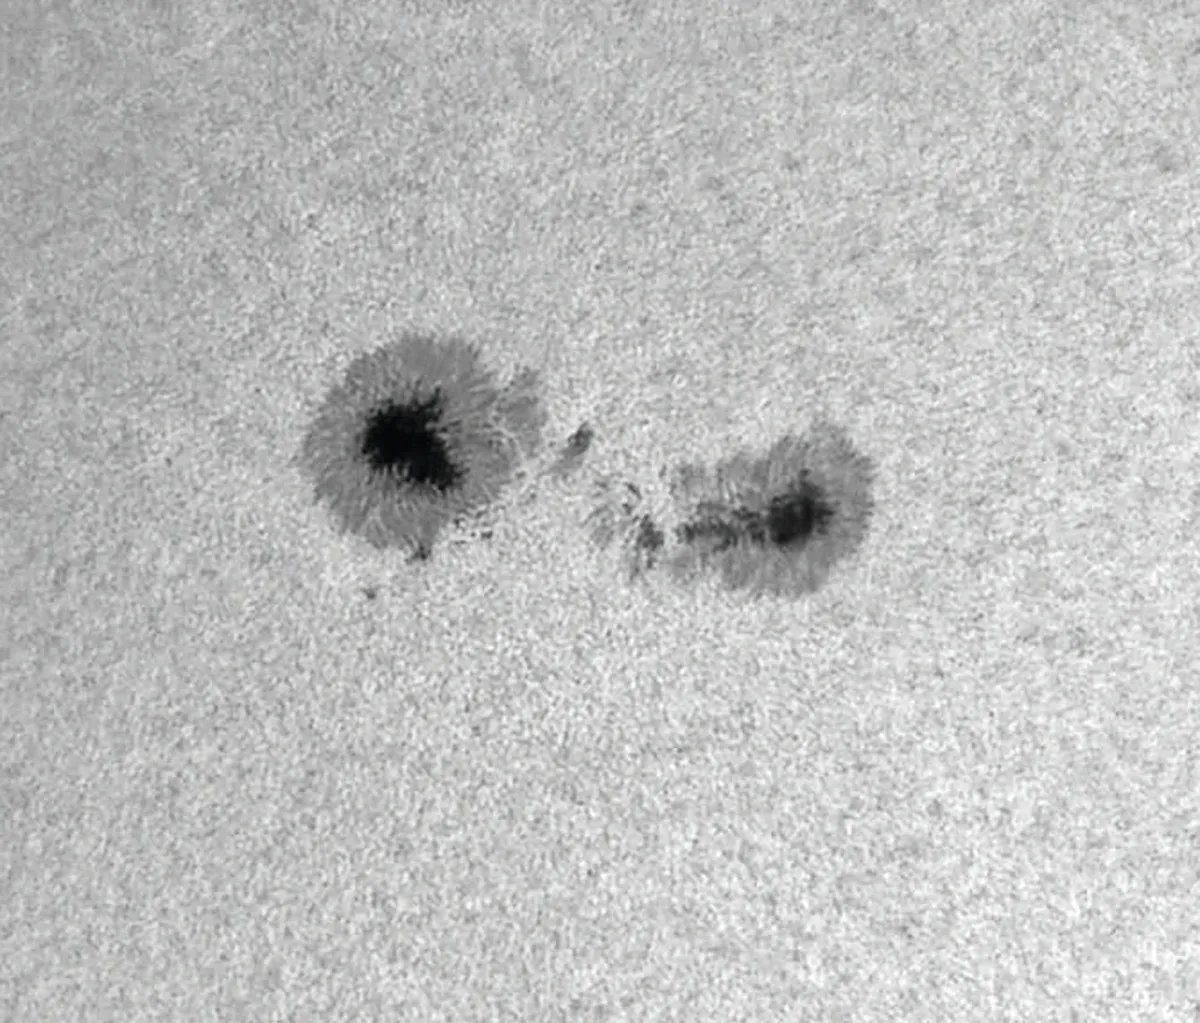
Sunspots are caused by immense magnetic fields.These reduce the temperature of regions of the photosphere producing dark spots.
See them with solar projection, PST or solar filters.
Filaments

A filament is the same as a prominence, except that whereas prominences are seen outside the Sun’s disc, filaments are seen against the disc – which makes them a little harder to pick out.
Best seen with a PST.
Flares
Flares are the most explosive features on the Sun and are associated with sunspots.
They are believed to be caused by sudden changes in the Sun’s magnetic field.
Best seen with a PST.
View the Sun in different wavelengths
There are different ways you can safely observe the Sun, as different wavelengths reveal different features.
With the right equipment, it is possible to isolate specific wavelengths of light coming from the Sun – white light, calcium K or hydrogen-alpha – at the same time as blocking the other wavelengths.
Here we look at what these three different views will show you of the Sun’s internal structure and features; things that would be otherwise hidden by our star’s overwhelming brightness.
White light
When observing in white light you are actually viewing a range of wavelengths across the visual spectrum.
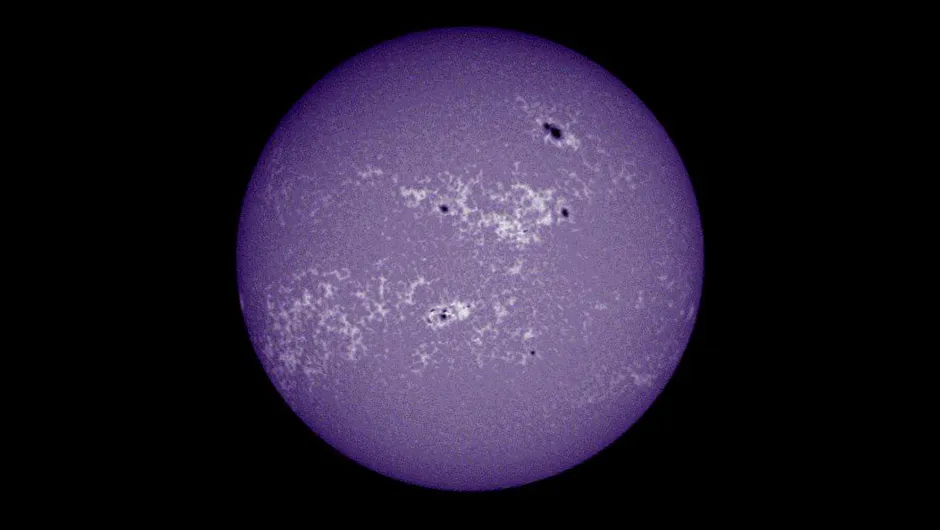
This allows you to see a layer of the Sun called the photosphere, where you can observe familiar sunspots, the darker and cooler regions where magnetic field lines are concentrated.
With their darker central umbra and lighter surrounding penumbra, sunspots are the easiest feature to see. Smaller dark spots without developed umbra and penumbra are known as pores.
In active regions we can observe faculae: brighter patches best seen from an oblique angle near the limb of the Sun where limb darkening allows them to stand out easier.
Through larger apertures and at higher magnifications polygonal granules are visible, which are giant convective cells of plasma.
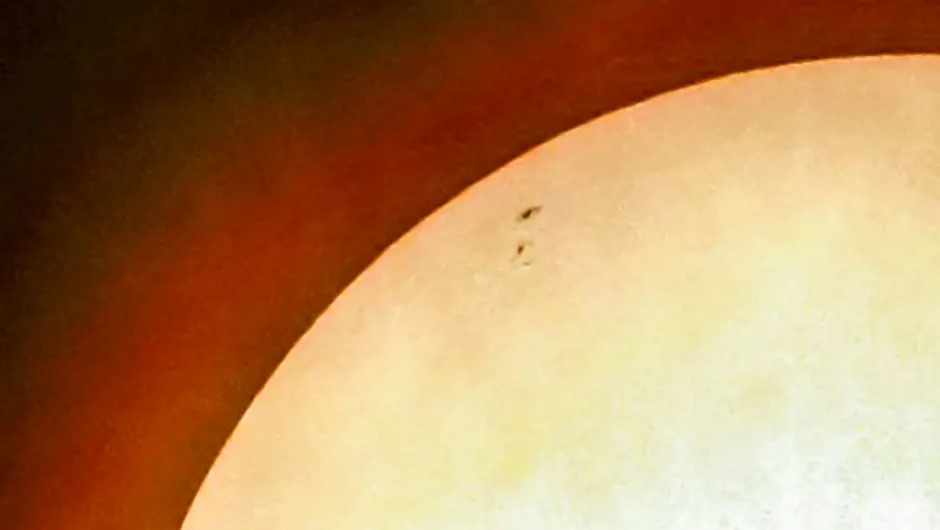
Solar transits, where an object passes in front of the Sun, can also be seen.
Commonly these are birds or planes, but on rare occasions the International Space Station will also pass over.
Any telescope can observe the Sun in white light by using a suitable front-mounted glass or solar film filter.
Be sure to get these from a dedicated astronomy retailer rather than attempting to improvise a filter yourself – the safety of your eyes is paramount.
A green or continuum filter at the eyepiece end will allow a higher contrast view or image to be achieved by reducing the effects of the poor daytime seeing.
For the highest contrast view, a Herschel wedge used in conjunction with a continuum filter, an ultraviolet/infrared-cut filter and a refractor is the best option.
Imaging the Sun in white light
Imaging the Sun in white light is easy and a wide range of cameras can be used.
With a dedicated solar filter over the front of your telescope, results can be captured and viewed instantly by holding a camera phone or compact camera afocal to the eyepiece, with a DSLR camera at prime focus or even by projecting the image of the Sun onto a white screen.
The best results are achieved using a Herschel wedge and digital CCD camera, where many hundreds of individual frames are captured in video format.
Using freely available software that can be downloaded from the internet, such as RegiStax or Autostakkert, the sharpest frames are automatically selected and digitally stacked into one final image with less noise and better quality than the individual frames.
This can then be coloured to individual taste using freeware such as GIMP.
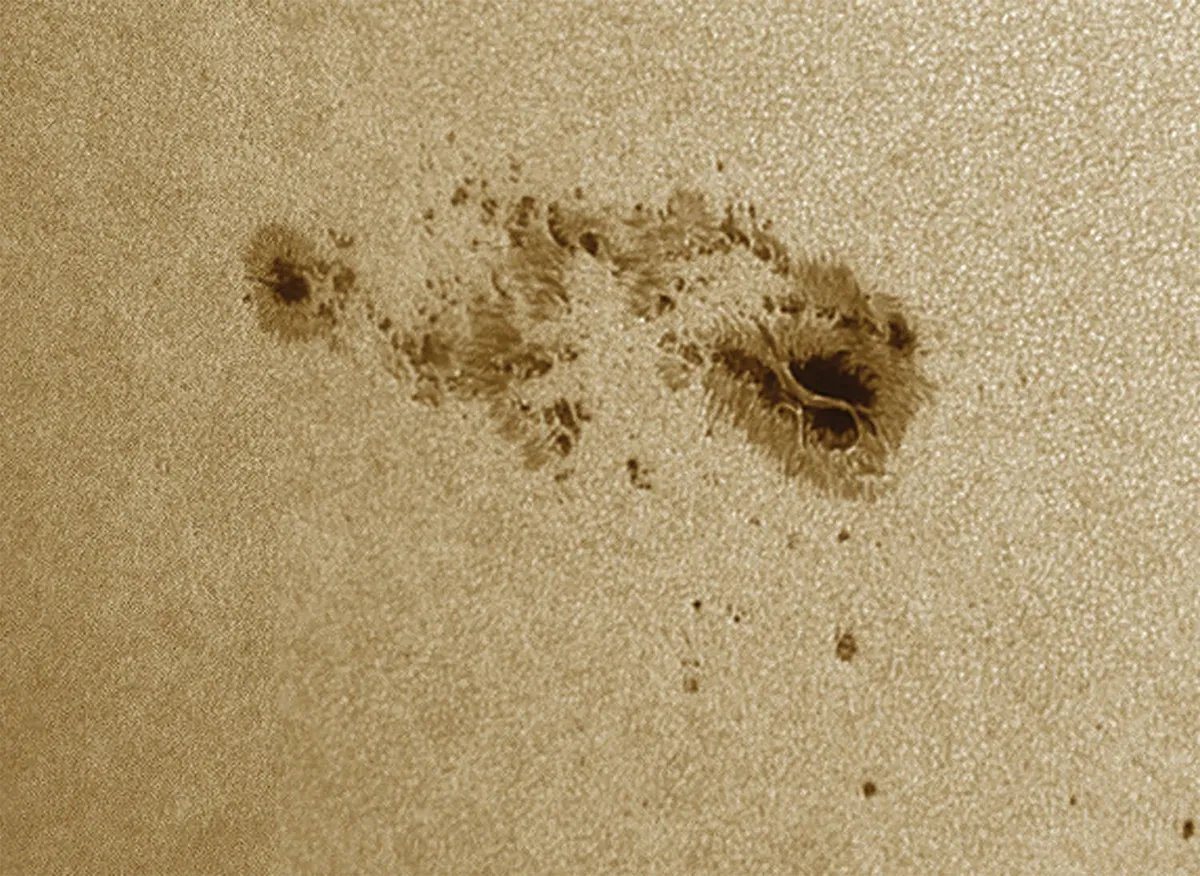
Sunspots
Sunspots appear dark against the photosphere, often occurring in groups known as active regions. A typical sunspot shows a dark inner core called the umbra, and a lighter surrounding region called the penumbra. Sunspots appear dark because they are cooler than the surrounding photosphere.
Faculae
The limb- darkened edge of the Sun’s disc provides excellent contrast for viewing faculae. These are magnetically affected regions where the Sun’s ‘surface’ becomes more transparent, allowing you to see into the deeper, hotter areas below.
Granulation
The Sun’s visible surface, or photosphere, is covered in a fine pattern called solar granulation. This can be tricky to see and image as it’s easily hidden by poor seeing. Granulation represents the tops of huge rising convective cells reaching the photosphere.

Limb darkening
When the Sun’s disc is viewed through a white light filter, the centre appears brighter than the edge. This is called limb darkening and occurs because at the centre of the disc you can see deeper into hotter, brighter layers.
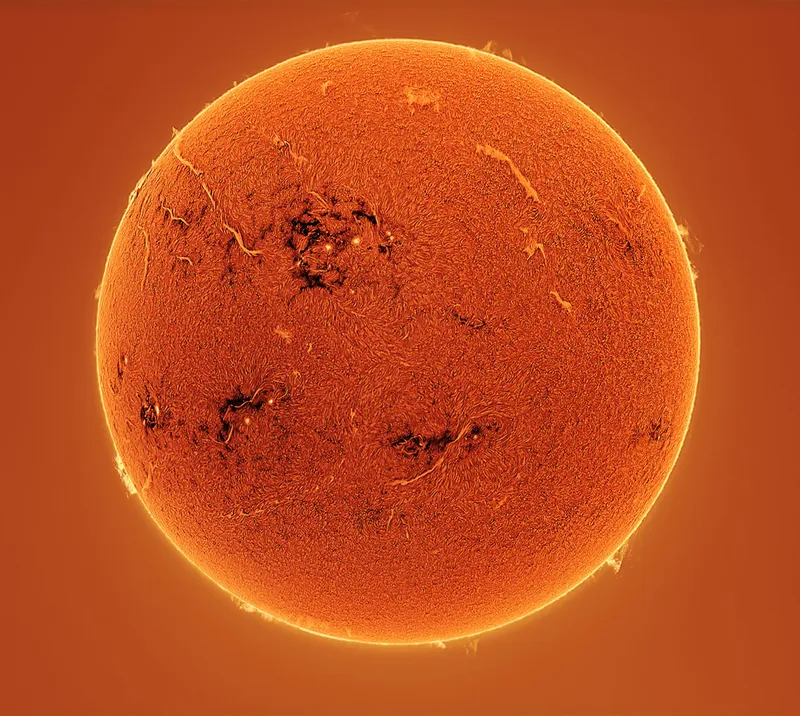
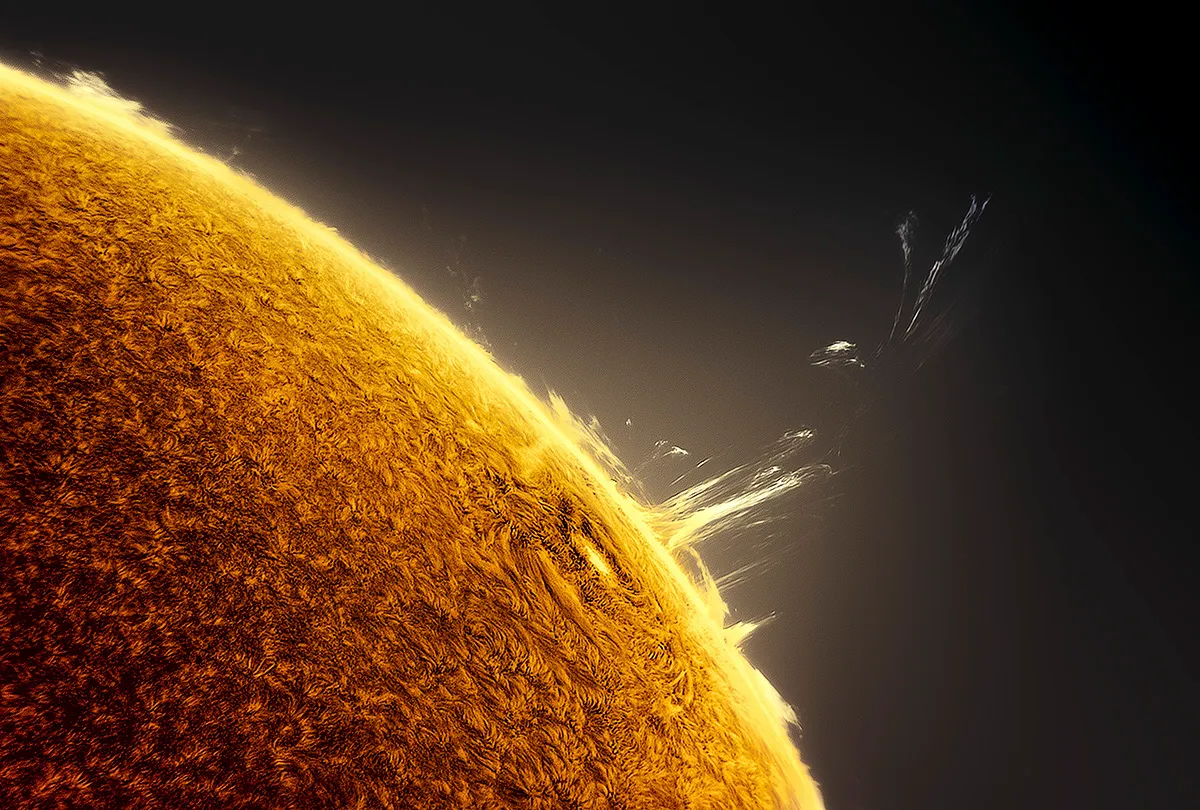
Hydrogen-alpha
Hydrogen-alpha gives the best all-round views of the Sun, being easy to see in the eyepiece and showing an ever-changing view of various features that never ceases to amaze: from flame-like prominences on the limb to long, snaking dark filaments that hover above the disc, both of which are clouds of plasma held aloft by intense magnetic fields.
Again we are looking into the Sun’s chromosphere in this wavelength, albeit at a slightly different temperature and height above the photosphere than calcium K.
Sunspots and the bright plage around active regions are still visible, with solar flares noticeably brightening and then fading over a period of minutes to hours.
In the best conditions a layer of spicules can be seen around the solar limb; a fine layer of dancing, hair-like jets of hot plasma that shoot out of the chromosphere.
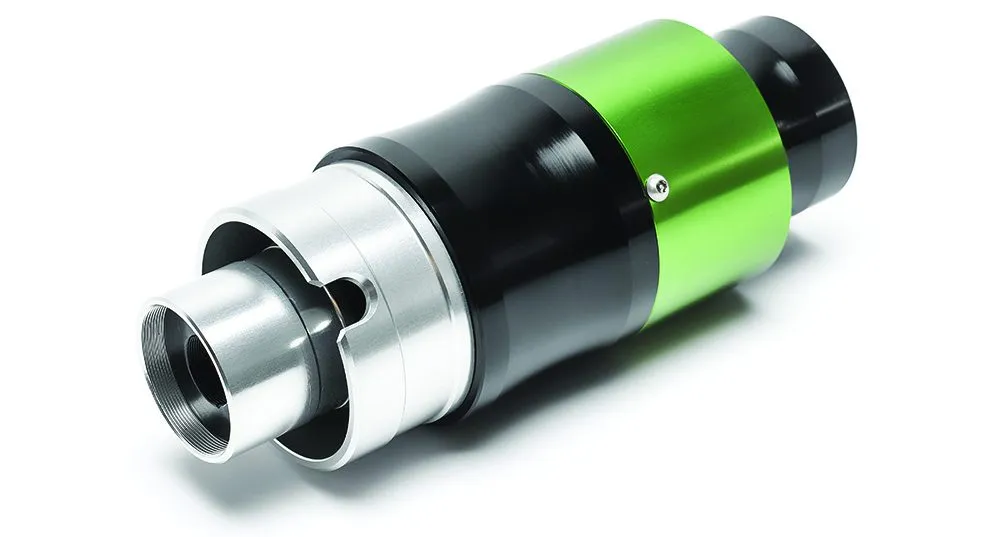
Hydrogen-alpha offers the largest choice of equipment available to suit all budgets, from front-mounted etalon filters that fit on existing refractors or compound telescopes used in conjunction with a blocking filter, to dedicated hydrogen-alpha telescopes or rear mounted filters that go before an eyepiece or camera.
Options such as double stacking during processing provide higher contrast views.
The different sizes of blocking filters can seem bewildering to a novice, so it is best to seek advice from your local astronomical society or dealer to see if you can try different options before buying.
Read our full Daystar Quark hydrogen-alpha eyepiece filters review here.
Imaging in hydrogen alpha
As in calcium K imaging, it is better to image with a mono CCD or CMOS camera to get the best results.
Often early in the morning is the ideal time to image; before the heat of the day builds and makes the seeing conditions blur the finer details.
Always make sure you have a crisp focus by observing the limb or a high contrast feature like a sunspot or a dark filament.
Exposure times can take a while to master in hydrogen-alpha, as too much can make the prominences on the limb stand out, but at the same time can wash out disc detail.
Conversely, too little exposure can give nice contrast on the disc, but then the prominences are underexposed.
Capture separate images of the disc and prominences then combine them into a composite to get the best of both worlds.
Spicules
The edge of the Sun’s disc seems to have a thin skin running around it. This is a cross-section of the chromosphere.
Under good seeing you can make out that it’s made up of tiny jets known as spicules. Together, they make the edge of the Sun appear ‘furry’.
Active regions
Sunspot groups, or active regions, take on a whole new appearance in hydrogen alpha. Dark sunspots become harder to see, partially hidden under the surrounding chromospheric blanket.
Around them, dark fibrils follow the intense magnetic fields associated with these regions. Large, bright areas called plage appear throughout and around sunspot groups.
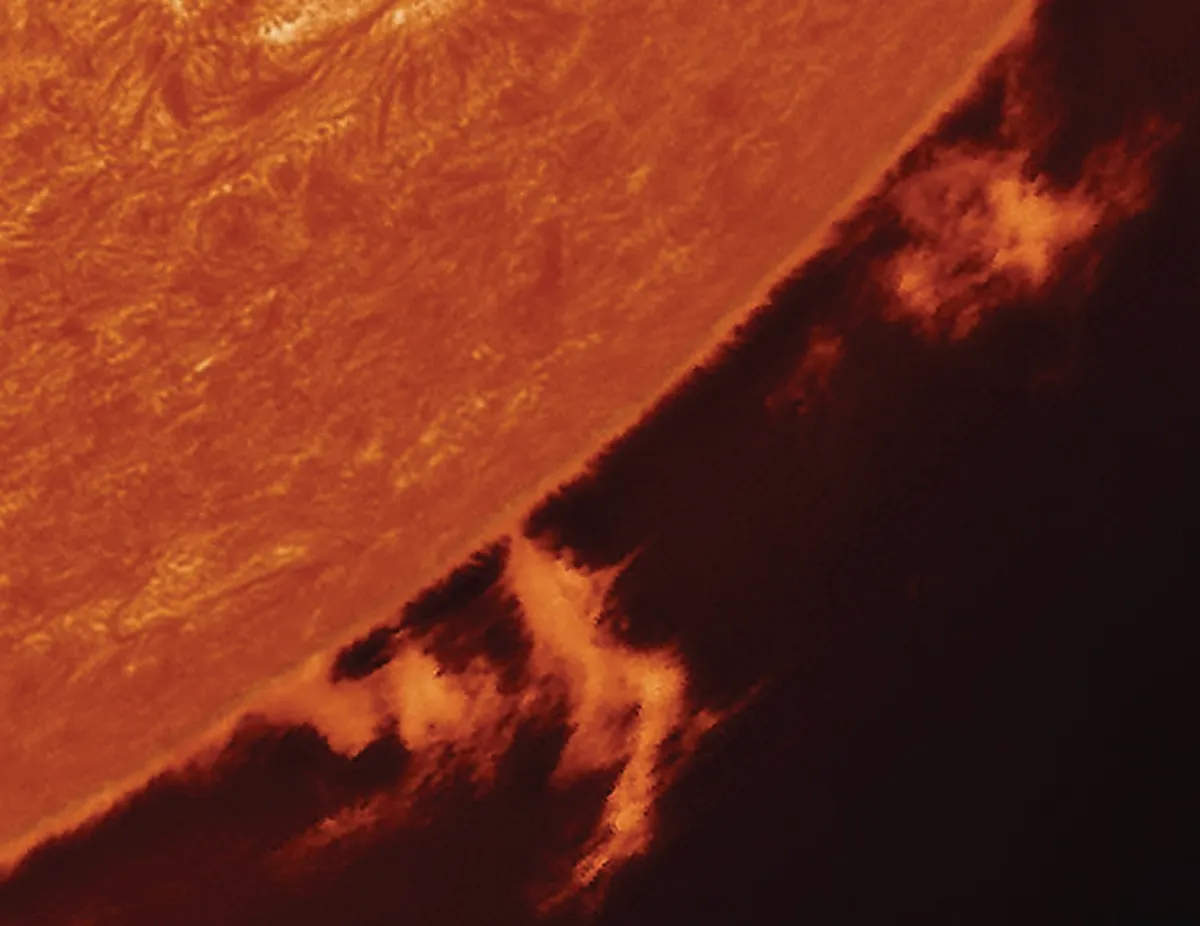
Prominences and filaments
Giant clouds of magnetically influenced hydrogen plasma can often be seen hanging off the edge of the Sun through a hydrogen-alpha filter. Known as prominences, these can change appearance day-to-day or, in extreme circumstances, real time.
When seen against the chromosphere away from the limb, they appear dark and are known as filaments.
Dynamic brightening
Active regions may also show dynamic bright regions. Tiny star-like points of light called Ellerman Bombs may come and go, each releasing the same energy as several million atomic bombs.
Larger ribbons of light called flares are associated with magnetic reconnection events, which may throw out huge clouds of charged particles known as coronal mass ejections.

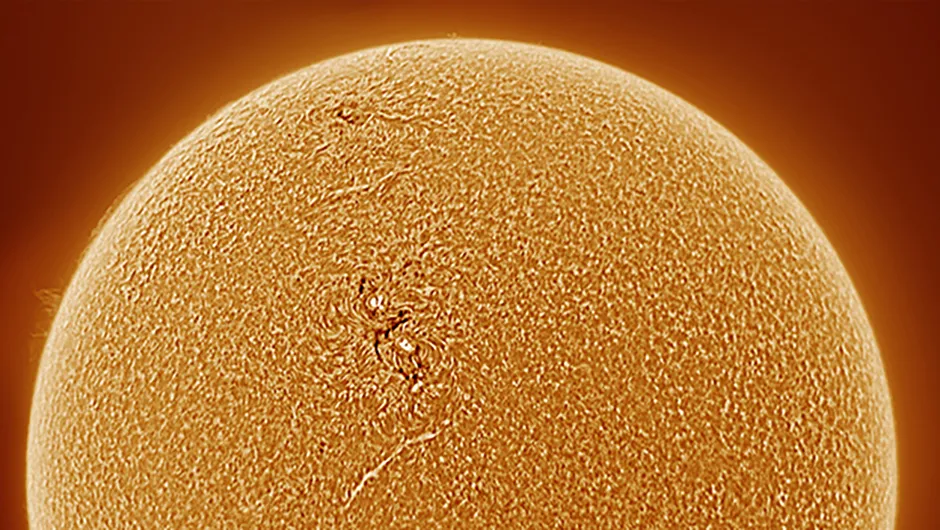
Dark mottling
A hydrogen-alpha filter shows the Sun’s inner layer of atmosphere, known as the chromosphere, which sits on top of the photosphere. This is covered in a coarse, magnetically influenced light and dark pattern collectively known as dark mottling.
The pattern is visible across the entire disc and makes the Sun resemble a giant orange.
Calcium K
When we observe the Sun in calcium K light, we are viewing our star at 393nm, the ultraviolet end of the spectrum. This reveals the solar chromosphere, a layer some 1,000km above the photosphere at a temperature of about 12,000 Kelvin.
Most people struggle to see anything at this wavelength visually, so it is better suited to imaging.
Some of the features seen in white light are visible, such as sunspots with their associated umbra and penumbra, and also faculae, but now we can also see the bright white plage; areas of hot, magnetically frothy plasma that extend upwards above the photospheric faculae.
In calcium K, the influence of magnetic fields gives a bright white appearance, with the exception of the very strong magnetic fields around sunspots, which appear dark.
Rarely, solar flares can be seen in calcium K, and rarer still are darker filaments, which can be seen on the disc.
Observing or imaging in calcium K requires a refractor, and better results are achieved with longer focal ratio scopes as they are less susceptible to spherical aberration, which can cause a softening of the image at calcium K wavelengths, particularly in budget telescopes.
A calcium K filter is needed and a number of different sizes are available from Lunt, plus a blocking filter
Be sure to check with your dealer which size of blocking filter is best suited to your telescope.
If observing visually it is best to try different eyepieces from your collection as the coatings on these can affect light transmission and image brightness.
Imaging in Calcium K
Calcium K imaging is a form of narrowband imaging, as only a very narrow spike of light at a certain target wavelength or colour is allowed to pass through the filter.
A mono CCD or CMOS camera is the best choice for capturing images; with a colour camera, only a quarter of the Bayer matrix (the blue component in this case) that covers a colour chip would be utilised, resulting in a loss of image resolution.
Freeware program FireCapture is a great choice for capturing images.
Try to keep exposure times fast, as shorter calcium K wavelengths are more susceptible to poor seeing and shorter exposure times allow the moments of best seeing to be captured.
Use the histogram function in the capture software to avoid overexposing the image and losing precious detail.
This guide was put together from articles that appeared in BBC Sky at Night Magazine by Lyn Smith, Mark Townley and Pete Lawrence.
