Best time to see: 21 January from 03:34 UT until 07:00 UT
The Moon enters the Earth’s umbral shadow in the early hours of 21 January 2019, producing a total lunar eclipse.
Given clear skies, the entire event will be visible from across the UK.
The Earth’s shadow at the distance of the Moon has two parts: a dark inner umbra surrounded by a lighter penumbra, arranged like the inner and outer bullseye at the centre of a dart board.
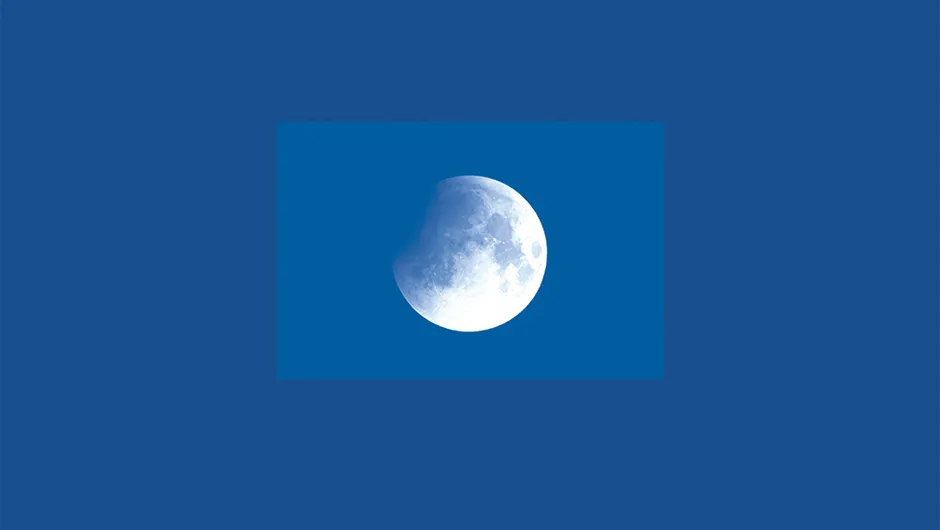
The Moon’s edge first touches the penumbral shadow (P1) at 02:37 UT, when it will be at an altitude of around 20° in the southwest, between Cancer and Gemini.
However, you probably won’t be able to see any signs of this weak shadow at this point.
Looking at the Moon’s disc at P1 shows it to be completely full, an event that is rarer than you might realise.
A ‘normal’ non-eclipse full Moon passes just north or south of the Earth’s shadow.
Consequently, a telescopic view of a regular full Moon still shows a tiny sliver of terminator shadows at the extreme north or south of the lunar disc.
As the Moon creeps deeper into the penumbra, the shadow’s intensity increases and you should eventually be able to detect its presence.
The edge of the Moon first touches the edge of the darker, central umbral shadow (U1) at 03:34 UT, marking the start of the first partial phase of the eclipse.
The partial eclipse grows in depth until the following edge of the Moon reaches the edge of the umbral shadow (U2) at 04:41 UT. This marks the start of the total eclipse.
The Moon continues to move into the umbra, reaching the point of greatest eclipse at 05:12 UT.
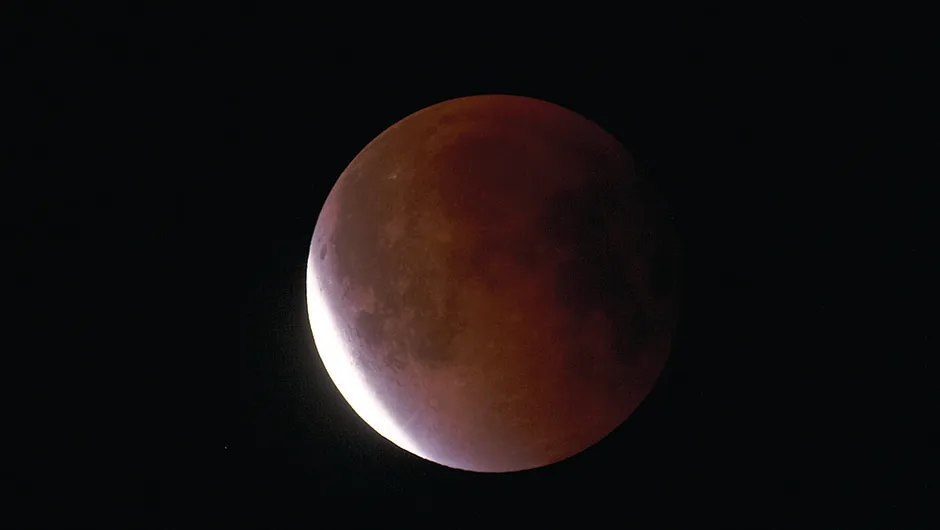
For this particular eclipse, the centre of the Moon lies half an umbral shadow radius north of the shadow’s centre at greatest eclipse, so expect the northern edge of the Moon to appear brighter than the southern edge.
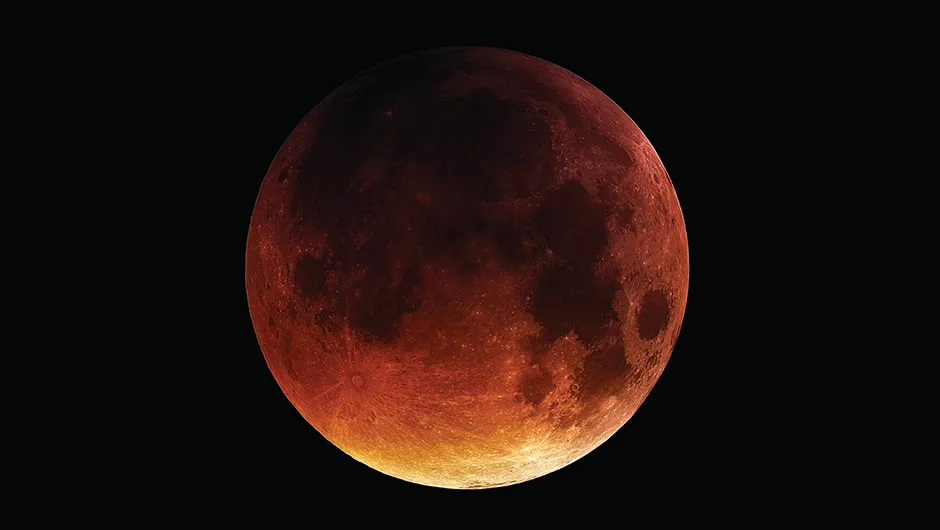
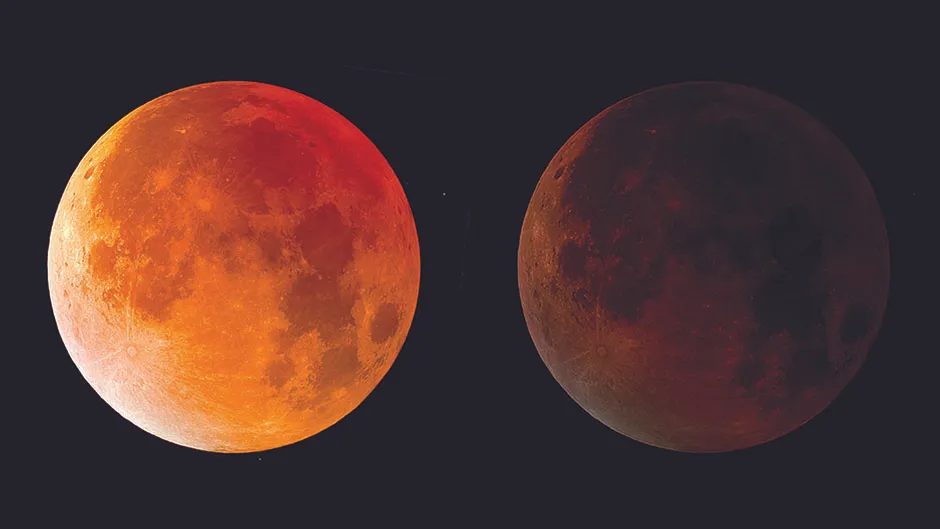
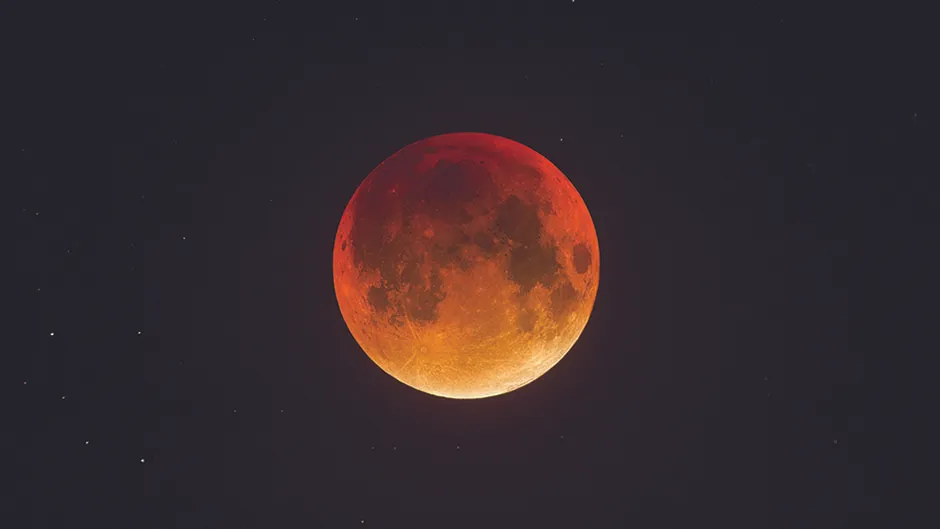
Although the umbral shadow represents the Sun’s light being completely blocked by the Earth, our atmosphere refracts sunlight into the shadow.
As our atmosphere is good at scattering blue light, the infill light is mostly orange and red.
Consequently the Moon’s disc will typically appear orange during a total lunar eclipse.
The clarity of Earth’s atmosphere also has an effect and each eclipse is different, appearing anything from a light coppery yellow to a really dark brown that virtually disappears against the background sky.
Totality ends at 05:43 UT (U3) when the Moon reaches the far side of the umbral shadow.
A second, decreasing partial eclipse follows with the Moon leaving the umbral shadow completely at 06:51 UT (U4) as the dawn sky starts to brighten.
The departure from the penumbra will be complete at 07:48 UT (P4), with the Moon hanging low above the west-northwest horizon in a twilight sky.
Photographing a lunar eclipse
Recommended equipment: DSLR camera, 200mm or longer focal length lens, or a telescope.
A lunar eclipse is a relaxed affair, taking several hours to play out in full.
As far as imaging is concerned the most important consideration is how you intend to capture it.
Do you want to get a large image of the Moon’s eclipsed disc or are you after a wide-field sequence showing how the eclipse plays out?
Whichever you choose, it pays to be prepared well in advance.
The total lunar eclipse on 21 January is well placed for UK viewing. Our last one, on 27 July 2018, was a damp squib.

After days of cloudless summer skies, the weather closed in just in time to ruin the event, obscuring it from virtually all of the UK.
Even if we could have seen it, we’d only have enjoyed part of the spectacle; totality was already underway even before the Moon rose over the horizon.
Fortunately the 21 January eclipse will take place entirely in UK skies so all we have to hope for are no clouds.
The eclipse starts at 02:37 UT when the Moon’s disc enters the weak outer penumbral shadow.
Photographically, this shouldn’t be too difficult as long as exposures and settings are maintained.
It’s important to ensure that any image of the Moon’s disc is correctly exposed.
A low ISO and short exposure should cope well with this bright Moon.
Comparing images taken at, say, five-minute intervals should reveal the subtle advance.
The main visual part of the eclipse occurs when the Moon enters the darker umbral shadow. This starts at 03:34 UT and continues until 06:51 UT.
The period of totality – when the umbral shadow fully covers the Moon’s disc – is between 04:41 UT and 05:43 UT. Totality is somewhat easier to deal with than the two partial eclipses either side of it.
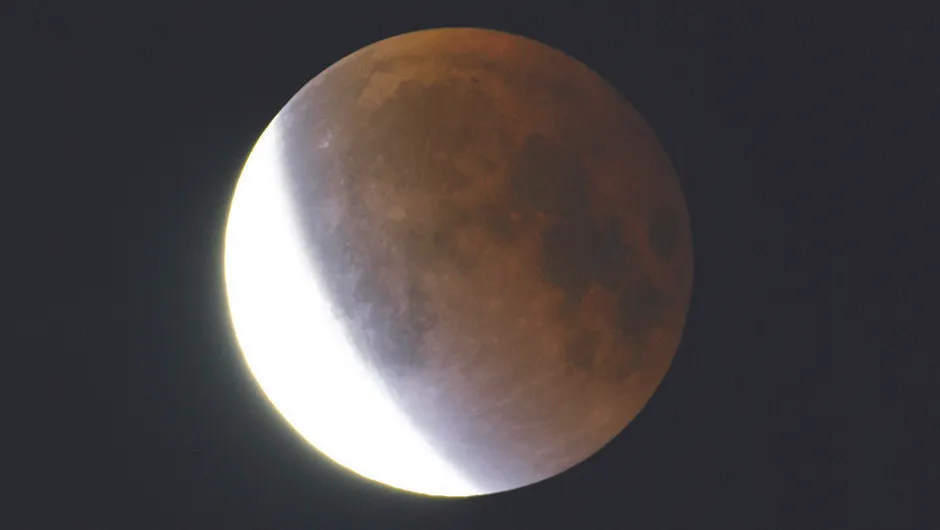
A partially eclipsed Moon presents part of the Moon’s disc darkened by the umbral shadow and part at normal brightness.
A typical DSLR doesn’t cope well with this and you’ll normally end up with shots that show either a black shadow with correctly exposed bright surface or a white surface with a beautifully coloured eclipse shadow.
Depending on your exposure frequency – i.e., one shot every two minutes – it’s possible to jump between two camera settings to take alternate shots revealing either shadow or surface.
A camera attached to a telescope works well if you’re after lunar detail.
A focal length around 1m provides a good balance between image scale and ease of tracking and framing.
Normal camera lenses can be used too.
For reasonable disc detail, a 200mm or longer lens is recommended, but the essence of the eclipse can still be achieved with shorter lenses.
Using a wide-angle lens it’s possible to produce a sequence shot showing the Moon’s brightness changing over time.
For this eclipse we recommend a 15mm focal length for a non-full-frame or 25mm for a full-frame DSLR.
Mount the camera on a fixed tripod pointing at azimuth 255° (position Betelgeuse on the frame’s vertical centre line at 02:34 UT).
Adjust so the horizon runs along the bottom (long) edge of the frame and ensure the Moon’s in the image.
Take shots at intervals of two to three minutes and add the images in a layer-based editor with upper layer blend modes set to Lighten.
The initial images of the Moon’s disc will typically need to show it over-exposed to white to cope with the dimming that occurs during the main part of the eclipse.
Step-by-step
1
Step 1
Select a lens or telescope to give you the field of view you need for the type of image you are after.
A 1m focal length gives good close-up detail but tracking is recommended at such a scale.
A 200mm lens will show the Moon’s disc with the eclipse shadow.
A wide-angle lens (see opposite) can be used to generate a sequence composite.
2
Step 2
If you’re using just a camera set it to [M]anual focusing, with an ISO of 200-400 and aperture of f/8–f/11.
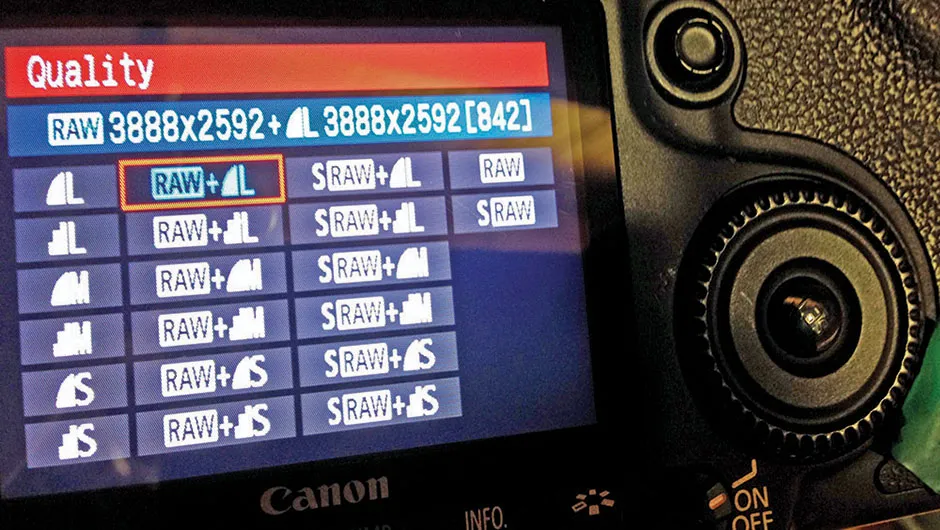
Pre-focus using the full Moon just before the eclipse starts. RAW format will produce the best results.
If you’re not sure how to use RAW, capture as RAW + large JPEG.
This will give you something to work with (JPEG) until you get used to RAW.
3
Step 3

The following steps assume the use of a camera attached to a telescope.
As in step 2, pre-focus the scope on the Moon before the eclipse.
The Moon’s edge is the best target for this.
It’s a good strategy to check the focus at regular intervals throughout the event, although this can be hard to do during the period of totality if the Moon is especially dark.
4
Step 4
Exposures depend on your setup and the darkness of the eclipse.
Totality can range from light coppery-yellow to deep brown, so dark the Moon’s disc virtually disappears.
Pre-eclipse, expose correctly for the Moon’s surface and make a note of the settings.
This will give you the settings for a correctly exposed surface with a virtually black shadow.
5
Step 5
To show colour and detail within the umbral shadow you’ll need more light sensitivity.
Consider lowering the f/number, increasing the ISO to a mid-range value and increasing exposure time, in that order.
Once you’re happy with the detail you’re imaging, make a note of the setting so you can return to it if you later decide to experiment further.
6
Step 6
During totality consider taking a shot with the Moon centered in frame using increased sensitivity to push the eclipsed Moon towards over-exposure.
This should reveal background stars.
A normal eclipse image and this ‘star’ shot can be combined using a layer-mask to produce a beautiful composite showing the eclipsed Moon against a star field.
Pete Lawrence is a presenter on The Sky at Night.
