The panorama aurora image above shows a view looking down on Norway’s Lofoten archipelago from Offersøykammen mountain, for which I won the Aurora category in the Astronomy Photographer of the Year 2019 competition.
I chose the location because I like mountains and there aren’t many photos taken from this viewpoint.
I took multiple images with the aim of creating a panorama of the wonderful aurora display that was taking place.
Read more:
- How to photograph the aurora
- Image processing: bring out the best in your astrophotos
- How to use DeepSkyStacker for astrophotography
When I set about processing the image, I wanted a result that would reflect just how special the moment was.
I wanted to ensure that there were no areas that were too light or dark, and that the colours remained true to nature, with just a little bit of highlighting to bring out more detail.
For more astrophotography tips, read our guide on how to photograph the stars.
How to create your aurora panorama
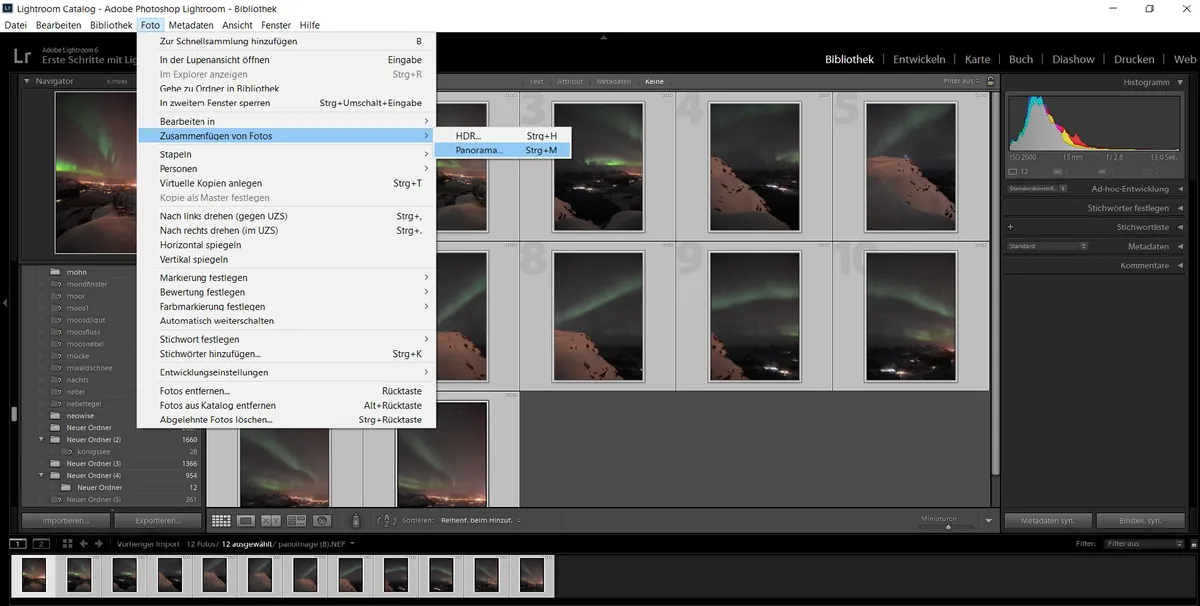
My first processing step involves the creation of a panorama in Adobe Lightroom. To do this I select the RAW images required from my photo library and mark them (see above).
The selected pictures are joined together to make the initial panorama by clicking on Photo > Merge photos > Panorama.
The completed RAW panorama can now be imported into Adobe Photoshop, ready for me to perform basic adjustments with the RAW converter (see below).
I adjust the Highlights slider, bringing it down completely, while the Shadows are adjusted up. I make tweaks to the Whites and Blacksby eye, to +31 and –8 respectively, but this is down to personal taste.
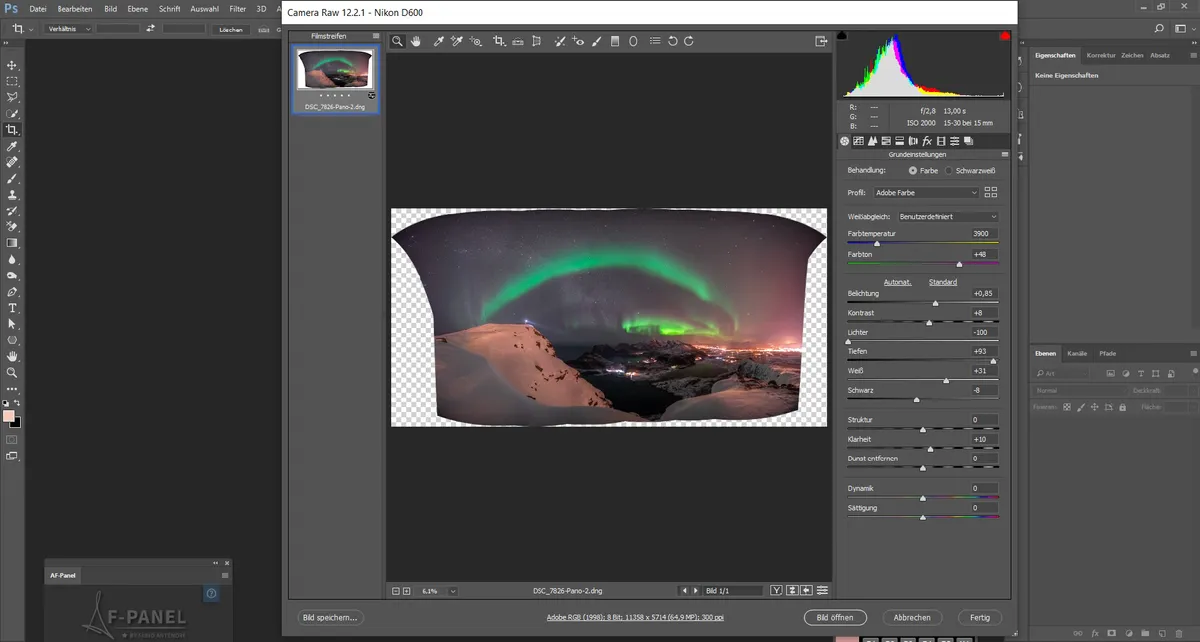
By adjusting the White Balance towards blue, the snow appears white and not too greenish. I boost the Contrast and move the Clarity slider up to +10 in the foreground and down in the background, with slight tweaks to the Brightness.
After removing noise with the Noise Reductiontool, I’m ready to move on from the RAW converter.
The next stage involves working with luminosity layer masks (see below) in Photoshop. I find the plug-in TK Basic panel tool is useful for making luminosity masks, because it’s an easy way to create layers automatically.
Within a layer you can create an ‘S’ curve in the Tone Curvepanel, which represents portions of the image. This darkens the shadows in the lower third of the curve and lightens the brighter portions of the image represented by the curve’s upper third.
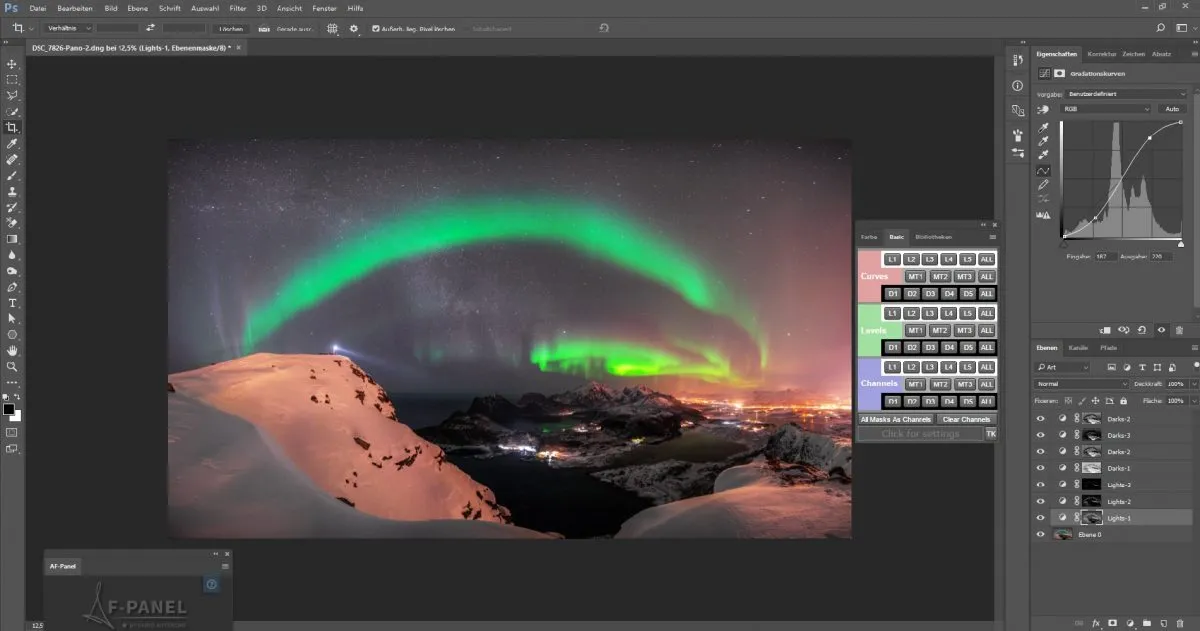
I make an ‘S’ curve for all the lighter tones, or ‘Lights’ (marked as L1 to L5 in the tool) so that they shine beautifully.I leave the middle tones untouched when I process night shots.
I then draw an ‘S’ curve for the Darks(marked D1 to D5). The exception is ‘Darks-1’, the category’s first section, where I boost the shadow to make the image brighter and more natural.
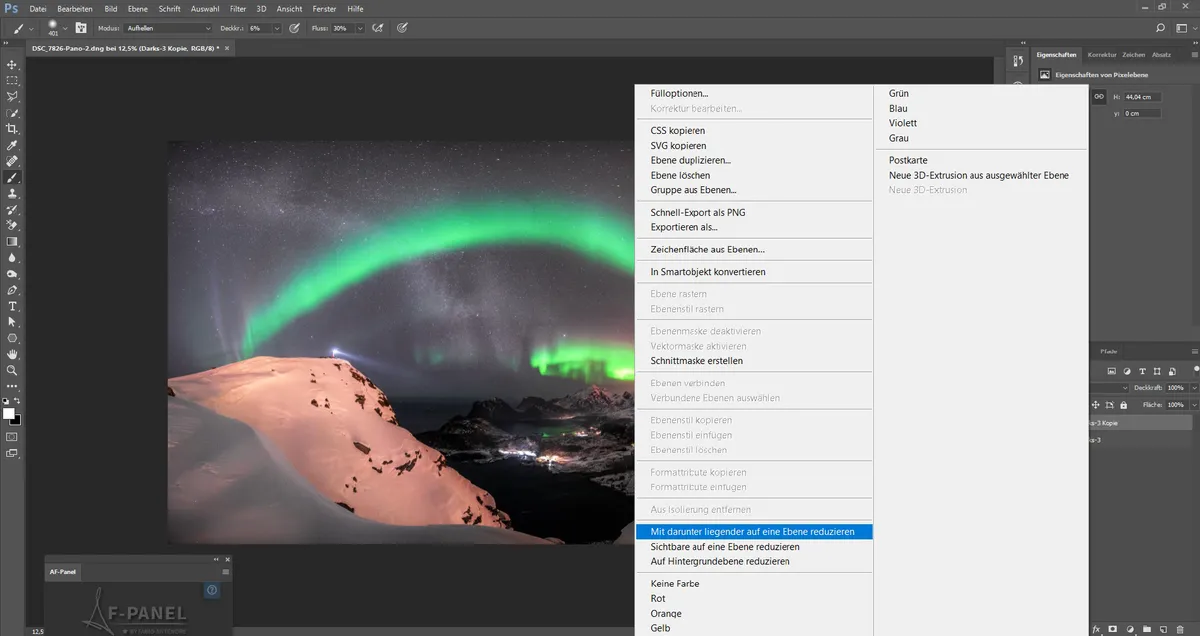
The Lightscan be enhanced more by using the brush tool over an extra layer (created by making a copy from the image to a new layer by right-clicking the mouse).
In Photoshop’s Lighten blend mode I move a soft brush with low Opacity over the areas of city lights, snow and aurora. I do the same for dark-shaded areas in the Darkenmode.
After this I pull the two layers (the copy and the original) together, with a right click on the copy layer, and combine with the lower layer (see below).
Finally, I add a softening effect by drawing over the lights with the soft brush tool and making them shine, to give the picture a nice, glowing look. By using the AF-panel, the effect is possible with a mouse click.
I’m careful to only apply this effect to the light areas, leaving the dark areas untouched – otherwise the picture can lose its coherence and look blurry.
The AF-panel automatically makes a perfect layer for that, so there’s no need to create extra ones. After that I sharpen the image with the RAW converter.
I may need to make more tweaks to ‘Saturation’ or turn the ‘Dynamic Range’ lower, as these can often change during the editing process and result in the snow losing whiteness.
To finish, I save my aurora image as a high resolution JPEG.
3 tips for creating an aurora panorama
1
Calibrate the screen to get the best colours in your final image, as devices often have a different white balance.
2
Check online for plug-ins or tools that make your work easier, or to find new effects.
3
Look at your finished picture again on the next day, as you’ll often find something that’s been overlooked.
Nicolai Brügger is a photographer who lives in Germany. He won the ‘Aurora’ category in the Insight Investment Astronomy Photographer of the Year 2019 competition with his image ‘The Watcher’.
This guide originally appeared in the October 2020 issue of BBC Sky at Night Magazine.