Taking the time to photograph the Harvest Moon is a great exercise, as you'll be able to capture a bright full Moon in the autumn sky.
The 2025 Harvest Moon will be visible this week, 6/7 October, and it will also be a supermoon.
For more info on lunar astrophotography, read our guides on how to photograph the Moon, how to photograph the Moon with a smartphone or how to use a DSLR camera.
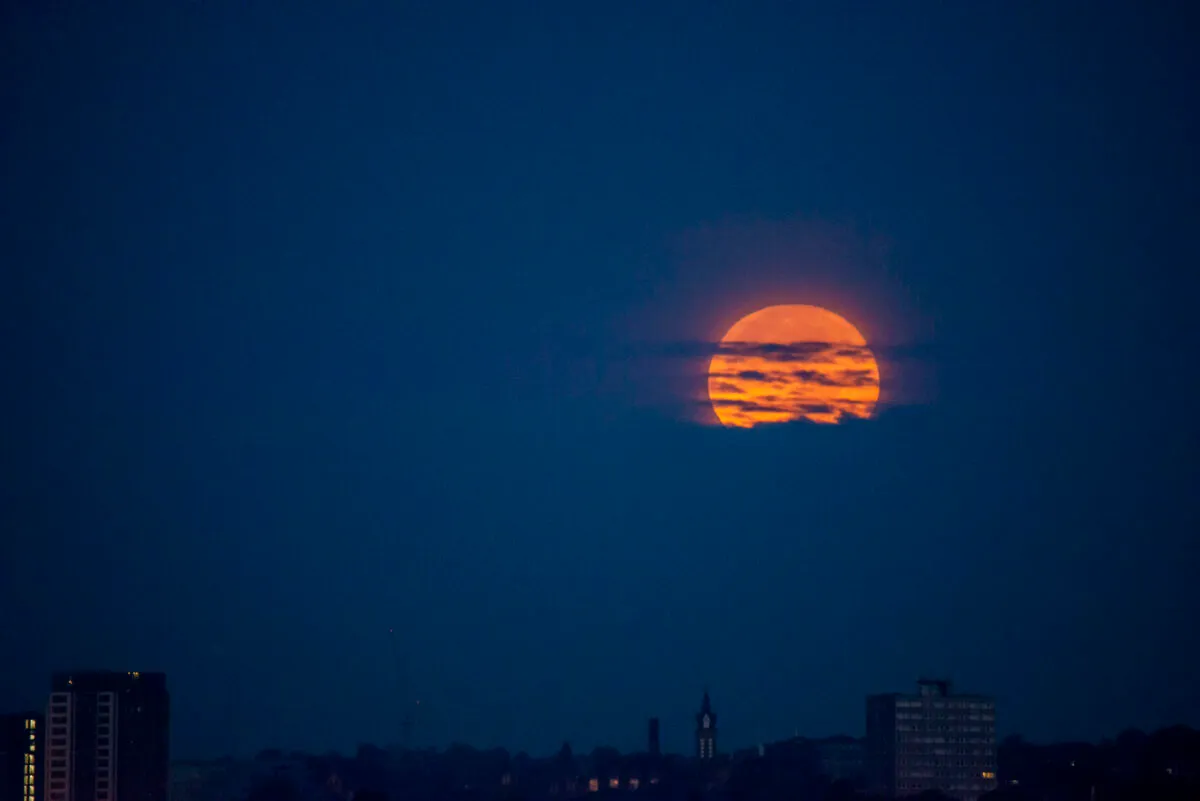
The sight of a big, bright full Moon is pretty impressive.
When it’s low in the sky, the ’Moon Illusion’ makes our nearest neighbour look much larger than normal and this is where nature plays a cruel trick on photographers.
With the full Moon having just risen and looking enormous, an average camera shot of it will show that it’s actually pretty tiny.
To capture any detail in your photograph of the full Harvest Moon, you’ll need at least a 200mm or longer focal length lens or telescope.
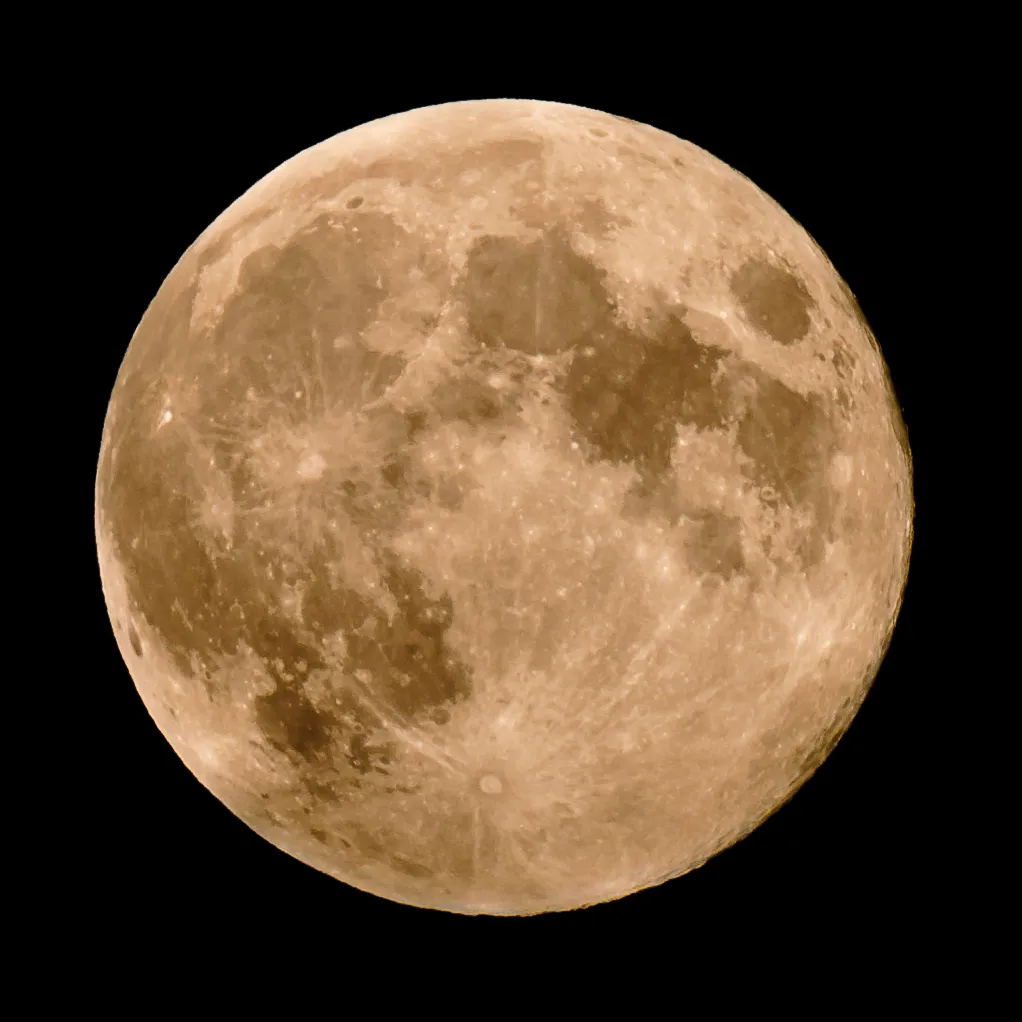
A Harvest Moon presents the perfect opportunity to catch that detail.
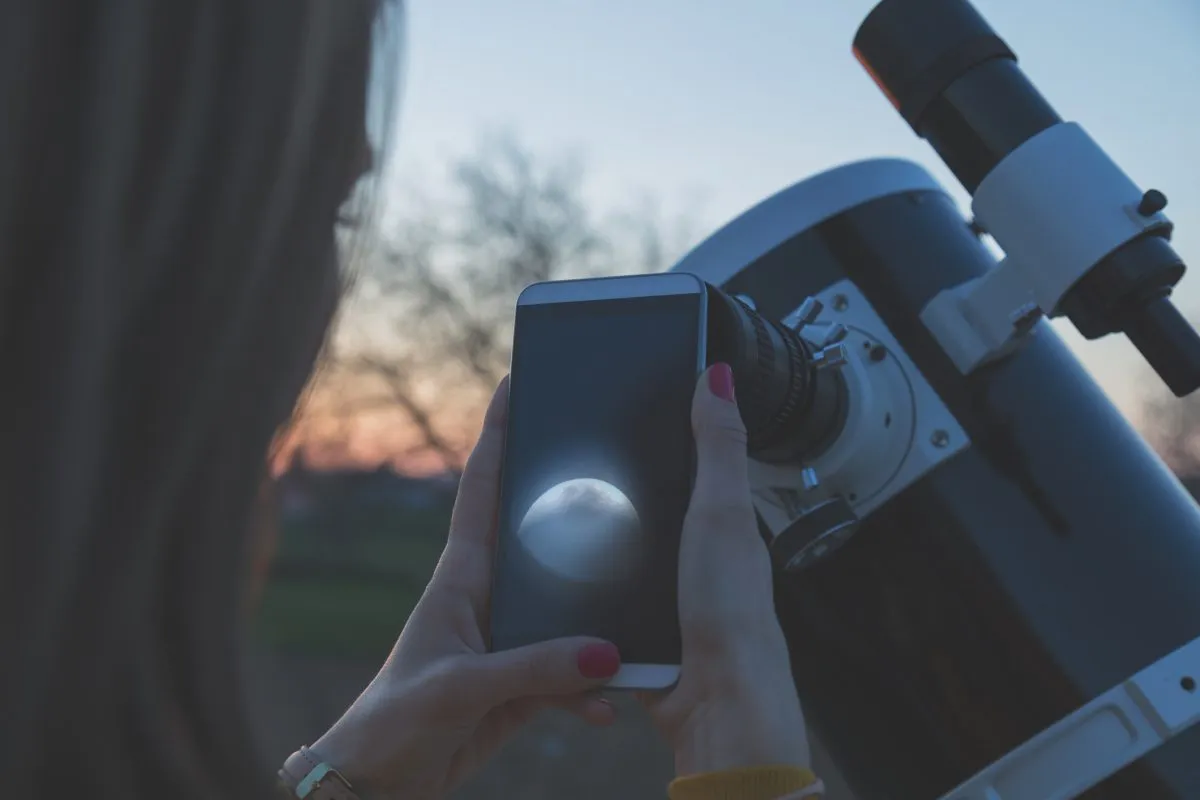
The easiest way to do this is to use a long focal length lens or telescope with a DSLR fitted.
Alternatively, if you have a steady hand, afocal photography (the technique where you point a camera or smartphone down the eyepiece) can work surprisingly well.
Photograph the Harvest Moon to capture detail and colour
If your lens or telescope’s focal length is long enough, say above 700mm, you can capture plenty of detail on the lunar surface.
But if you photograph the Harvest Moon like this, examination of your shots will reveal two issues: the image is virtually monochrome and detail is a little blurry.
You may think the Moon is fairly colourless and grey, but you’d be wrong. There’s actually quite a lot of subtle colour on offer.
One way to reveal it is to super-saturate your shot.
But this needs to be done with care because it can bring out noise and produce artefacts (features that aren’t actually there).

When you’ve finished the saturation process (outlined in the step-by-step guide below), the result will typically be pretty gaudy.
There’s a trick to improve things.
Use the saturated colour image to provide the colour information and a sharper luminance image for the tone and detail.
If you’re using just a DSLR shot, the luminance component can be provided from your original image of the Moon.
Convert to a greyscale image or, if available, use your graphics editor to turn it black and white.
Load the saturated colour image into a layer-based graphics editor and make a safety duplicate of the layer.
To remove excessive noise, simply apply a reasonably strong Gaussian blur.

Photograph the Harvest Moon with a natural look
If you want to photograph the Harvest Moon and keep it looking natural, your aim is to produce an image showing relatively smooth areas of colour, free from random splodges of unnatural colour.
Don’t worry about losing detail – that’s what the luminance image is for.
It may take a few attempts to get the right amount of blurring, but this is why you’re working on a duplicate layer.
If things go wrong, just delete and start again on another duplicate of the original colour saturated version.
To restore the missing detail from the image, load the greyscale luminance image as a new layer above the saturated and blurred colour image.
Set the greyscale image’s blend mode to luminance and you’ll then have a beautifully detailed image of the Moon showing enhanced colour.
If you have access to a monochrome high-frame-rate camera, use this to produce a sharper, highly detailed luminance image via stacking software such as AutoStakkert! or RegiStax.
For more on this, read our guide on how to stack DSLR images of the Moon.
Recommended equipment
- DSLR camera
- Lens or telescope of at least 700mm focal length
Photograph the Harvest Moon, step-by-step
Step 1

The quickest way to produce a detailed colour image of the Moon is to attach a DSLR camera to a telescope.
A 2-inch adaptor works best and, with the appropriate t-adaptor and barrel for your camera model, simply slots into the eyepiece holder of the telescope.
A tracking mount will make the imaging process easier.
Step 2

Fit the camera and use focus assist (LiveView) to focus, setting it to maximum zoom while looking at the Moon’s edge or a shadowed region.
Bring the scope to its sharpest focus and centre the Moon. Choose a low ISO and adjust the exposure so the Moon looks well defined but isn’t overexposed to pure white anywhere on its disc.
Step 3

When you have a good shot, transfer it to a computer and make a copy of it. Load the copy into a layer-based editor. Duplicate the base layer and work on the upper duplicate.
Open your editor’s saturation control and boost the image saturation to about 50%. Repeat the process until clear colour information is shown.
Step 4

Strong edge blues or reds arise from atmospheric dispersion effects and sometimes aren’t obvious in the original image. Select these colours and reduce their saturation to avoid unwanted false colour bands in your final image.
Once you’re happy, apply a mid-strength Gaussian blur to remove any unwanted colour noise.
Step 5

Put the colour image aside and open the original, unmodified image file. Change the mode to greyscale to lose its colour information.
At this point you can apply an unsharp mask sharpening process to the image to crisp up the detail. Be careful not to overdo this, otherwise you’ll bring out unwanted noise.
Step 6

Select the greyscale (luminance) image and copy it to the clipboard. Paste it in as an upper layer into the colour-saturated blurred image and set its blend mode to ‘luminosity’.
The colour will be added to the sharp luminosity data to give you an enhanced colour image of the Moon.
If you capture a photograph of the Harvest Moon, send us your pictures by emailing contactus@skyatnightmagazine.com


