
In this guide we'll show you how to photograph the Moon, revealing the astrophotography equipment you need and techniques that will help you to capture the Moon with a DSLR camera or a smartphone.
With its shifting phase and the wobbles of libration bringing myriad new features into view each night, the Moon is a wonderful target for photographers of all abilities.
As the largest object in the night sky seen from Earth, the Moon an obvious place to start when you’re learning to take photos of the night sky.
More Moon photography tips

For more info, read our guide to the phases of the Moon.
For weekly lunar phases delivered directly to your email inbox, sign up to the BBC Sky at Night Magazine e-newsletter.
Quick links
Jump to:
- Equipment for photographing the Moon
- Photograph the Moon with a smartphone
- Photograph the Moon with a digital camera
- Capturing close-up shots of the Moon
- ISO settings and 'noise
- Compose your Moonshot
- Capturing Earthshine
- Photograph the Moon, step by step
- Photograph the phases of the Moon
- Send us your Moon images
Equipment for photographing the Moon
Anyone with a telescope and either a smartphone or a compact camera can take a decent image of the Moon.
Just hold your camera up to the telescope’s eyepiece and start snapping away.
This technique is known as ‘afocal photography’ and if you already have a camera and telescope, you don’t need anything else to get started.
A DSLR provides you with several options. They can be used to take afocal shots, just like smartphone and point-and-shoot cameras.
Or they can be turned directly to the night sky to capture nightscapes. For more on this, read our DSLR guide.
Bear in mind that the Moon will appear small in such an image taken with an APS-C camera’s standard 18-55mm lens.
To increase the size of the Moon’s disc in your images and reveal more detail on its surface, you’ll need a longer focal length lens.
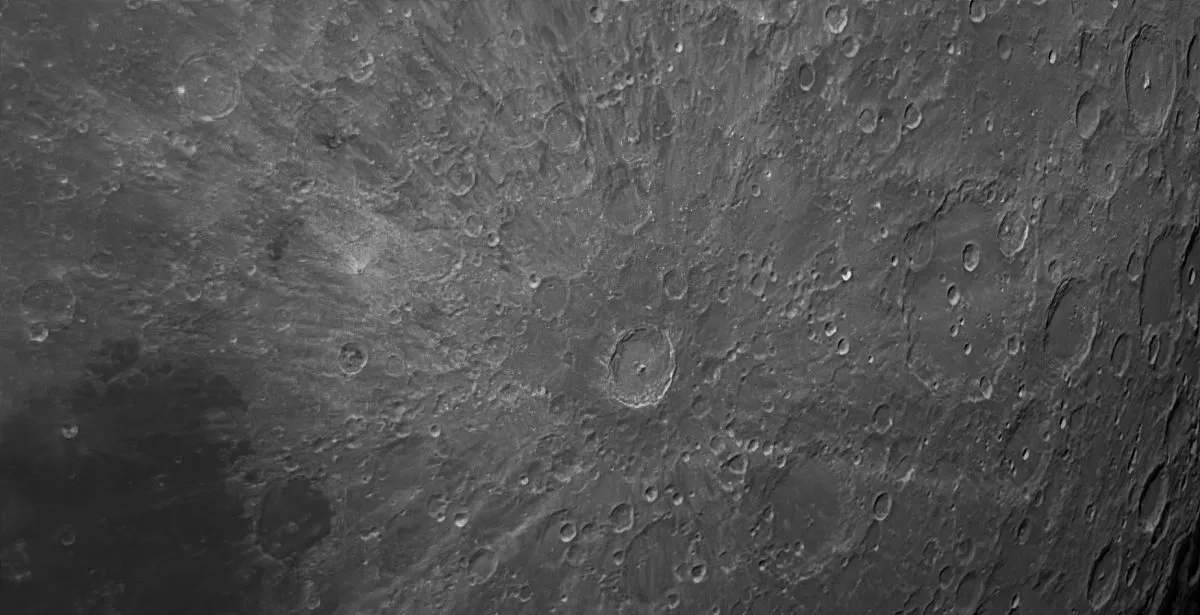
A lens with a focal length of 300mm or more will show the lunar maria as well as some of the more prominent craters and mountains. For more on this, read our guide to photographing craters on the Moon below.
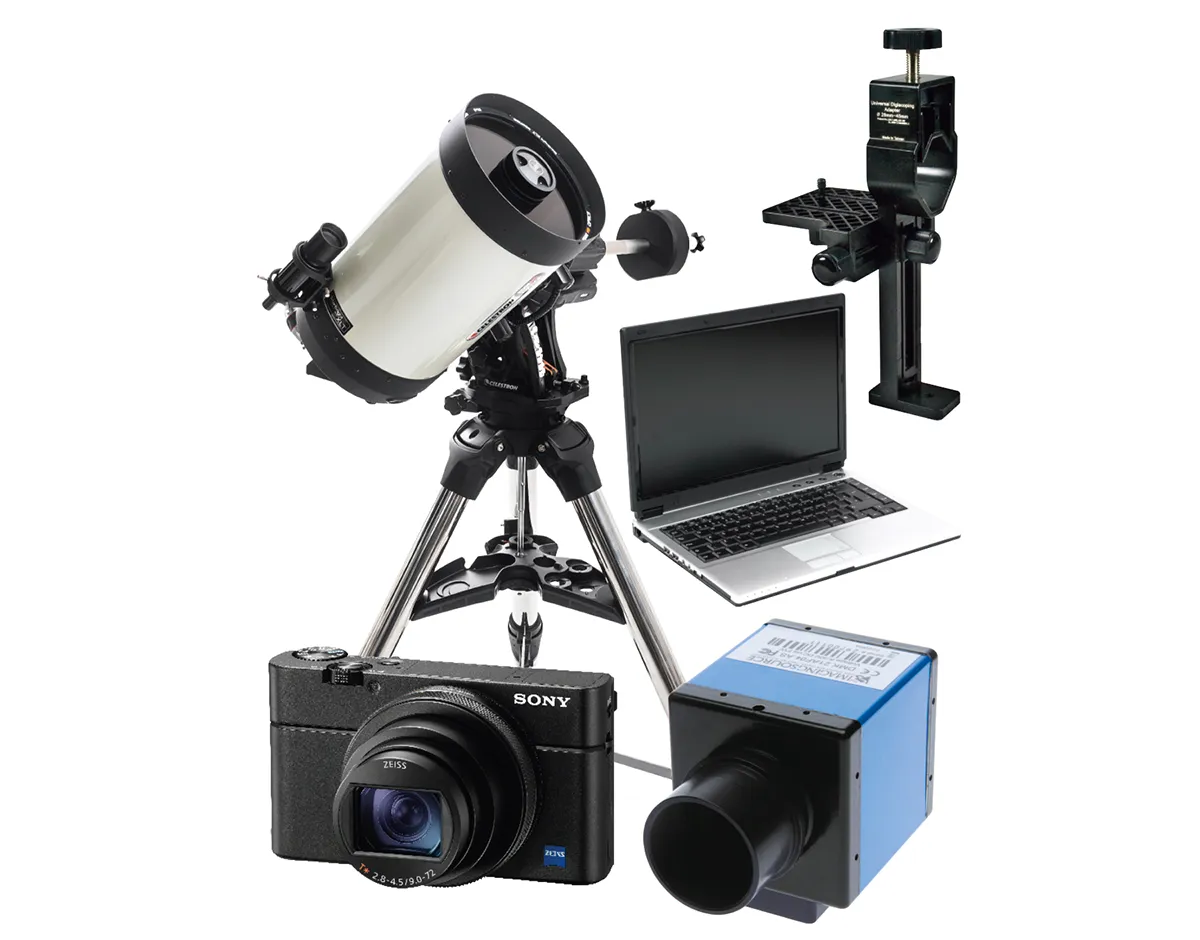
That DSLRs have detachable lenses means that they can be connected directly to a telescope, essentially turning the telescope into the camera lens.
You’ll need a T-adaptor and a T-ring. The T-ring is brand-specific. It mounts on your DSLR and screws into the T-adapter, which then attaches to your telescope.
Find out how to do this in our guide on how to attach a DSLR camera to a telescope.

Although the newest models of DSLRs can shoot video, they’re not ideal for high-resolution lunar imaging, and this is where high frame rate planetary cameras come in.
These cameras are capable of taking short videos and shoot many frames per second. You can use any telescope you like, although large aperture Schmidt-Cassegrains and Maksutov-Cassegrains are popular choices with top lunar photographers.
This is because their longer focal lengths are well suited to close-up imaging of the Moon, and compared to a high-quality refractor telescope you get a much larger aperture for your money.
For advice on which telescope to use, read our guide to the best telescopes for astrophotography.
Some colour cameras have excellent infrared sensitivity and can be used this way too. Aim to capture at least 1,000 frames. Process in a stacking program and tweak the result.
More Moon photography tips

Photograph the Moon with a smartphone

Today's smartphones are more than capable of taking good Moon shots, provided you follow a few steps.
Skip digital zoom
Your phone’s digital zoom stretches the image and loses detail. Stick to the maximum optical zoom and crop the photo later using editing software for a cleaner result.
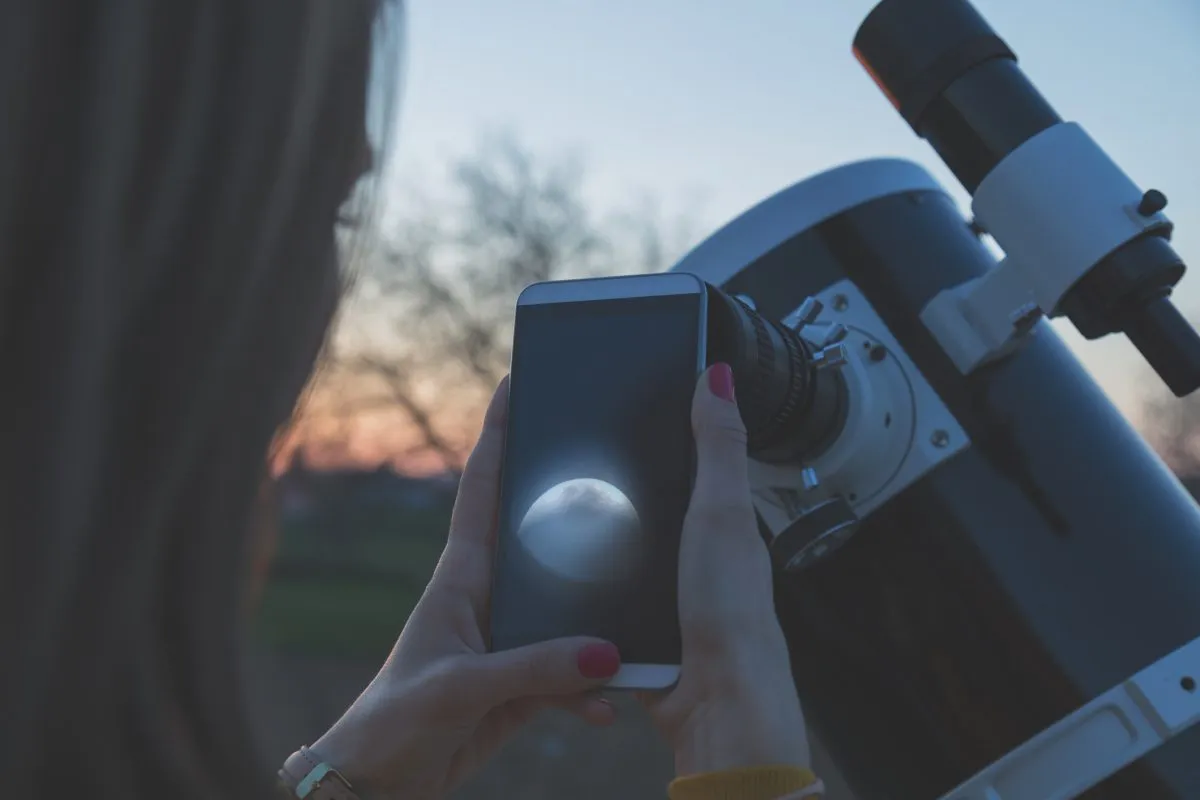
Try afocal imaging
This is the name for holding your phone camera directly up to a telescope’s eyepiece. It takes practice to align, but it’s the best way to get high-magnification crater shots. Use a smartphone telescope adapter to help you align your phone with the eyepiece.
Use headphones as a shutter
To avoid blurry photos caused by touching the screen, plug in wired headphones. On many phones, the volume buttons act as a remote shutter release. Some smartphone tripods come with a device that enables you to take the photo via bluetooth connection.
Select 'pro' mode
If the Moon looks like a glowing white blob, switch to your camera's 'pro' or manual mode. This allows you to manually lower the ISO or exposure until you can see surface details.
Time it for twilight
For the best photos that include the landscape (foreground) as well as the Moon, shoot during dawn or dusk. The sky is still bright enough to illuminate the ground without overexposing the Moon.
Steady your shot
Even a tiny wobble ruins a night photo. Support your phone against a solid structure or use a smartphone tripod or telescope adapter to keep it perfectly still.
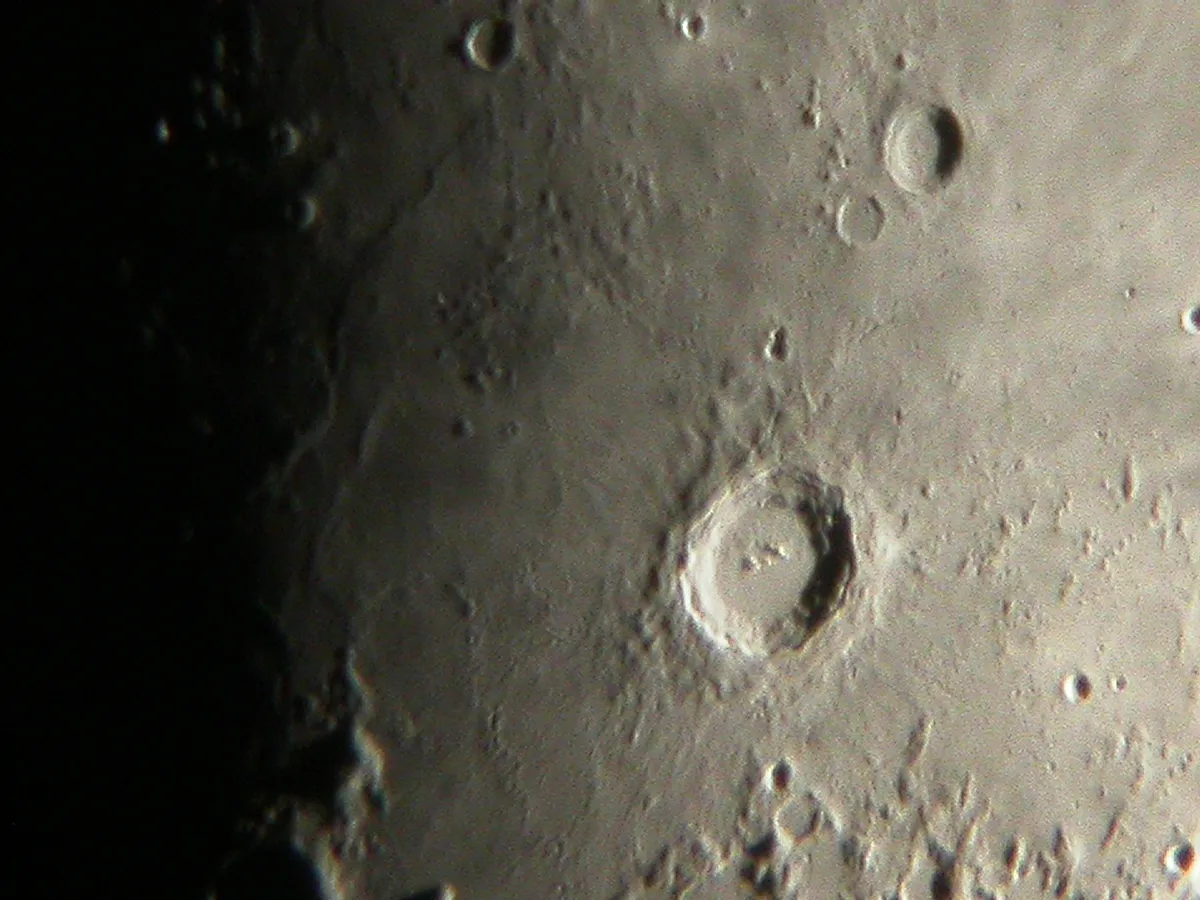
Focus on the terminator
When using a telescope, aim at the terminator line (the line between the light and dark sides of the Moon).
The high contrast there makes it much easier to tell when your focus is sharp.
Be patient and keep trying
Getting the perfect alignment between a tiny phone lens and a telescope eyepiece is tricky. If you miss the shot the first time, keep adjusting the position until the image "pops" into view.
For more info, read our full guide on photographing the Moon with a smartphone and our guide to smartphone astrophotography with a telescope.

Photograph the Moon with a digital camera
Here we'll we show you how to take afocal images of the Moon with just a point-and-shoot digital camera and a telescope.
You can use a DSLR camera for afocal imaging and, since their lenses are detachable, you could buy a relatively inexpensive adaptor to directly attach the camera to the scope, rather than point your DSLR lens through your telescope.
One of the biggest difficulties with afocal photography is keeping the camera still as you take the shot.
Putting the camera on a photographic tripod will provide much needed stability.
Similarly, using the delayed exposure setting will reduce the likelihood of you blurring the image when you press the shutter button.
Afocal photography is suitable for taking wide shots of the whole of the Moon’s disc. But don’t shy away from pushing the limits of the method either.
You can create quite reasonable close-up Moon mosaics this way.
DSLR cameras are great for taking wide-field images of the Moon, too, such as an image of the crescent Moon sitting low down against a tree line, a lunar eclipse or a shot of the full Moon rising above the horizon.
You can take wide-field lunar astro images using your standard DSLR kit lens, which will typically have a focal length of 18-55mm.
This is great for capturing lunar halos and conjunctions of the Moon with other planets. Find out more about how to do this in our guide on how to photograph a conjunction.
Capturing close-up shots of the Moon
To increase the size of the Moon in your images and reveal more detail on its surface, you’ll need a longer focal length lens.
A lens with a focal length of 300mm or more will show the lunar seas as well as some of the more prominent craters and mountains.
One of the great advantages of DSLRs is that they use detachable lenses, making them relatively easy to attach to a telescope.
With a T-ring (a brand-specific adaptor that clips into the DSLR) and a T-adaptor (an adaptor that screws into the T-ring, with a nosepiece for placing it into the telescope’s eyepiece holder) you can effectively use a telescope as the lens.

ISO settings and ‘noise’
When photographing the Moon with a DSLR camera, it’s important to choose the right ISO setting.
This is essentially a sensitivity setting; the higher it is, the brighter an image will be.
However, a high ISO setting typically comes with more ‘noise’ (the colourful granulation and brightly coloured pixels often seen in high ISO images).
You should aim to use a low ISO (100 or 200) if you can, as you’ll get less noise and clearer detail.
Get more info in our beginner's guide to ISO in photography.

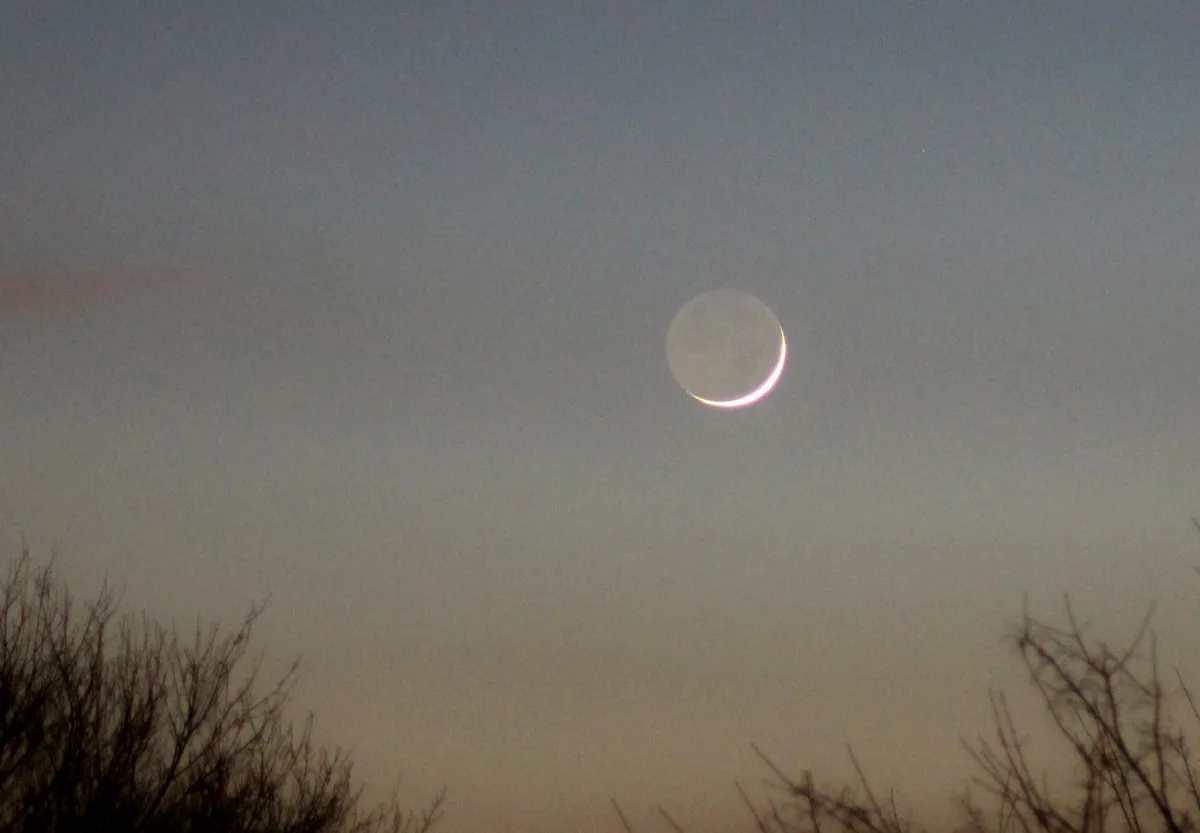
Compose your Moon shot
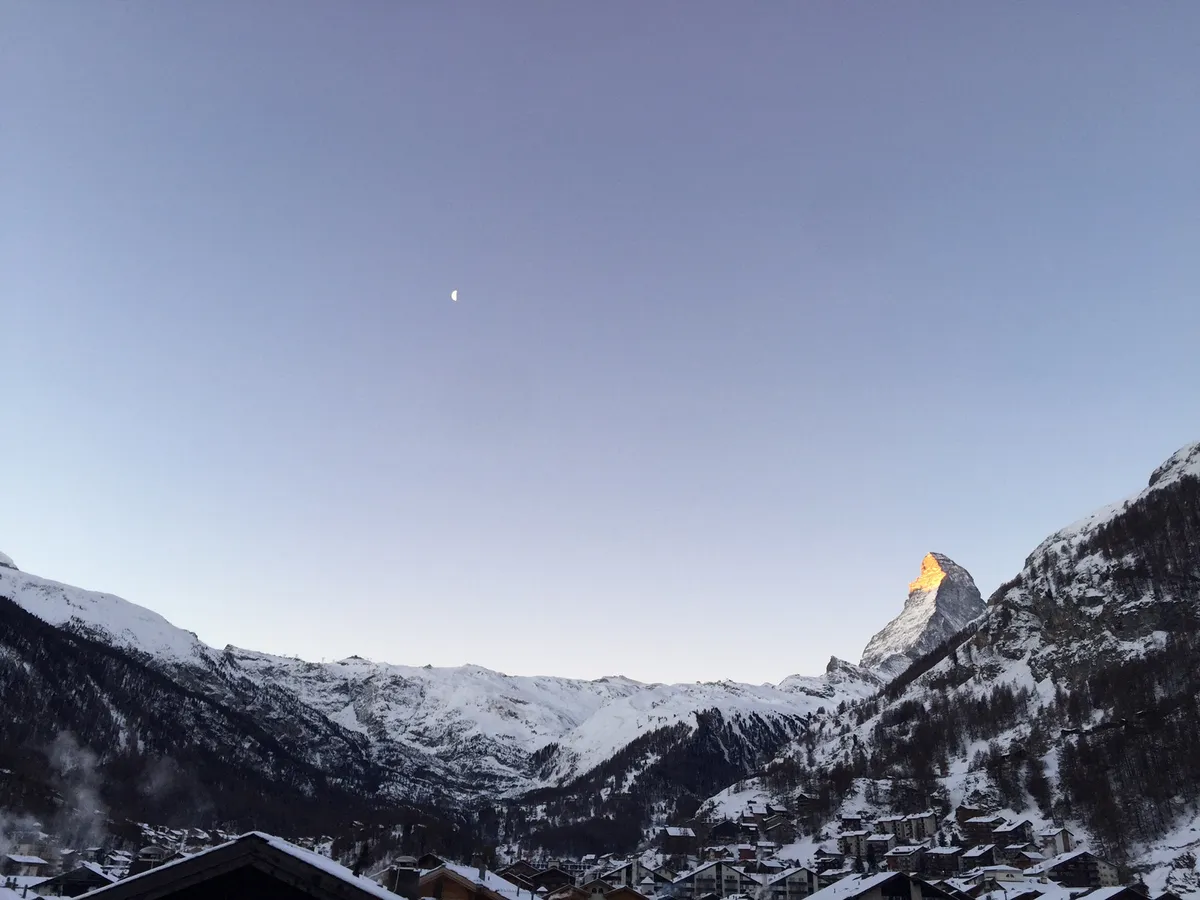
Start by seeing if there’s any foreground scenery that would make your photograph of the Moon look more interesting.
it doesn't have to be a perfectly clear night. You may encounter dark clouds scudding by, beautifully lit by a crescent Moon’s light.
Next, focus the camera. A DSLR’s autofocus should be capable of focusing on the bright crescent itself.
Now take several shots, varying both the exposure lengths and ISO settings. Look for the settings that give pleasing detail in the Moon, without overexposing it.
More Moon photography
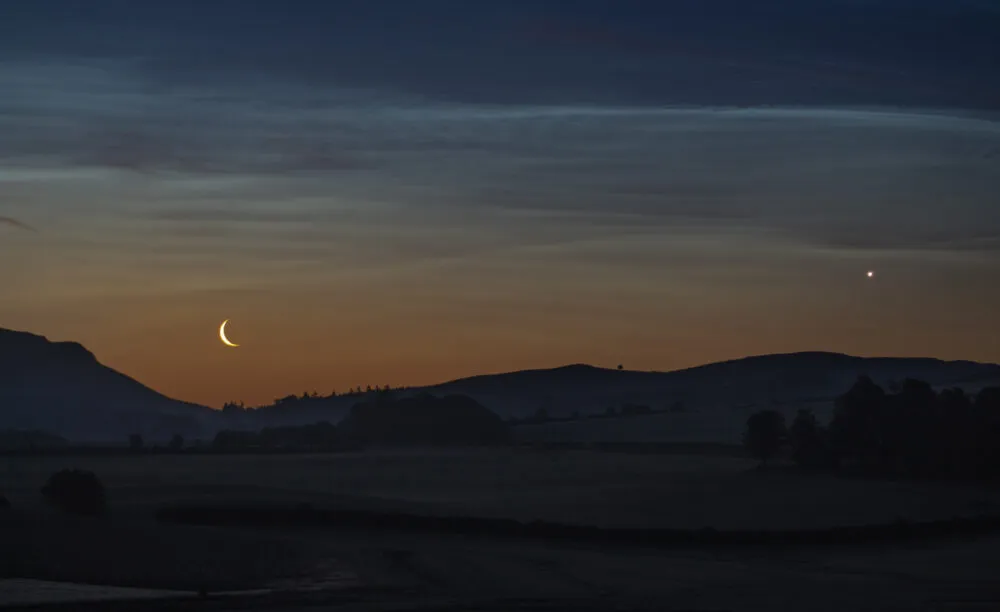
Capture Earthshine
When the Moon is a thin crescent you’ll often seen a phenomenon known as ‘earthshine’.
It’s caused by sunlight reflecting off the cloud tops and surface of the Earth, and shining towards the unlit portion of the Moon.
This light illuminates the shadowed surface just enough to make features like the lunar ‘seas’ visible.
With a DSLR, you can capture the effect for a great lunar image. There are a few ways to take this shot.
You could attach the DSLR to a telescope and just shoot the earthshine and crescent Moon up close.
Or you can use a relatively long focal length lens (say 200-300mm) and capture some foreground scenery too.

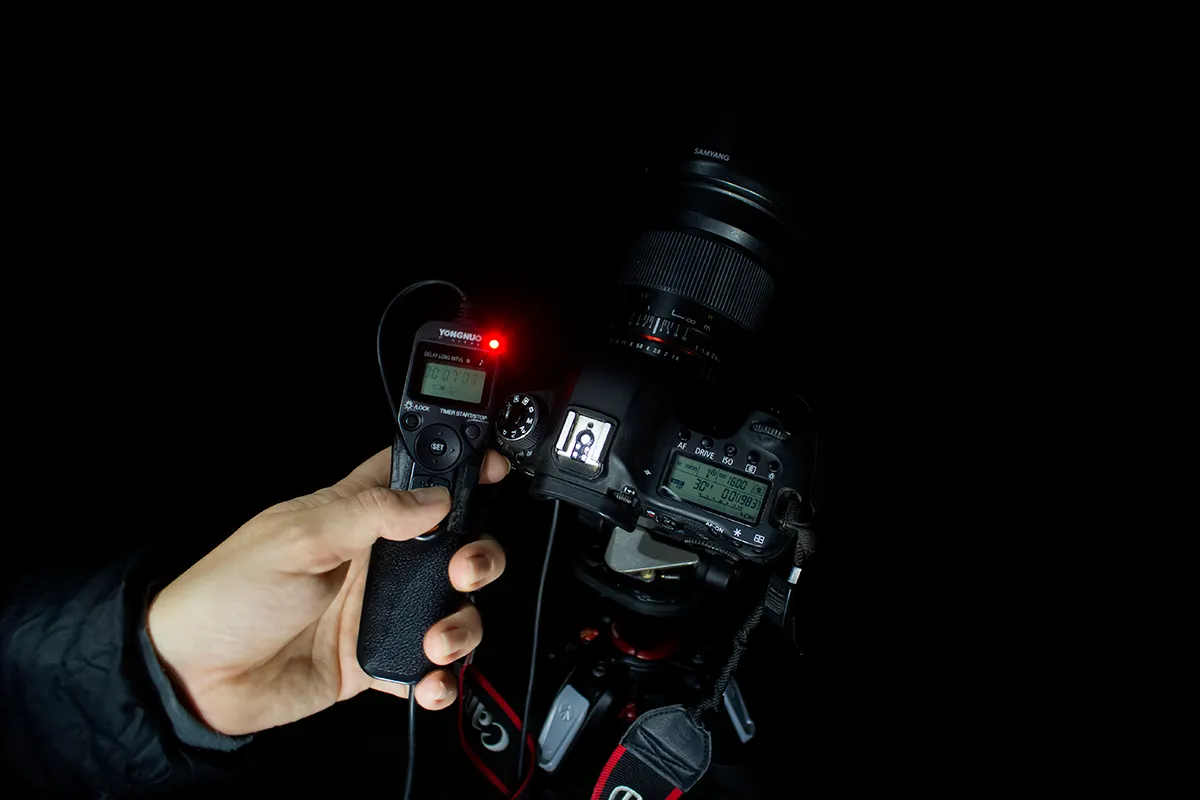
If using a long focal length lens on a DSLR to photograph the Moon, use a photographic tripod and cable release.
The trick with this shot is to balance two things. Firstly, you want to have a long enough exposure to capture both the bright crescent and the dim earthshinelit lunar surface.
But secondly, you don’t want too long an exposure – otherwise the Moon’s motion will blur the detail.
This might mean you have to up the ISO setting. If you manage to balance these factors you’ll capture a great image.
Photograph the Moon, step-by-step

Arrange the camera tripod
Set up your scope and attach your camera to a photographic tripod. Make sure the surfaces of the camera lens and the eyepiece lens are parallel.
Position it close to the eyepiece, but not so close that you’ll damage the camera’s lens if you zoom in. If using a digiscoping bracket, fix it on the camera and scope.
Position your target
Centre your target by making adjustments to the telescope controls. If using a digiscope bracket, it's attached to the telescope, so your camera will already be looking at your target.
If you’re using a photo tripod, you’ll need to adjust the camera so it’s looking at the target too.
Focus
Now is the time to focus the image. Many point-and-shoot cameras have a live view screen that can really help with this.
Select manual focus on the camera if you can, and focus using the telescope’s focuser – this should give you much greater control when making fine adjustments.

Take the image
If you can, for the best lunar shots choose a low ISO setting on your camera. This should produce a less
‘noisy’ final image.
Be sure to also set the delayed exposure on the camera, leaving plenty of time for any vibrations to settle down once you’ve pressed the shutter.
Process the results
Once you’ve taken your image you can then open it in a graphics program like GIMP or Photoshop to make any final adjustments.
For instance, you might want to tweak the ‘Levels’ to improve the contrast. You may also like to apply a gentle ‘Unsharp mask’ to make your image a little crisper.
Photograph the phases of the Moon
Different targets on the Moon are better photographed during specific phases of the Moon. Here are some of the best to capture during the key phases.
Waxing crescent
- Earthshine
- Mare Crisium
- Craterlets Picard and Cleomedes
- Craters Theophilus, Cyrillus and Catharina
- Mare Nectaris
First quarter
- Crater Hipparchus
- Crater Albategnius and crater Klein
- Mare Imbrium
- Crater Aristillus, crater Autolycus and crater Cassini
- Montes Apenninus, Montes Caucasus and Montes Alpes.
- Vallis Alpes
Waxing gibbous
- Rupes Recta
- Mare Nubium
- Craters Ptolemaeus, Alphonsus and Arzachel
- Crater Plato
- Crate Copernicus
- Crater Clavius and the eyes of Clavius
- Mare Humorum
- Craters Gassendi, Mersenius, Doppelmayer and Hippalus
- Crater Aristarchus
- Vallis Schröteri
Full Moon
- Full Moon rising
- Lunar rays
- Lunar libration
- Lunar halo
- Moondog
- Lunar eclipse
Waning gibbous
- Craterlets Picard and Peirce
- Craters Langrenus, Vendelinus and Petavius
- The Apollo 11 landing site
- Craters Theophilus, Cyrillus and Catharina.
- Craterlets Torricelli and Maskelyne
- Craters Moltke and Sabine
Last quarter
- Craters Ptolemaeus, Alphonsus and Arzachel.
- Mare Imbrium
- Crater Plato and Plato's Hook
- Mons Pico
- Crater Archimedes
- Montes Alpes
Waning crescent
- Sinus Iridum
- Crater Bianchini
- Crater Harpalus
- Jura Mountains
- Mare Humorum
- Crater Schiller.
- Craters Schickard, Wargentin and Phocylides
- Grimaldi basin
- Oceanus Procellarum
Have you managed to capture a beautiful photograph of the Moon? We'd love to see it! Send it to us via contactus@skyatnightmagazine.com or get in touch on Facebook, Twitter and Instagram.

