The transit of Mercury is an infrequent enough event to make it worth pushing the boat out for. Assuming you do get clear skies on the afternoon of the 11 November 2019 transit, imaging the event is going to be a high priority. Bear in mind that the next one doesn’t occur until 13 November, 2032.
- The transit begins (first contact) at 12:35 UT when the Sun’s altitude is 19˚.
- Mercury’s small black dot reaches greatest transit at 15:19 UT when the Sun’s altitude is around 7˚.
- Contacts 3 and 4 sadly occur after sunset from the UK.
If you do get suitable weather conditions, the good news is that the event isn’t too hard to image.
To do so you’ll need a telescope that has been prepared for solar imaging. For white light imaging this will necessitate covering the scope’s front aperture with a white light solar filter.
This is constructed from inexpensive solar safety film, but pre-made versions are also commercially available.
Remember to never observe or image the Sun withthe naked eye or any unfiltered optical instrument. If you aren't sure what you are doing, do not attempt it!

If your scope has too large an aperture to be cost-effectively covered by the film, consider using thick card over its front opening with a smaller aperture cut within it.
For reflectors and catadioptric scopes, offset the hole to one side – referred to as an offset aperture – to avoid having the secondary mirror appear within its boundary.
An important and often overlooked element to a solar imaging setup is the finderscope: this must also be filtered, covered or removed completely to avoid damage.
Once the scope is correctly filtered, it’s possible to image the Sun in exactly the same way as you would, for example, image the Moon.
All the white light filter material does is reduce the incoming light to safe levels for your telescope and camera to deal with.
Mercury’s silhouetted dot will appear quite small, around three times the apparent diameter of Uranus.
If you want to get a decent size to it, a reasonably long effective focal length must be used. We’d recommend at least 1,000mm.
Longer effective focal lengths will still give you a larger image of Mercury’s black dot but will also leave you looking at just a portion of the Sun’s disc.
For this to work you’ll need to know where Mercury will first make contact with the Sun’s limb (see below).
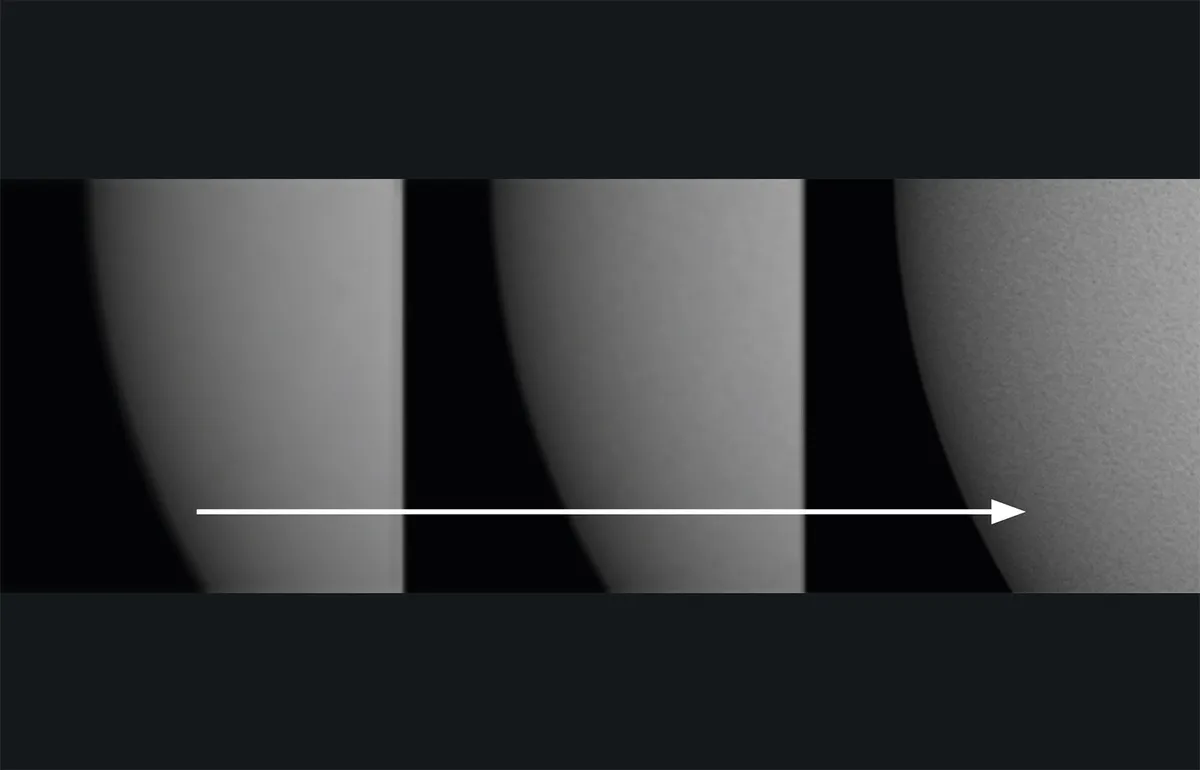
Like any astronomical target, imaging the Sun requires precise focus. A dark, high contrast sunspot is best for this, but the Sun has been blank for quite a while as it slumbers during a solar minimum.
If no sunspots appear, the Sun’s edge is a good substitute.
The Sun’s photosphere, its visible surface, is covered in a fine ‘rice-grain’ pattern called solar granulation.
This represents the top of huge convective cells welling up from within its interior. Each cell occupies an area similar in size to the US state of Texas.
Divisions between cells have a slight magenta colour bias. Imaging through a green filter (the opposite colour to magneta on a colour wheel) gives these boundary lines better contrast, making them appear darker.
If conditions are steady, solar granulation also works as a fine focus guide.
How to set up your telescope to observe the transit

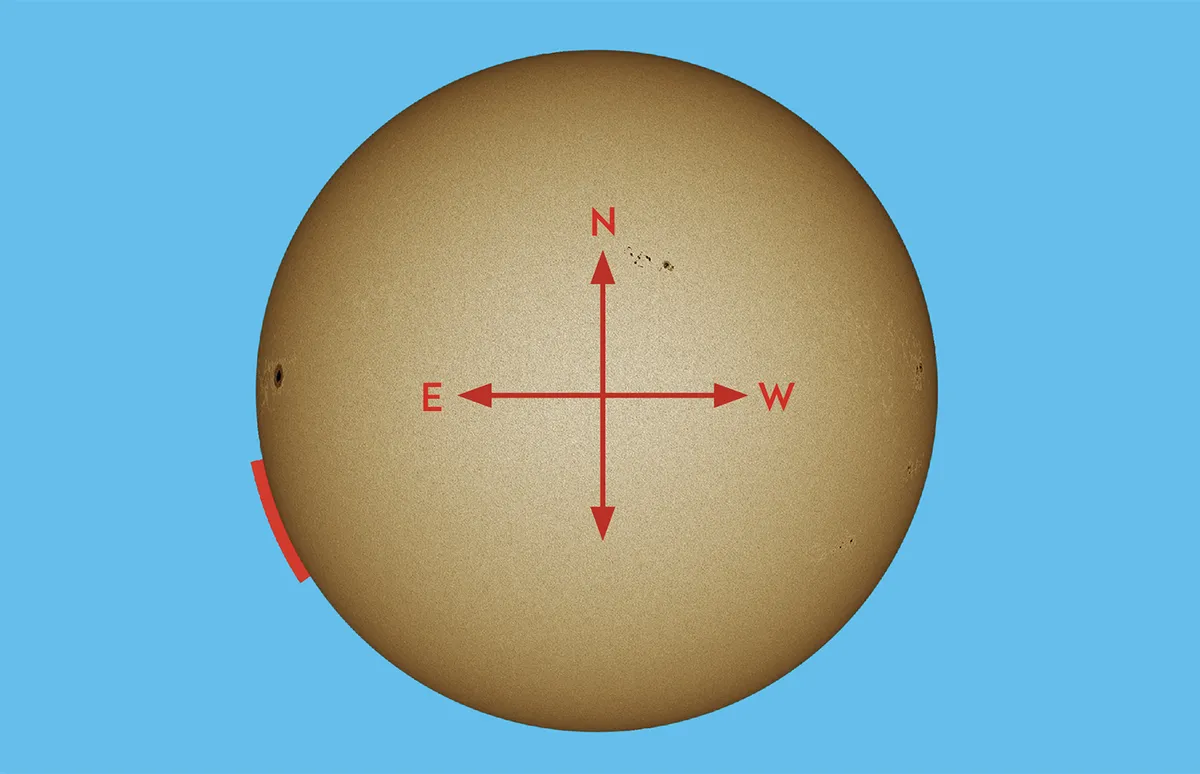
You’ll need to work out where Mercury will first appear on the Sun’s disc after first contact. The graphic above shows first contact occurs at the east-southeast limb.
Determining where this is in your scope view is essential to see the event start.
Using an equatorially mounted scope set up for solar observing and with the Sun’s disc centred, apply gentle pressure to the scope’s top (north point) as if to push it down (south).
The Sun will appear to move in the eyepiece. Its first part to touch the edge of the field of view will be its north limb.
Now apply pressure to the scope tube’s side as if to move it west. The first part of the Sun to touch the side of the field of view will be east.
Once you’ve determined north and east, you can identify the east-southeast first contact limb.
This technique works for an altaz mount, but only when the Sun is due south.
Mercury will appear 10 arcseconds across during the transit, 1/194th the apparent size of the Sun, and just three times larger than the apparent size of Uranus.
A medium to high power eyepiece or a good camera image scale that shows just part of the Sun’s disc is recommended.
Our step-by-step guide below will show you how to obtain a record of this infrequent event.
Photographing the Mercury transit: step by step
Recommended equipment: a telescope fitted with a certified solar filter and a high frame rate camera.
1
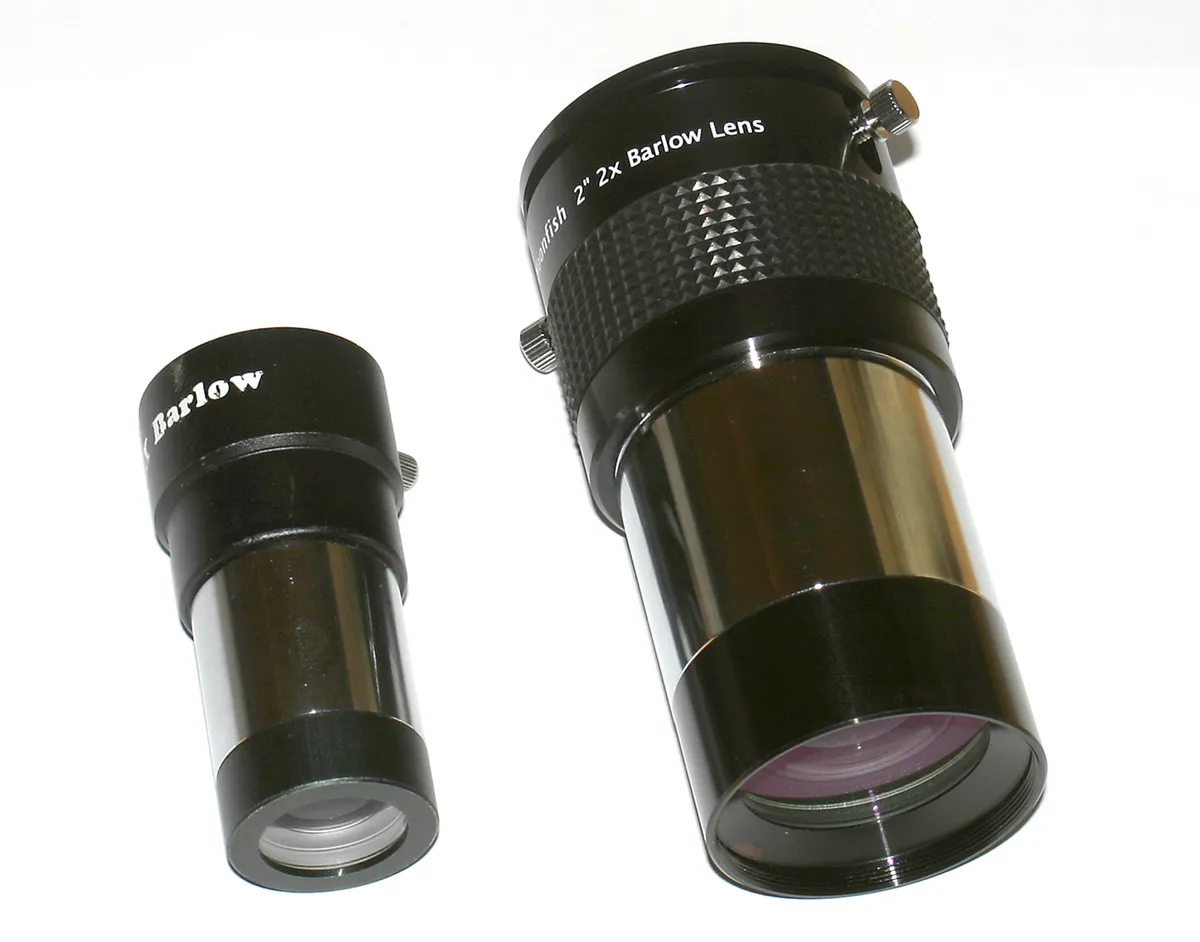
Your telescope has a fixed focal length, but it’s effective focal length can be adjusted with an optical amplifier such as a Barlow lens or Powermate. We suggest working with at least 1,000mm for this transit. Increasing the effective focal length with an optical amplifier will increase the size of the dot but also lower contrast.
2
We’d recommend an equatorial mount. Set up for white light solar observing and point the scope at the Sun. If using an image scale which only shows part of the Sun, work out your orientation using our guide (see How to set up your telescope to observe the transit above). Determine where the east-southeast limb is prior to the transit’s start and centre it in your field of view.
3
Focus is important so take your time and recheck it during the transit. The Sun remains at a low altitude during November and this means the seeing is likely to be unsteady. The transit starts close to the Sun’s highest point in the sky, due south, so this should help. On the flip side, the heat of the day also fuels instability.
4

Mercury’s apparent speed will be about 0.1 arcseconds per second, so it’ll take the planet 100 seconds to move its own 10 arcsecond diameter across the solar disc. Capture times should be as short as possible using as high a frame rate as you can get away with. A 10-20 second capture, with say 800-1,000 frames, is a good target.
5
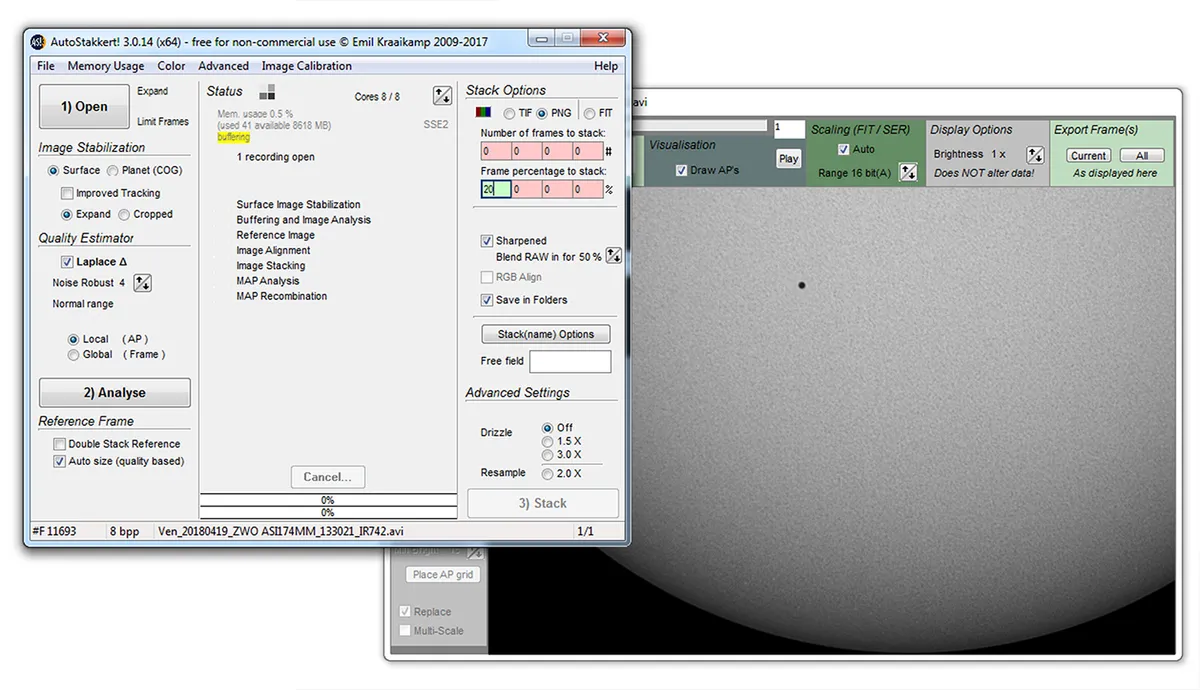
Decide beforehand the time intervals between captures. Approximately 220 minutes of transit are visible from the UK so one 10–20 second capture every 10 minutes would be a reasonable target. Process your captures with a registration / stacking application such as AutoStakkert! or RegiStax.
6
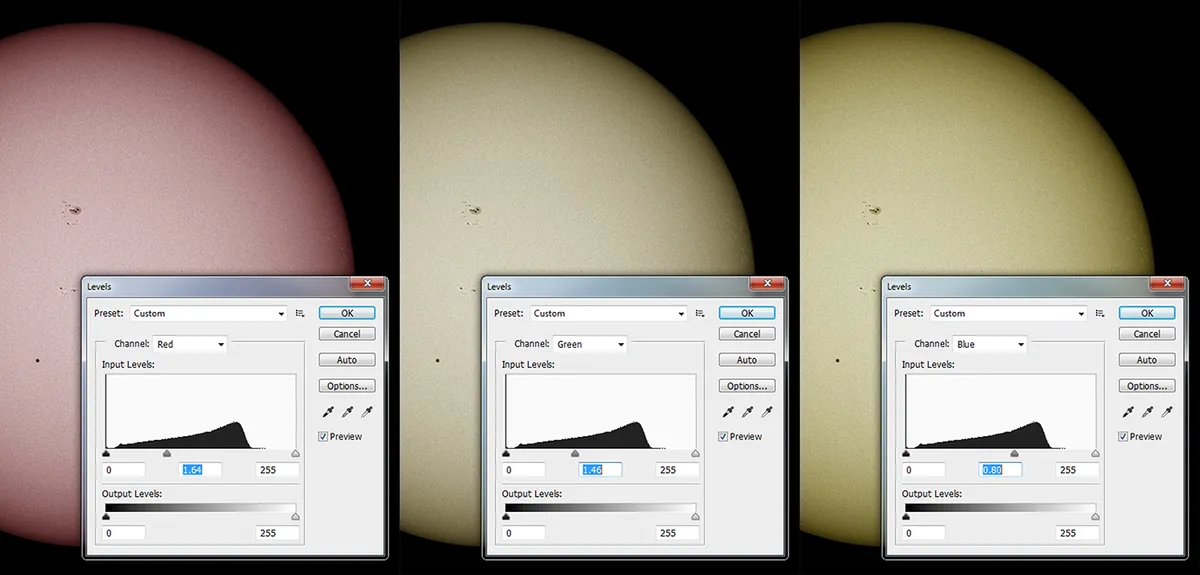
For greyscale results, open in an image editor and save in a lossless format (eg, PNG) as an RGB file. Open the Levels control. Adjust the mid-point slider for the red and green channels towards black, blue towards white. When happy with the colour, note the adjustments. Save as a custom preset to use with the other results.
If you do manage to photograph the transit, be sure to share with us via Facebook, Twitter or drop us an email.
This guide appeared in the November 2019 issue of BBC Sky at Night Magazine. Pete Lawrence is an experienced astrophotographer and a co-presenter on The Sky at Night.

 is needed to define Mercury against the Sun’s disc. Credit: Pete Lawrence")
