A backyard astrophotographer will often strive for world-class results. Perhaps it is in our nature.
But rising to this challenge requires continued improvement in image processing techniques and also careful consideration of attainable goals for each project.
In years past, I was honoured to be recognised and awarded in the annual Astronomy Photographer of the Year exhibition.
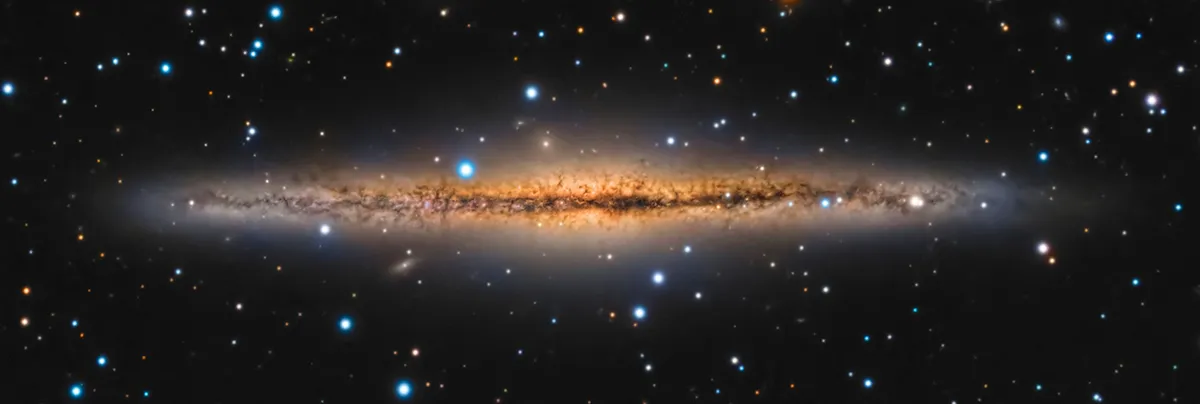
It happened again in 2022 as my image, ‘Edge-On’, was shortlisted in the ‘Galaxies’ category.
It’s interesting to revisit it and consider what makes this particular image stand out above thousands of other submissions.
The target is NGC 891, a beautiful spiral galaxy 30 million lightyears distant. Our vantage point lies along the plane of its galactic disc.
Find out how to improve your image processing
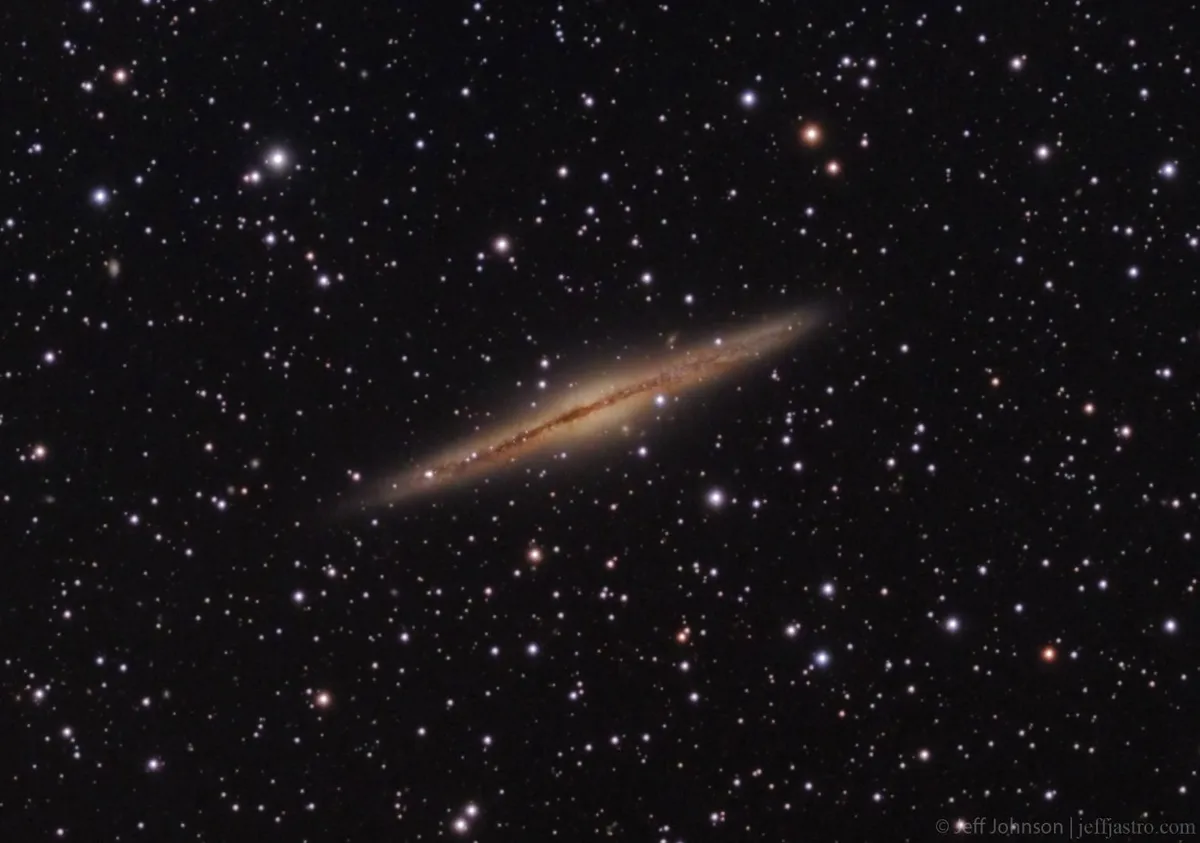
We are treated with a spectacular edge-on view: a diffuse stellar halo crossed with a complex, backlit dark dust lane.
The contrast within these delicate and wispy features creates a visual drama that draws the eye deeper into the galaxy.
Highlighting this dust was a definite goal from the beginning.
If we consider each workflow to be a unique creative journey, that artistic vision of the end product can serve as a guide to our processing choices.
The aim is to simply serve the image, assessing what is needed and continually adjusting course as necessary.
A capable collection of tools can be used to steer, with subtle corrections, towards that ultimate goal.
Here is a brief overview of some post-processing concepts for dust lane enhancement, widely applicable to galactic images.
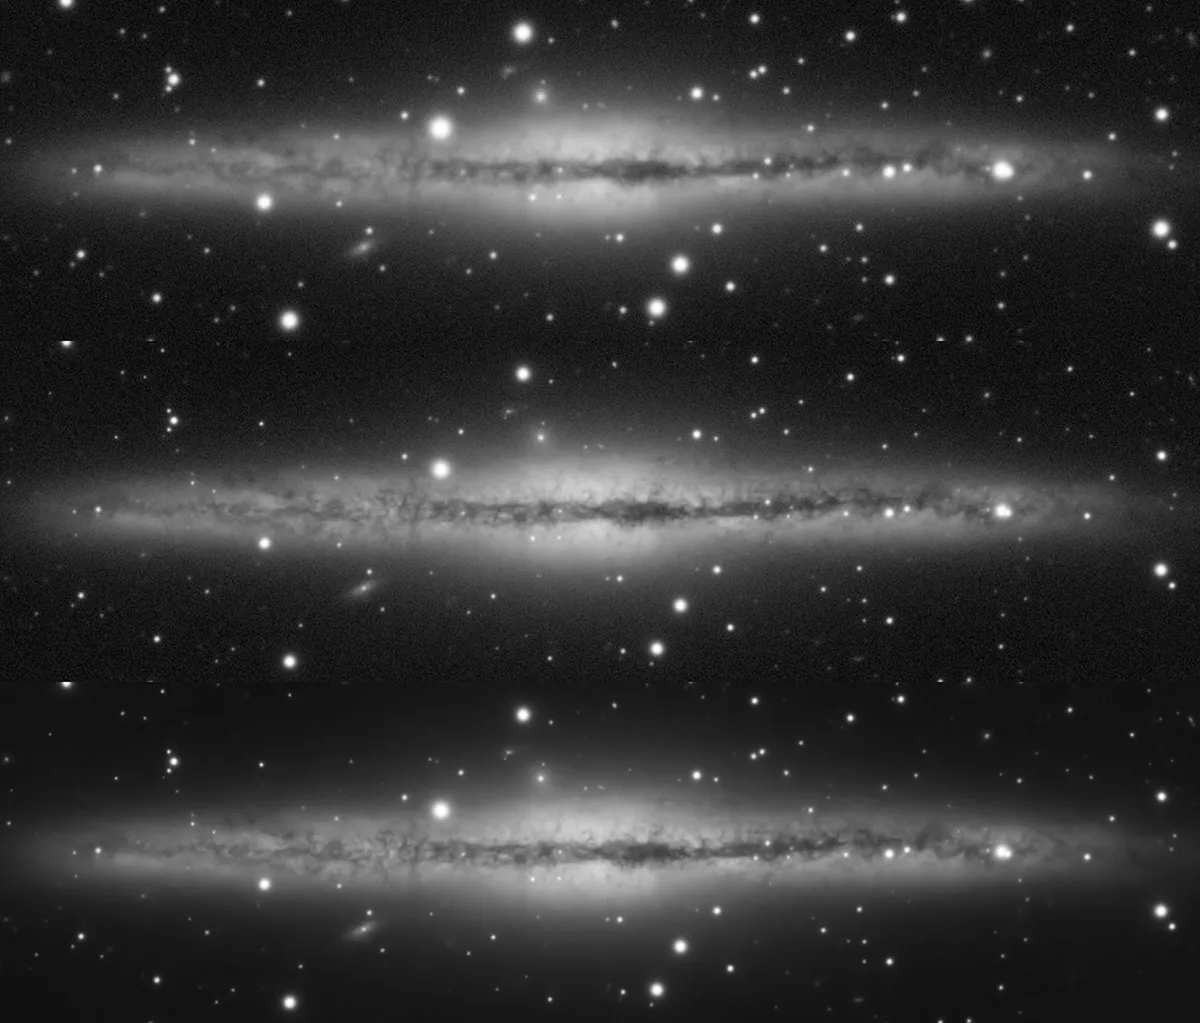
I started with the raw stack for the monochrome luminance filter, as this channel conveys visual details in the image (see image below).
Deconvolution in PixInsight mathematically sharpens the image based on data contained within.
When I originally processed ‘Edge-On’, I used an elaborate workflow of mask generation and deconvolution.
Ultimately this can be replaced by the new BlurXTerminator plug-in from RC-Astro.
In reprocessing this photo, I can confirm the results to be directly comparable to my previous process, and with just a single button click!
Noise Reduction in PixInsight reduces the noise without destroying fine detail.
For this demonstration, another RC-Astro tool, NoiseXTerminator, does an excellent job of protecting the details within the galaxy while effectively reducing background noise.
After stretching and applying colour to the previous result in Photoshop (see image below), I turned to contrast enhancements.
Several software packages are capable, but Photoshop offers the benefit of working in layers of varying opacity while still providing real-time visual feedback.
Creating projects consisting of many layers using different enhancement processes, and blending them into each other in creative ways, can yield results unobtainable with single processes executed in a serial fashion.
One effective method of multi-scale contrast enhancement is high-pass filtering.
Start by duplicating the original layer. With the new layer selected, navigate to Filter > Other > High pass.
The Radius slider allows you to choose the scale of the effect (smaller radii will emphasise smaller structures).
Click Ok and then change the blending mode of the layer to Overlay (or Soft light for less effect).
The layer opacity can be lowered to provide a subtle contrast enhancement.
I repeated this technique multiple times at different radius scales and layer opacities.
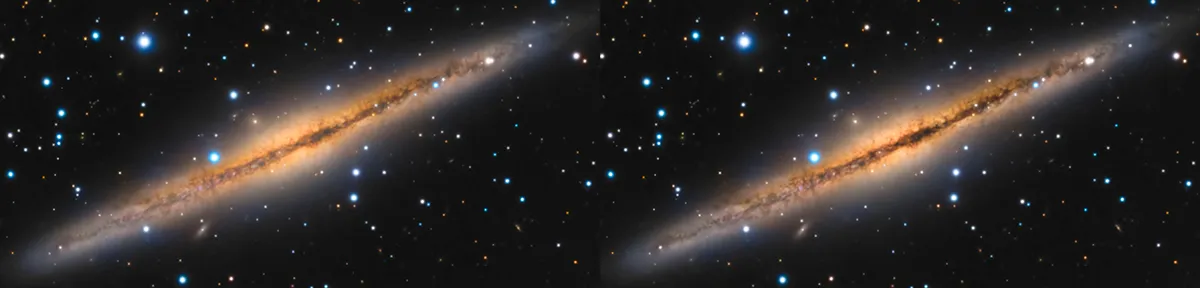
I used masks to limit the effect to exactly where it was needed in the galactic core (see image above).
Other interesting tools to try for local contrast enhancement include:
- Camera Raw filter (clarity/texture/dehaze)
- Shadows/Highlights adjustment tool in Photoshop
- Plug-ins from Topaz Labs
PixInsight has a DarkStructureEnhance script, LocalHistogramEqualization process and HDRMT process.
It’s easy to overuse these tools. The finesse of a light touch is important.
Work in small, targeted and progressive changes (baby steps!) so that the results are neither harsh or unnatural.
Using low-opacity layers and effective masking, multiple techniques can be combined to gradually build the desired effect, as seen in the reprocessed result (see image below).
I hope this provides some insight into a useful thought process and workflow ideas.
Keep an initial vision in mind. Work with purpose, but also a high degree of care, to let that natural beauty of the cosmos shine through.
3 quick tips
1. The goal is to simply serve the image; assess what is needed and continually adjust course as necessary.
2. Layers blended together in creative ways can yield results unobtainable using single-process methods.
3. It’s easy to overuse these tools. Have a light touch!
Are you an astrophotographer? Don't forget to send us your images.
This guide originally appeared in the May 2023 issue of BBC Sky at Night Magazine.