The lack of truly dark skies is an issue for the UK in the summer months. Some compensation is the chance to see noctilucent cloud (NLC) displays, and here we’ll look at how to photograph them to capture their structural movement.
NLCs are high-altitude ice-sheet clouds able to reflect sunlight despite the Sun being below the horizon from ground level.
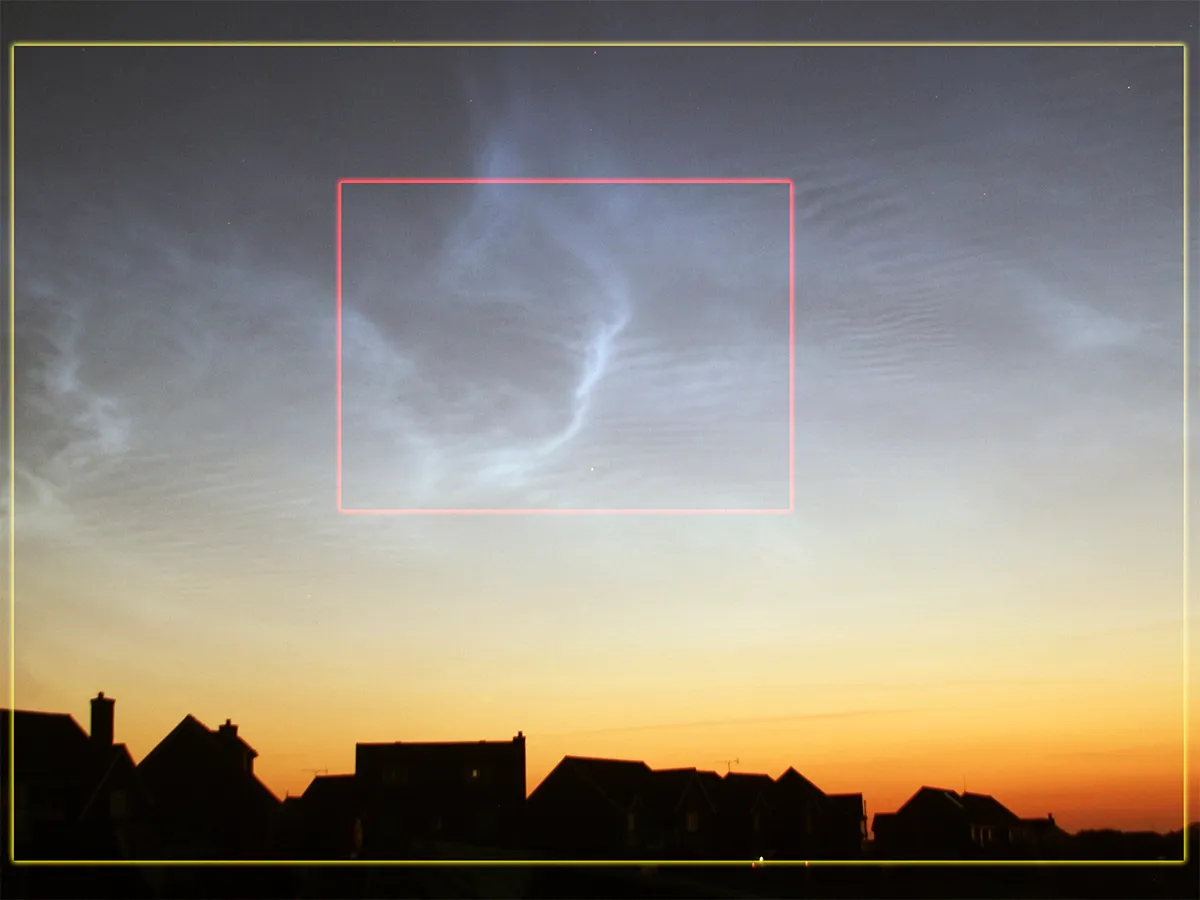
They are typically seen 90–120 minutes after sunset, low above the northwest horizon or a similar time before sunrise, low above the northeast horizon.
Find out more in our guide on how to capture and process images of noctilucent clouds.

If you've ever had clouds roll in - or even seen those lumpy mammatus clouds that tell you a storm is on the way - during an astro-imaging session, you're not alone.
Yet noctilucent clouds are the sort of clouds that astrophotographers do like to capture.
Extensive displays of noctilucent clouds may last all night, tracking from the northwest, through the north and ending in the northeast.
There are many interesting things about noctilucent cloud displays, including their brightness, colour and different types of structure.
This can all be seen visually, but recording displays with a camera allows you to create timelapse movies that show how NLCs develop over time and how their structures move.
This isn’t particularly complicated to do and the results can be quite stunning, revealing aspects of noctilucent clouds that you may not have realised were there.

What you'll need
- DSLR or equivalent on a tripod
Or
- Sensitive, night-capable smartphone camera
Let’s consider the basics of anoctilucent cloud capture setup, starting with the obvious: a camera that is capable of capturing them.
Adjustment to the camera settings should allow a fair bit of control to get the best image possible.
You should also bear in mind that NLCs appear against a twilight sky.
This is one of the most challenging backgrounds in astronomy, as light levels are constantly changing, meaning you need to stay sharp to avoid under- or overexposure.
A wide lens is ideal for capturing panoramic views of a display, but will also reduce the size of cloud structures and the apparent speed of any movement.

A telephoto lens may not give the most stunning panorama, but it can help reveal rapid structural and drift variation in noctilucent cloud formations.
Cameras sensitive enough to capture movies of noctilucent clouds offer another exciting capture method, but be prepared to speed up the output to get the full effect.
Although NLC movement can be rapid, typically it’s slow and subtle.
Some smartphones have now reached the point where their cameras can easily record NLC displays. Auto settings may work, but do experiment with manual settings if you can, as you may get a much better result.
You can find out more about this in our guide on how to photograph noctilucent clouds with a smartphone.

A stable platform is essential for animation captures. For regular cameras, this typically means a tripod, although a solid surface that allows you to point your camera in the right direction would do just as well.
For smartphones, a smartphone tripod or a tripod with an inexpensive phone holder adaptor is the way to go.
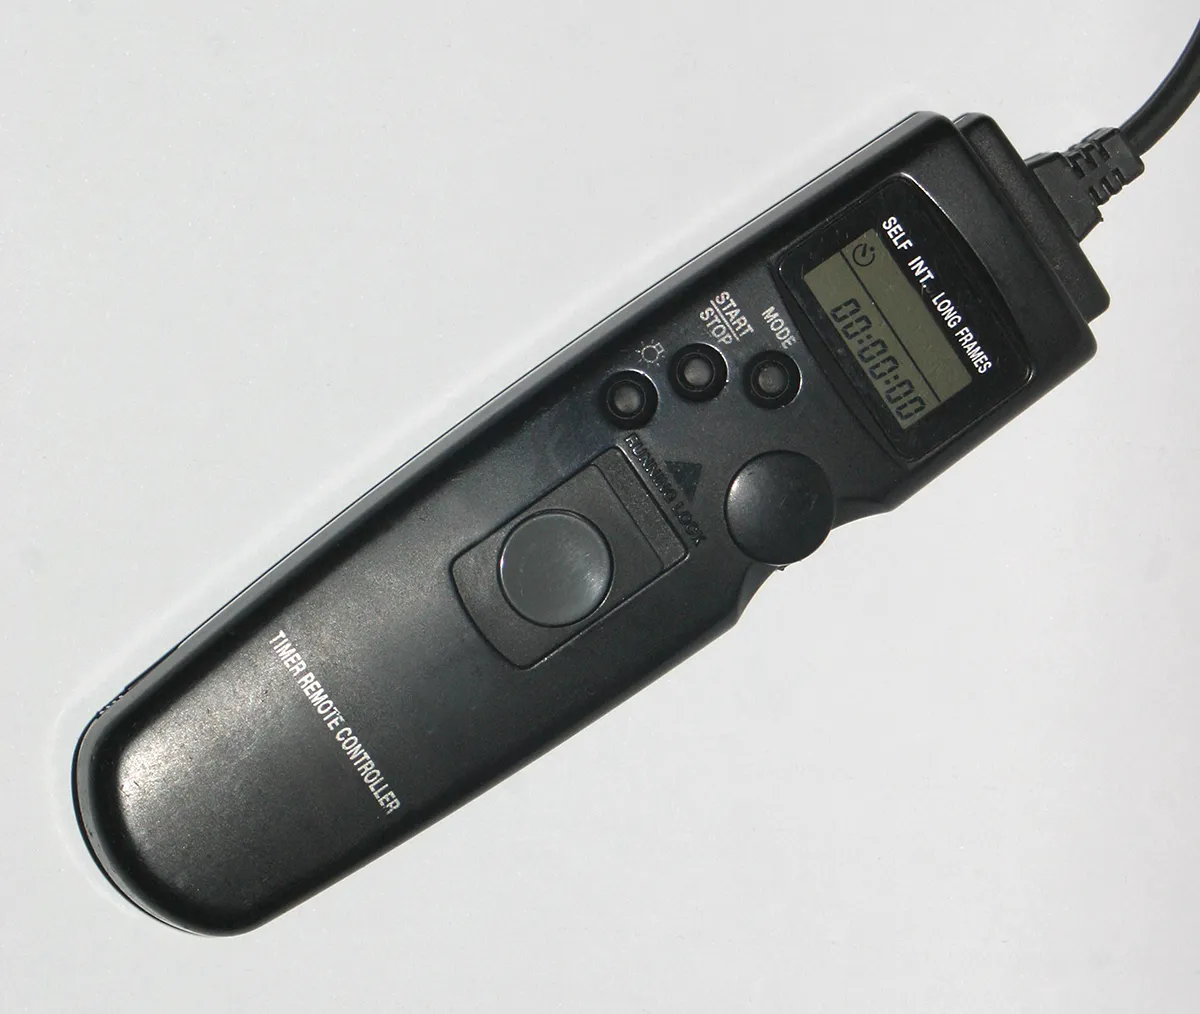
As ever, the best way to take shots without getting motion blur when you press the shutter release button is to use a remote shutter release.
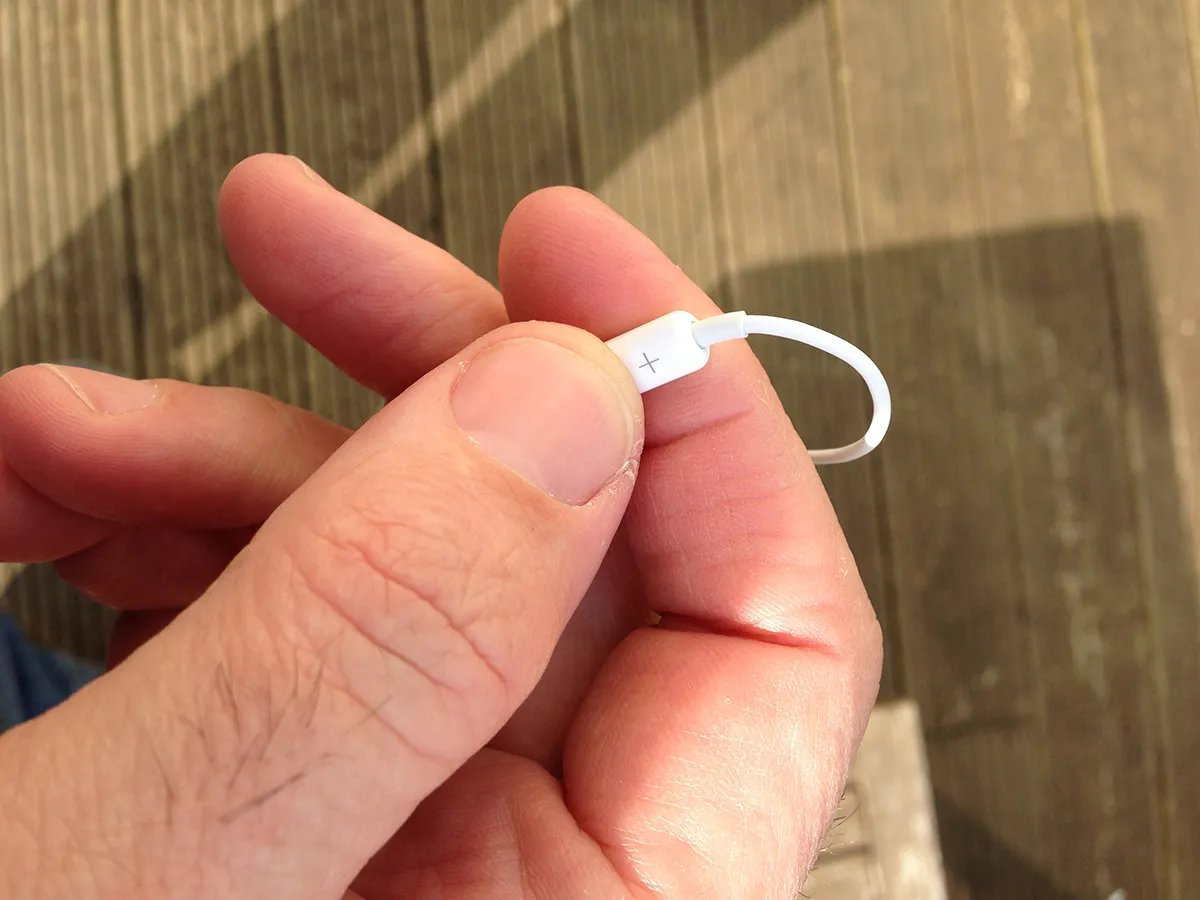
For many smartphones, a good hack for this is to use a headphone lead with a volume control.
Connect one to your phone and, with the camera app running, see whether pressing the volume up button triggers your camera’s shutter.
If it does, you’ve got a useful shutter release cable.
Follow our step-by-step guide below and create your own visual record of the movement of noctilucent clouds.
Step-by-step
Step 1
You can achieve panoramic views using short-focal-length lenses, but their structure and motion may lack impact in any animation you put together.
A telephoto lens or even a low-image-scale telescope setup will get you closer to interesting features and will really exaggerate any motion. Better still, use two cameras and get a widefield and a close-up.
Step 2
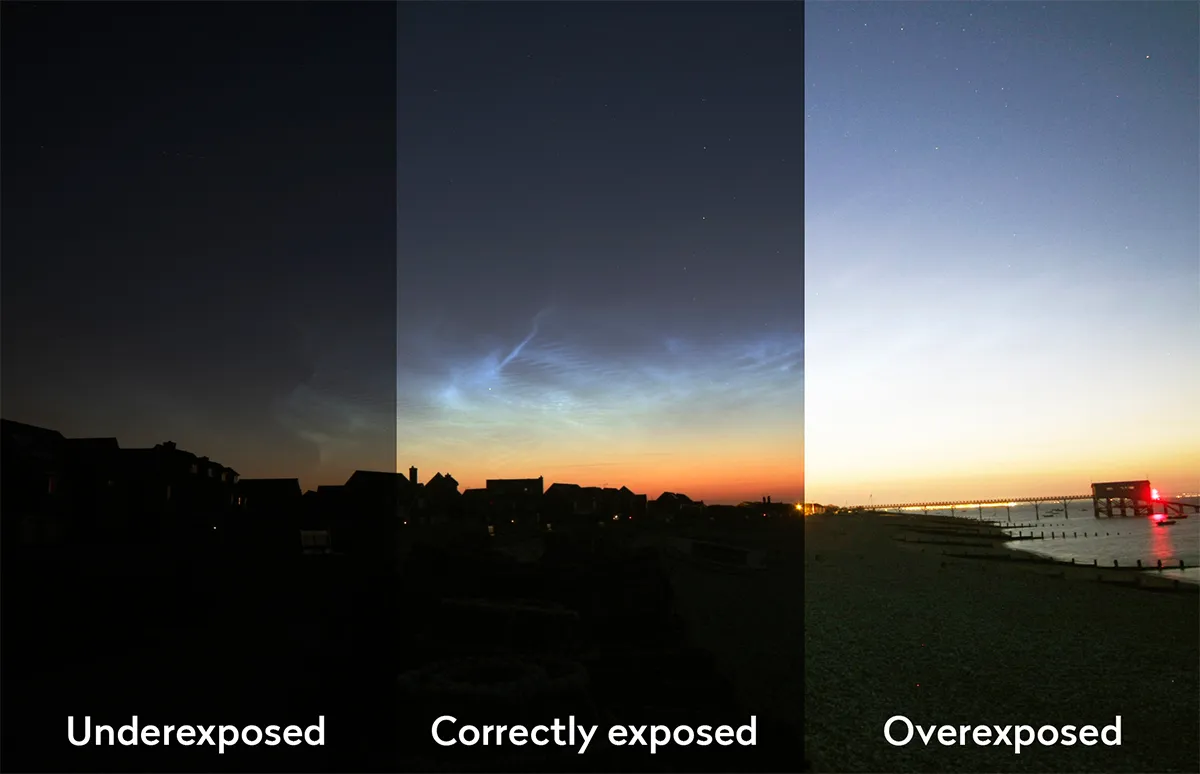
Use a fixed platform such as a tripod. Your camera settings will depend on the twilight’s brightness. As a rule of thumb use a wide-open lens (low f/number) and low to mid ISO. Adjust so that for an evening display you get a bright first image; for a morning display, allow the first image to be slightly darker than usual.
Step 3
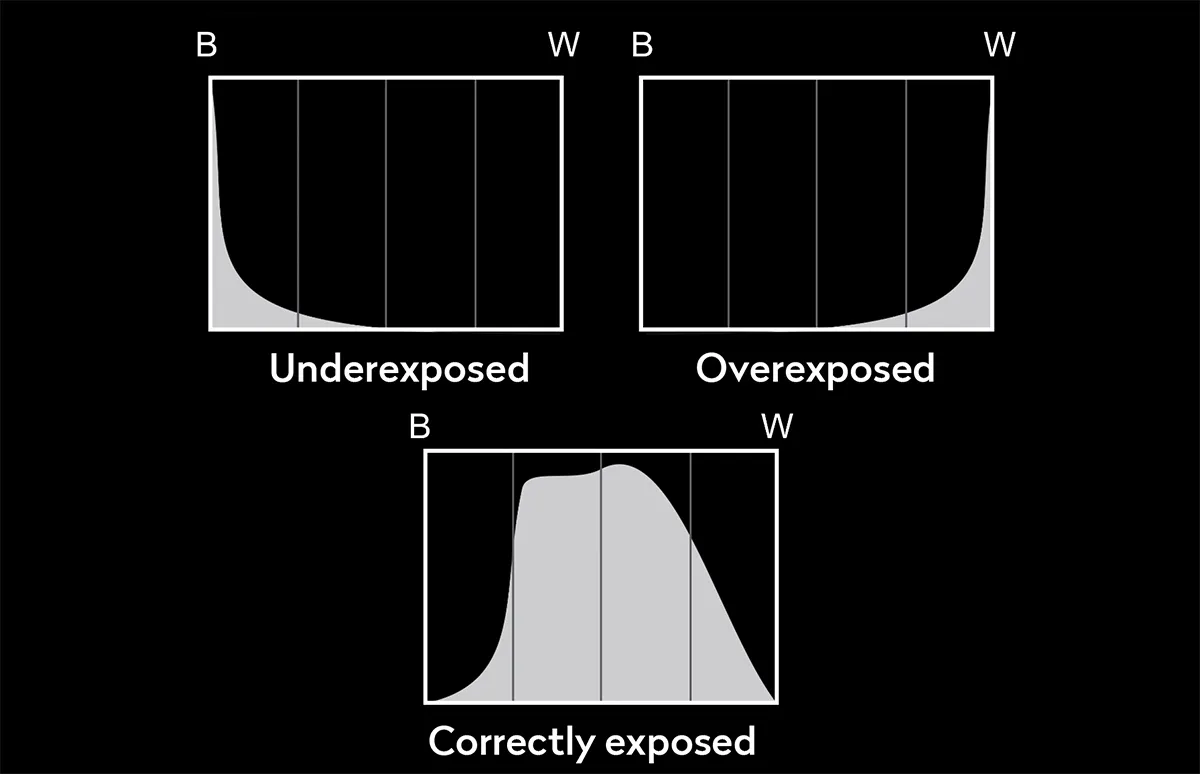
Monitor your exposures every few minutes. This can be done quickly if you adjust your camera to display the histogram as each image is taken. Make sure the histogram isn’t pushed to one side of the graph area, creating a ‘cliff-edge’. If it is, or it’s approaching one side, make a quick adjustment to the settings.
Step 4
Rapid, repeated captures will produce smooth animations, but you’ll get fewer chances to adjust the settings (see Step 3). The gap between captures should be smallest for close-up views, but can be longer for widefield shots (say, 10–20 seconds vs 30 seconds). An intervalometer makes light work of this if you have one. If not, you’ll need to time and operate the shutter manually.
Step 5
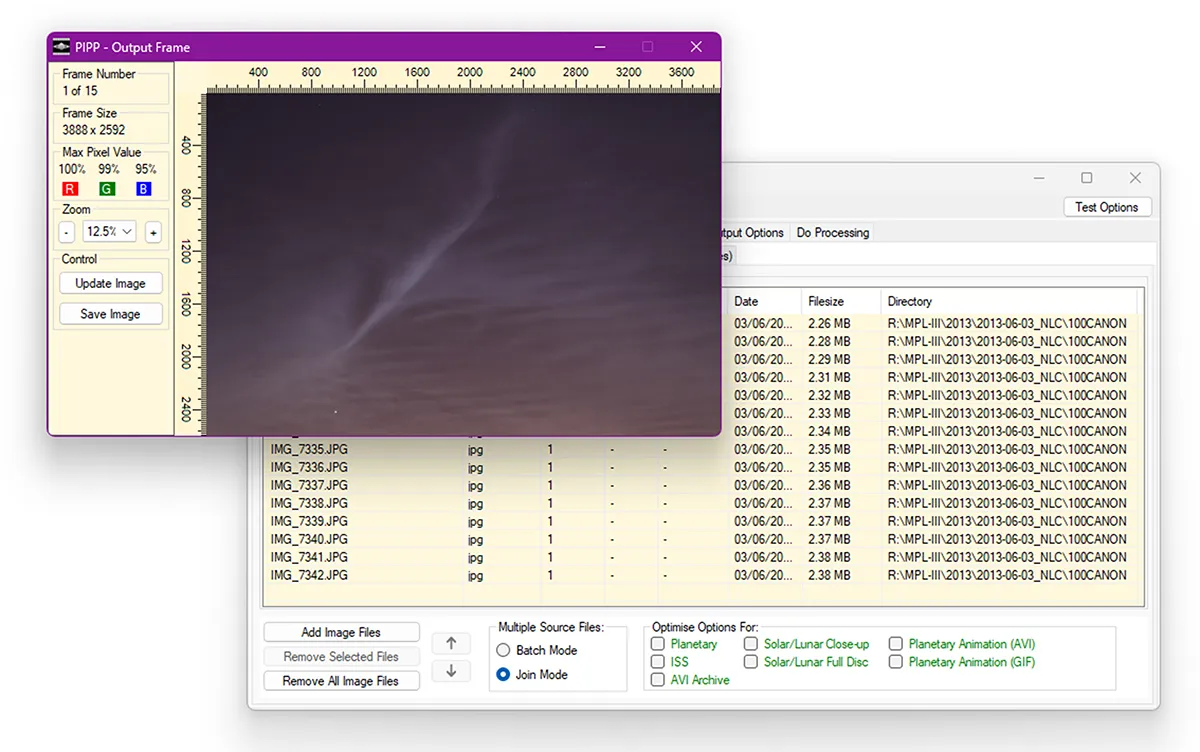
Once you have your captures, apply any adjustments across the whole batch. It’s sensible to work on copies of your originals. Use a program like PIPP for the batch adjustment and the animation build. Drop your captures into the source files tab, selecting ‘Join mode’.
Step 6
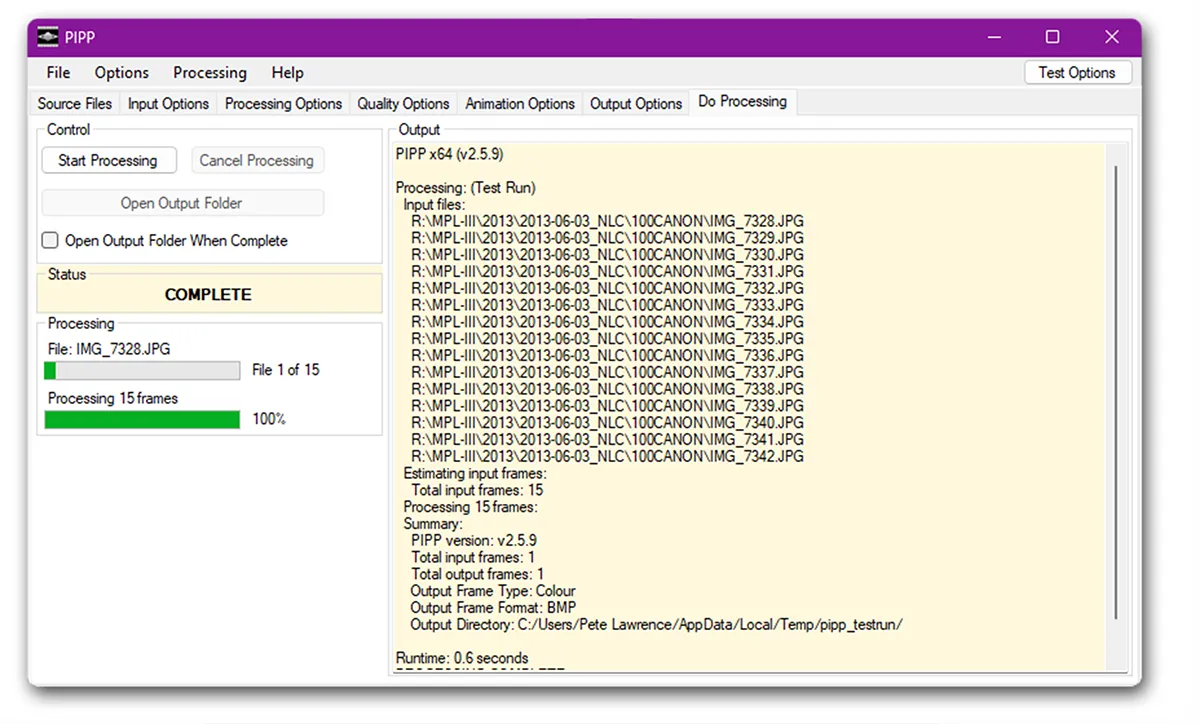
Use the ‘Processing options’ tab to make adjustments (your tweaks will appear in the preview image) and the ‘Animation’ and ‘Output options’ tabs to set these. Simply click ‘Start processing’ on the ‘Do Processing’ tab. Review your output and tweak options again as necessary to improve your results.
Have you managed to photograph noctilucent clouds? Don't forget to send us your images!
This guide originally appeared in the June 2023 issue of BBC Sky at Night Magazine.
