In this tutorial we are going to look at how you can ‘denoise’ lunar and solar images using Adobe Lightroom. Noise can make your images look grainy, and removing it brings myriad benefits. In lunar images, you can add definition and depth to the Moon’s surface by enhancing craters and highland regions, and bring out more colour across the maria.
In solar images, sunspots, filaments and prominences can be enhanced.
Here, we will walk through the steps needed to enhance lunar images, but the same basic principles can be applied to solar ones too.
If you're new to lunar astrophotography, read our guide on how to photograph the Moon.
Our starting image was taken with an 8-inch Ritchey-Chrétien telescope fitted with a 0.67x focal reducer and a Canon EOS 1100D DSLR.
- How to capture scientific images of the Moon
- How to colour-saturate your astrophotos of the Moon
- How to colourise astrophotos of the Sun
For the best results, you should take your images as RAW files, as this will give you a higher resolution starting point and make processing easier.
Note that if you are planning to stack your shots in either Autostakkert! or RegiStax that neither can handle RAW files.
One of the reasons we are using Lightroom is that its batch processing function can convert them into Tiff format.
This stage is simple, and if you also crop your images at this point it reduces the file sizes, something that helps the stacking software to run faster.
If you do not wish to stack images, just open your image as described below, then move straight to the tweaking of the final image.
Start by cropping Open Lightroom and make sure you are on the Library tab.
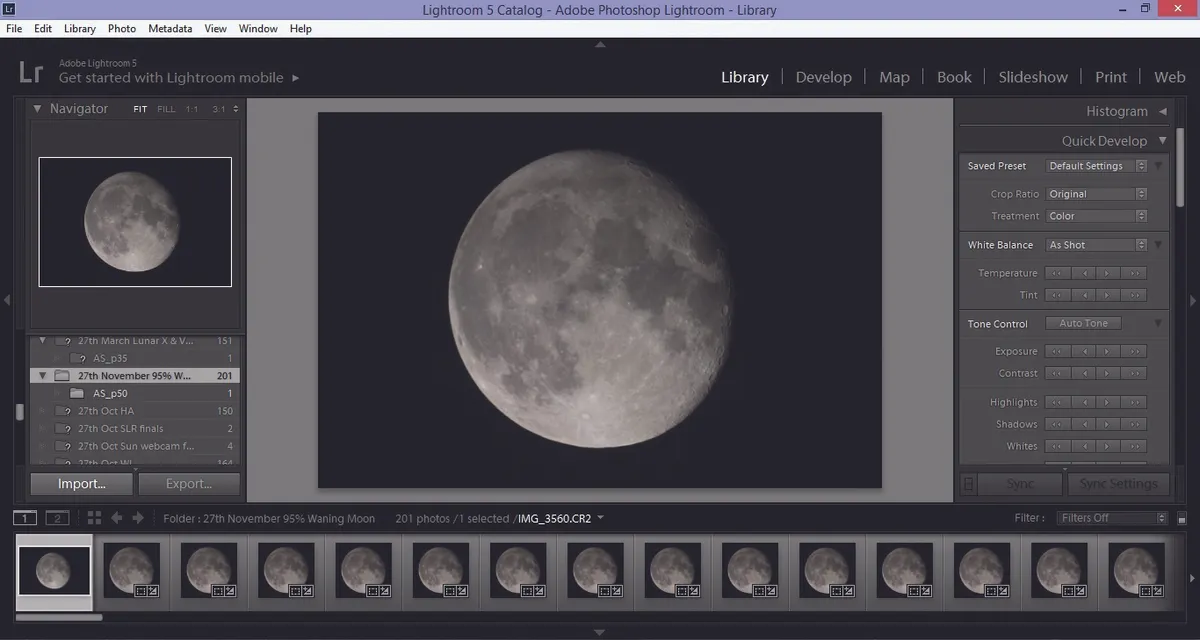
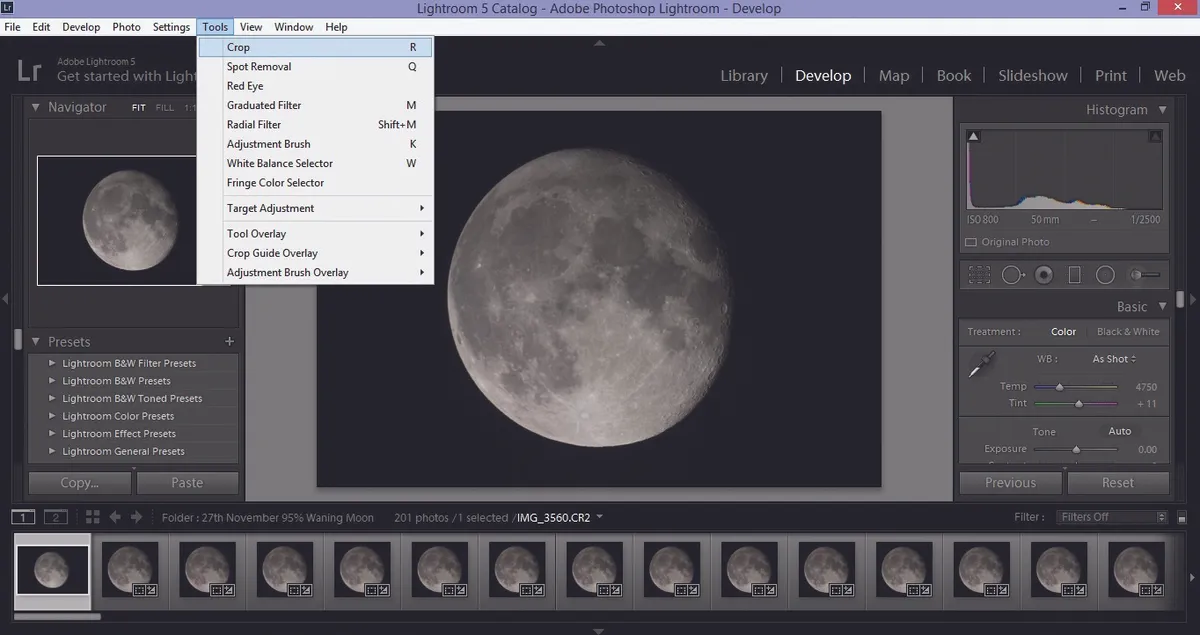
Click the Import button, select your images, then click Import. Now move onto the Develop tab. From the top navigation menu, select Tools > Crop.
Drag the edges of the box around until you are happy with the crop area, then hit Enter.
To apply the crop to the rest of your images, click Edit > Select All, then click Copy > Check All > Copy.
Hover your mouse over the photos at the bottom, then right click and choose Develop Settings > Paste Settings.
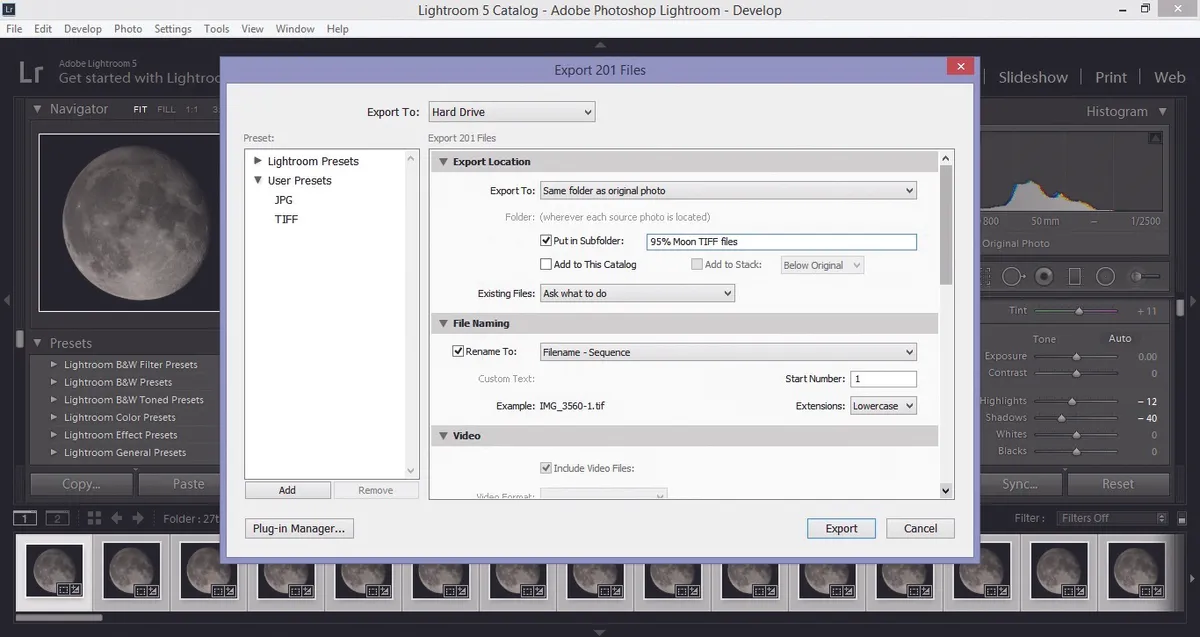
Now you need to export your images. Make sure all images are selected, then click File > Export to bring up the export window.
It is helpful to put your exported images into a new folder, so check the Put In Subfolder box and type in a folder name.
Using the scroll bar, move down to the File Settings menu and select Tiff. Then click Export and wait until your files have been saved.Now you are ready to stack your images.
Once you have done so, follow the same import process as before and make sure you are on the Develop tab.
The image we will use for the next part is a stack of 100 Tiff files. Editing with sliders The adjustments to remove noise are all made using the sliders on the right of the Develop tab.
There is no single correct set of values you should be using: every image will need different processing.
Personal taste plays a part too, so play with the sliders and decide which adjustments are right for your shot.
A good place to start is with the Highlights and Whites sliders. Highlights adjusts the overall brightness
of the lunar surface, whereas Whites enhances the brighter, highland areas.
Make small adjustments until you are happy with the balance of the two, taking care not to blow out the white areas, then move on to the Shadows and Blacks sliders.
Once again be careful not to push these too far, but alter them just enough to give a nice level of contrast between the lunar maria and highland regions.
Next you can adjust the Clarity slider. This is the slider that can most easily wreck your image, so use a very gentle hand.
Underneath the Clarity slider you will find ones for Vibrance and Saturation. Increasing these will highlight the different basalt compositions within the maria, but pushing them up too far will make the image look very artificial.
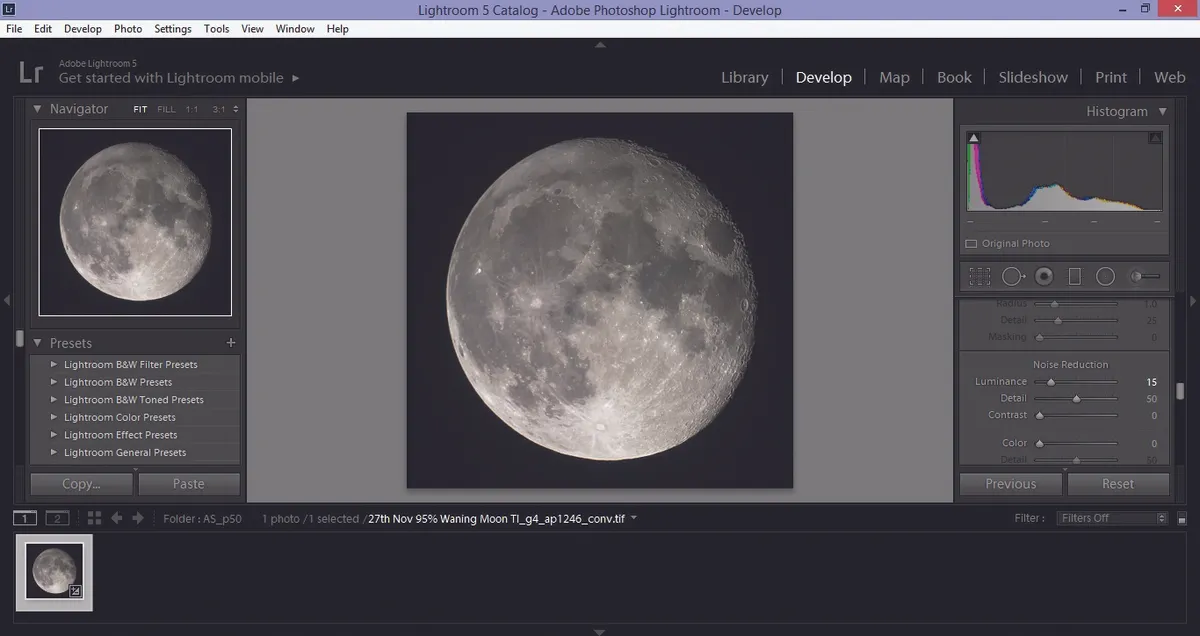
More minor tweaks can then be made using the Tone Curve sliders. Move down into the Noise Reduction section and alter the Detail slider to reduce graininess.
The amount needed will depend on the quality of your image; too much will make the image blurred.
When you are happy with the image, export it in the same way as described previously, but this time select Jpeg instead of Tiff for the export.
This will give you a final image which is a suitable file size for sharing online.
This article originally appeared in the February 2016 issue of BBC Sky at Night Magazine. Mary McIntyre is a passionate astro imager based in Oxfordshire.
