If you've ever wanted to photograph the Geminid meteor shower, 2023 is the year to do it.
In this guide we'll reveal how you can increase your chances of capturing a Geminid meteor on camera.
The Geminid meteor shower reaches its peak in the middle of December and this year there’s no Moon to spoil the show.
If the skies remain clear, this is a fantastic opportunity to capture a meteor on camera.
Viewing or photographing a meteor is a statistical game: anything you do to tip the odds in your favour will boost your chances of catching a trail with your camera.
Thankfully, the steps you can take are all fairly simple to implement.
For more advice, read our guide on how to photograph a meteor shower and our pick of the best equipment for photographing meteors.
Aim to photograph Geminids during peak activity
Meteors occur throughout the year, but at certain times the expected number increases.
Such periods occur when Earth passes through a comet’s orbital debris stream, an occurrence that creates a meteor shower.
These streams tend to be wide, creating enhanced activity over a period as short as several days or as long as several weeks.
It’s in the centre of the passage that activity rises to a crescendo: the peak of the shower’s activity.
Find out more about this in our guide to what causes a meteor shower.
Setting up to photograph the Geminid meteor shower
Set your camera up when there is no shower active and your chances of capturing a meteor are not zero, but they aren’t too high either.
Do the same thing when shower activity has begun and your chances are much better.
Set up on the night of maximum Geminid activity and your odds will peak.
Not all showers are the same, however.
Although the peak of a mid- to low-rate shower does improve your odds, the amount of improvement won’t be as much as if you’re photographing during the peak of a high-rate shower.
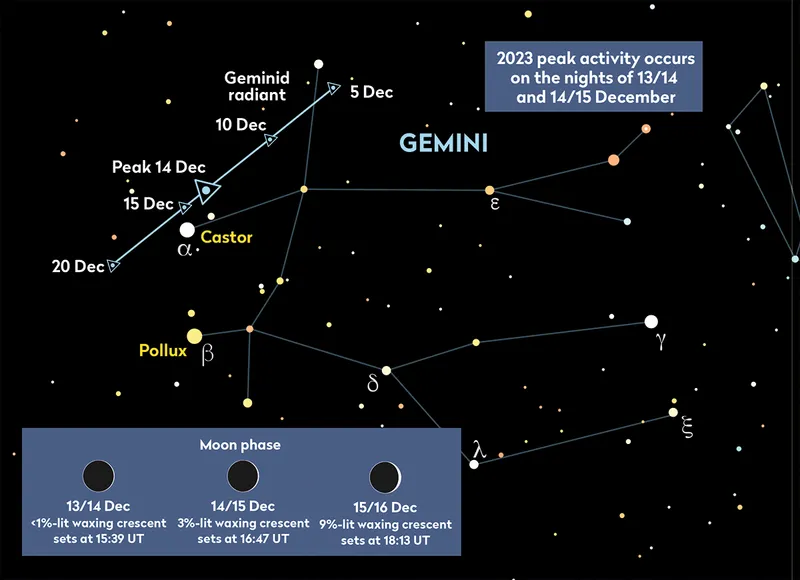
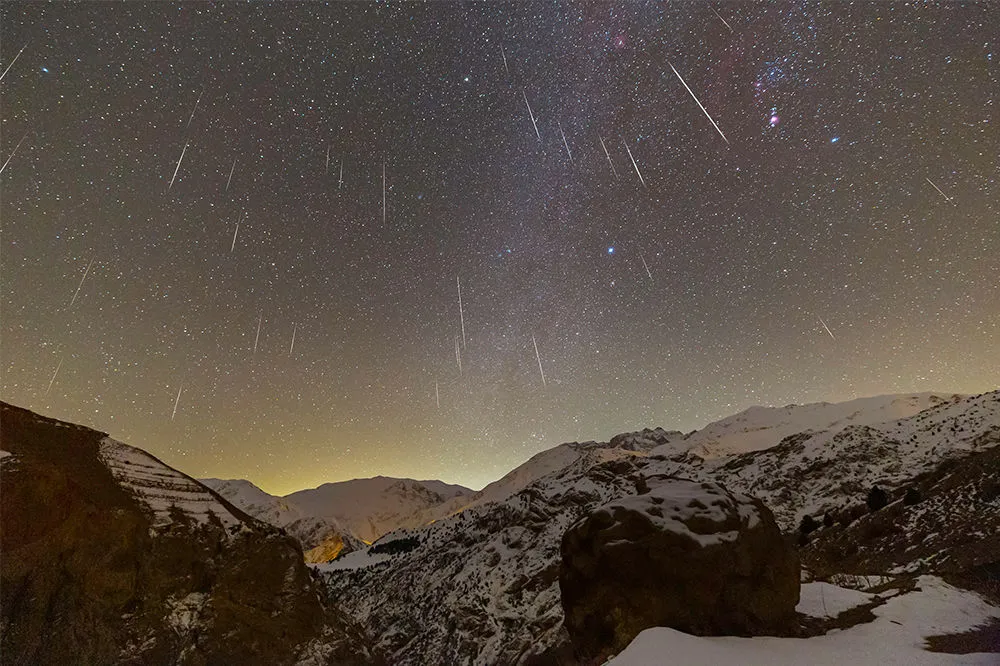
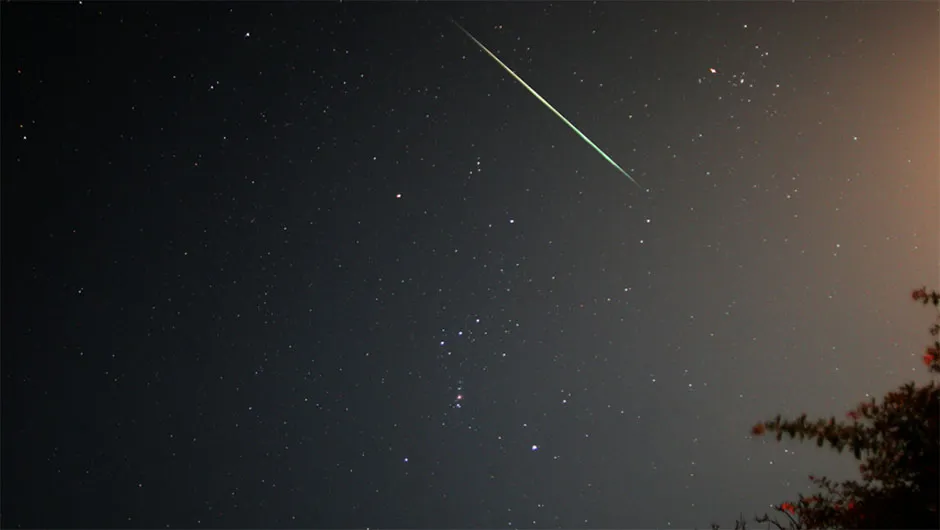
Geminid meteor activity
The Geminids is one of the highest-rate showers of the year, with a Zenithal Hourly Rate (ZHR) of 120 meteors per hour.
Impressive though this sounds, the actual number of meteors you can expect to see will be lower than this.
The ZHR is the predicted rate under perfect skies with the radiant – the point in the sky from which the shower meteors appear to come – directly overhead.
Another plus for the Geminids is that the peak is broad, activity remaining high for the nights before and after the predicted peak date of 14 December.
This means a session on 13/14, 14/15 and 15/16 December will give you an elevated chance of catching something.
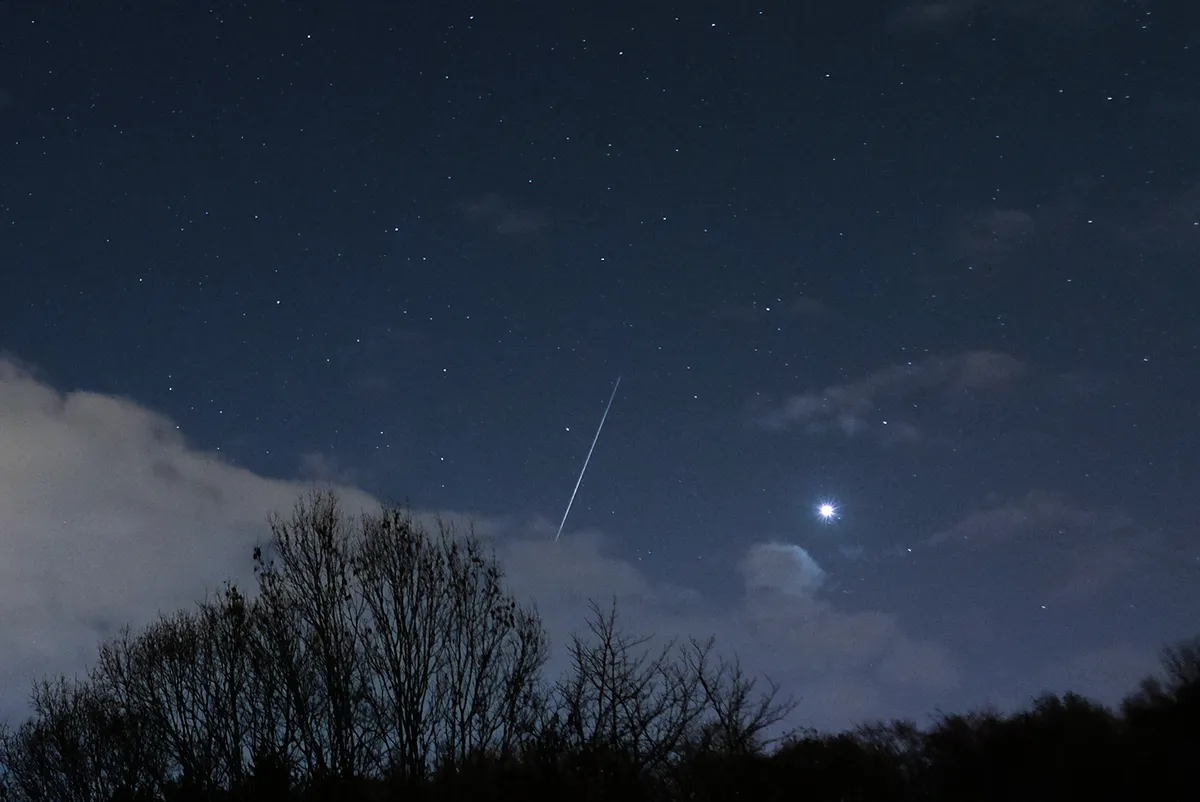
Photograph away from unwanted light
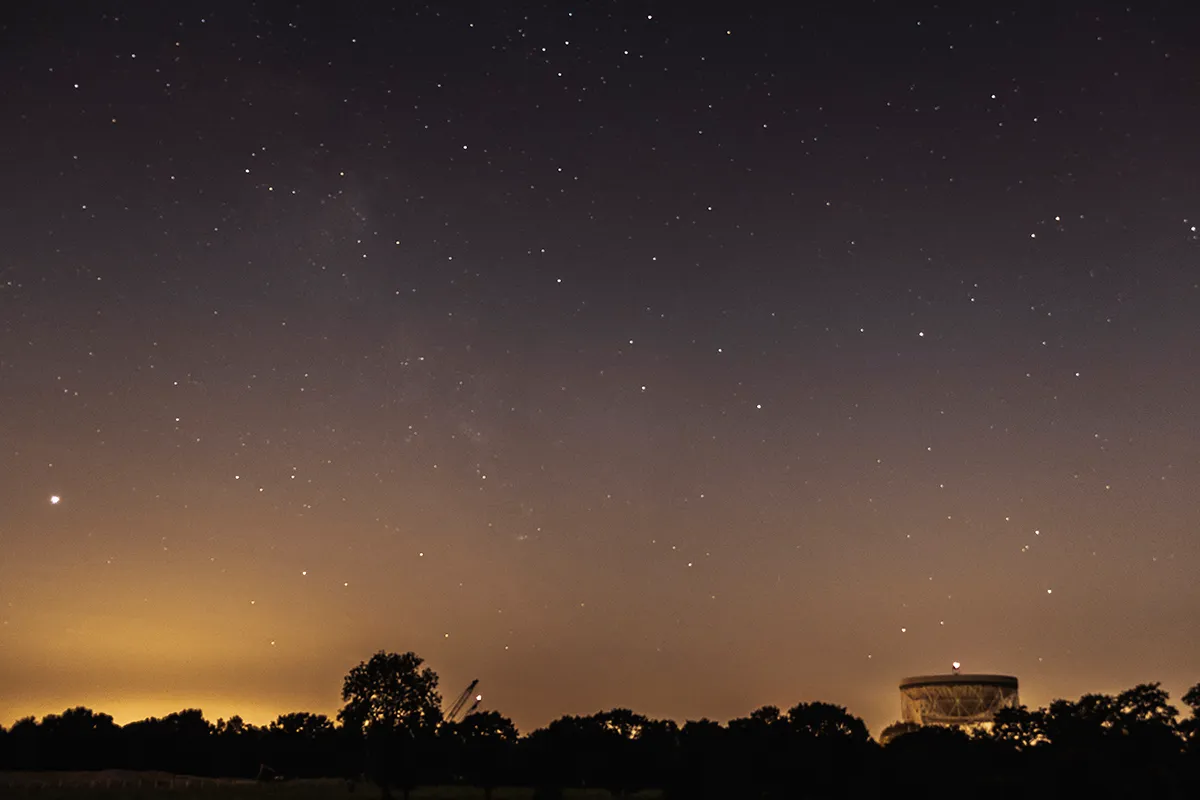
Meteor visibility is improved by the darkness of your sky. If you’re in a location suffering from light pollution, picking somewhere darker will help, although this may not always be practical.
The absence of the Moon this year will definitely help, though, and is a big natural boost to those all-important odds.
The absence of its bright glow is the reason why this year’s shower is described as favourable. Next year, the balance will shift so that the Geminids will be unfavourable.
The weather is another important factor.
Haze, thin cloud or just clouds will all affect the odds of capture.
A perfectly clear sky is best of course, but photography can still be done under less perfect conditions, the chances of capturing a trail simply reduced as a consequence.
In our step-by-step guide opposite we look at some of the setup considerations if you want to photograph the Geminid meteor shower this year.
We've put an emphasis on how to keep your odds of success as high as possible.
Equipment for photographing the Geminid meteor shower
- DSLR or equivalent
- Fixed tripod
- Shutter release cable
- Fast mid- or wide-angle lens (12–20mm)
Step-by-step guide
Step 1
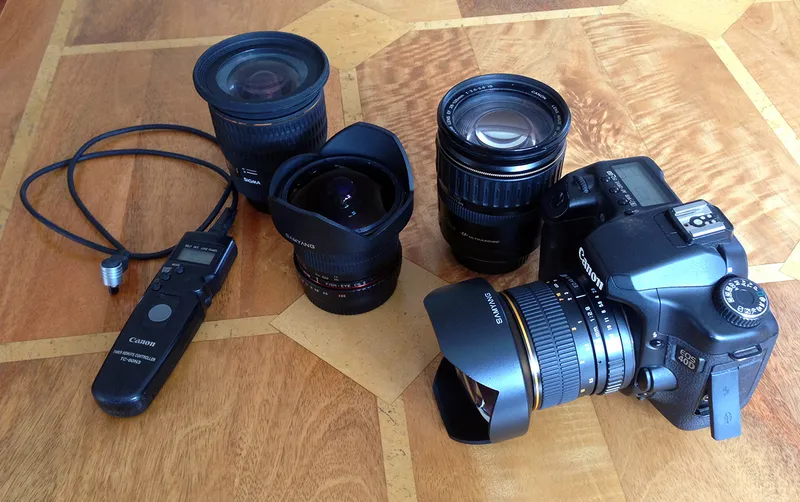
A fish-eye lens will give you the best chance of capturing a trail, but the trail will appear small. A compromise may be choosing a mid- to wide-angle lens. A fast lens is preferred, something with a lower minimum f/number than 3.5 being ideal. A focal length of 12–20mm should give you decent coverage and reasonable trails.
Step 2
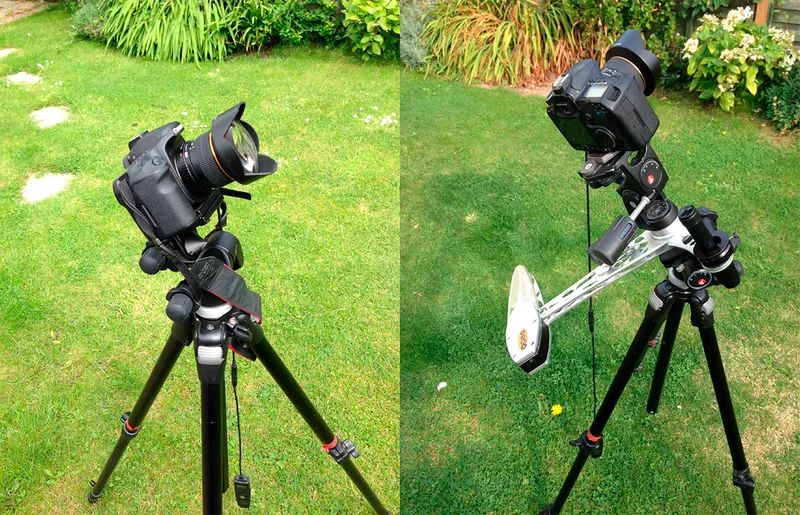
There’s no need to drive your camera, a fixed tripod being just as good as a tracking platform. Aim the frame centre to point 60° up in any direction. Despite conventional advice, it’s pleasing to have the radiant in frame because then you see trails pointing back to it. Trails are shortest near the radiant and longest 90° from it.
Step 3
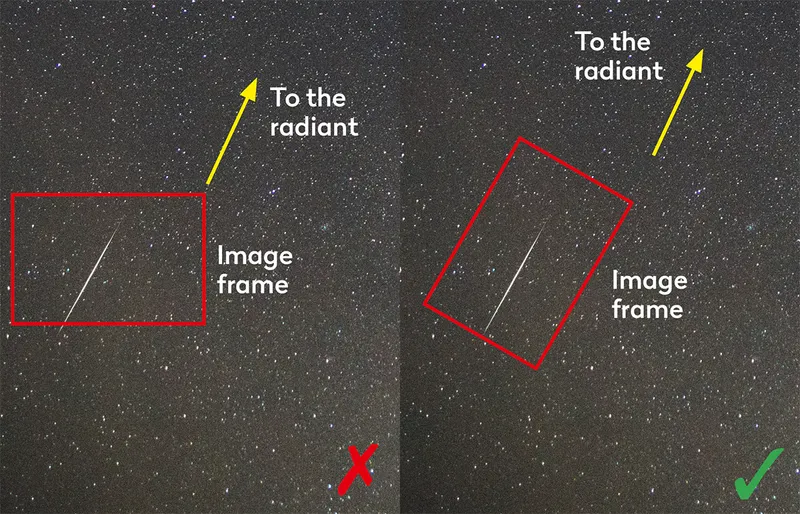
Orientate your camera so the long axis of the frame points to the radiant. This means that any long trails have a better chance of staying in frame. If you can, check the orientation several times throughout the night, realigning the camera to maintain this framing.
Step 4
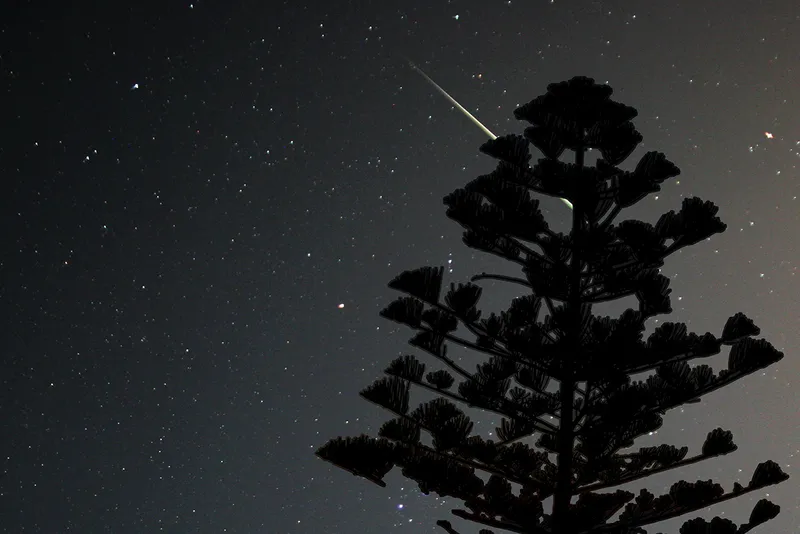
Improve your chances of capturing a meteor by choosing a location where there are no foreground objects in the way. In fact, try to have nothing in view except sky. It may seem like a great idea to have a picturesque tree silhouetted in the shot, but this will simply act as an all-too-effective meteor shield. If you’re tracking, ensure the image frame remains clear at all times.
Step 5
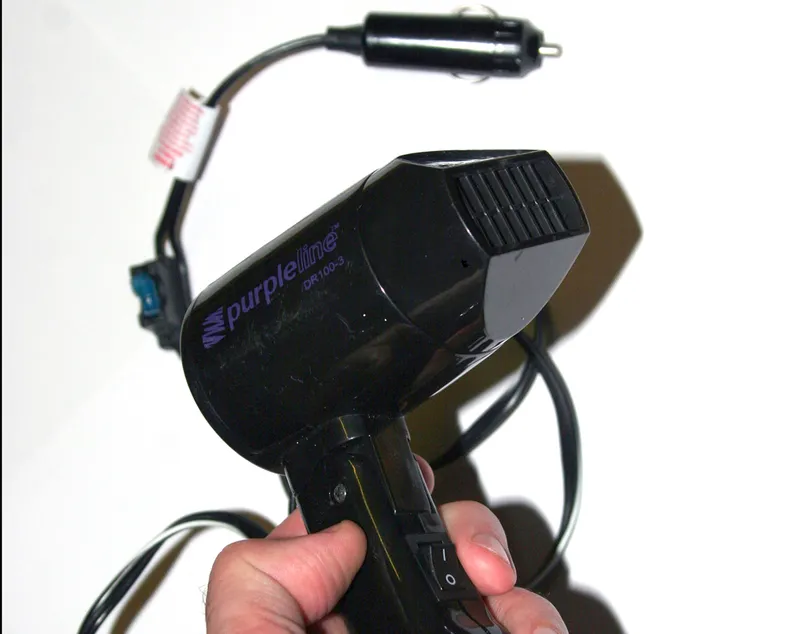
Dew build-up is a common issue from moisture-heavy sites when the temperature dips. A dewed-up lens will greatly reduce your chances of capturing a meteor. A 12V hairdryer can be used to gently warm the lens at frequent intervals, say every 30 minutes. Alternatively, a camera dew heater and wrap-around band is a great solution that will operate unattended.
Step 6
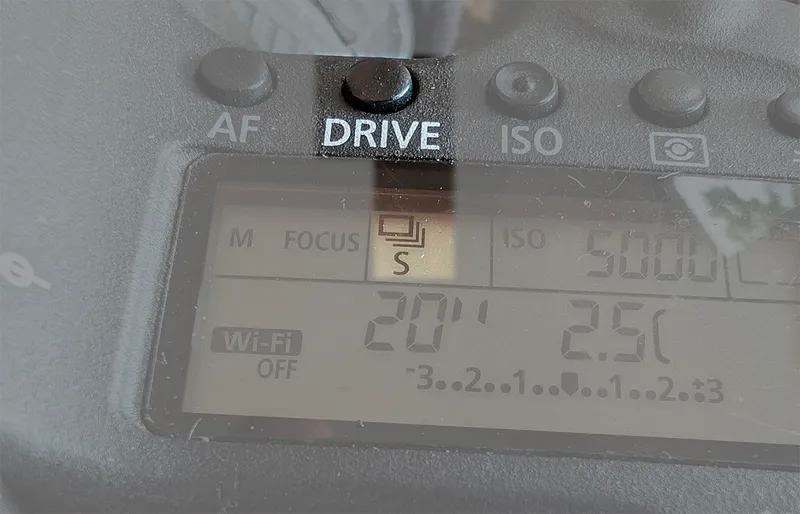
Open the lens fully. For older cameras, choose one of the highest ISOs available (1600–3200) or a mid-range value on newer models (5000-10,000). Use continuous shutter operation: lock your shutter release cable so the camera takes repeat exposures. Start at 30 seconds, but reduce if the result is too bright or over-saturated.
Have you managed to photograph the Geminid meteor shower? Don't forget to send us your images or tag us on Facebook, Twitter and Instagram.
