How many times have you seen astronomical objects move in the sky? Ignoring artificial satellites, there isn’t much that you can look at directly and see move. Meteors and the aurora fit into this category, but outside Earth’s atmosphere, there’s little else.
Rare examples include bright close-pass asteroids or highly energetic coronal mass ejections from the Sun viewed through a hydrogen-alpha filter.
Every now and then there are examples of celestial objects moving across the night sky that can't be seen in real time. This could be a conjunction of a planet moving near an open star cluster or a minor planet like Vesta moving through a constellation over a period of weeks.

So, how can you capture photographs of the night sky that will show celestial objects in motion? If you're starting out, you might like to read our beginner's guide to astrophotography first or our DSLR guide.
On long exposure shots of the stars, it is sometimes possible to see asteroid movement as a streak in the image. At high image scales, the asteroid drifts in position over the length of the exposure and its star-like dot draws a line on the image.
However, at low to medium image scales, the movement is imperceptible and no such drifting is recorded. The movement we’re interested in recording here occurs over days, rather than the length of a typical long exposure photograph, and this requires a different strategy.

The best way to show movement over several nights is to create a composite image. Combining results from each night, a single image can be created that shows the apparent movement of an object.
Although at first this seems like a straightforward task, there are caveats. The weather can play havoc with this type of image presentation, creating unwanted gaps and, where it’s poor, destroying the impression of movement. For help with this, read our guide to predicting the weather for astronomy.
The Moon changes the brightness of the surrounding sky, which can also create issues with the composite, so it pays to be aware of the phases of the Moon around the time you are shooting.
Sign up to receive the BBC Sky at Night Magazine e-newsletter for weekly Moon phases delivered directly to your email inbox.
Use stars as your background reference point
, is the 5th brightest star in the night sky. Altair can be seen below in the middle and Deneb is far left. Credit: A. Fujii")
One of the biggest considerations is positional reference. If you’re lucky enough to have a home observatory in which you can leave a telescope plus camera setup untouched for the sequence duration, then fine.
But if, like most imagers, you need to move things between shots, getting the final images registered to one another can be a challenge. Fortunately, the stars come to the rescue, as they create an effectively fixed background reference.
Even here there are potential issues; if the sky conditions vary from night to night, it’s important that the positions of the reference stars are recorded.
Then there’s the issue of twilight shooting, when there may be no stars seen at all. Here, you rely on the foreground horizon for reference, ensuring that each shot is made at the same time from one night to the next.
Time this incorrectly for an evening shoot and you may get close to sunset, naturally bringing the sequence to an unwanted and abrupt end.
In the step-by-step instructions below you’ll find some more tips for creating a motion composite.
Recommended equipment:
- DSLR (lens as determined by field size)
- Tripod
- Remote shutter release cable
Create a motion composite astrophoto: step-by-step
Step 1
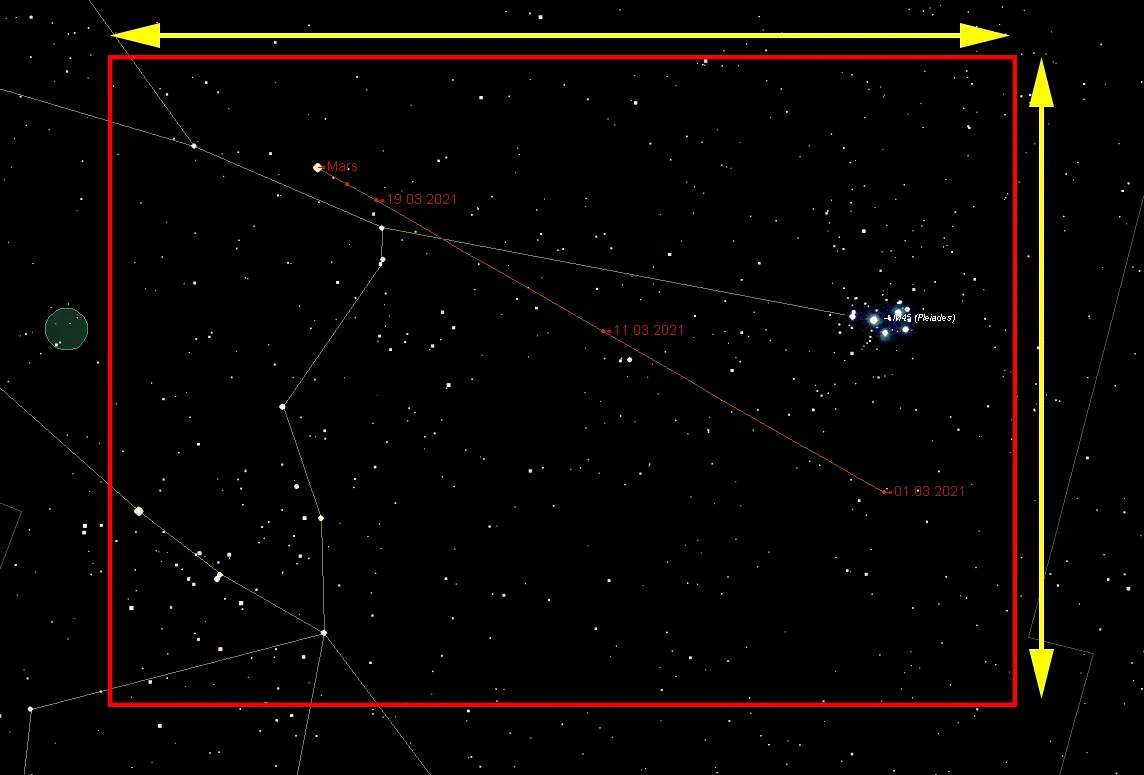
Using a planetarium program like Stellarium,work out the capture field of view for the desired date range. An astronomy field-of-view calculator can determine the setup to achieve this. Work out the centre of the field of view and frame orientation in terms of background stars.
Step 2
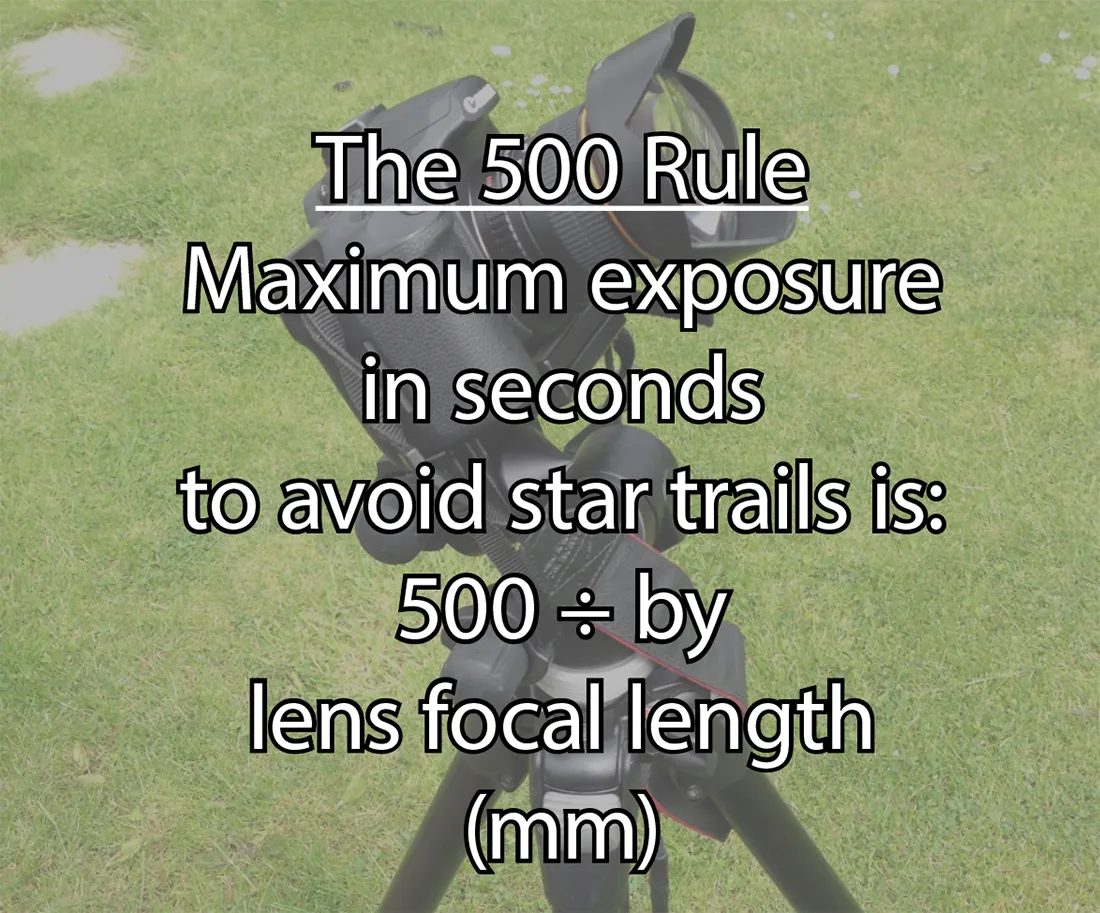
With your gear set up and pointed at the centre of the field of view, take a test shot. For shots where you're not using a star tracker but are using, say, a camera on a fixed tripod use the ‘500 Rule’ (left) to determine the longest exposure you can take without producing star trails. If you divide 500 by the attached lens/telescope focal length (mm), this gives you the maximum exposure in seconds.
Step 3
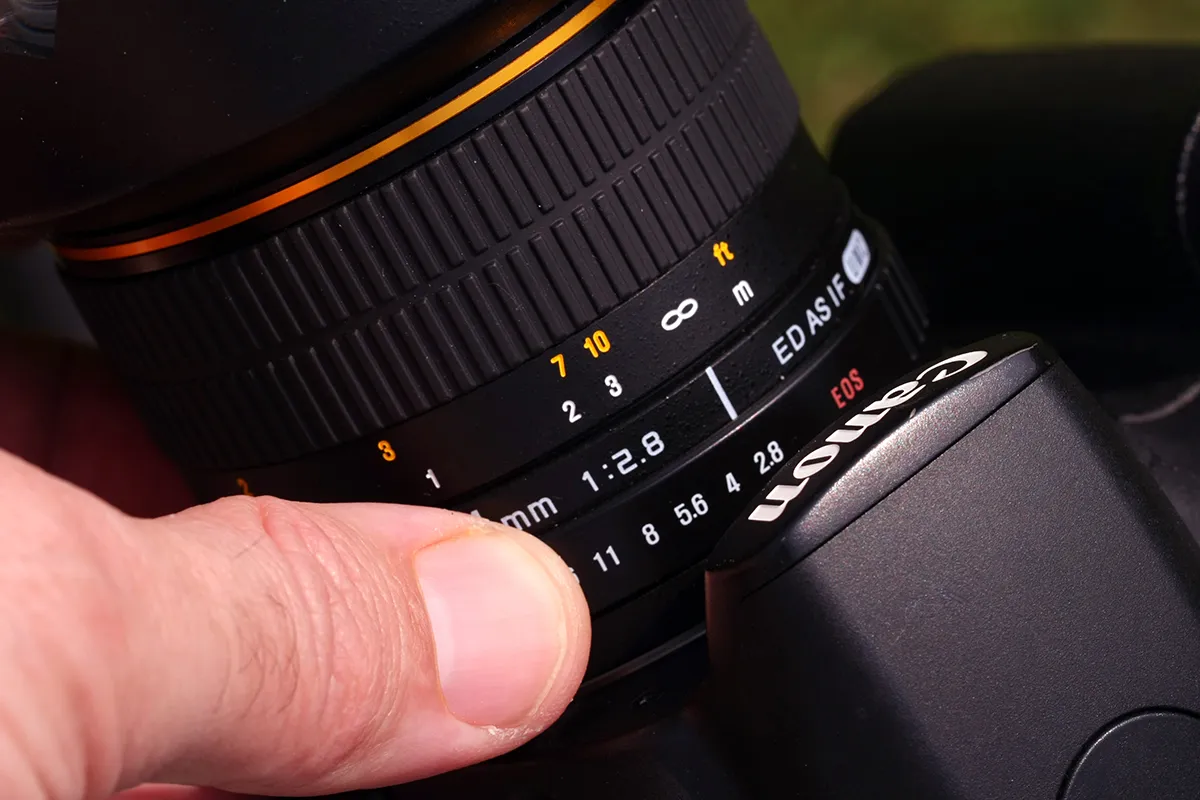
Set your ISO to a lowish value (eg ISO 400-1600). If using a camera lens, set the f/-number low and then increase it by a stop or two to reduce potential image distortion at the frame’s edge. Use an exposure setting lower than the maximum in Step 2 and take a test shot. Examine for background stars: more than three is ideal.
Step 4
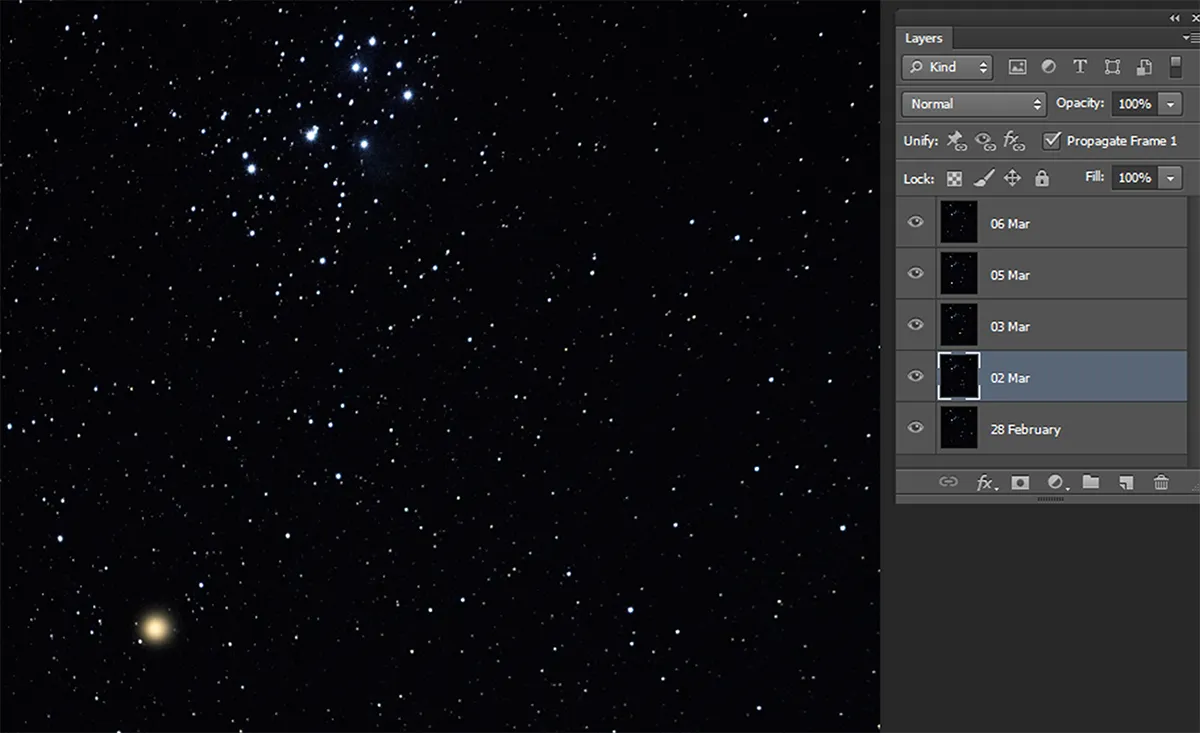
Take your photo and record setup and settings details, then repeat over several nights. Use the first image as a reference, tweaking settings to achieve a similar number of background stars. Next, load all the shots in date order into a layer-based editor, each as a separate layer, oldest at the bottom.
Step 5
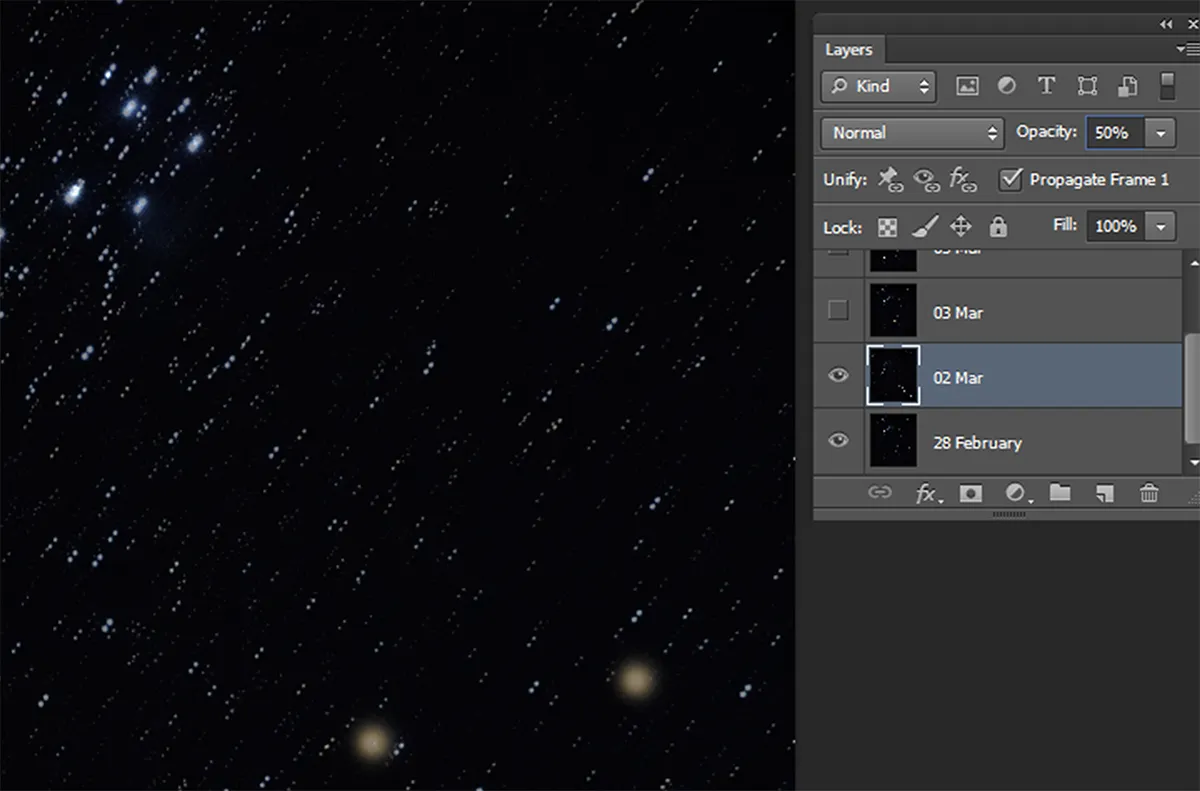
Make all but the lowest layer hidden. Turn visibility on for next layer up and transparency to 50%; adjust its position so the stars align accurately. Set its transparency to 0% and hide. Repeat for all layers using the lowest as the reference. Next, make all layers visible and set the blend mode for all except the lowest to lighten.
Step 6
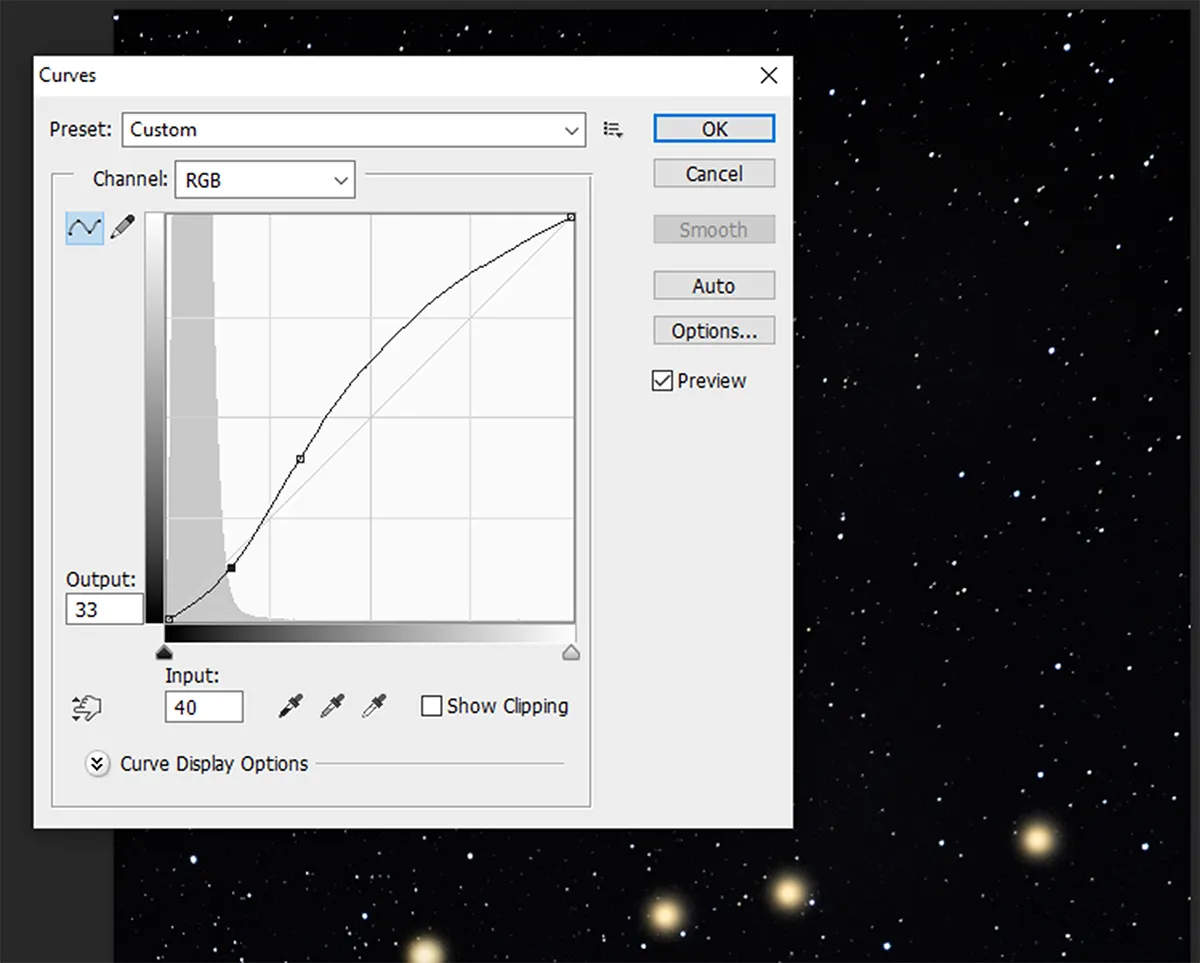
The background sky of the lowest layer should be bright enough to dominate. If it’s poor, you can swap with a better one but set the lowest layer’s blend mode to ‘normal’, all upper layers to ‘lighten’. If upper backgrounds ‘shine’ through, dim them with the curves tool, applying an S-shape curve adjustment over the histogram.
Have you managed to capture a composite image showing a celestial target moving across the night sky? We'd love to see it! Get in touch by emailing contactus@skyatnightmagazine.com or via Facebook, Twitter and Instagram.
Pete Lawrence is an expert astro imager and a presenter on The Sky at Night. This guide originally appeared in the March 2021 issue of BBC Sky at Night Magazine.
