The Moon will pass in front of a part of the Sun on the morning of 25 October, an event that will result in a partial solar eclipse.
Partial solar eclipses, as their name suggests, don’t cover the Sun’s disc completely.
As the greatest coverage will only be 24.5% at best from mainland UK, the area of Sun that remains visible will pose a danger to eyesight and equipment.
Consequently, great care needs to be taken to protect both. Here we’ll look at some of the ways you can image the event safely.
Find out more about the event with our guide to the 25 October partial solar eclipse. For more on solar photography, read our guide on how to photograph the Sun.
What to photograph during the eclipse
Although there aren’t many ‘special effects’ during a partial solar eclipse, there are still things to look out for.
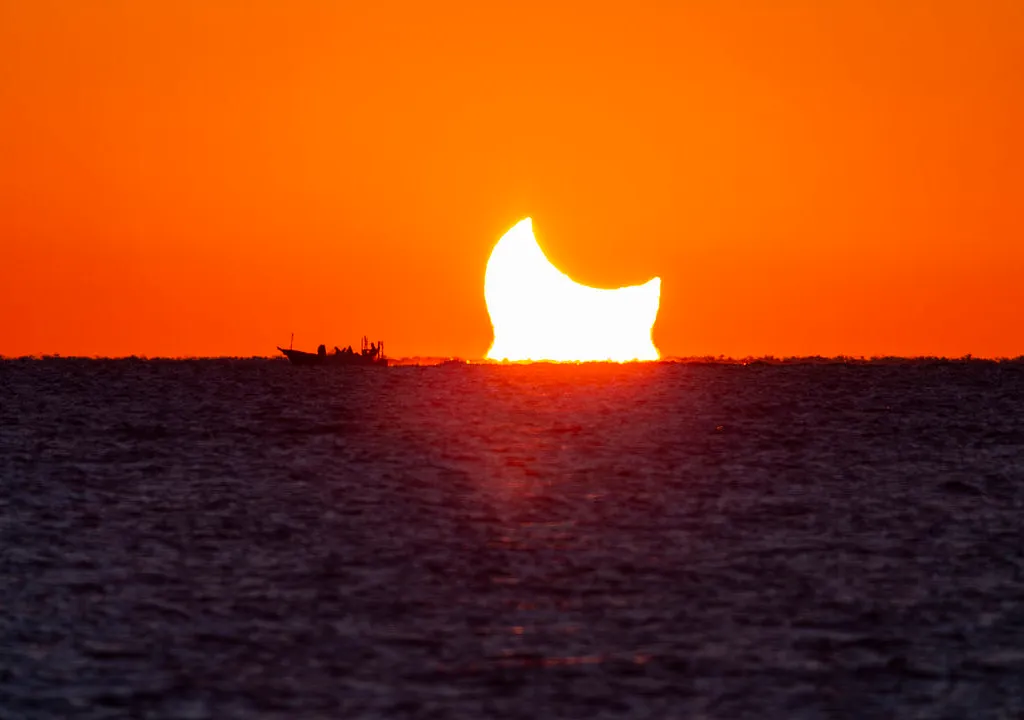
First contact is always exciting, noticing the first intrusion of the Moon in front of the Sun's disc being strangely satisfying.
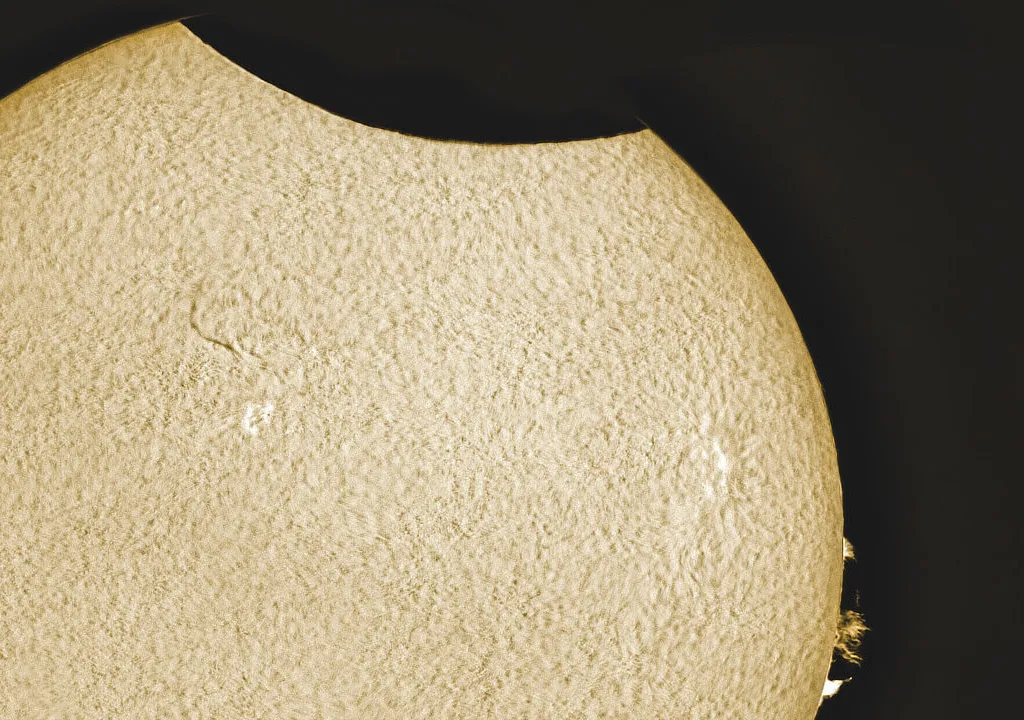
You may also have access to H-alpha filters, which can expand the experience.
With an H-alpha filter it’s possible to see the edge of the Moon move in front of what’s known as the spicule layer, essentially the appearance of the chromosphere seen sideways-on at the edge of the Sun.
Made up of many plasma jets, each around 10,000km in length, the tightly packed spicules create an edge to the H-alpha Sun that looks, for want of a better term, furry.
The Moon’s passage across the spicule layer will be brief, the layer appearing very narrow against the large apparent diameter of the Sun’s main disc.
However, the Holy Grail would be if there was a well-positioned, well-timed prominence on show. Seeing the Moon pass across this would really give H-alpha setups an extra spectacle.
But what if you don’t have an exotic and, let’s face it, expensive H-alpha filter to hand?
Low-tech solutions exist too, thanks to the fact that the Sun’s so bright.
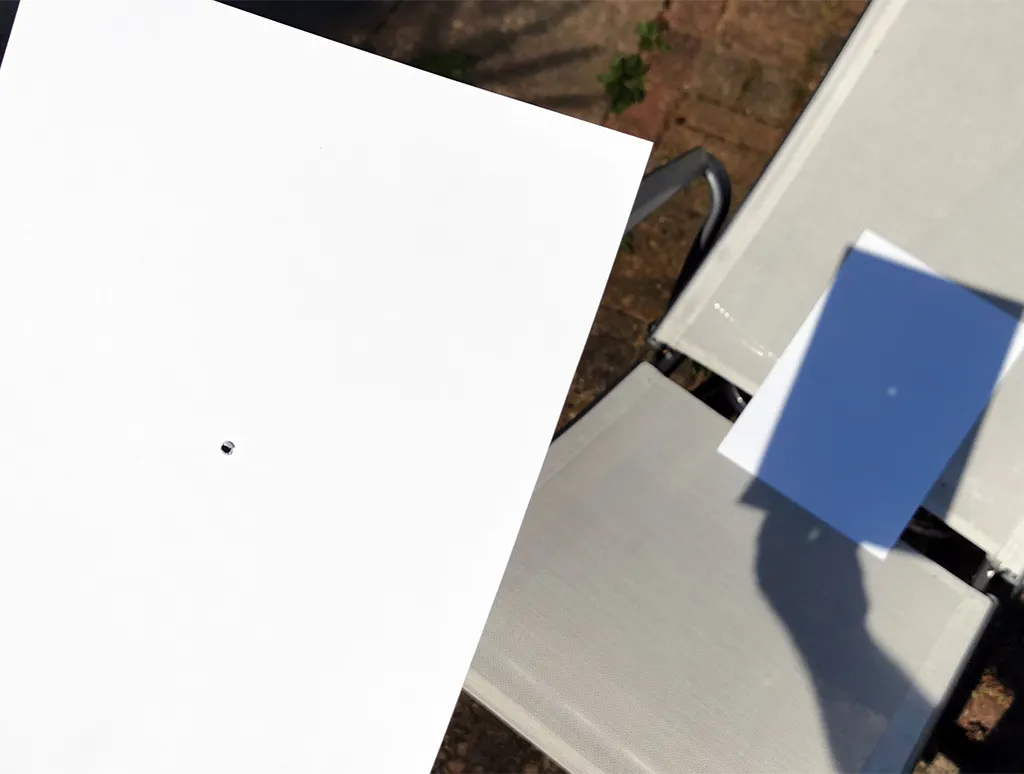
A piece of card with a 1–2mm hole in the centre will cast a shadow with an image of the Sun projected by the pinhole.
This image can be safely photographed with something as basic as a smartphone (read our guide to smartphone astrophotography for tips).
For a little more pazazz, consider making a series of holes to form a familiar pattern or shape.
Natural effects occur too. Find a tree or bush with leaves on it and look at the points of sunlight that occur on the ground as the light passes through during the middle part of the eclipse.
The leaves form irregular but still functional pinholes, the light cast on the ground forming a multitude of little eclipse images.
We’ve suggested a number of ways you might like to capture the event below. All we need now is clear skies on 25 October!
Photographing the eclipse: tips and techniques
Equipment
- Card
- Scissors
- Sharp pin
- Telescope with a certified solar filter
- Camera
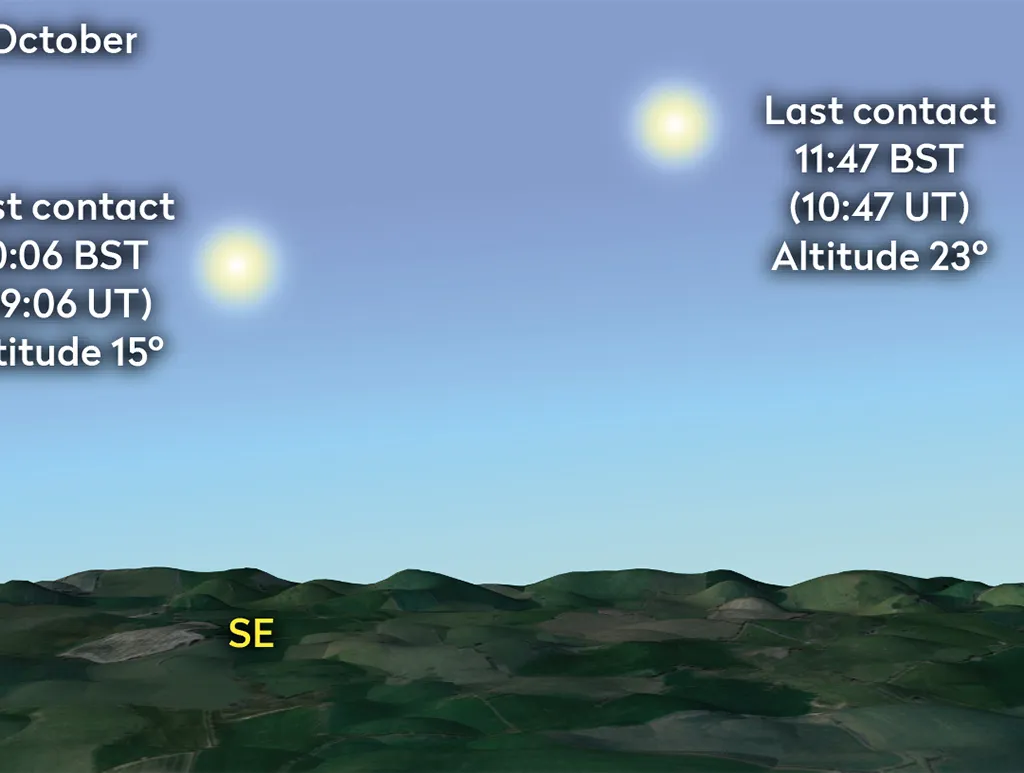
From the UK’s centre, the eclipse begins at 10:06 BST (09:06 UT), concluding at 11:47 BST (10:47 UT). Times vary slightly depending on location.
The Sun is 15° up at the start, 23° by the end. Ensure your location allows the Sun to be seen by checking visibility between the stated times on a clear day prior to the eclipse.
Photographing a pinhole projection
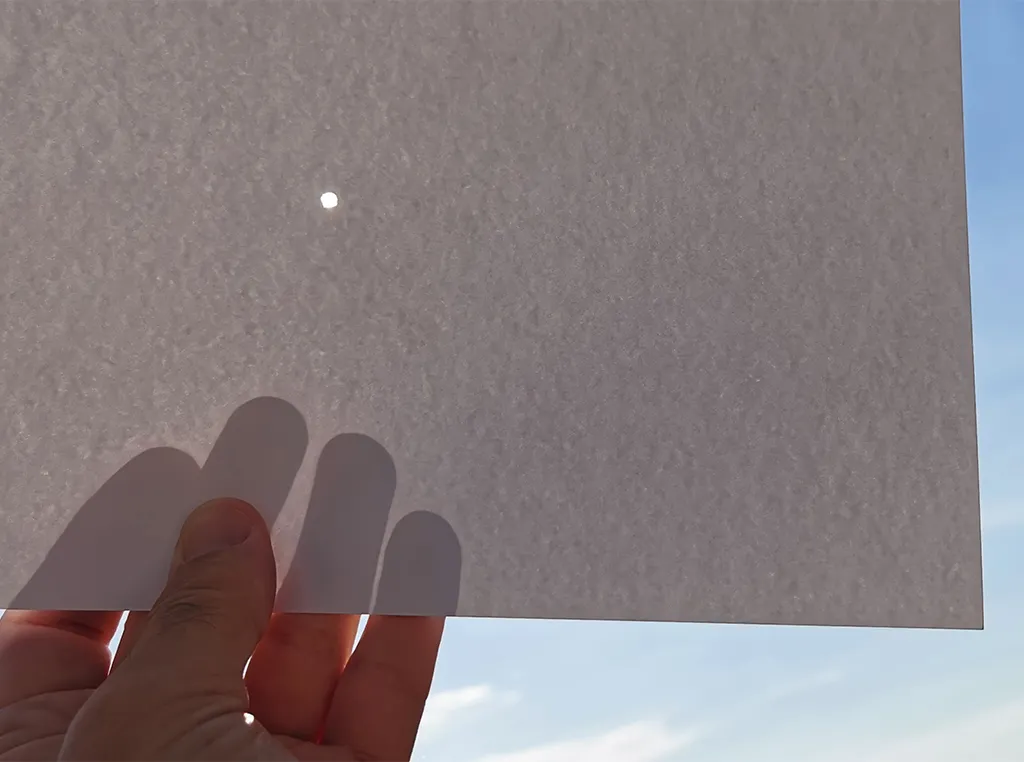
The simplest way to photograph the eclipse is to create a 1–2mm pinhole in card and project sunlight through it onto another piece of white card.
The ‘screen’ will need to be a metre or more away from the hole to give a decent image size and mounted vertically or at right angles to incoming sunlight to reduce distortions.
Hold a smartphone or camera so it can see the image created by the pinhole on the ‘screen’. For automatic cameras, the image should be bright enough for auto-focus.
Take the shot (another pair of hands really helps here). To be more adventurous, make several holes in the card, spelling a word or creating a shape.
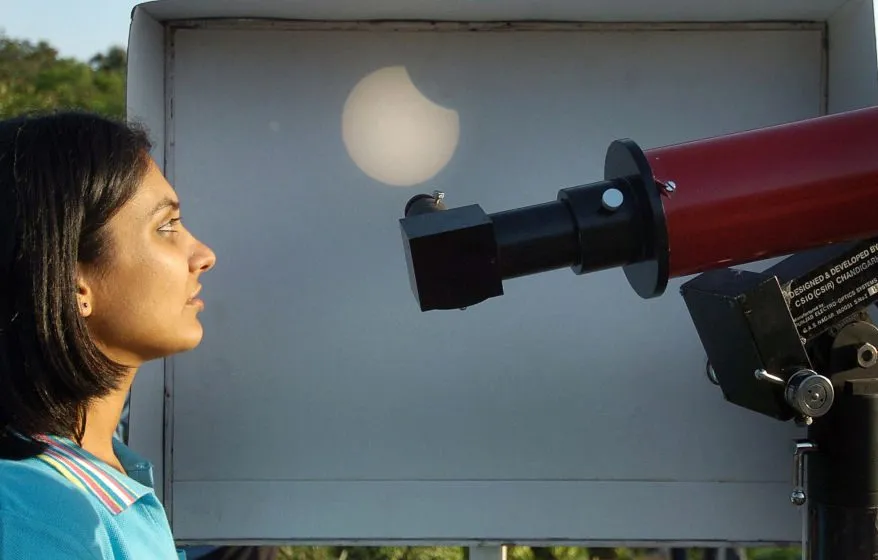
Photographing a telescope view
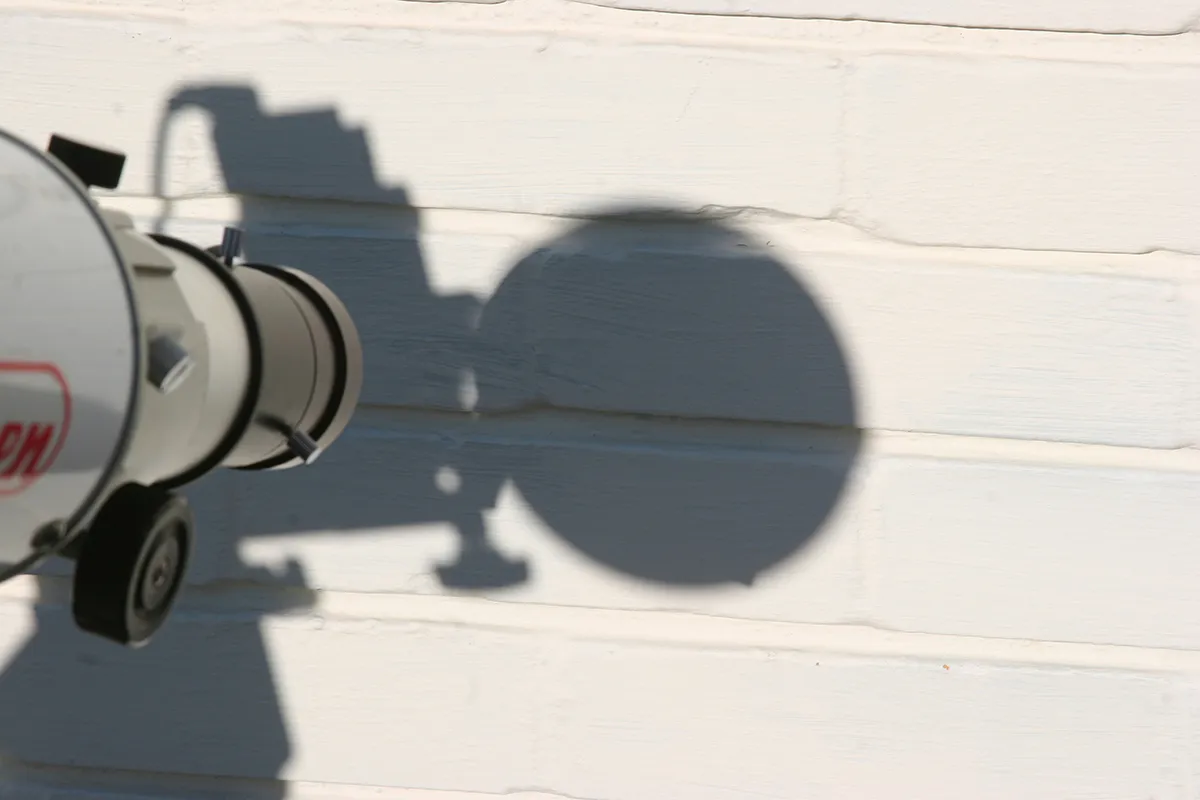
If using a telescope, make sure it’s fitted with a suitable certified solar filter, and cap or remove any additional finderscopes.
Then, 15 or more minutes before the eclipse starts, point it at the Sun using the scope’s shadow on the ground or on a wall to refine the alignment.
Important: don’t sight by looking up along the scope!
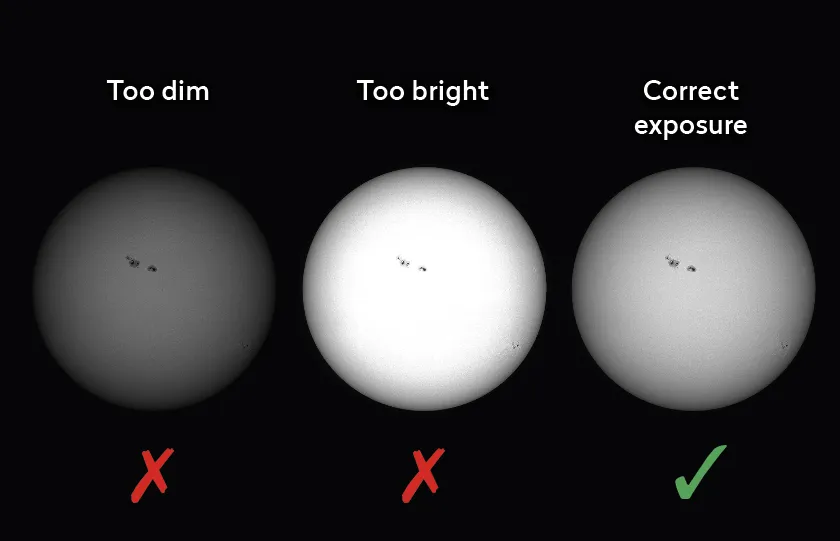
Adjust the camera settings so the image isn’t over-exposed. If using a white light filter and mono high-frame-rate camera, consider a green imaging filter to improve surface contrast, revealing the granular texture of the Sun’s photosphere.
Focus as accurately as possible either on this texture or on the Sun’s limb.

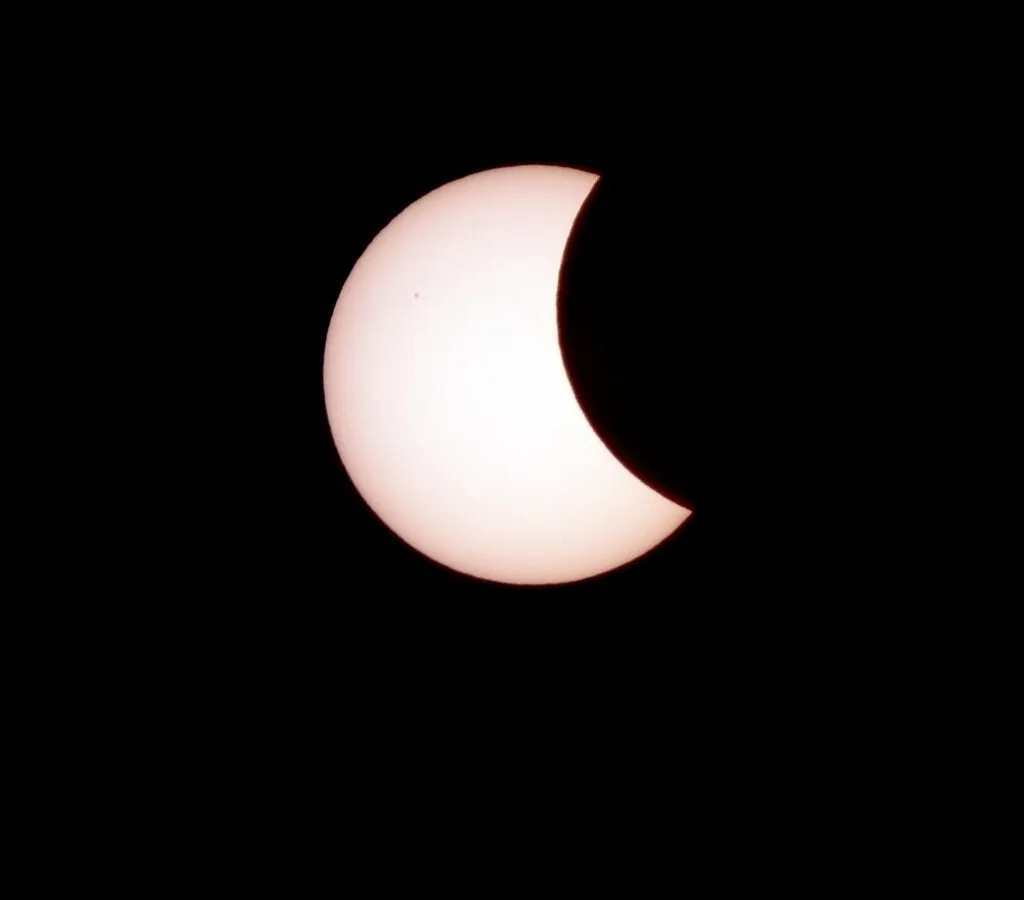
The typical key times to capture are slightly after first contact, mid-eclipse (10:56 BST (09:56 UT)), and just before last contact.
For H-alpha setups, examine the Sun’s northwest and northeast limbs for prominences. Northwest features will disappear first, so be vigilant from five minutes before first contact.
Did you manage to photograph the eclipse? We'd love to see your image! Share it with us by emailing contactus@skyatnightmagazine.com or via Facebook, Twitter and Instagram.
