Smartphone astrophotography may sound a bit far-fetched, but nowadays most new phones will have a camera good enough for capturing photos of the night sky.
With modern smartphones you can take photos of the stars or capture planets, sunsets and other astronomical phenomena like Noctilucent Clouds.
More astrophotography

In this smartphone astrophotography guide we’ve got suggestions for some brighter subjects, as well as more challenging targets.
Some devices are better at this than others, the most successful being the ones that offer good manual control over exposure, ISO and (most importantly) focusing.
Find out how to photograph the night sky with a fisheye lens
But there are very good devices on the market that can help, including numerous smartphone astrophotography gadgets, smartphone tripods and smartphone telescope adapters.
And you can also discover our pick of the best smartphone astronomy apps.
Since phone cameras vary significantly in capability, we’ve also included a few tricks to help you overcome some of the hurdles you may encounter.
If you'd prefer to capture your nightscapes with a DSLR camera, read our guide on how to photograph the stars and how to photograph the planets.
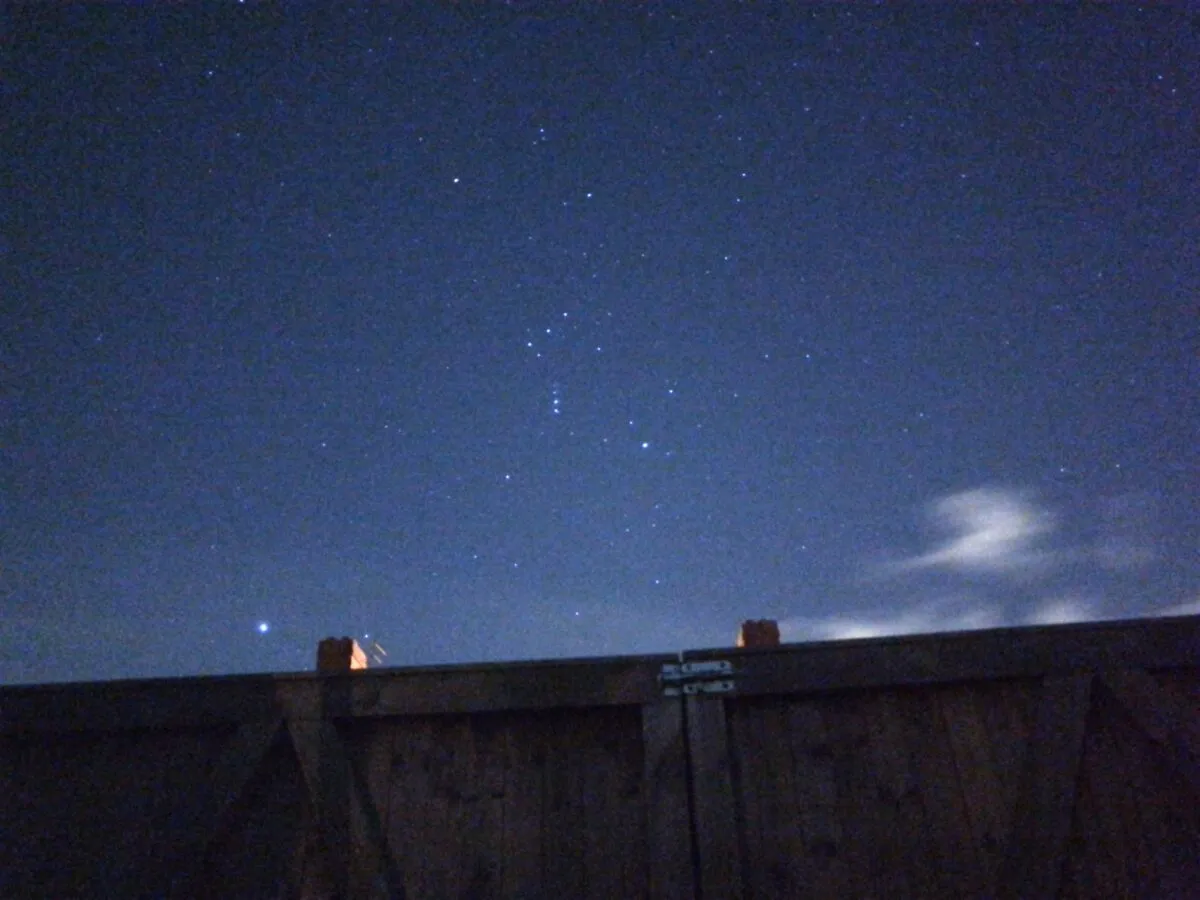
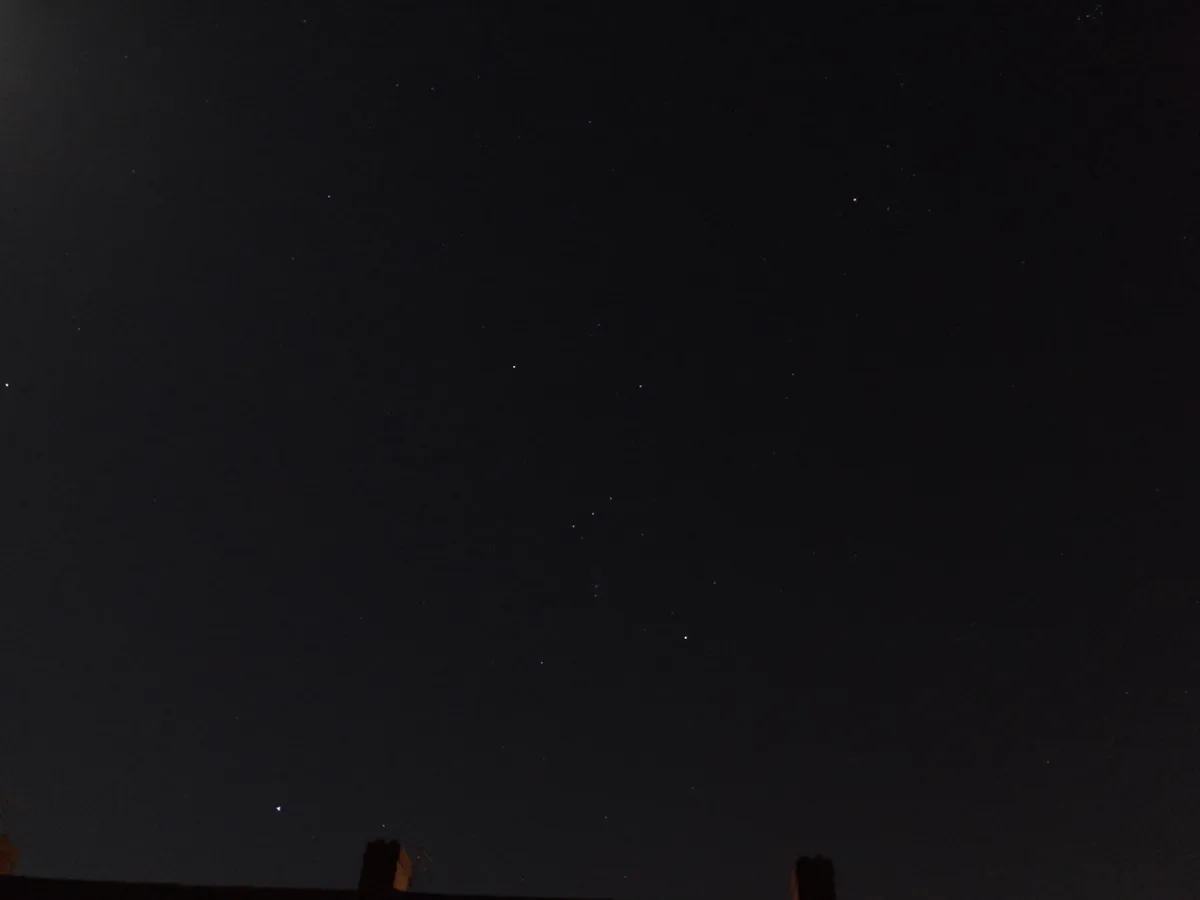
Photograph the stars with your smartphone
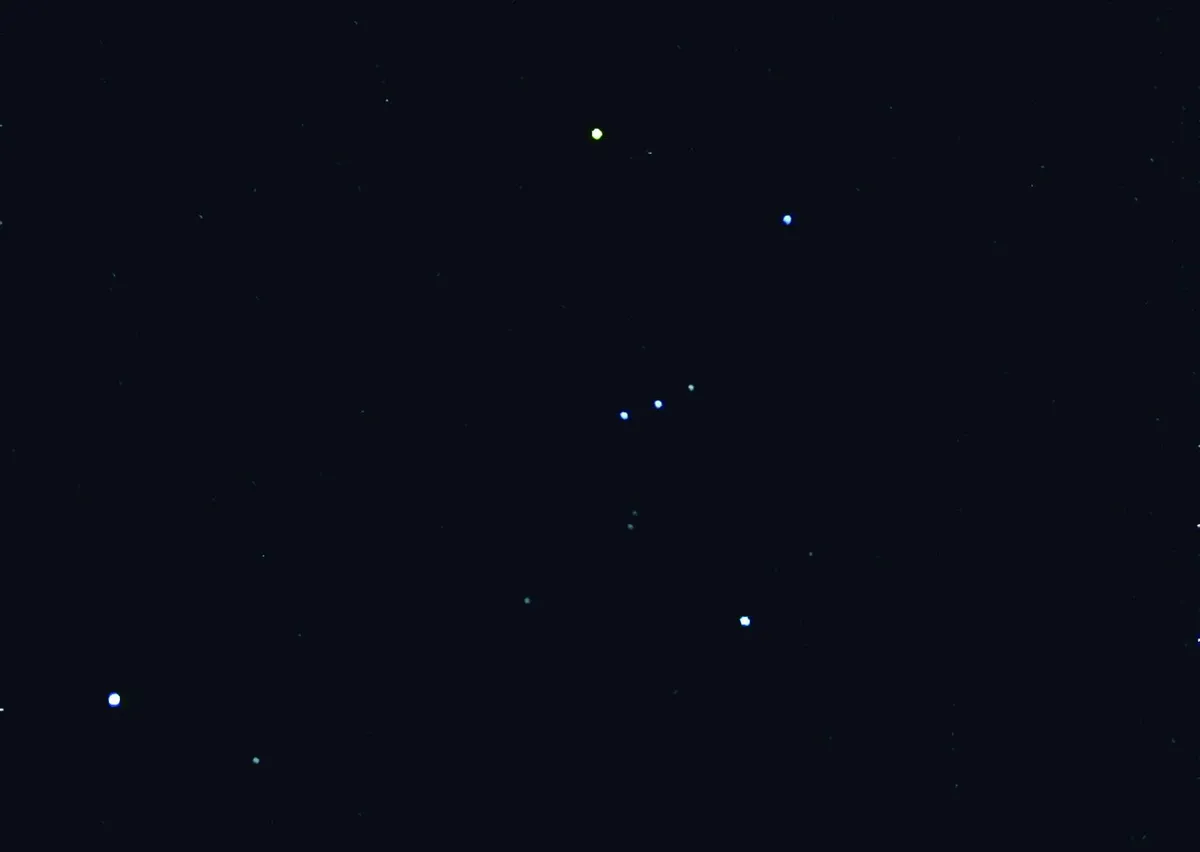
Stars can pose a more challenging target for many camera phones because they simply lack the brightness to register properly.
The advice is, as ever, to give it a go and see what you get. Focus is a big issue here because, where the inclusion of a bright or silhouetted horizon may work with the planets, it’ll simply drown out delicate stars.
An app that lets you take control of the camera, including focusing, is the way forward as long as your phone’s camera supports focus control.
If it does, there are several apps that present a slider to change the focus distance.If you’re not sure where the best focus is, one way to achieve this is to practice in daylight on a distant object.
Once you’ve determined exactly how to set the camera’s focus position to infinity, you’ll need to push the camera’s sensitivity to the max.
This is where many cameras will run out of steam, only permitting low values for ISO and exposure.
However, don’t be defeated by this. Holding the camera still for the duration of even a one-second exposure is critical.
If you move during the shot, the delicate starlight you’re trying to capture will be moved across the camera’s chip and the result won’t be very good.
Inexpensive tripod mountings for smartphones can work wonders in astrophotography, or you could make your own telescope smartphone holder.
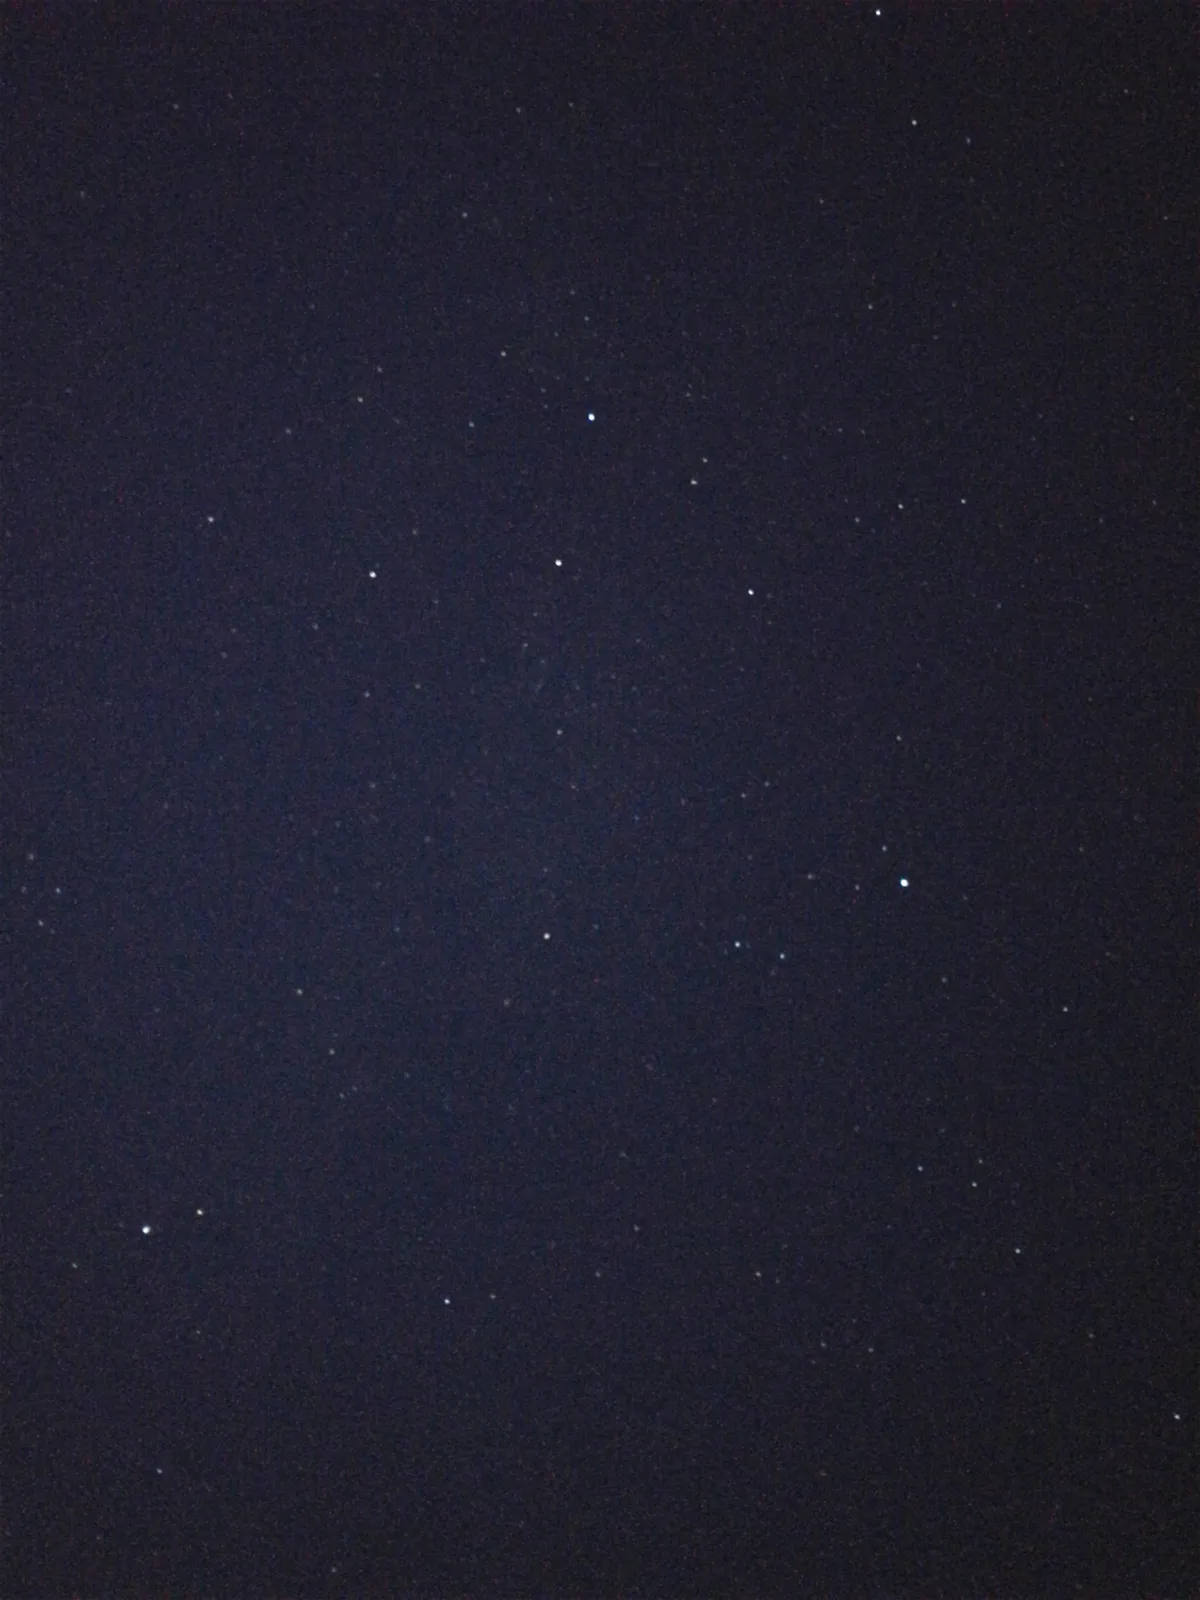
Results from star shots can be rather unimpressive and just look dark. However, loading the image into an editor and stretching it can often produce some quite nice surprises.
As long as you don’t expect to go down to really faint stars, many camera phones are able to produce some very recognisable renditions of the brighter constellations.
Don’t worry about the stars trailing as your exposures probably won’t be long enough for this.
Photographing the stars directly with a phone camera really tests how capable it is under low light conditions.
If you don’t get much detail in the shots you take, then you may have reached your camera’s limit and it may be time to consider an alternative device for capturing your photos such as a DSLR.
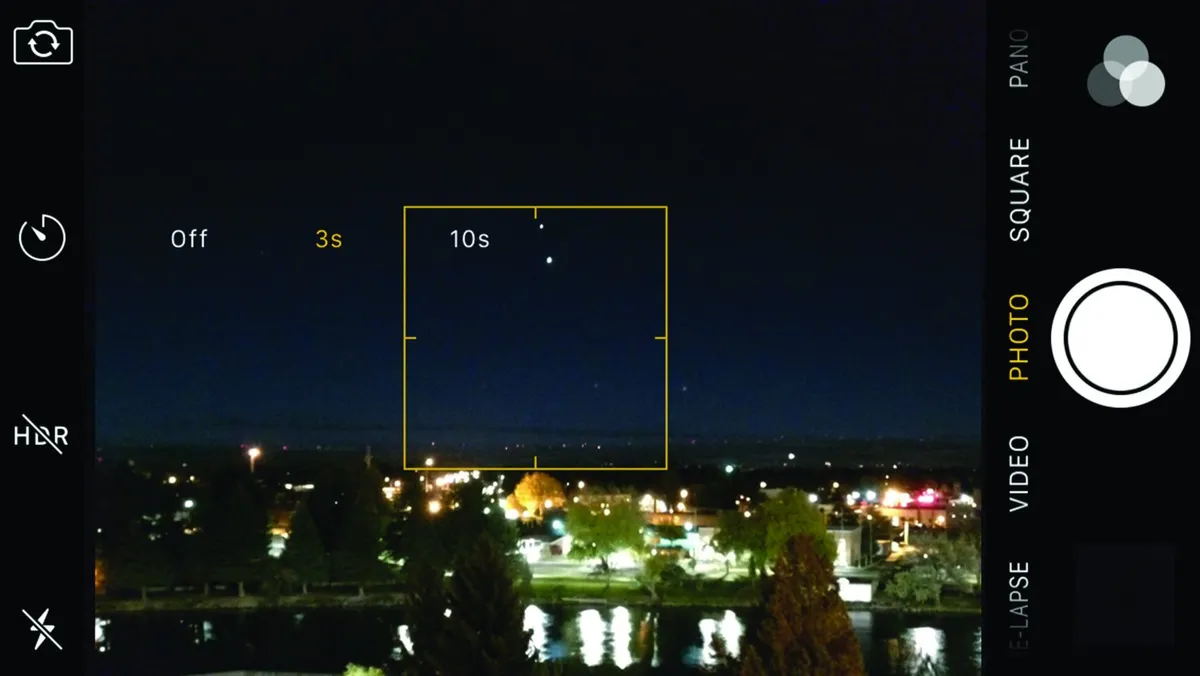
Photograph the stars with your smartphone: step-by-step
- Start with the bright and easily recognised constellations: Orion in winter; Cygnus in the summer; Leo in spring; Auriga and Taurus in autumn.
- Make sure your phone is rigidly supported
- Use a remote shutter lead or delay timer app to trigger the shutter.
- Use a manual control app to set infinity focus, high ISO and exposure of 1 second or greater.
- It may just look black: use a photo editor to change the Levels setting by moving the mid-point slider towards the white point. This may reveal the brighter starts visible during the shot.
Apps for photographing the stars
- NightCap Pro (iOS)
- ProCam (iOS)
- Camera FV-5 (Android)
- StarTrail Photos Generator (Android)
Photograph a sunset or sunrise with a smartphone
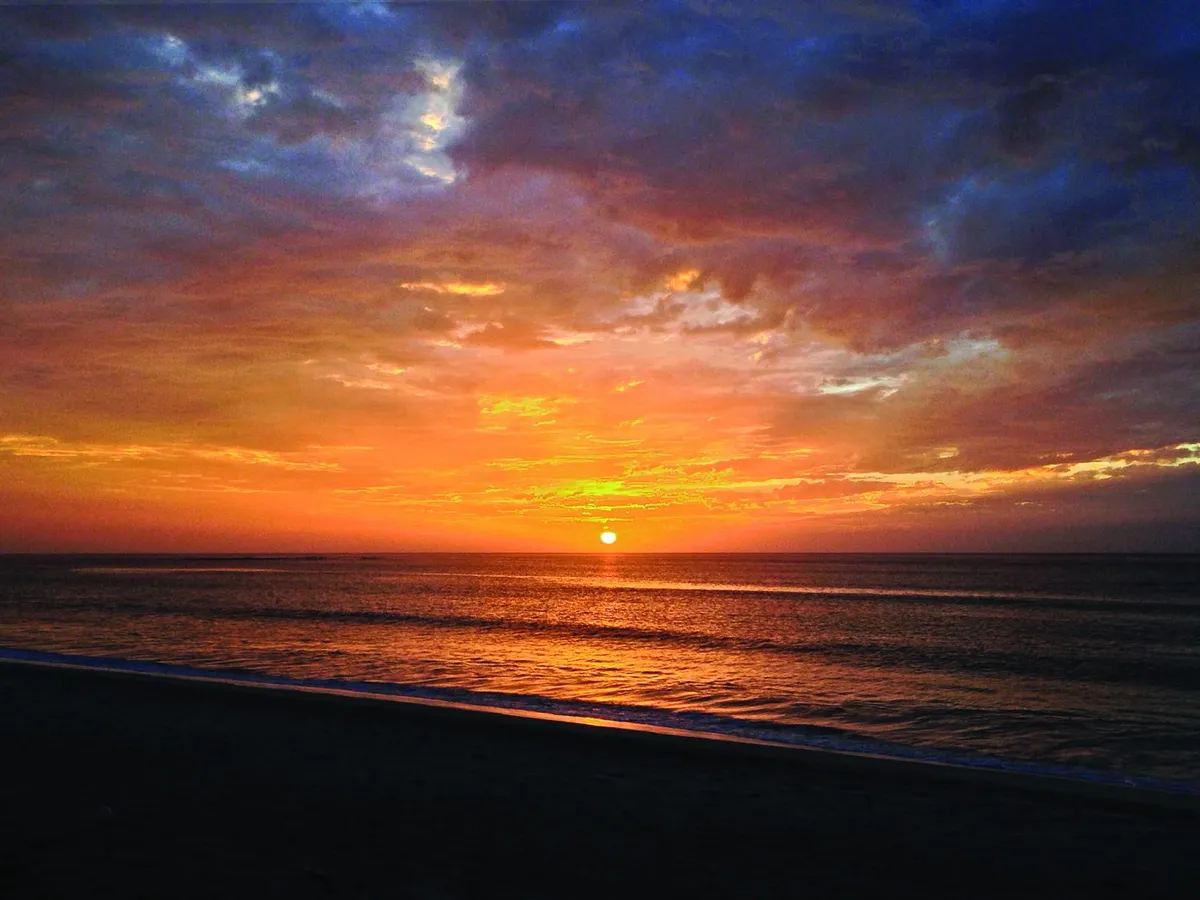
The periods around sunrise and sunset provide a fairly easy target for many smartphone and tablet cameras, as both the sky and landscape below are sufficiently well lit to allow the camera’s auto functions to react without too much difficulty.
Some sunrises and sunsets are better than others, and clouds can actually enhance the scene as they reflect the reddened light of a low Sun.
The shadows cast by clouds into the atmosphere can give rise to crepuscular rays, a phenomenon that makes it look as if dark rays are spreading out from the Sun.
These can be pretty spectacular and, amazingly, only appear to emanate from the Sun due to perspective. They are actually parallel to one another.
The rising or setting Sun can appear to be larger than it does when high up (not that it’s advisable to look directly at the Sun of course), but this is an illusion, much like the well-known Moon illusion.
Using a camera, an apparently large red Sun will still photograph small. Smartphones cope with the bright Sun in different ways according to model and make.
Consider the foreground. Silhouetted objects, people or birds will often add another dimension to sunrise or sunset photographs.
Similarly, a body of foreground water can produce some superb effects, especially if flat enough to reflect the main sunrise or sunset scene.
If the camera’s auto functions deliver a large white blob where the Sun was located, then there’s not much you can do with this in post-processing.

Sonia Turkington, North Reddish, Greater Manchester, UK, 7 June 2023
Equipment: Google Pixel smartphone, Sky-Watcher 10-inch Dobsonian
However, if you have an app that lets you take control of the phone’s camera settings then it may be possible to reduce sensitivity (ISO), aperture and exposure to reduce this effect.
Many smartphones come with a high dynamic range (HDR) capability. If yours has this, turn it on and, if available, set it to save both the original shot and HDR shot.
HDR basically delivers an image with an extended tonal range to deal with both bright and dark portions of a scene.
Once photographed, there are third-party apps that can be employed to bring out even more detail, but be careful here as it’s very easy to step over the line and produce something that looks quite unnatural.
Find out more in our guide on how to photograph a sunset.
Photograph a sunset or sunrise with a smartphone: step-by-step
- A colourful sunset or sunrise will give the best results.
- If possible, shoot with the Sun above the horizon but dimmed behind cloud.
- Frame the shot to include one-third of the horizon, preferably in a landscape orientation.
- If your phone has HDR capability, turn it on. Many HDR-capable phones give the option to save the original shot and the phone-processed HDR image. If so, it’s a good idea to make use of this.
- Final tweaking in a third-party app can really help to make the final result that bit more dramatic.
Apps for photographing a sunset or sunrise
- SnapSeed (iOS)
- HDR (iOS)
- Camera HDR Studio (Android)
- HDR Camera (Android)
Photographing atmospheric phenomena with a smartphone
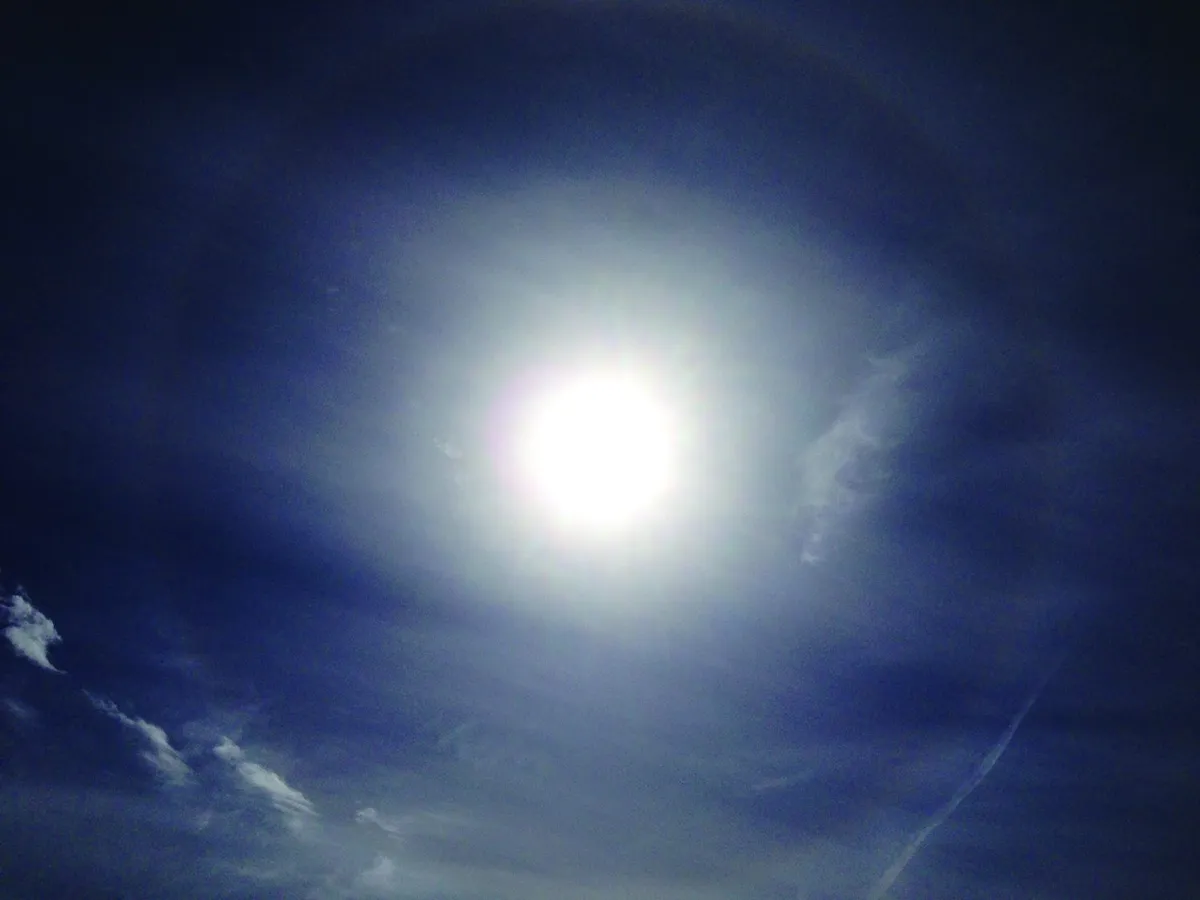
When we look up at the sky from the surface of the Earth, we’re looking up through the atmosphere of our planet.
The light from the Sun can create all manner of interesting effects within this atmosphere and these are often bright enough to photograph with a smartphone.
Auto exposure settings can cause issues with bright phenomena but an HDR setting, if available, is normally able to keep this in check.
Alternatively, use an app that lets you use your camera in manual mode. Effects caused by the Sun, such as circumzenithal arcs, solar haloes and sundogs, make for great photos.
Those caused by moonlight are good too, but are harder to capture because of the lower light levels when they appear.
Of course, different phone cameras have different levels of capability for night-time photography, so what doesn’t work for one make or model may well work for another.
The bottom line here is to have a go. If you think that this is all sounding a bit meteorological then we can bridge the gap between meteorology and astronomy by trying to capture noctilucent clouds which, if they appear at all, will do so typically from late May through to early August.
These ‘night-shining’ clouds are seven times higher than regular clouds.At that height, they can still catch the Sun when it’s below the horizon for us on the ground. This makes them appear to shine at night.
A bright noctilucent cloud display should register with some phones. Long exposure or stacked exposure apps can really help here.
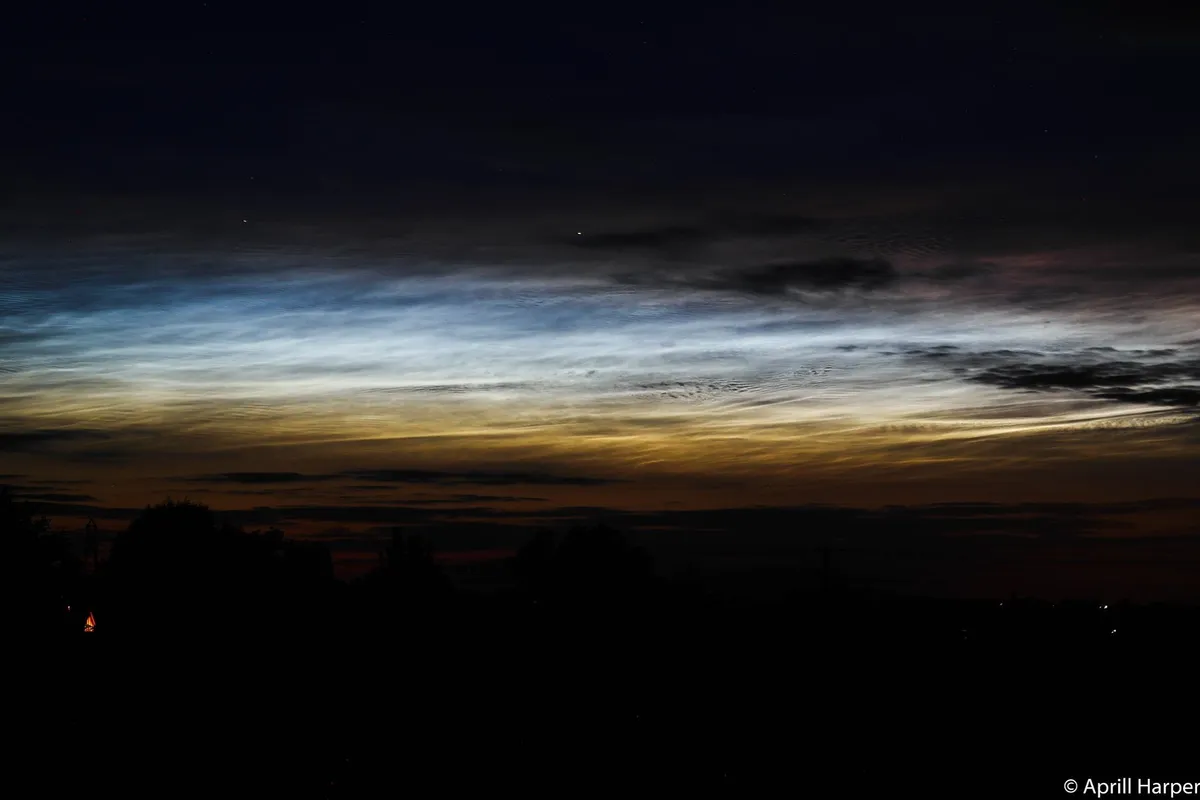
They can’t be seen during the day, but aiming to catch it as the sky is starting to dim in the evening, or brighten in the morning, can bring enough light for the camera’s auto functions to kick in.
Be aware that this then becomes a balancing act: if the sky is too bright, the noctilucent clouds will fade out of view.
If you’re able to hold your phone steady, consider taking a number of shots of the scene and stacking them together using a freeware, computer based application such as StarStaX.
This will average the results, so reducing image noise.
Find out more in our guide on how to photograph Noctilucent Clouds.
Photographing atmospheric phenomena with a smartphone: step-by-step
- Trying to catch atmospheric effects such as haloes or arcs can prove tricky for your camera’s auto focus.
- Include a distant horizon or, if your phone’s camera has focus control, use an app to set focus to infinity.
- If there are noctilucent clouds, use an app that gives you manual control over your phone settings.
- Set the exposure between one and 10 seconds and ISO to 800. Again, focus should be at infinity.
- Place your phone against a solid structure or use a tripod adaptor.
- Some phone camera shutters can be activated by the volume controls on certain headphones. Take a few shots to see what comes out.
Apps for photographing atmospheric phenomena
- Night Modes (iOS)
- ProCam (iOS)
- Long Exposure Camera 2 (Android)
- Night Camera (Android)
Photographing planets with a smartphone
The planets can look amazingly bright to the naked eye, especially Venus. The most dramatic views of Venus occur when seen against a darker sky.
However, focusing on what a camera phone will see as a bright dot can prove troublesome.
One trick is to catch Venus above a lit horizon. As long as this horizon is far enough away, the phone’s auto focus should lock onto the horizon, allowing you to grab a shot of Venus in context.
Alternatively, some phones offer a ‘focus lock’ facility where you can point at any distant horizon and lock focus on that. Consult your phone’s documentation to see if this is possible.
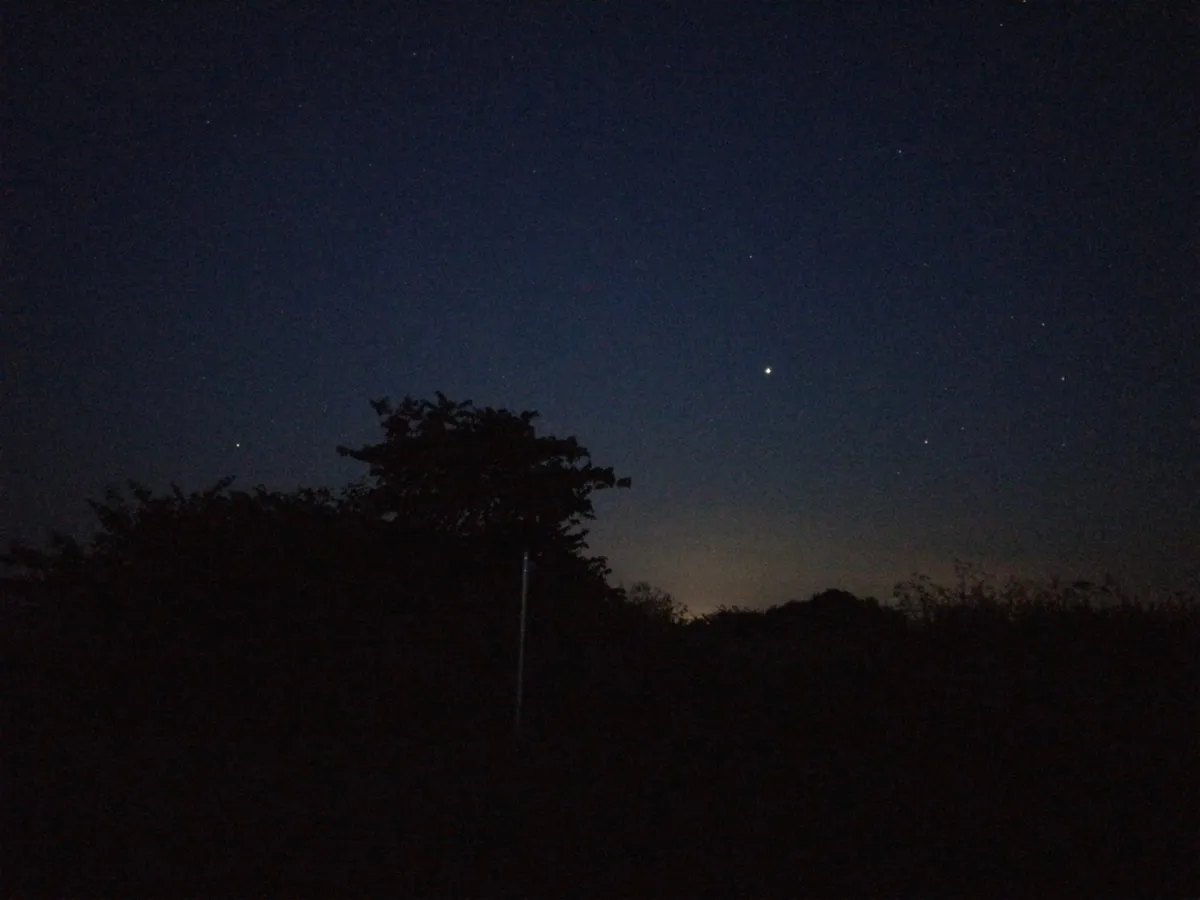
Mars and Jupiter can also become bright enough for many camera phones.
The brightness of Mars is mostly unimpressive, but around opposition it can brighten considerably, even beating Jupiter to the position of second brightest planet. Again, use the trick of placing it above a distant lit horizon to achieve focus.
If you want to record the planets as more than just dots, point your phone’s camera down the pre-focused eyepiece of a telescope. Known as afocal imaging, this takes a bit of practice and a steady hand!
Some even adopt this technique with binoculars as a means of taking a photograph through a pair of binoculars.
Or you could always use a smartphone holder. Read our DIY guide on how to build a smartphone holder for a telescope.
Photographing planets with a smartphone: step-by-step
- Target a distant horizon with recognisable lit regions in the shot
- If the horizon is interesting, include more of it to give context to the shot
- Bright planets may register using your phone camera’s auto functions. If not, use a control app setting the focus at infinity, mid to high ISO and exposure of one second.
- Lower the ISO if the result is noisy.
- Support the phone against a solid structure. If possible, use the volume control on a pair of connected headphones to trigger the shutter.
Apps for photographing planets
- Night Cam (iOS)
- 645 Pro (iOS)
- Camera FV-5 (Android)
- Open Camera (Android)
Have you managed to capture a beautiful astrophoto on your smartphone? We'd love to see it! Get in touch by emailing contactus@skyatnightmagazine.com or via Facebook, Twitter and Instagram.
Click here for some ideas of how at catalogue your stars once you've photographed them


