In this guide we'll reveal how you can photograph the October 14 annular solar eclipse.
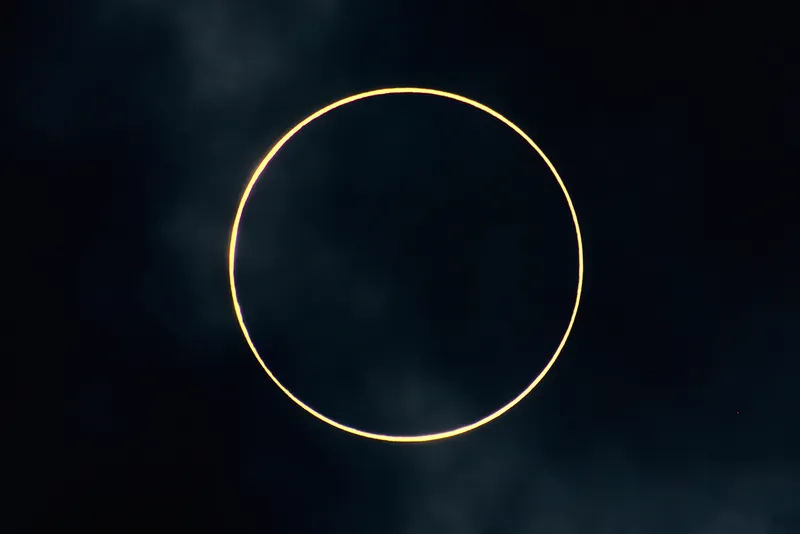
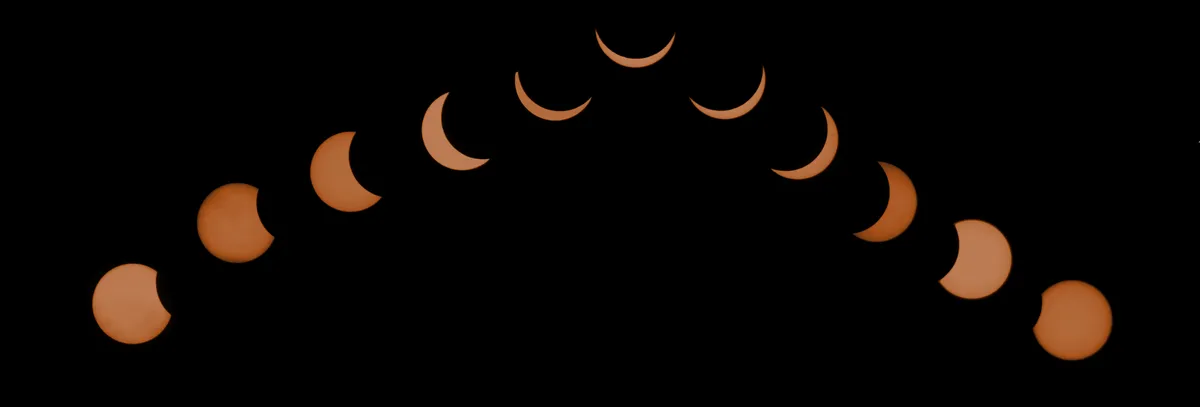
The Moon moves across the face of the Sun on October 14 2023, leading to a wonderful solar eclipse as seen from Earth.
The October annular solar eclipse will be running a decent path down through the US.
This won't be a total solar eclipse, but will instead be an annular solar eclipse or 'ring of fire' eclipse.
Read our complete guide to viewing the October 14 solar eclipse and find out when the next eclipse is occurring.
Away from the path of annularity, an ever-decreasing magnitude of partial solar eclipse will be seen.
When far enough away from the path, the Moon will appear to miss the Sun completely, giving no eclipse experience whatsoever.
You can see the effect of this in our October eclipse map below. Use the map to work out what you'll see from your location and when.
Or work out how far away you are from the regions that will experience the full eclipse (the path of annularity).
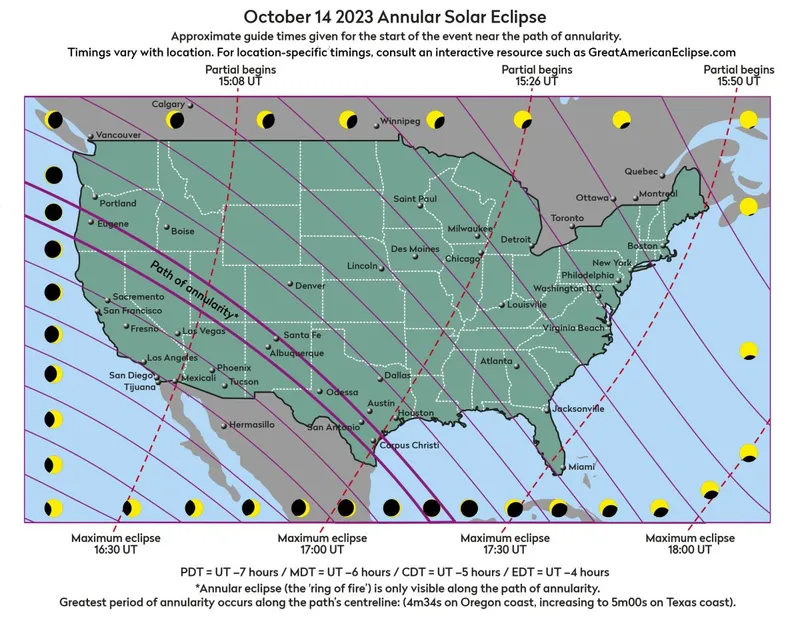
October 14 eclipse timings
The October 14 eclipse will begin in the US in Oregon at 9:13 am PDT. It will move southeast, leaving Texas at 12:03 pm CDT.
The narrow ‘path of annularity’ (where the full ring of fire will be seen) begins south of Alaska.
The eclipse will be visible across the US, Mexico, Belize, Guatemala, Honduras, Nicaragua, Costa Rica, Panama, Colombia and Brazil.
The path of annularity will reach about 140 miles at its widest, with the maximum duration of the ‘ring of fire’ occurring off the coast of Nicaragua in the Gulf of Mexico.
Ways of photographing the October 14 eclipse
It goes without saying that certified solar filters must be fitted to cameras and telescopes that are pointed at the Sun.
And you should never observe the Sun with the naked eye: only with certified solar eclipse glasses or with a dedicated solar telescope, or a telescope expertly-fitted with a certified solar filter
Solar projection
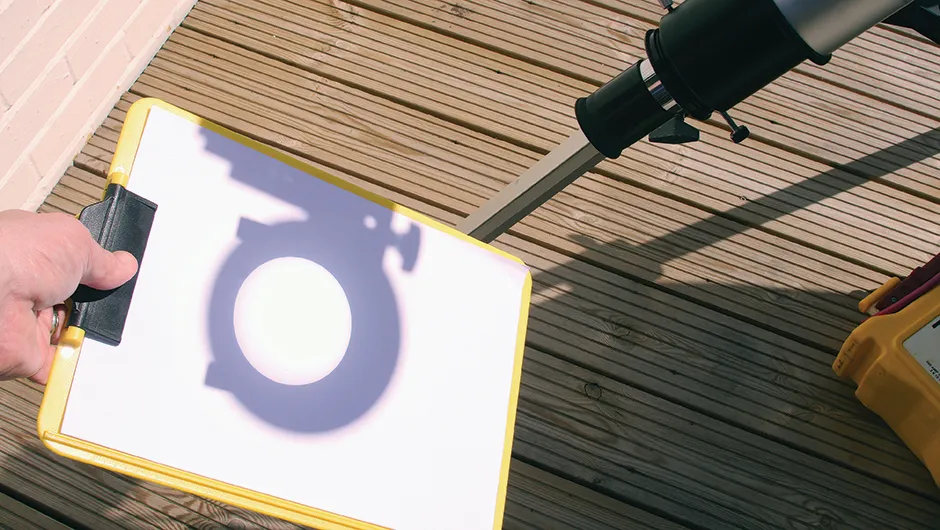
You can use the technique of solar projection to photograph the progression of the eclipse.
Here, a telescope fitted with an eyepiece is pointed at the Sun, but without looking through it.
A screen is held up to catch the bright light emitted from the eyepiece and with a bit of careful focusing, a detailed Sun image can be projected onto the screen.
This image can be safely watched or captured, but there are provisos.
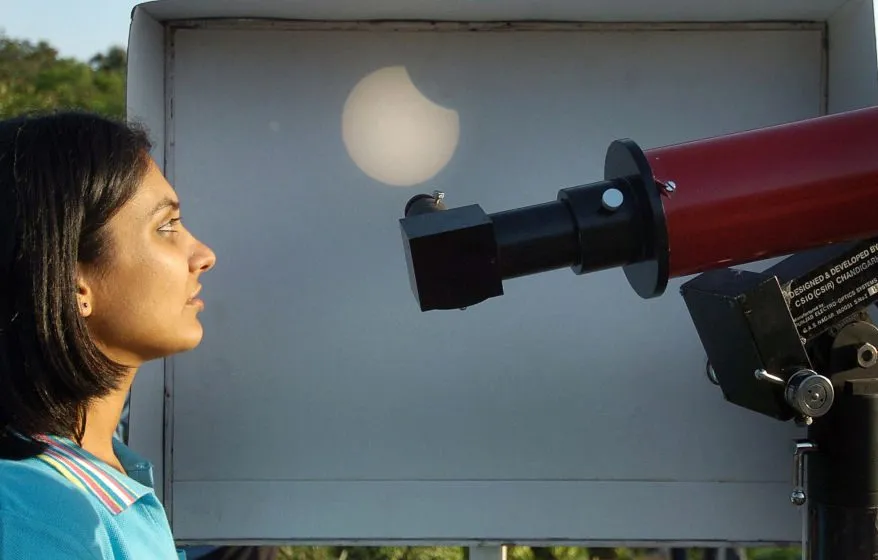
Projection has associated dangers. It’s a technique only suitable for refractors below 5-inches (127mm) in diameter.
People use reflectors to project the Sun’s image, but there is a potential for damage to be caused to instruments.
Enclosed optical tubes such as those found in SCTs are unsuitable for projection due to internal heating.
If you do go down the projection route, never leave the setup unattended and keep everyone’s eyes away from the eyepiece!
Always cap or remove the finderscope and, when you've finished safely observing, put the cap on the telescope and point it away from the Sun.
Solar filters on a telescope
A full or offset aperture white light filter allows you to view and photograph a dimmed version of the Sun safely during an eclipse.
Such telescope filters are normally bought as a sheet or roll and, after a bit of DIY, cover the front aperture of your telescope.
Once you’ve capped or removed all finders, you’re good to go.
However, this technique must only be carried out by an experienced astronomer. If in doubt do not risk it.
Only ever buy safe certified filters from a reputable supplier, and always check your filter for pinpricks or tears before use.
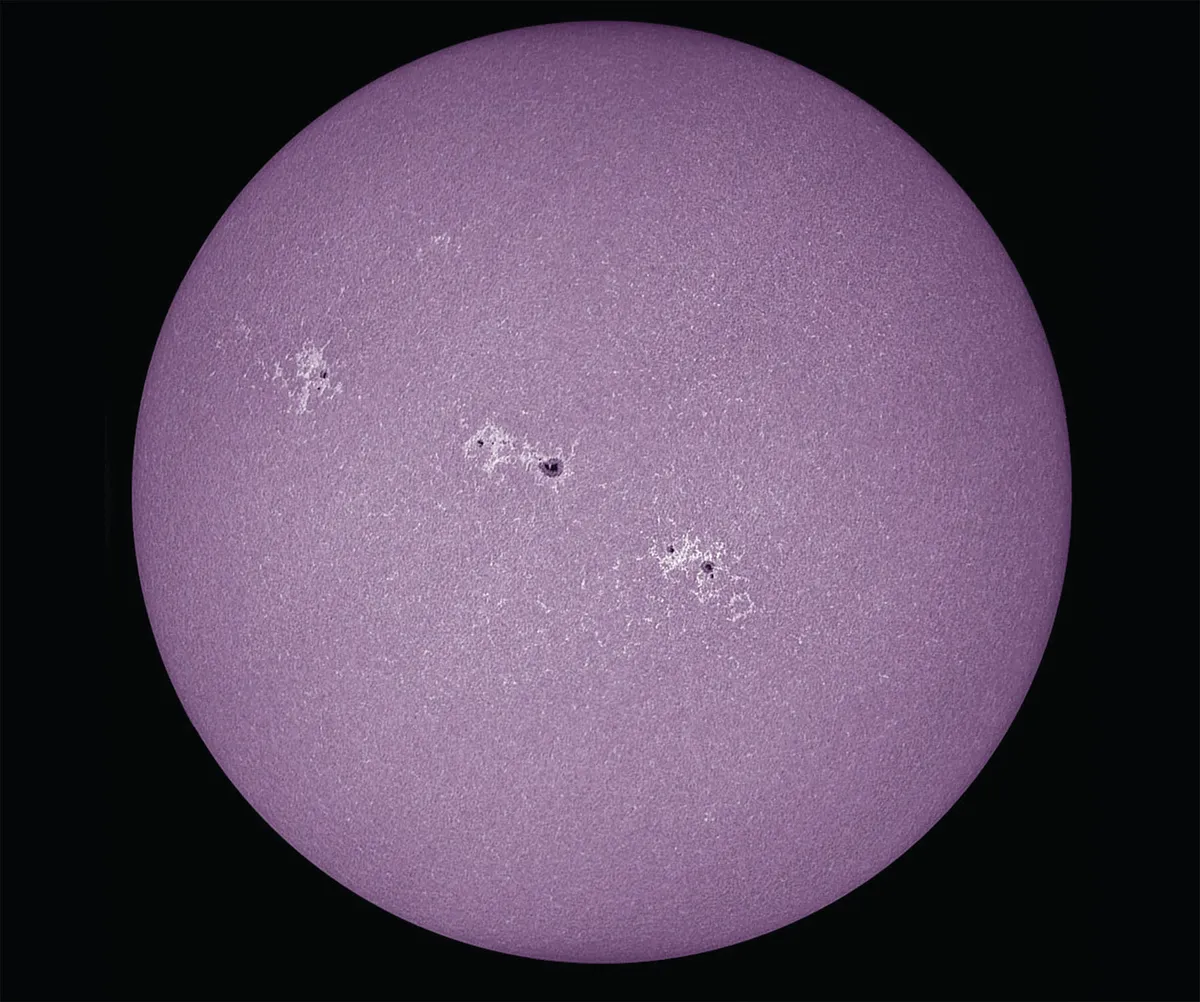
You can also use hydrogen-alpha (Ha) or calcium-K (CaK) solar filters. These are ideal for grabbing a less conventional image.
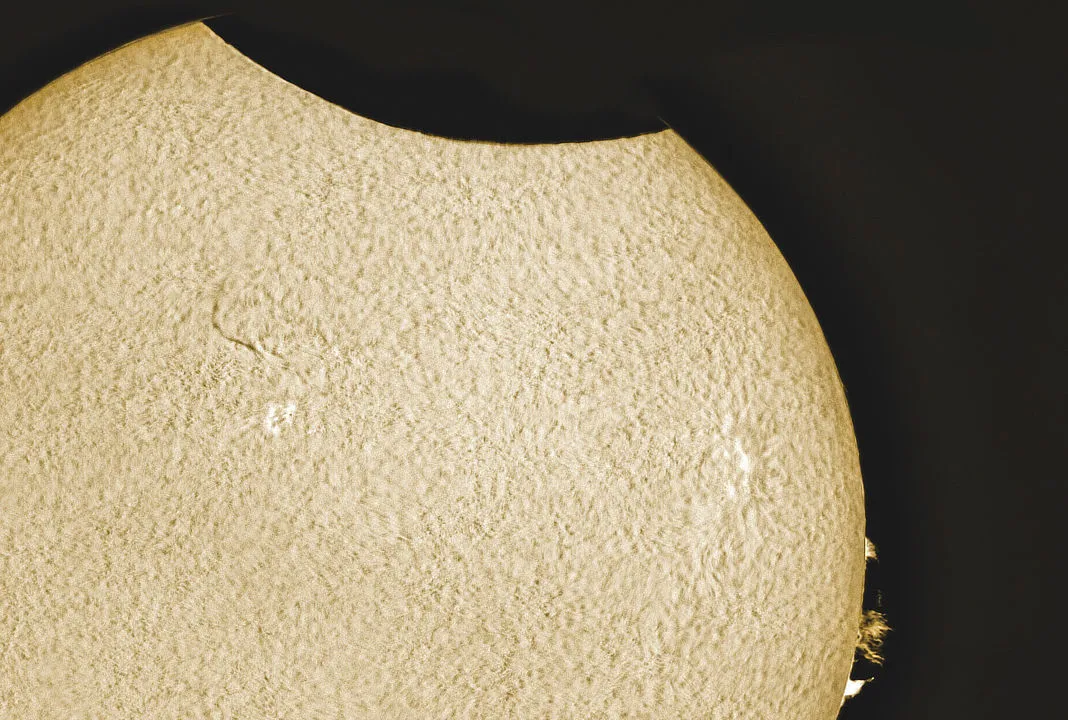
Using an Ha filter, you can check for solar prominences and it will allow you to view a ‘fur-like’ edge to the Sun’s chromosphere known as the spicule layer.
Furthermore, a magnified view of the section of limb where the Moon first makes contact or leaves the Sun’s disc will allow you to catch the edge of the Moon as it crosses this strip.

 Select a camera. A DSLR works fine for white light, but it’s less effective with Ha or CaK wavelengths.
DSLR still images will be
Select a camera. A DSLR works fine for white light, but it’s less effective with Ha or CaK wavelengths.
DSLR still images will be  Get to know the view orientation to catch the beginning of the
 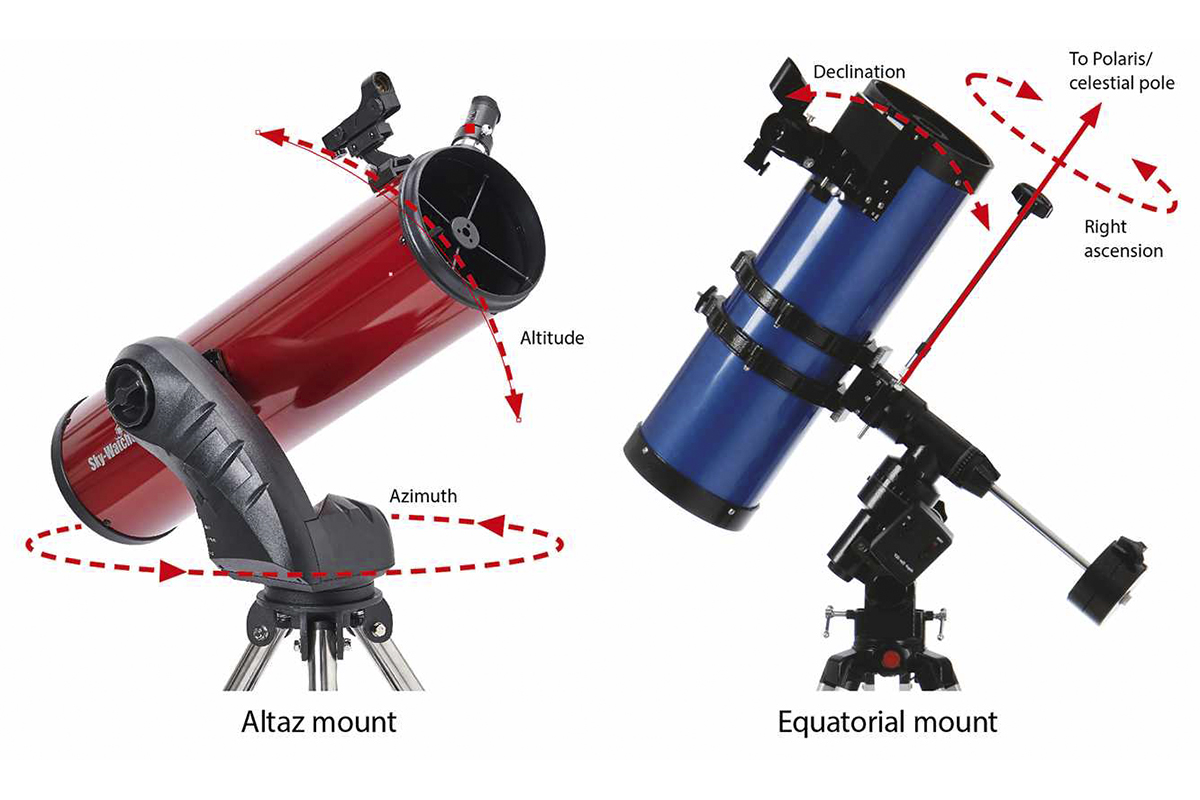 For equatorial mounts, moving a telescope south in declination
  If using an equatorial mount, set it up on nights before the eclipse to ensure accurate
  Set up early on October 14 to give yourself as much time as possible.
If using hydrogen-alpha equipment, remember first contact will occur a bit earlier than
Set up early on October 14 to give yourself as much time as possible.
If using hydrogen-alpha equipment, remember first contact will occur a bit earlier than 

