Mars is best imaged using a high-frame-rate camera. Around opposition its magnitude is sufficient to allow imaging at low gain and high frame rates, optimal settings for the technique of ‘lucky imaging’.
Under typical seeing conditions, the recommended imaging resolution is 0.25 arcseconds per pixel. This can be extended to, say, 0.1 arcseconds per pixel under exceptional seeing.
Read more 'Imaging for Science' articles:
The optimal focal length for this can be derived using the formula:
Focal length = 206.3 x pixel size (microns) ÷ [desired arcsecond per pixel value]
We can simplify that formula to: focal length for 0.25-inch per pixel = 825.2 x pixel size (microns) and focal length for 0.1-inch per pixel = 2,063 x pixel size (microns).
As an example, for a 5.6 micron sensor, 0.25-inch per pixel resolution is achieved at 4,621mm and 0.1-inch per pixel at 11,553mm.
In practical terms these values are guides and the use of optical amplifiers such as Barlows or Powermates to get close to them is sufficient.

Mars rotates every 24h 37m. This means that a feature measuring 0.25 arcseconds at a favourable opposition will move its own width in around four minutes.
For this reason, capture sequences should be completed in under this time to avoid motion blur.
For 0.1 arcseconds resolution the time limit is slightly under two minutes. Monochrome cameras exacerbate this situation if you want full-colour images.
The cumulative time to take red, green and blue images, plus time to change filters and re-focus, needs to be under the resolution time limit.
Imaging Mars with a one-shot colour camera largely removes the constraint. A brighter image – all three channels being delivered at once – allows for faster frame rates and reduced overall capture times.
Low altitude appearances of Mars or any planet will be subject to atmospheric dispersion. This is an atmospheric effect that spreads the light of an object into a spectrum causing colour fringing.
The effect gets worse with diminishing altitude. The use of an atmospheric dispersion corrector is advised to correct this issue.

Hardware & software:
- High-frame-rate camera
- RGB imaging filters for use with mono camera
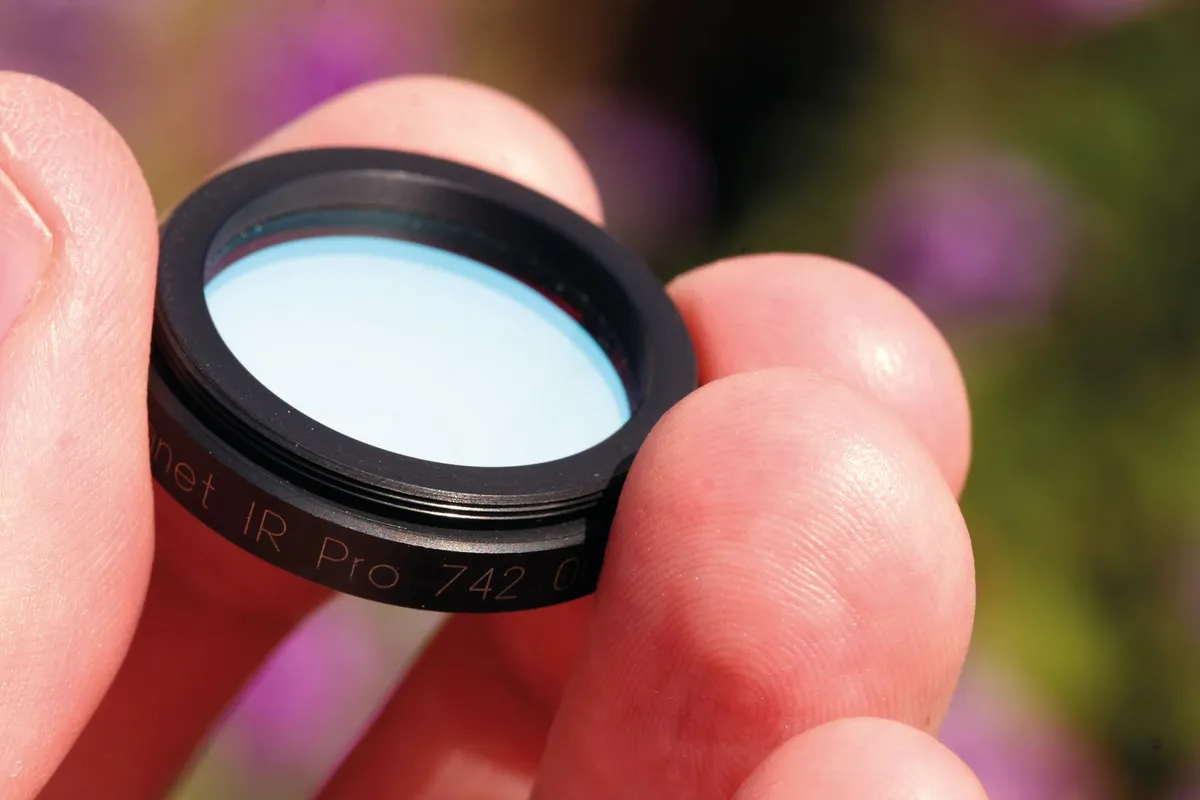
- Speciality filters, eg, IR-pass
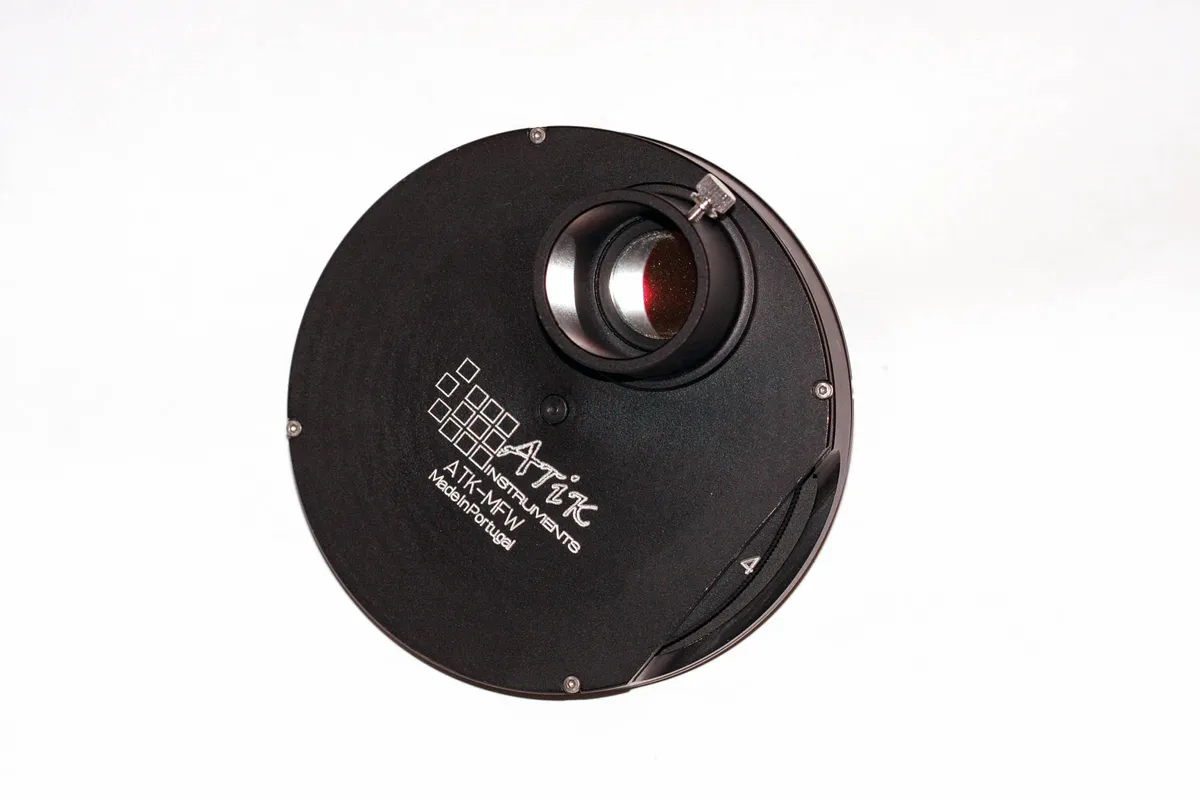
- Filter wheel
- Atmospheric dispersion corrector (ADC)
- Large-aperture, long-focal-length telescope on a driven mount
- A laptop
- WinJUPOS
- Capture software, eg, FireCapture or SharpCap
- RegiStax
- AutoStakkert!
- Image editor, e.g. GIMP or Photoshop
Using Filters
You can image Mars through filters to isolate specific aspects of its appearance. What kind of camera you’re using will dictate which filters work best.
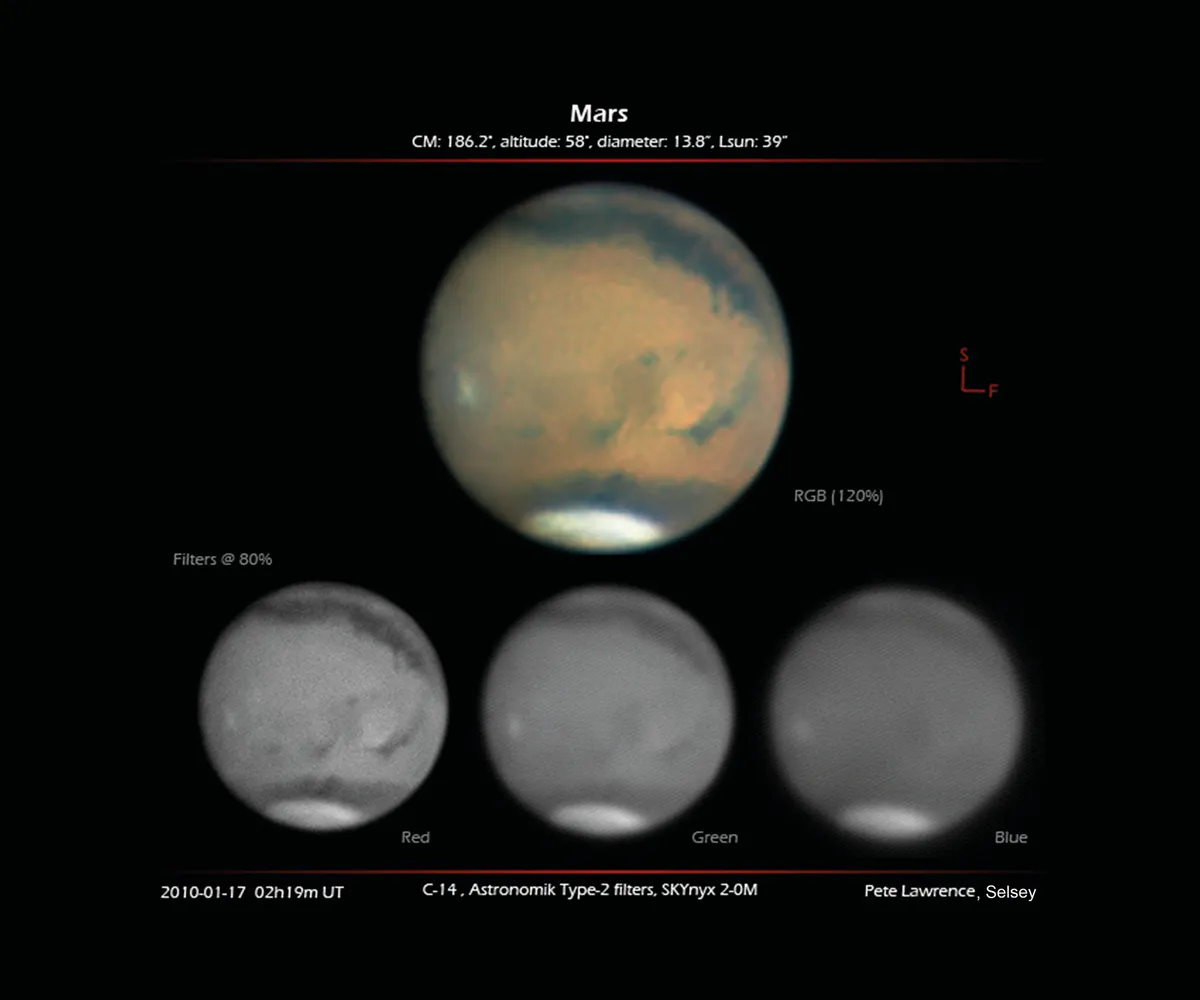
For example, a monochrome camera with an RGB imaging filter can be used to create full-colour images.
Blue-filtered images are useful for showing clouds in the thin Martian atmosphere. Infrared pass filters also work well with Mars, producing crisp definition between the dark, exposed rock features, lighter deserts and polar caps.
Depending on the sensor response curve, either monochrome or colour cameras may be suitable for use with infrared pass filters.
Step 1 Owing to the time constraints necessary to create a full RGB capture sequence using a monochrome camera, a filter wheel is recommended.Manual or automated versions are available. A re-focus is required after each filter change.
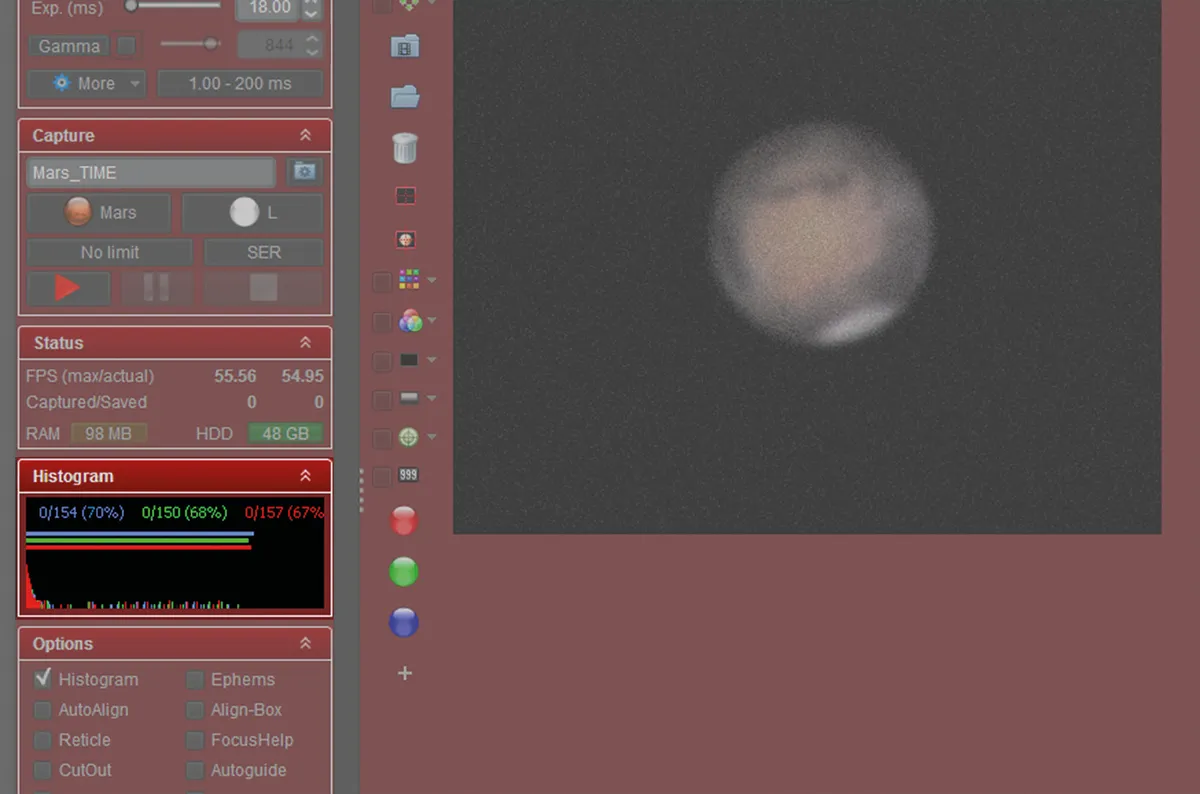
Step 2 A typical full capture sequence should be completed in less than four minutes. Blue typically takes longer because it appears dimmer. Using your capture software’s level indicator, aim to capture at similar peak levels of around 70-80%.
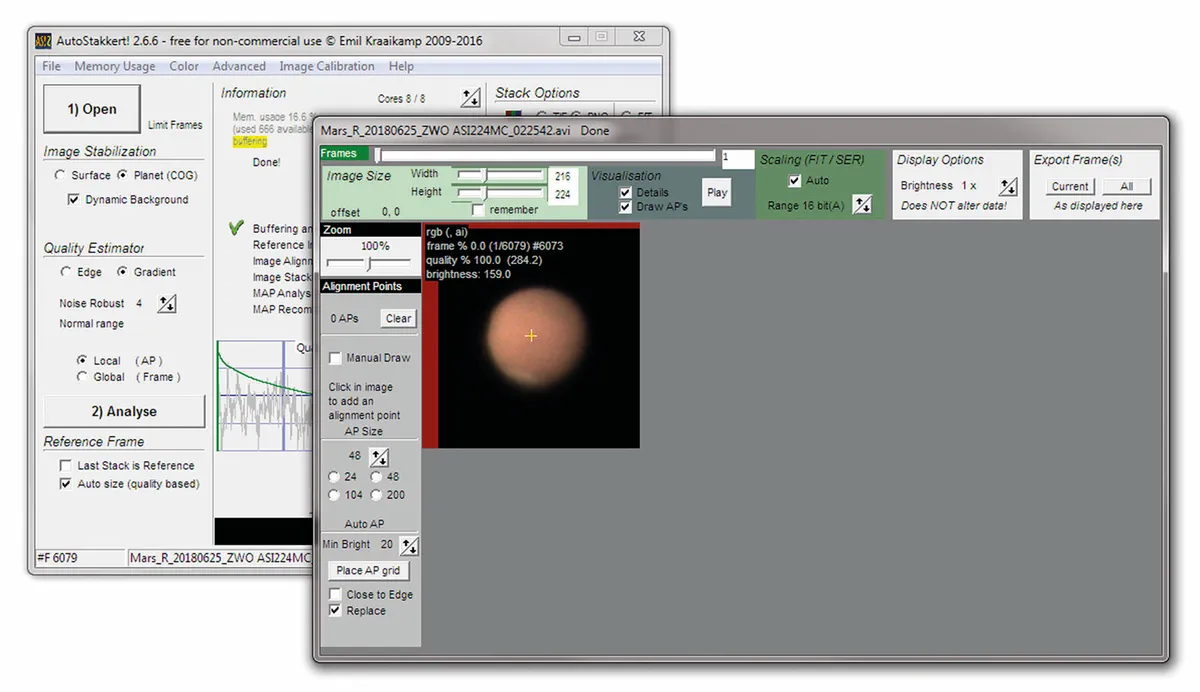
Step 3 Use a registration-stacking application such as AutoStakkert! to process each capture file. The number of stacked frames depends on the sky quality but typically, for a total capture count of 3,000 frames, 10-30% works well.
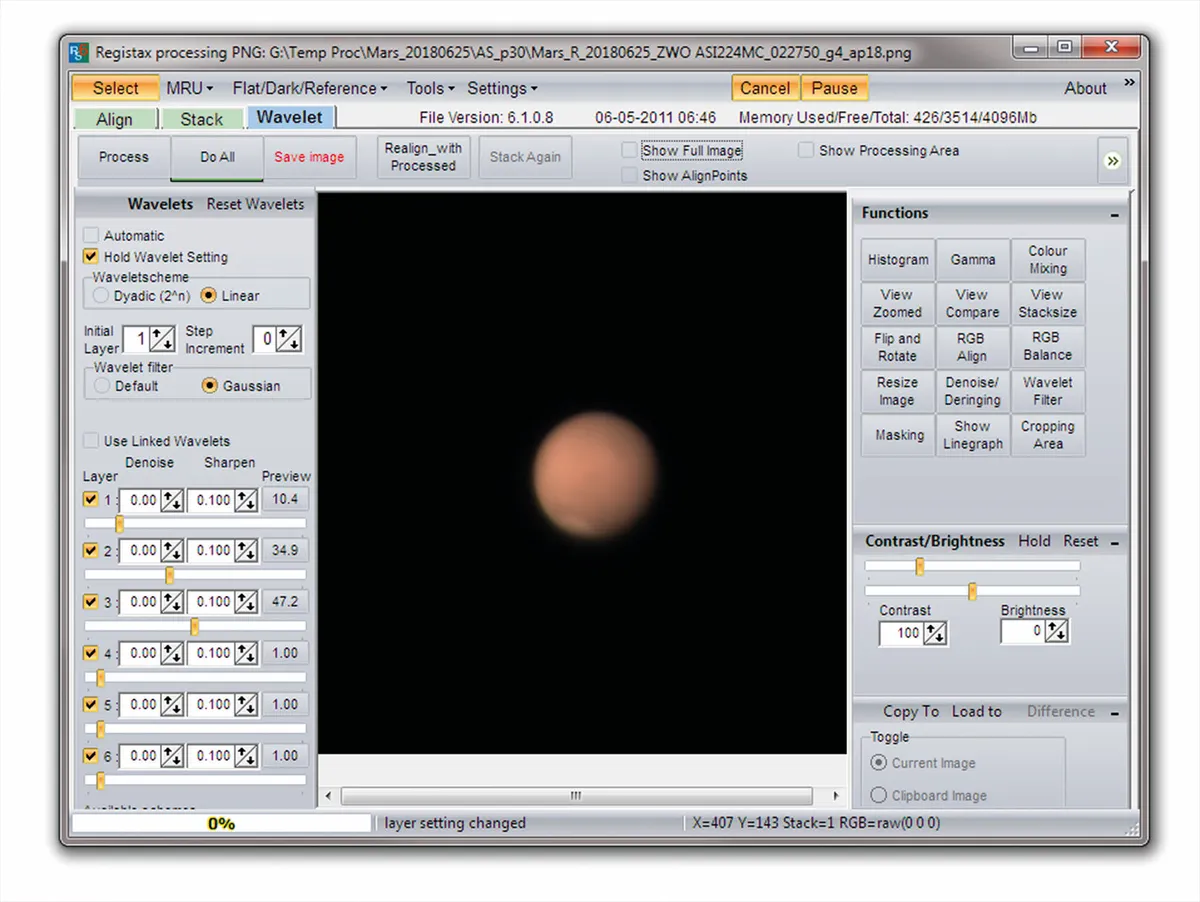
Step 4 Individually processed frames can be wavelet-sharpened using RegiStax. Once done, an image editor such as GIMP or Photoshop can be used to assemble the individual colour channel results into a full RGB image.
Step 5 IR-pass captures can be processed in the same manner. Using an IR-pass image to increase luminance contrast in an RGB result should be stated on the image, as it may produce a false impression of relative feature intensity.
Step 6 The final image should be presented according to the requirements of the organisation to which you intend to send it. Date, time, observer, instrument detail, location, filters used and image orientation should be shown on the image.
Measuring features with WinJUPOS
Despite its name, WinJUPOS supports all the main planets, the Sun and the Moon. It’s useful for preparing imaging sessions, providing simulated views of features at specific dates and times.
In addition, it has an excellent image measurement system that can be used to pre-prepare images for analysis or subsequent image processing routines such as de-rotation, which effectively allows you to ‘undo’ a planet’s rotation to avoid motion blur.
WinJUPOS can also be used to create maps of Mars during an apparition which you can compare with previous apparitions to see how its surface features are changing.
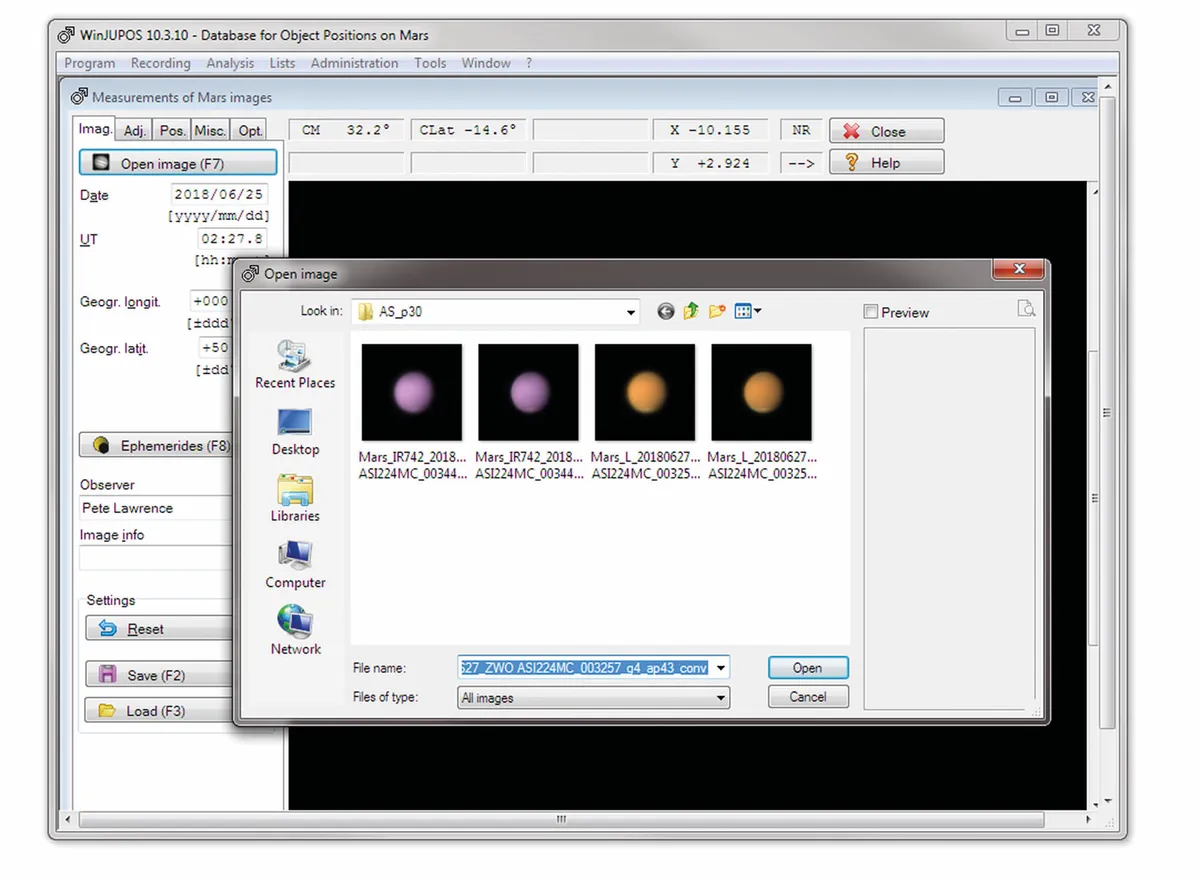
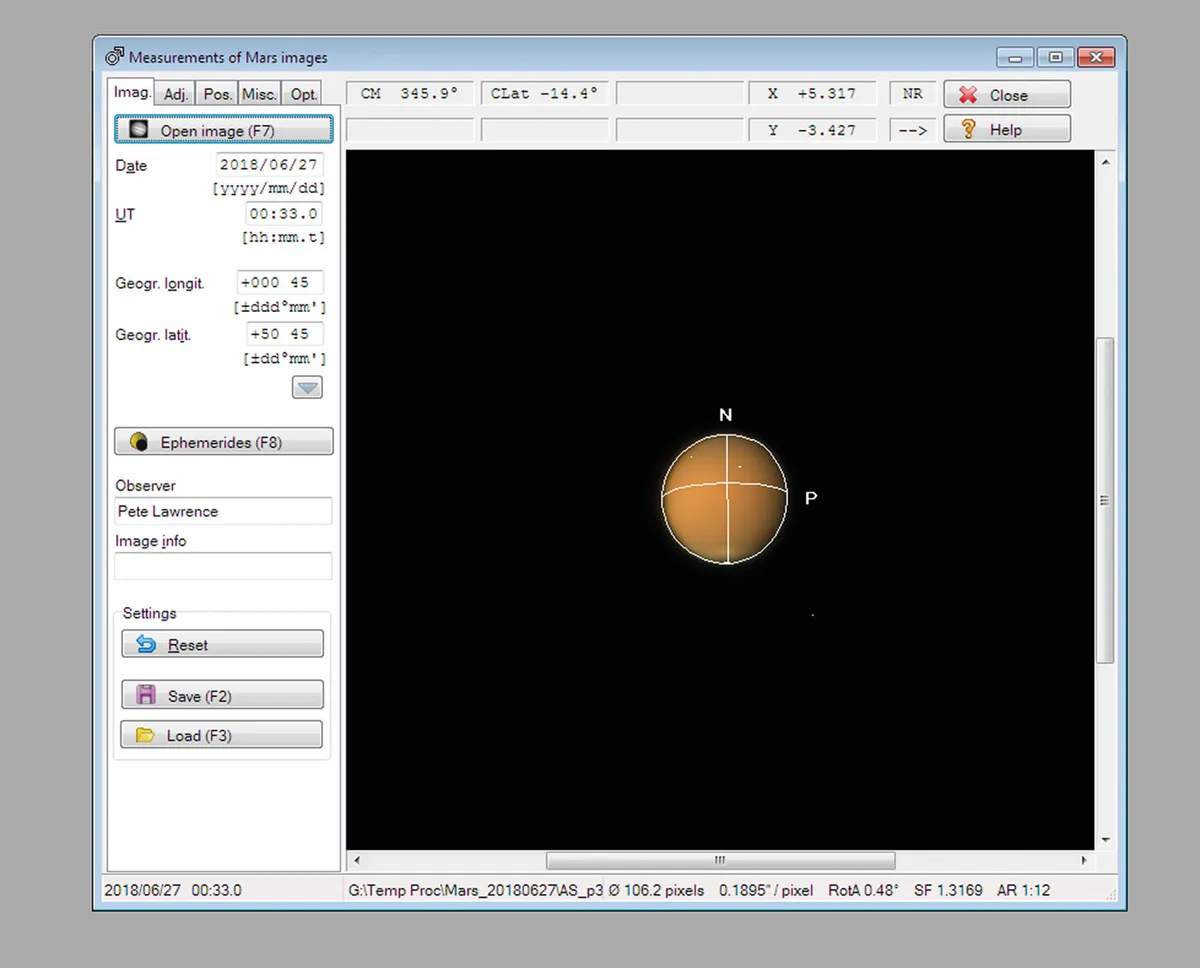
Step 1 Open WinJUPOS and from the Program menu option click on Celestial Body and select Mars. From the Recording menu option select Image Measurement. In the window that appears, from the Imag. tab, click Open image (F7).
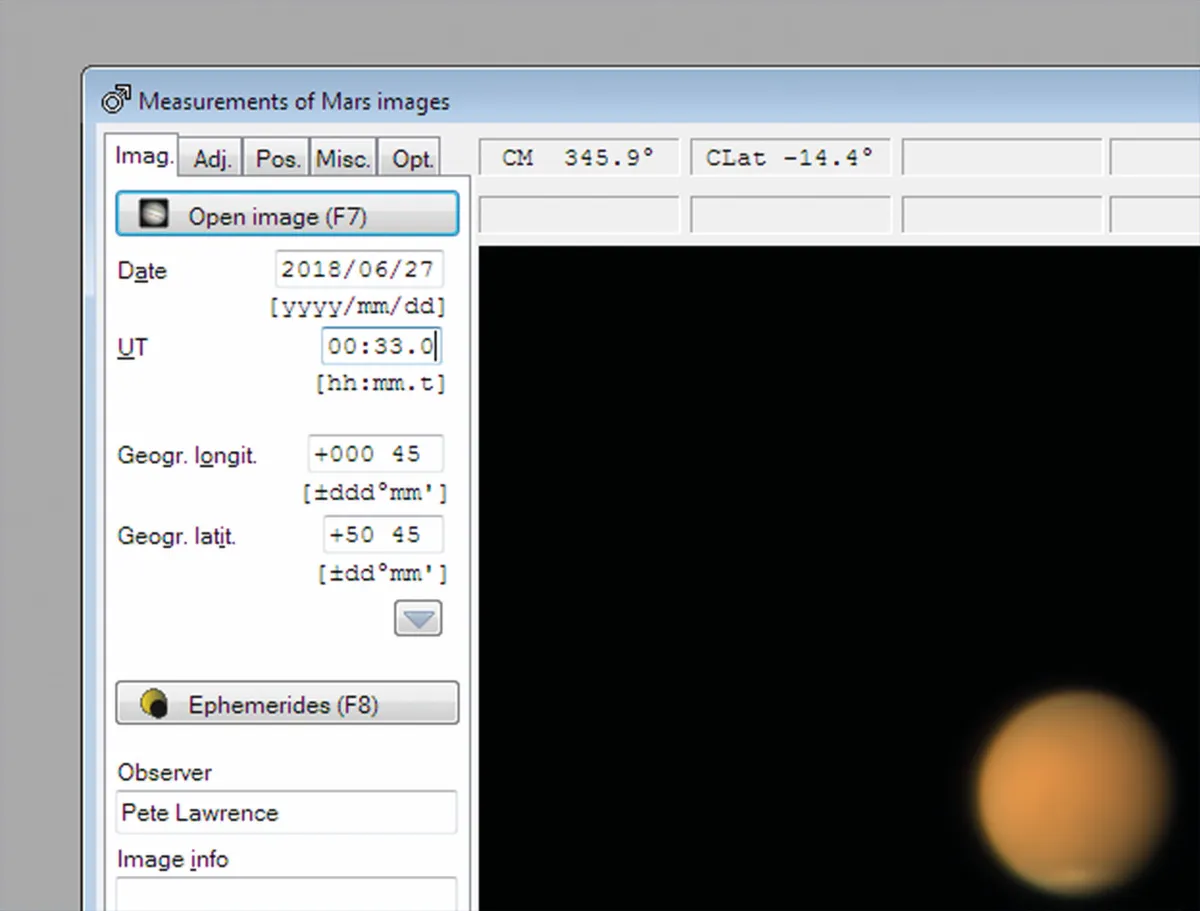
Step 2 Enter image values under the Imag. tab as requested. Select the Adj. tab and ensure the Draw Outline Frame box is ticked. Press F11 (or Outline Frame Automatic detection) to align frame to image.
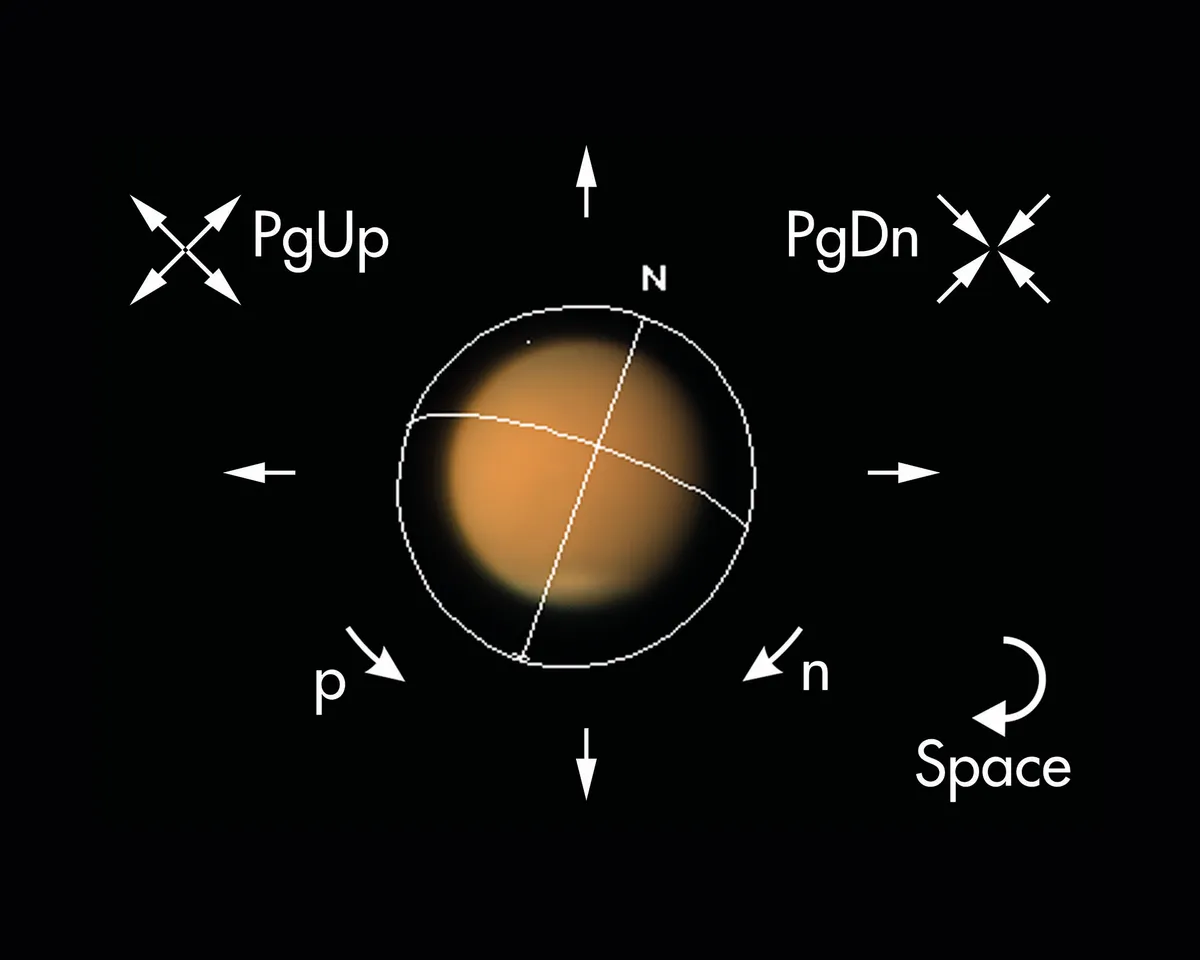
Step 3 Adjust the outline frame to match Mars’s limb and orientation: arrow keys move the outline; N rotates clockwise; P rotates counter-clockwise; PgUp enlarges; PgDn shrinks; space bar rotates by 180°. Use LD compensation to brighten the planet’s limb if required.
Step 4 Save as an .IMS (image settings) file via the Imag. tab’s Save button. Repeat for all capture images. It is recommended that once the outline frame has been set, leave it unadjusted for all similar images from the same session.
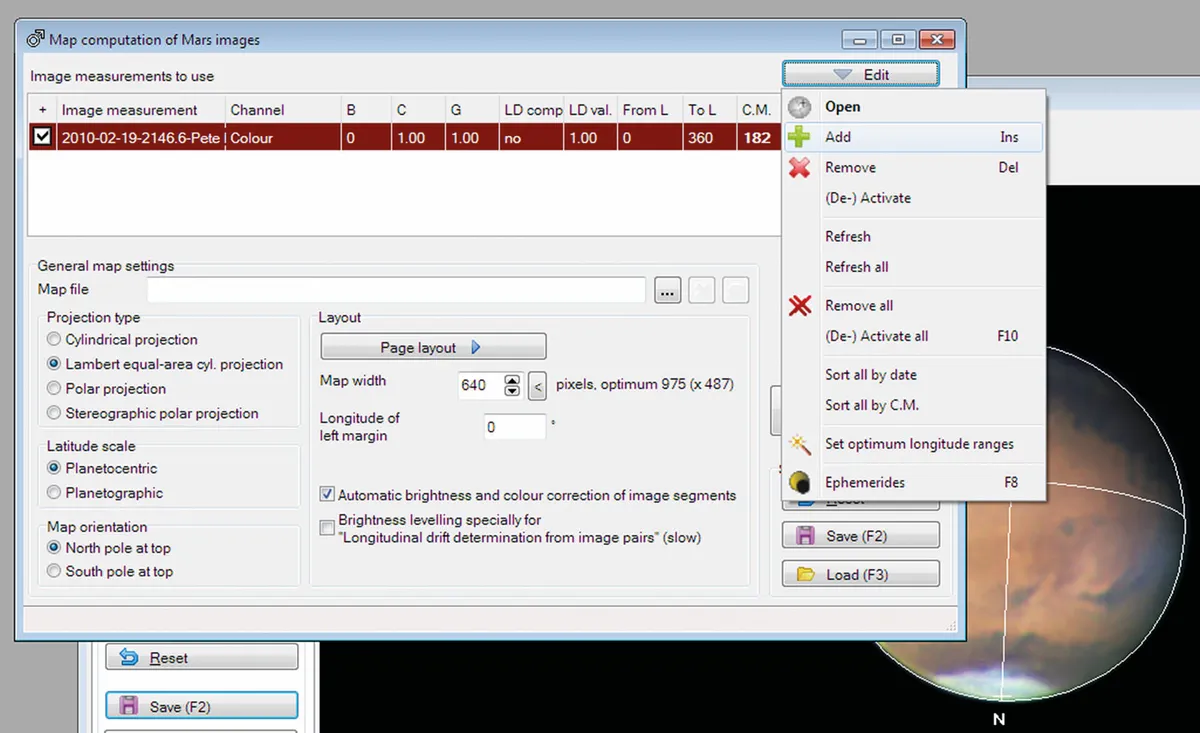
Step 5 To create a map from several .IMS files, select Analysis Map Computation… Click the Edit button and add the .IMS files to be used. Define where the output file should go in the Map file input box.
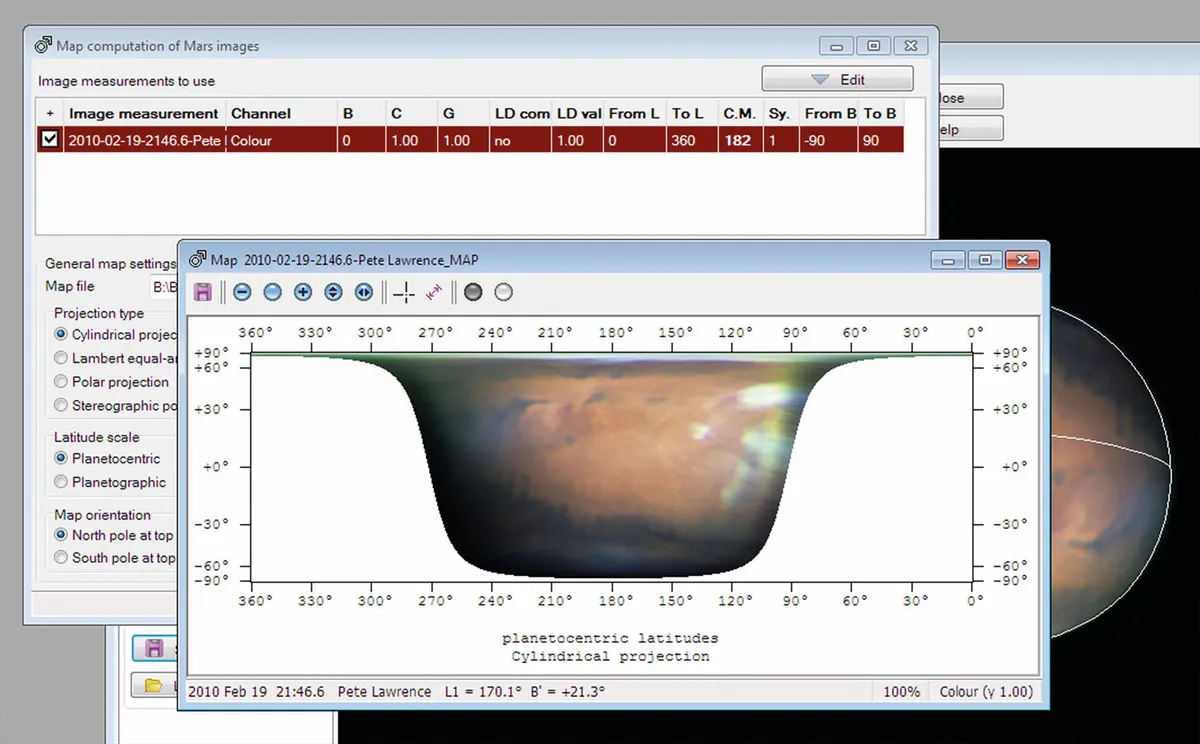
Step 6 Select the projection type required – the process is quick enough for experimentation – and press the Compile Map button (F12). WinJUPOS will automatically join .IMS files taken at different dates to provide a more complete picture.
Pete Lawrence is an experienced astrophotographer and a co-host of The Sky at Night. This guide originally appeared in the December 2018 issue of BBC Sky at Night Magazine.


